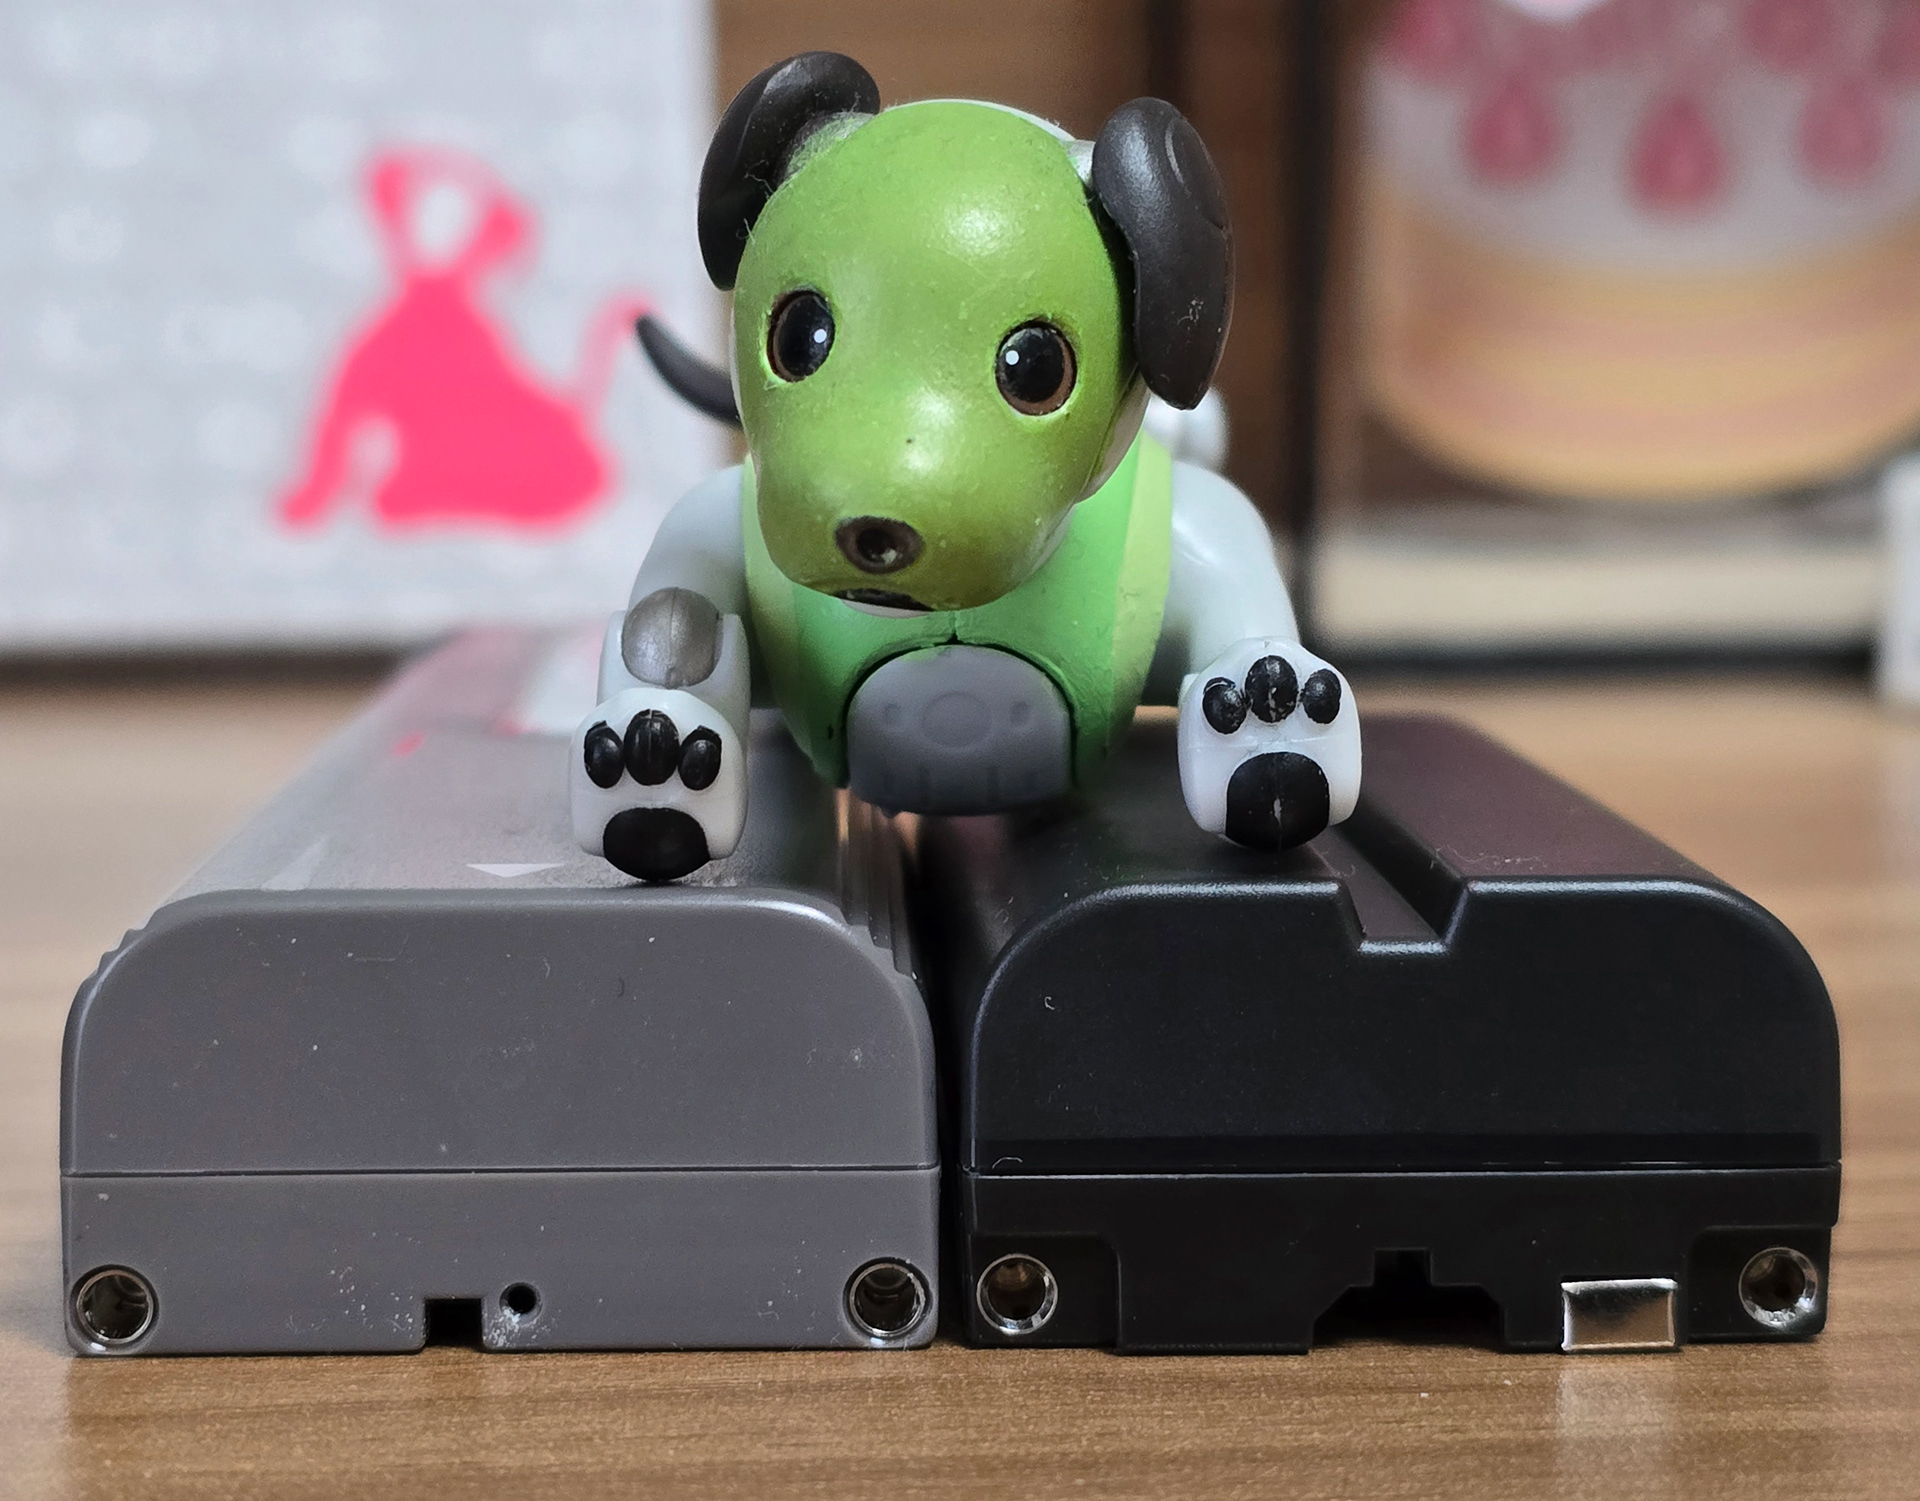
Aibo batteries are often costly to buy/refurbished and having to charge the ERS-110/111 batteries via the bulky charging station is very inconvenient when travelling. But there actually exists a far better (and more future proof) method of powering your aibo = camera batteries! As the power delivery connectors for the ERA-110B and Sony NP-F550 batteries are the same, the NP-F550 batteries works fine with ERS-110 and ERS-111 aibos.
Why is this the case? Well it's a little known fact that the ERS-11x battery was not originally designed for the aibo, but instead designed for use with photo kiosks and power tools. That is why you sometimes see versions of the battery with blue casing - these are the original batteries before they were exclusively used for aibo. The Sony L series camcorder batteries simply reuse this layout but with a different communication pin.
Important Note: Because the communication pin between the ERS-11x and the camcorder is different, the aibo cannot get battery level information from the battery, so aibo will not go into charging pose when the battery is nearly empty. To work around this I recommend timing how long the aibo lasts on one full battery charge and then setting a timer for when you need to press the aibos chest button in. That way your progress can be saved to the stick as normal and you know when to switch batteries.
aiboのバッテリーは購入や再生に費用がかかることが多く、ERS-110/111バッテリーをかさばる充電ステーションで充電しなければならないのは、旅行時に非常に不便です。しかし、実はaiboに電源を供給するはるかに優れた(そして将来性にも優れた)方法があります。それは、カメラ用バッテリーです!ERA-110BとSony NP-F550バッテリーの電源供給コネクタは同じなので、NP-F550バッテリーはERS-110およびERS-111 aiboでも問題なく動作します。
なぜそうなるのでしょうか?あまり知られていないことですが、ERS-11xバッテリーは元々aibo用ではなく、フォトキオスクや電動工具用に設計されていました。そのため、青いケースのバッテリーを時々見かけますが、これはaibo専用になる前のオリジナルバッテリーです。Sony Lシリーズのビデオカメラ用バッテリーは、このレイアウトを再利用していますが、通信ピンが異なります。
重要事項:ERS-11xとビデオカメラの通信ピンが異なるため、aiboはバッテリーからバッテリー残量情報を取得できません。そのため、バッテリー残量がほぼゼロになってもaiboは充電ポーズに入りません。この問題を回避するには、一度のフル充電でaiboがどれくらい持続するかを計測し、aiboの胸のボタンを押すタイミングをタイマーで設定することをお勧めします。こうすることで、通常通り進行状況をスティックに保存でき、バッテリー交換のタイミングが分かります。
Using camera batteries in the aibo is super cost efficient and convenient. Not only do the higher capacity cells offer longer playtime, but because the aibo will have two placed inside of it, once one is depleted, you can easily switch the two around and carry on playing without having to store any bulky batteries in your bag!
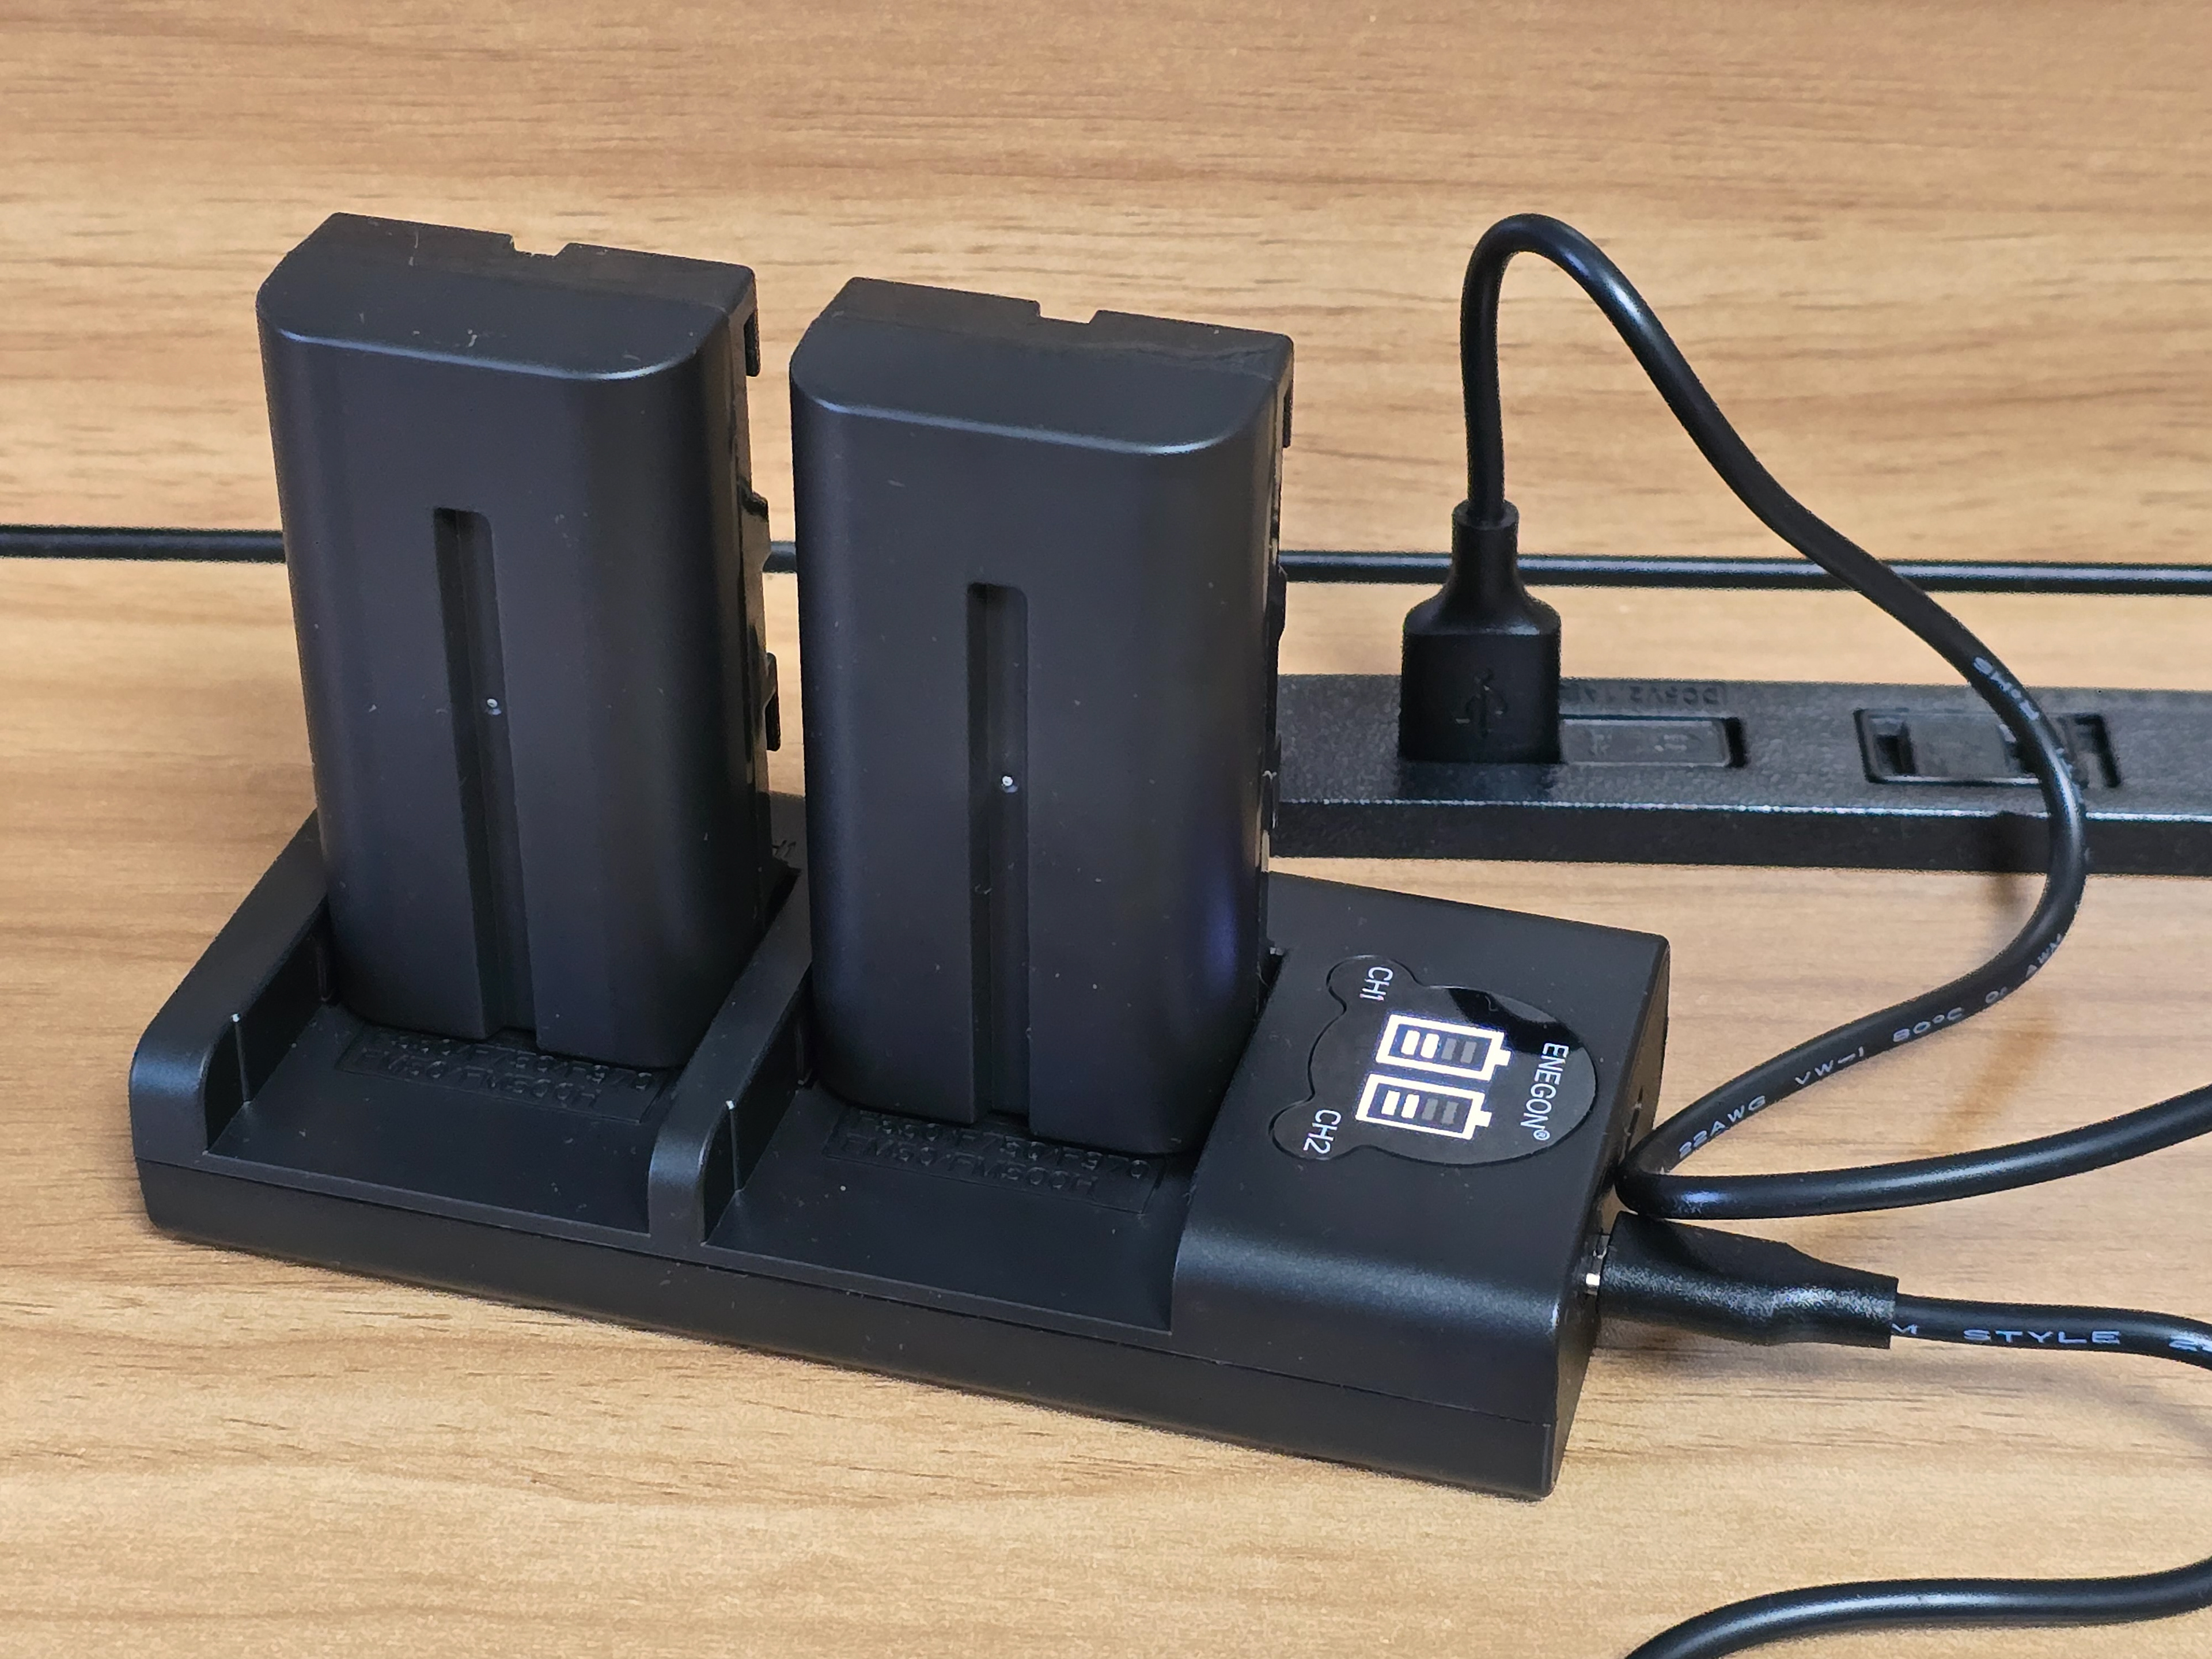
The batteries come with a USB based charger that can charge two batteries at a time, so you can charge them anywhere without having to take the bulky ERS-110/111 station with you. ^_^
aiboにカメラ用バッテリーを使うと、とても経済的で便利です。大容量のバッテリーでより長く遊べるだけでなく、aiboには2つのバッテリーが搭載されているので、片方のバッテリーが切れても簡単に入れ替えて遊び続けることができます。かさばるバッテリーをバッグに詰め込む必要はありません!
バッテリーには、2つのバッテリーを同時に充電できるUSB充電器が付属しているので、かさばるERS-110/111充電ステーションを持ち運ばなくても、どこでも充電できます。^_^
バッテリーには、2つのバッテリーを同時に充電できるUSB充電器が付属しているので、かさばるERS-110/111充電ステーションを持ち運ばなくても、どこでも充電できます。^_^
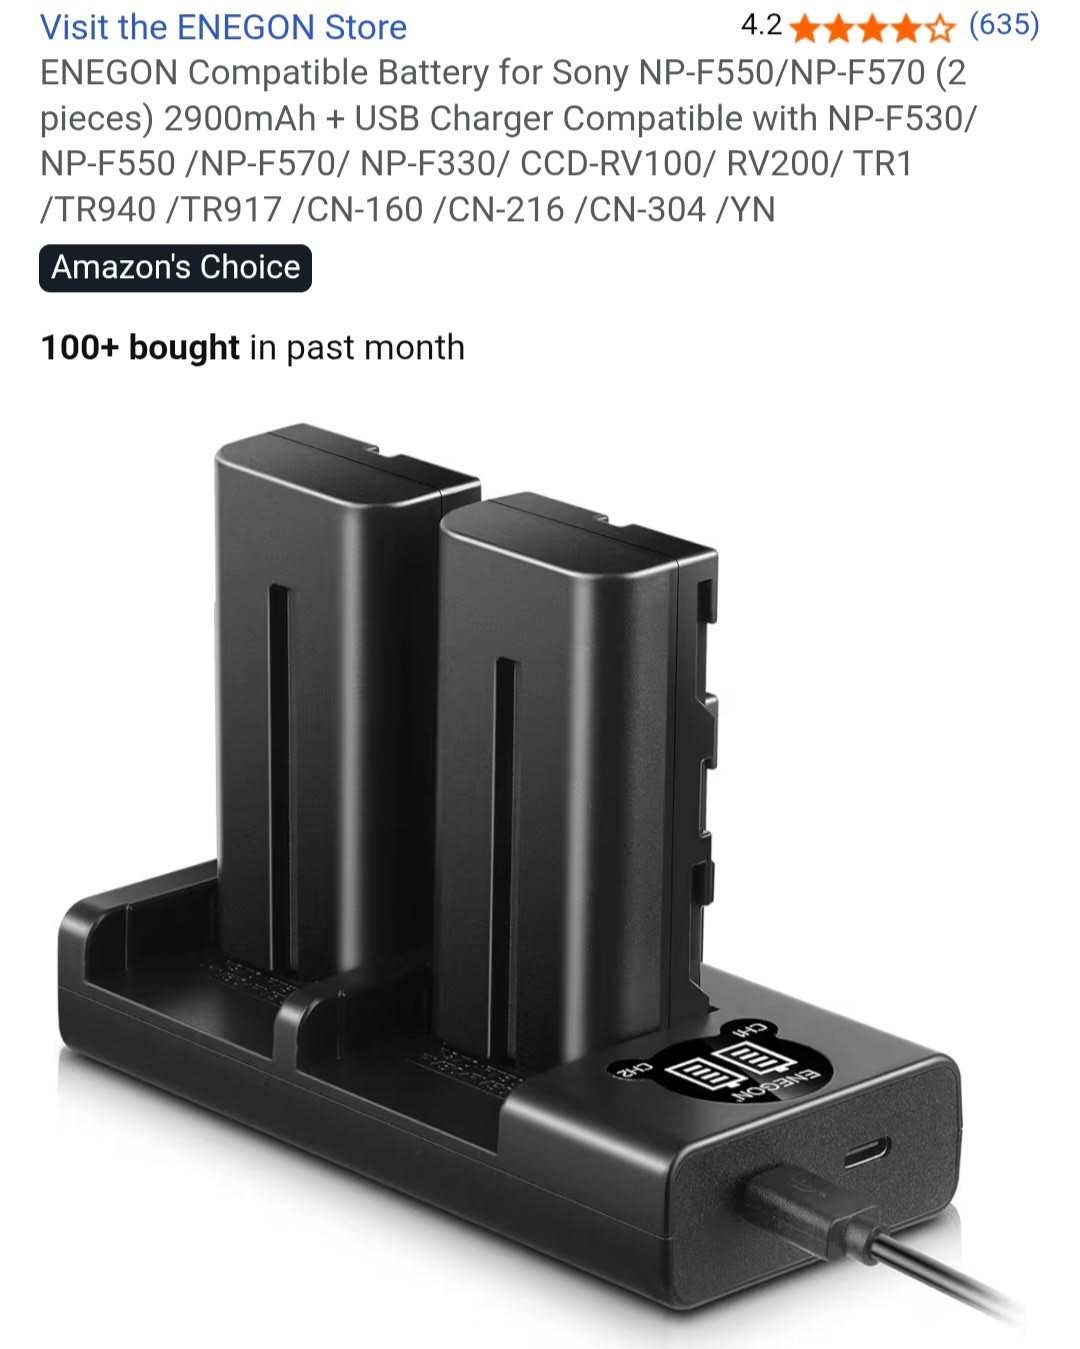
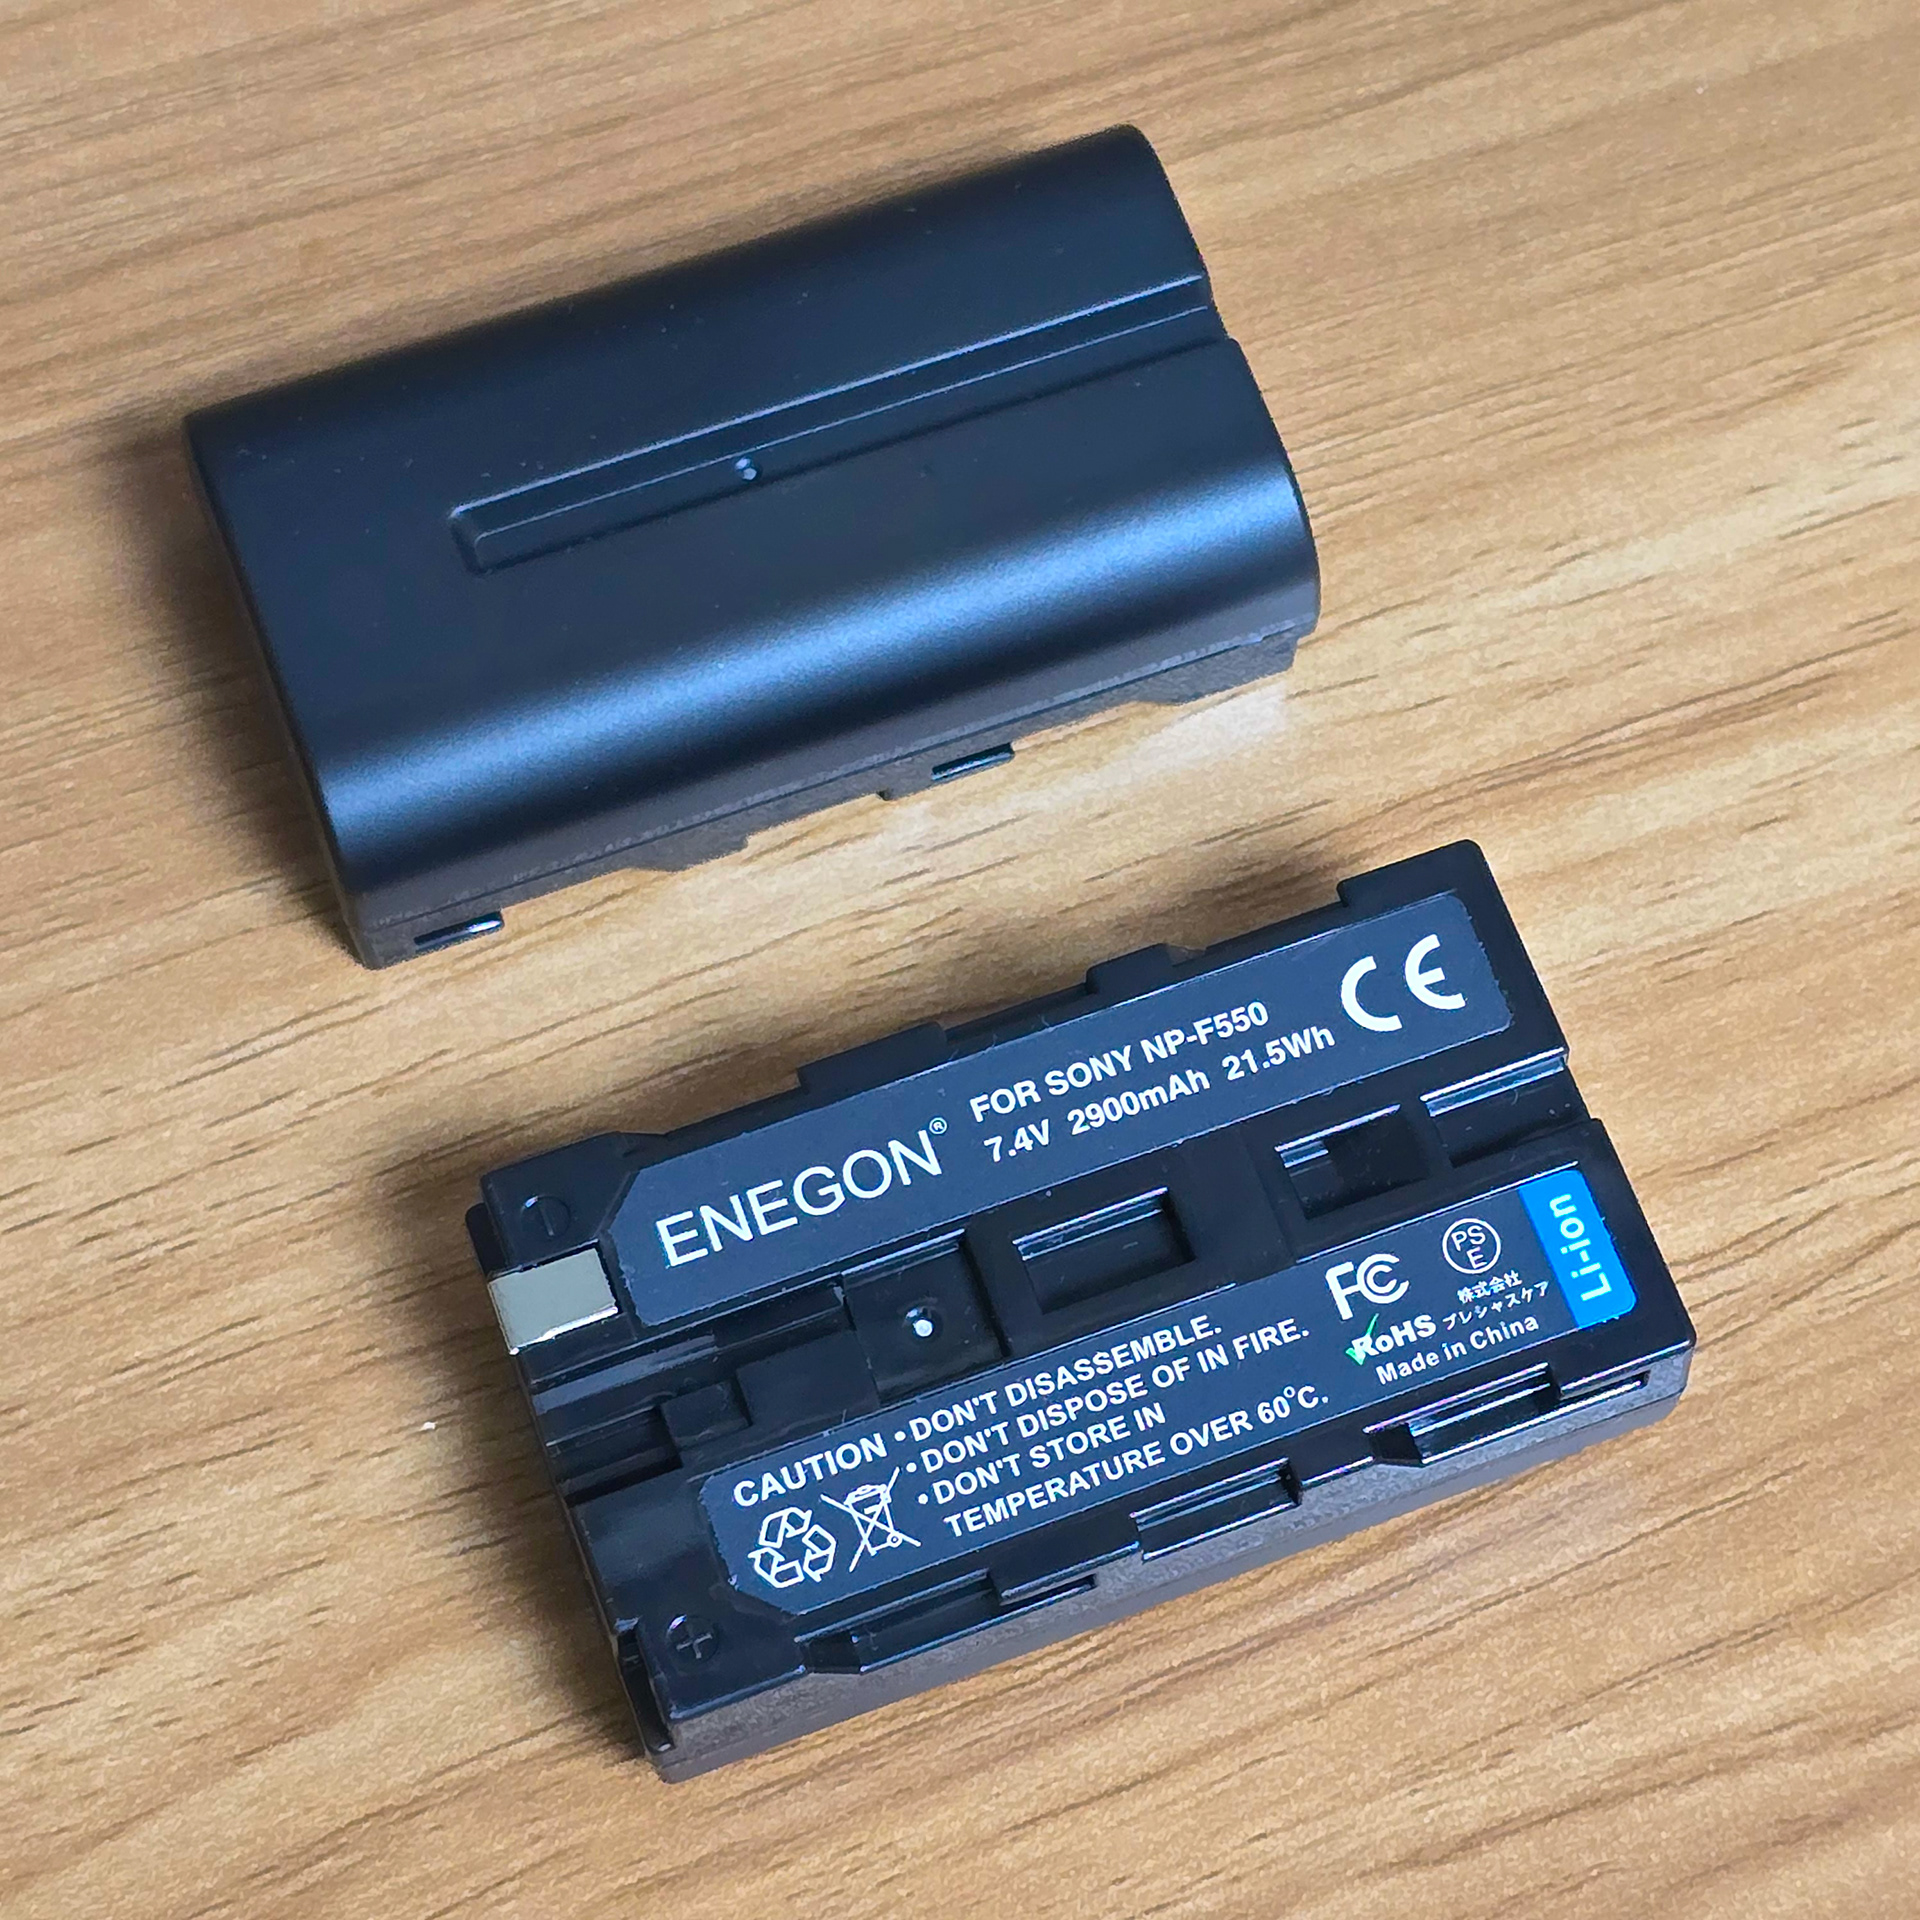
I'm using the 'ENEGON' branded NP-F550 battery set I purchased from Amazon for 3999 yen. This included 2 batteries, the battery charger and a USB cable. The charging stand can use both microUSB and USB-C for extra convenience.
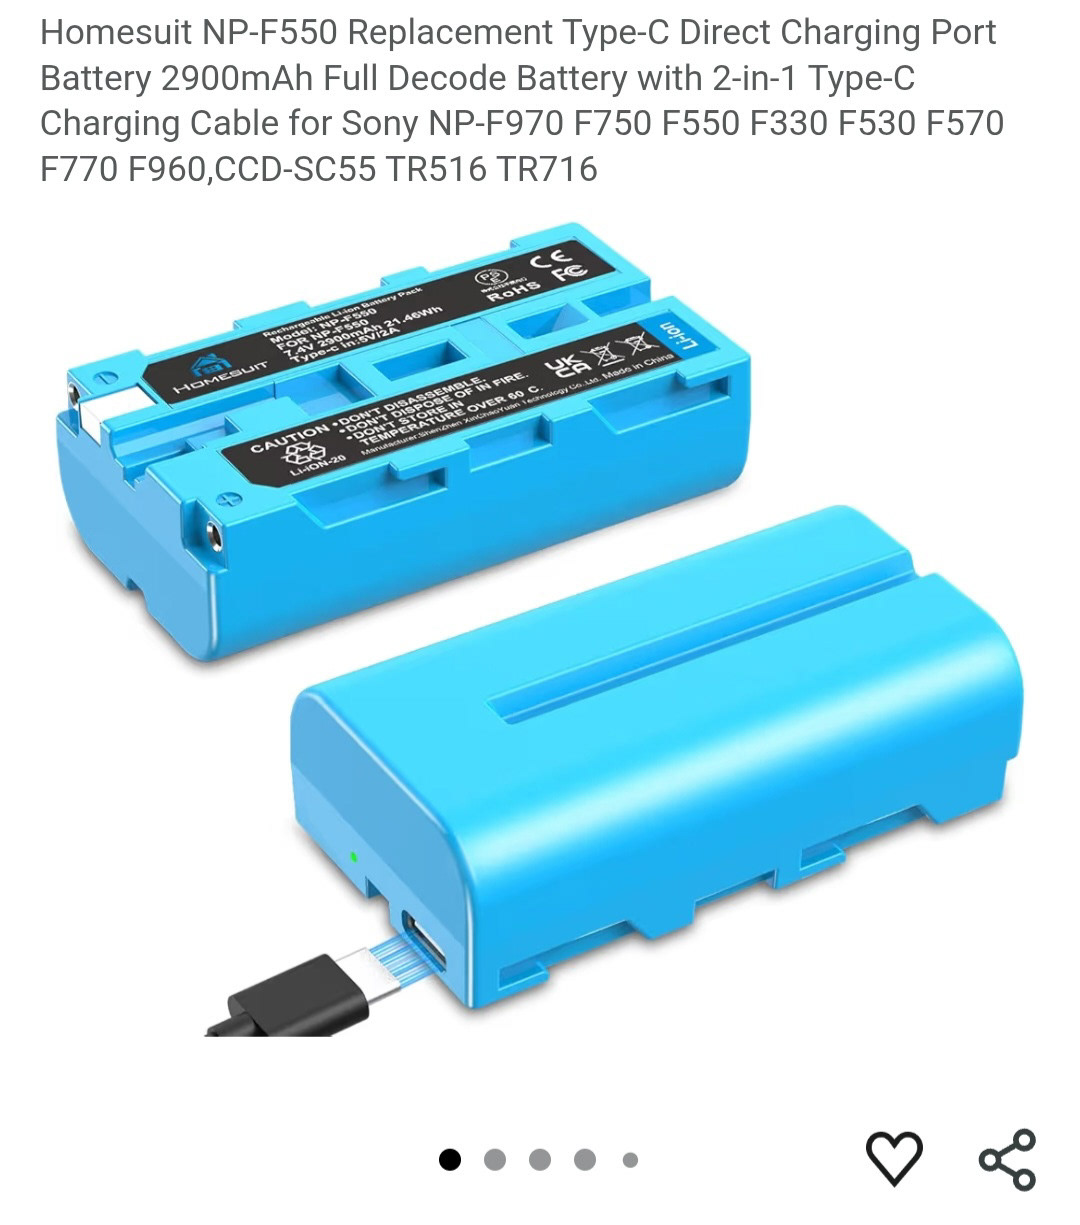
There are also other options available, including batteries that have a USB port built into the battery itself so you don't need a charger, but personally I prefer the option I got as I can charge multiple batteries at once and its cheaper.
私はAmazonで3999円で購入した「ENEGON」ブランドのNP-F550バッテリーセットを使っています。バッテリー2個、バッテリーチャージャー、USBケーブルがセットになっています。充電スタンドはmicroUSBとUSB-Cの両方に対応しているので便利です。
他にも、バッテリー本体にUSBポートが内蔵されていて充電器が不要なバッテリーなどもありますが、個人的には複数のバッテリーを一度に充電できて価格も安いので、私が購入したバッテリーセットの方が気に入っています。
他にも、バッテリー本体にUSBポートが内蔵されていて充電器が不要なバッテリーなどもありますが、個人的には複数のバッテリーを一度に充電できて価格も安いので、私が購入したバッテリーセットの方が気に入っています。
ENEGON NP-F550 Battery Set: https://amzn.asia/d/hKtDmfl
Preparation (準備)
Before we use the batteries, we need to do some simple quality-of-life preparations so that the battery can easily be removed + fit correctly. For this I'm using supplies from CanDo and a local DIY store, but you'll be able to purchase similar supplies from anywhere or online.
電池を使う前に、電池が簡単に取り外し可能で、正しく取り付けられるように、簡単な準備作業が必要です。私はCanDoと地元のDIYショップで購入した材料を使用していますが、似たような材料はどこでも、あるいはオンラインでも購入できます。
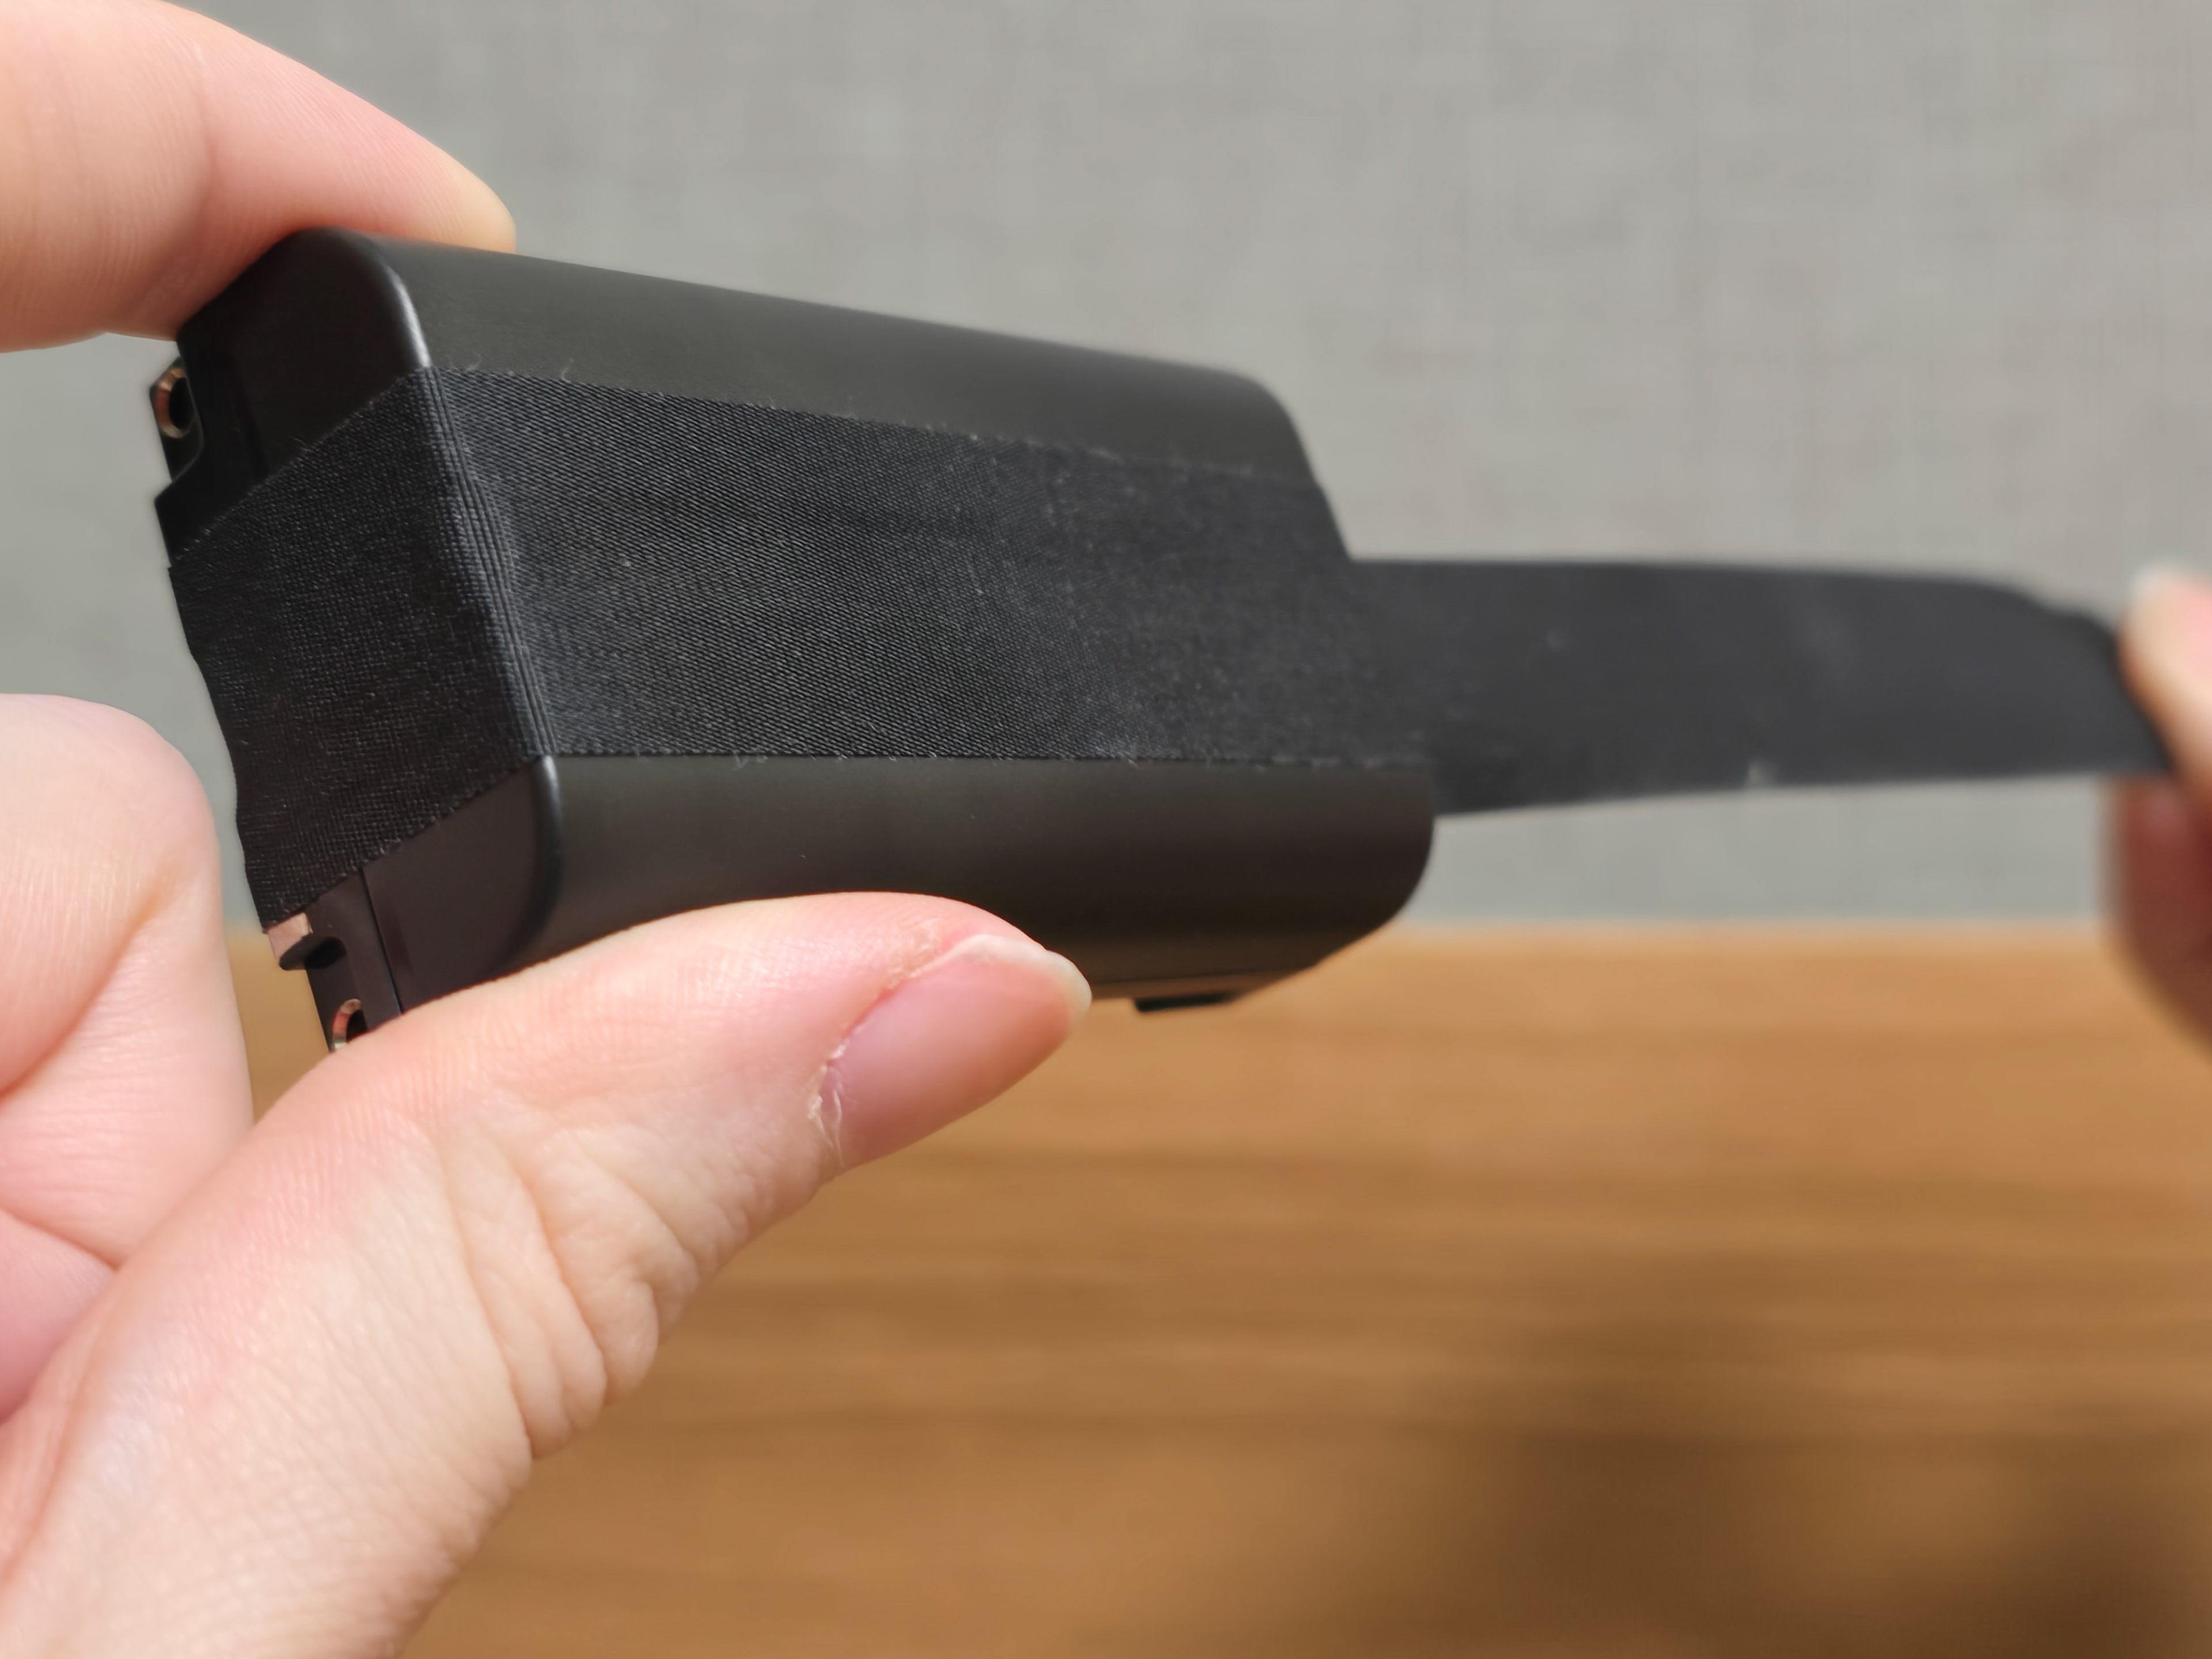
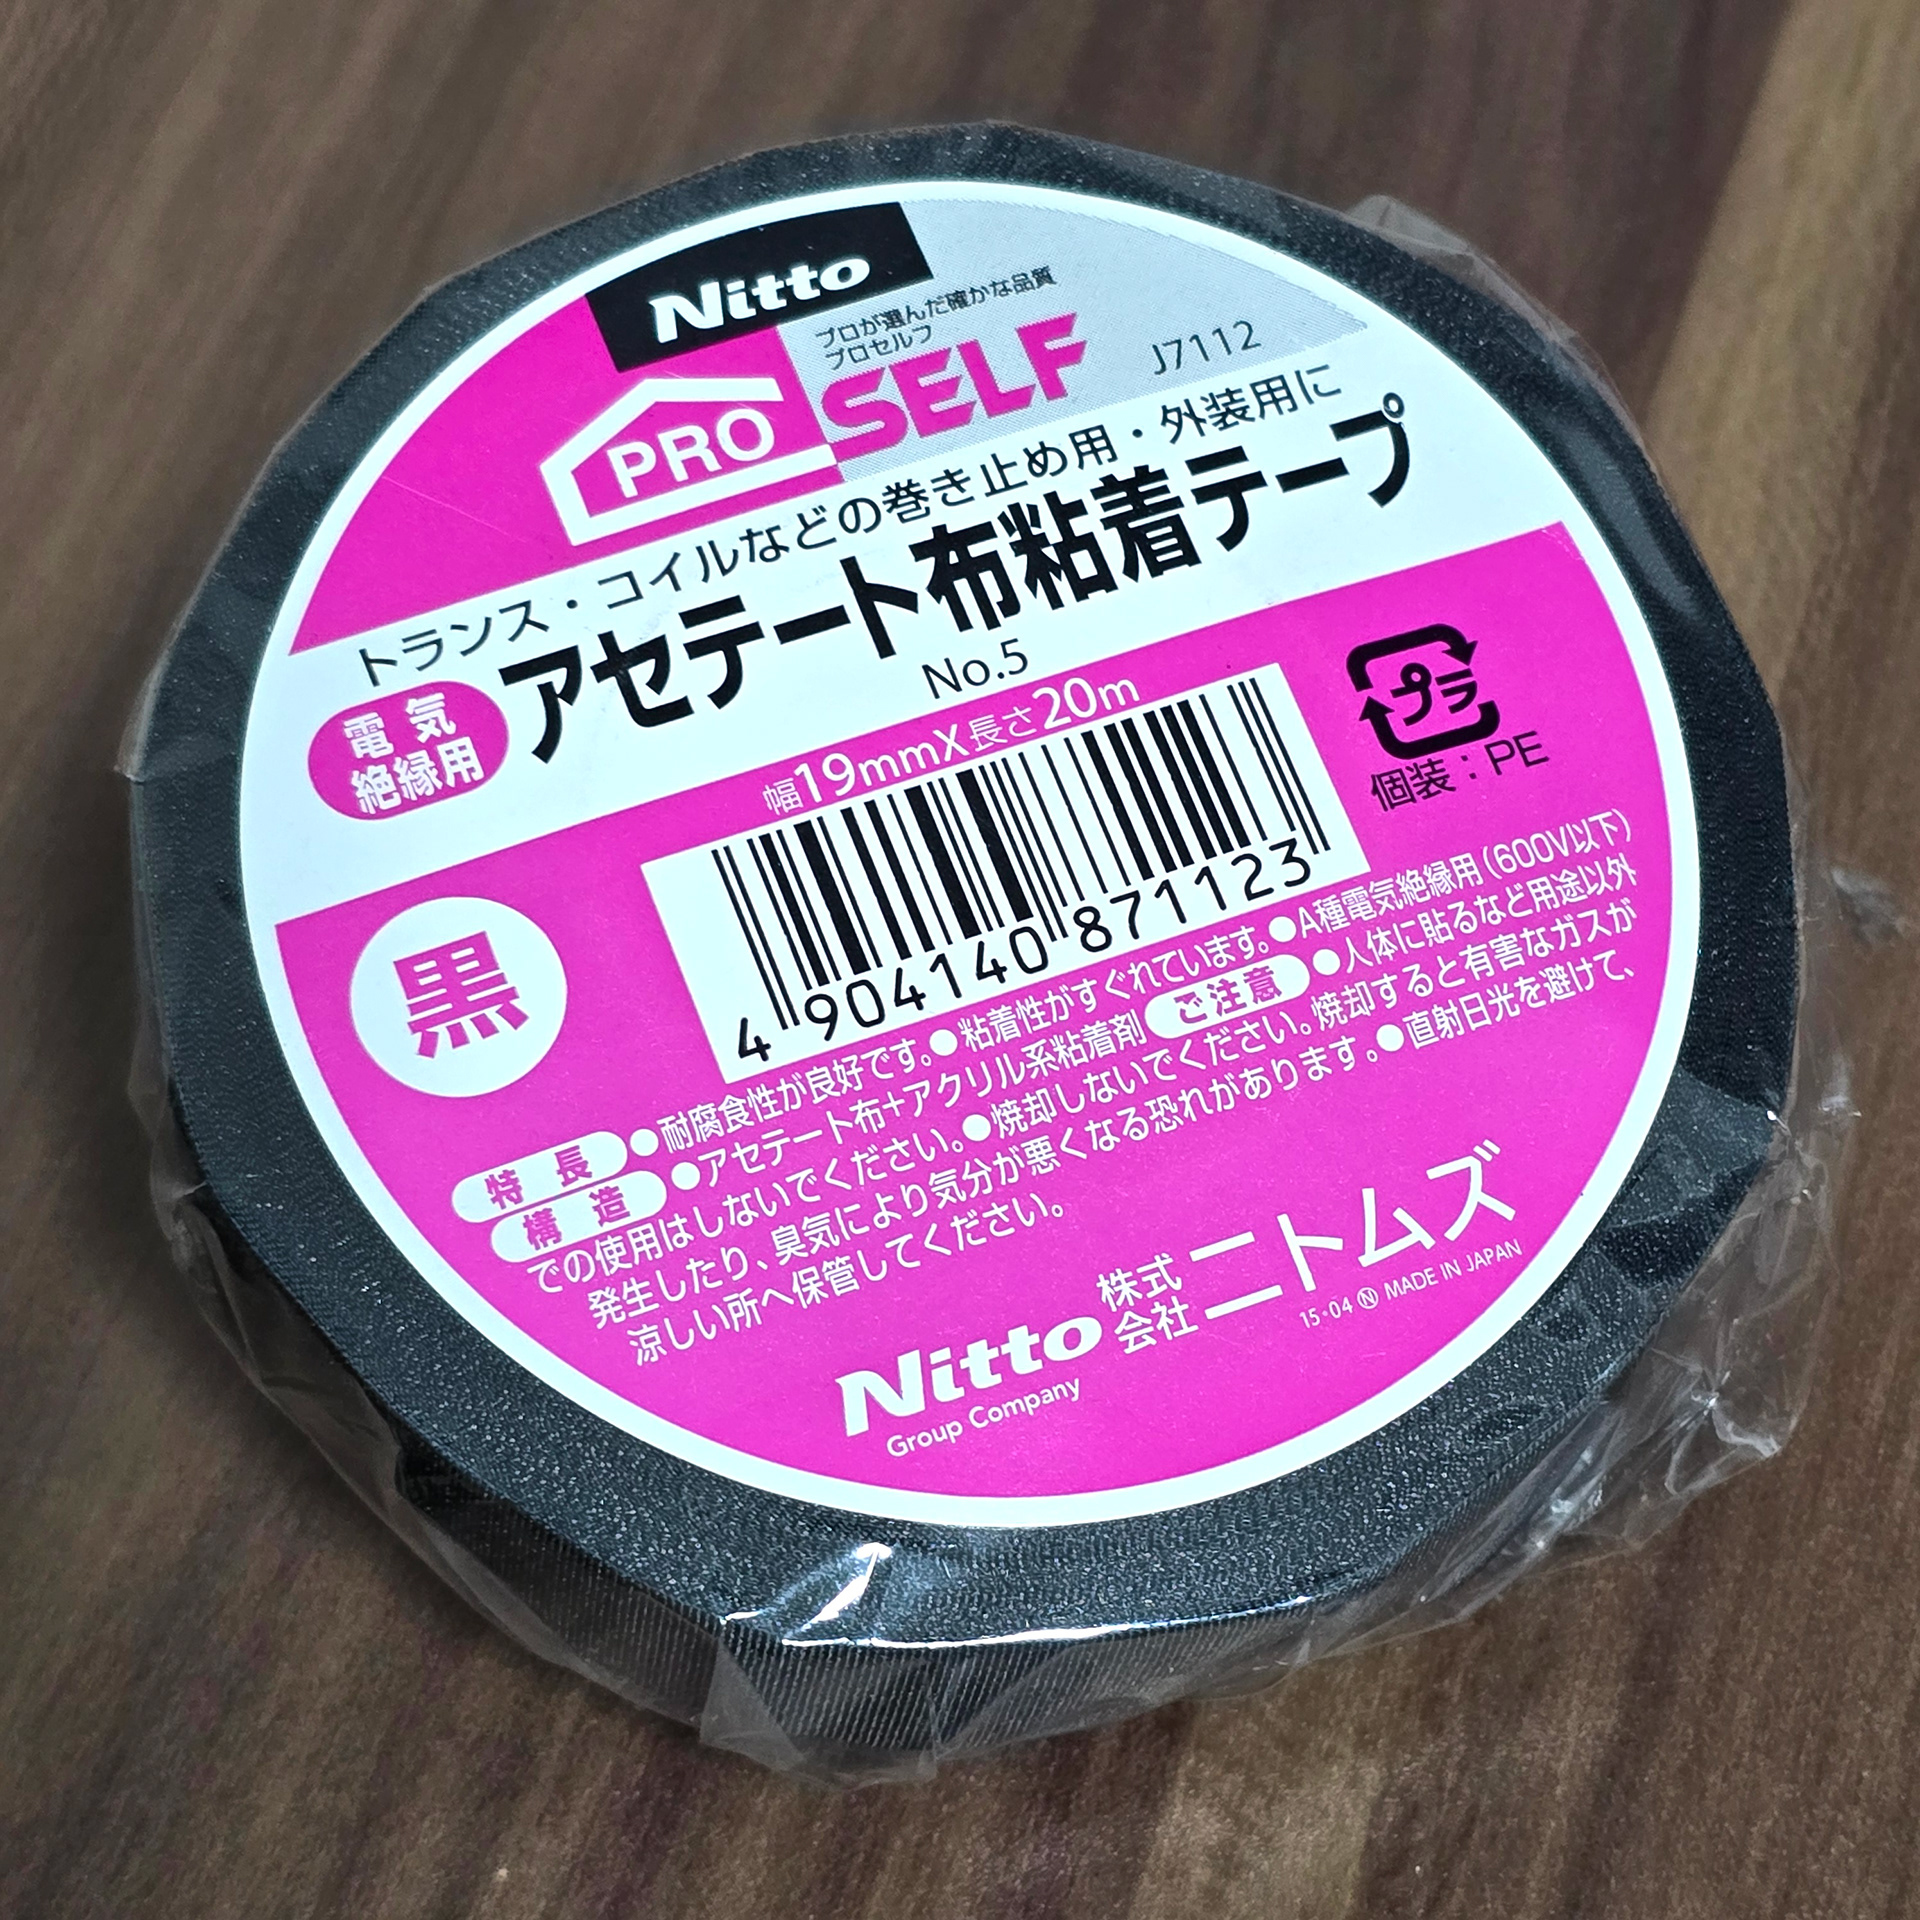
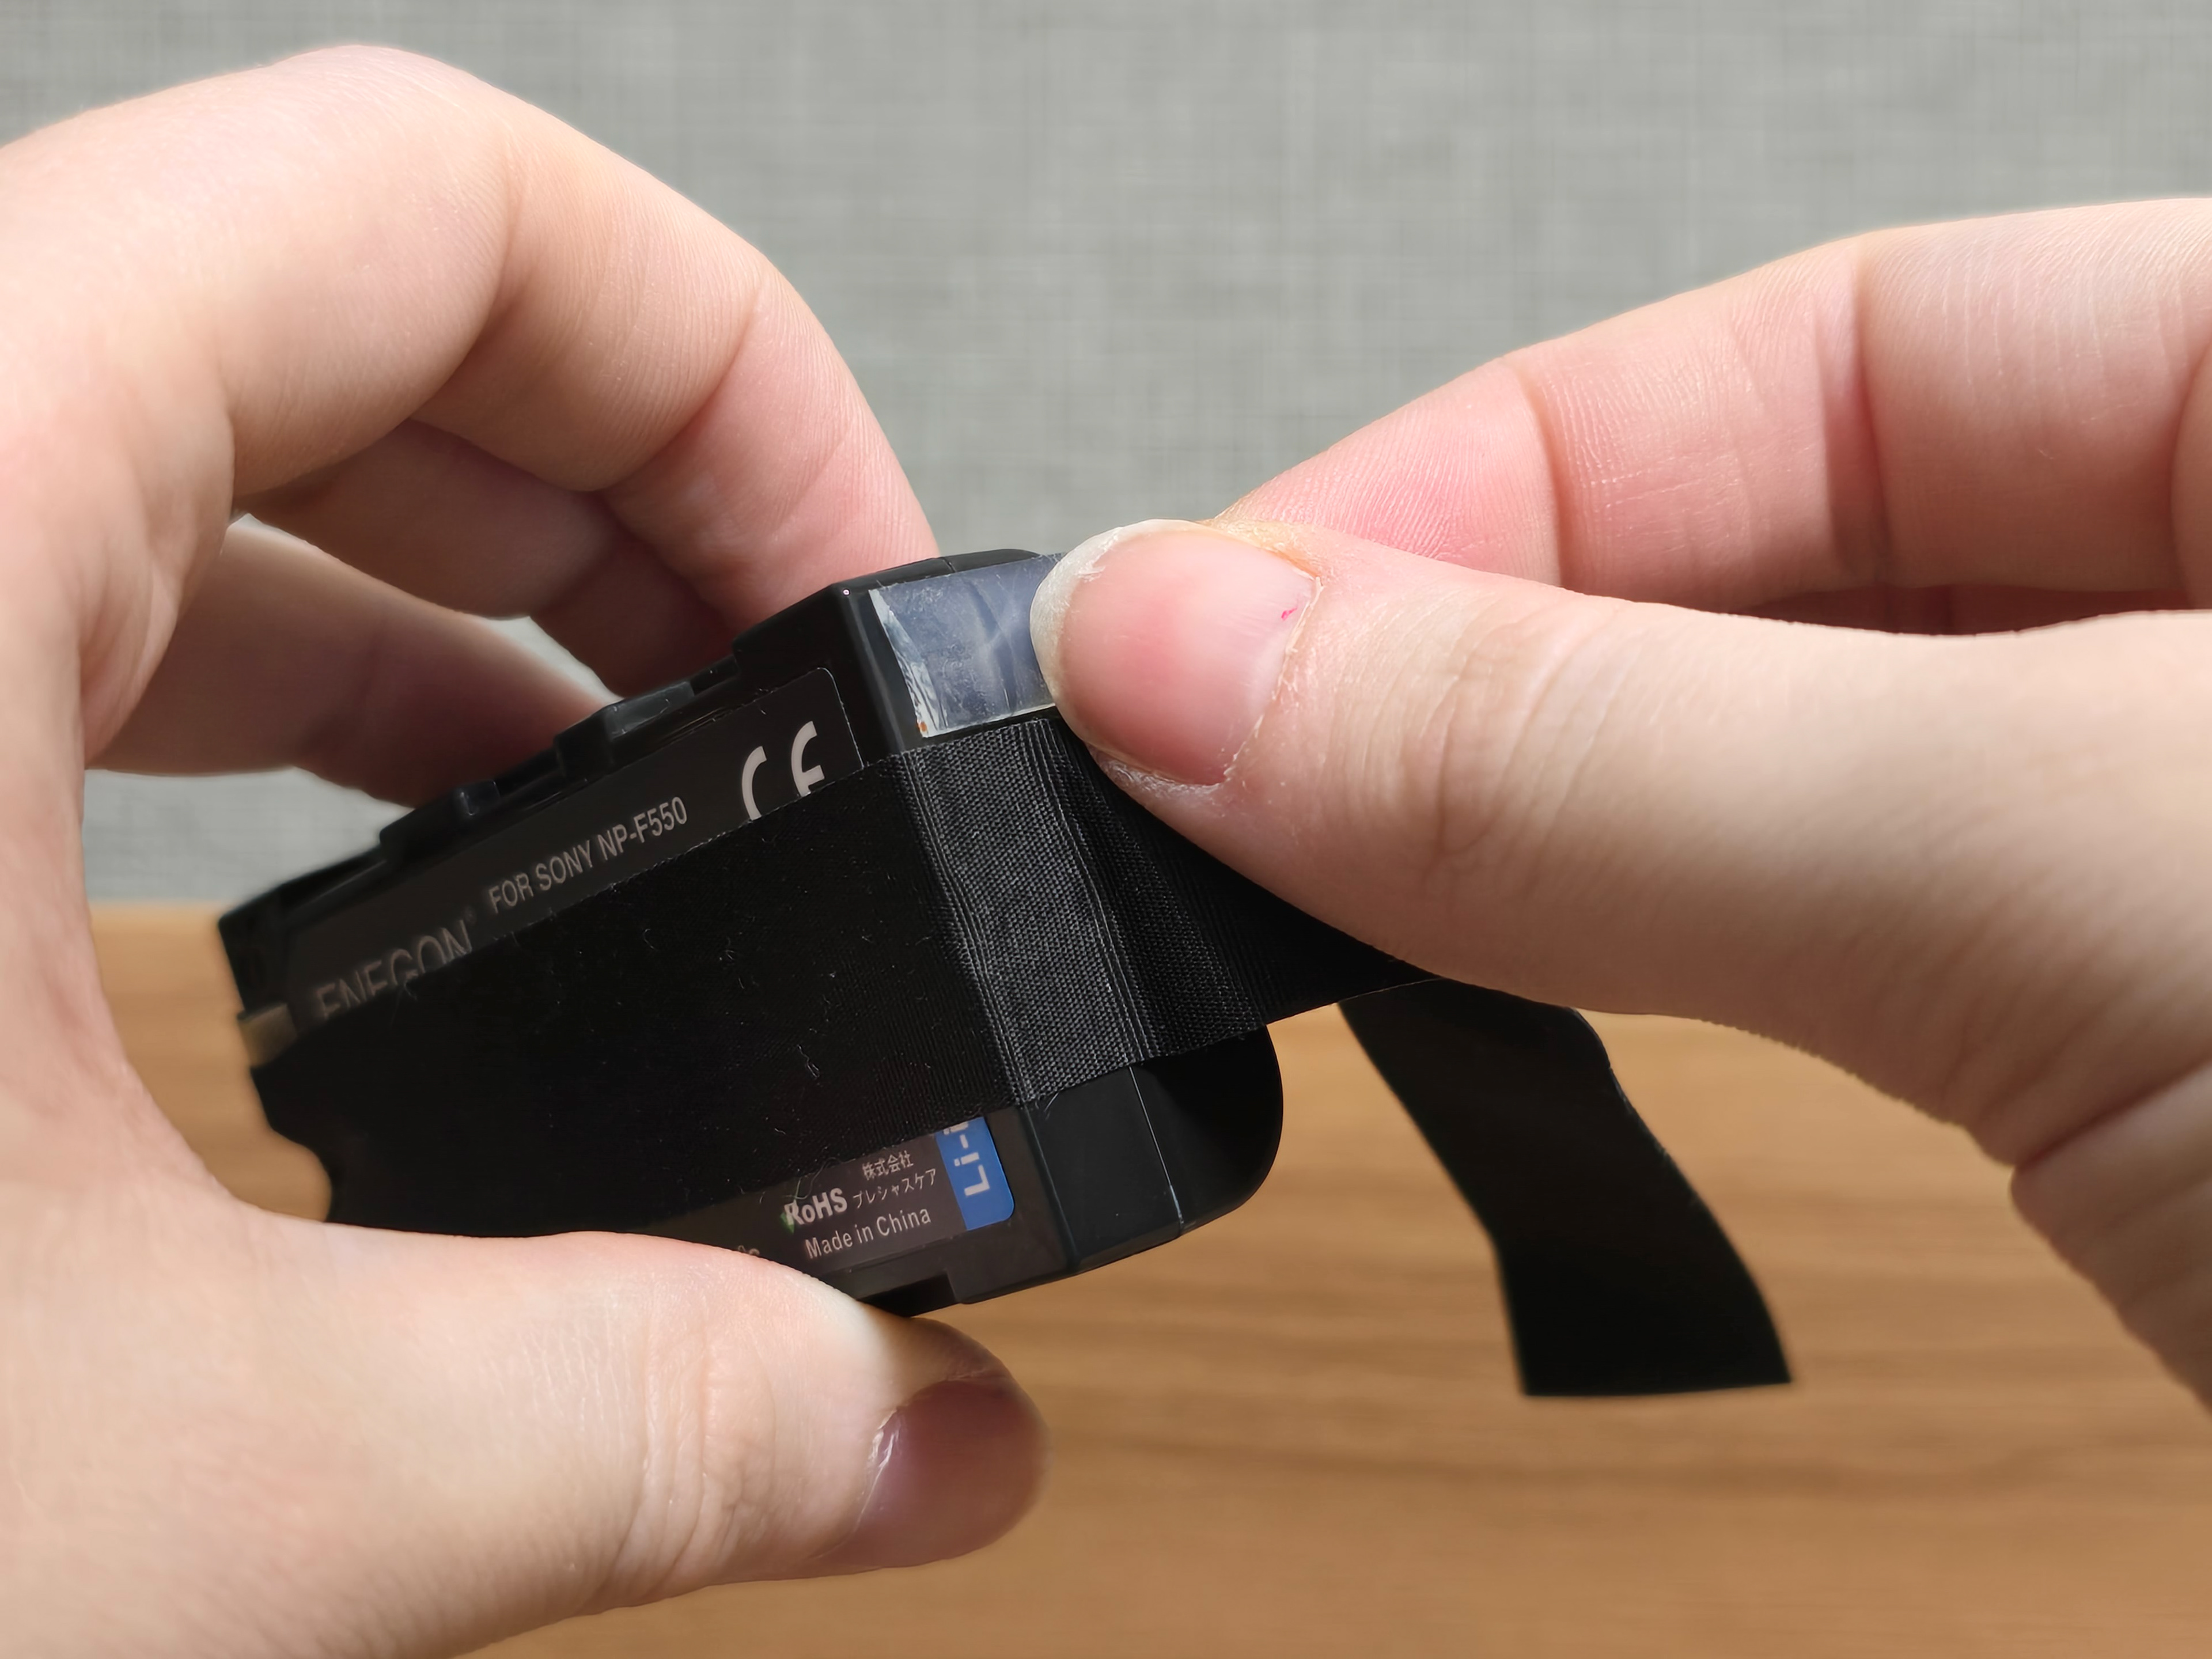
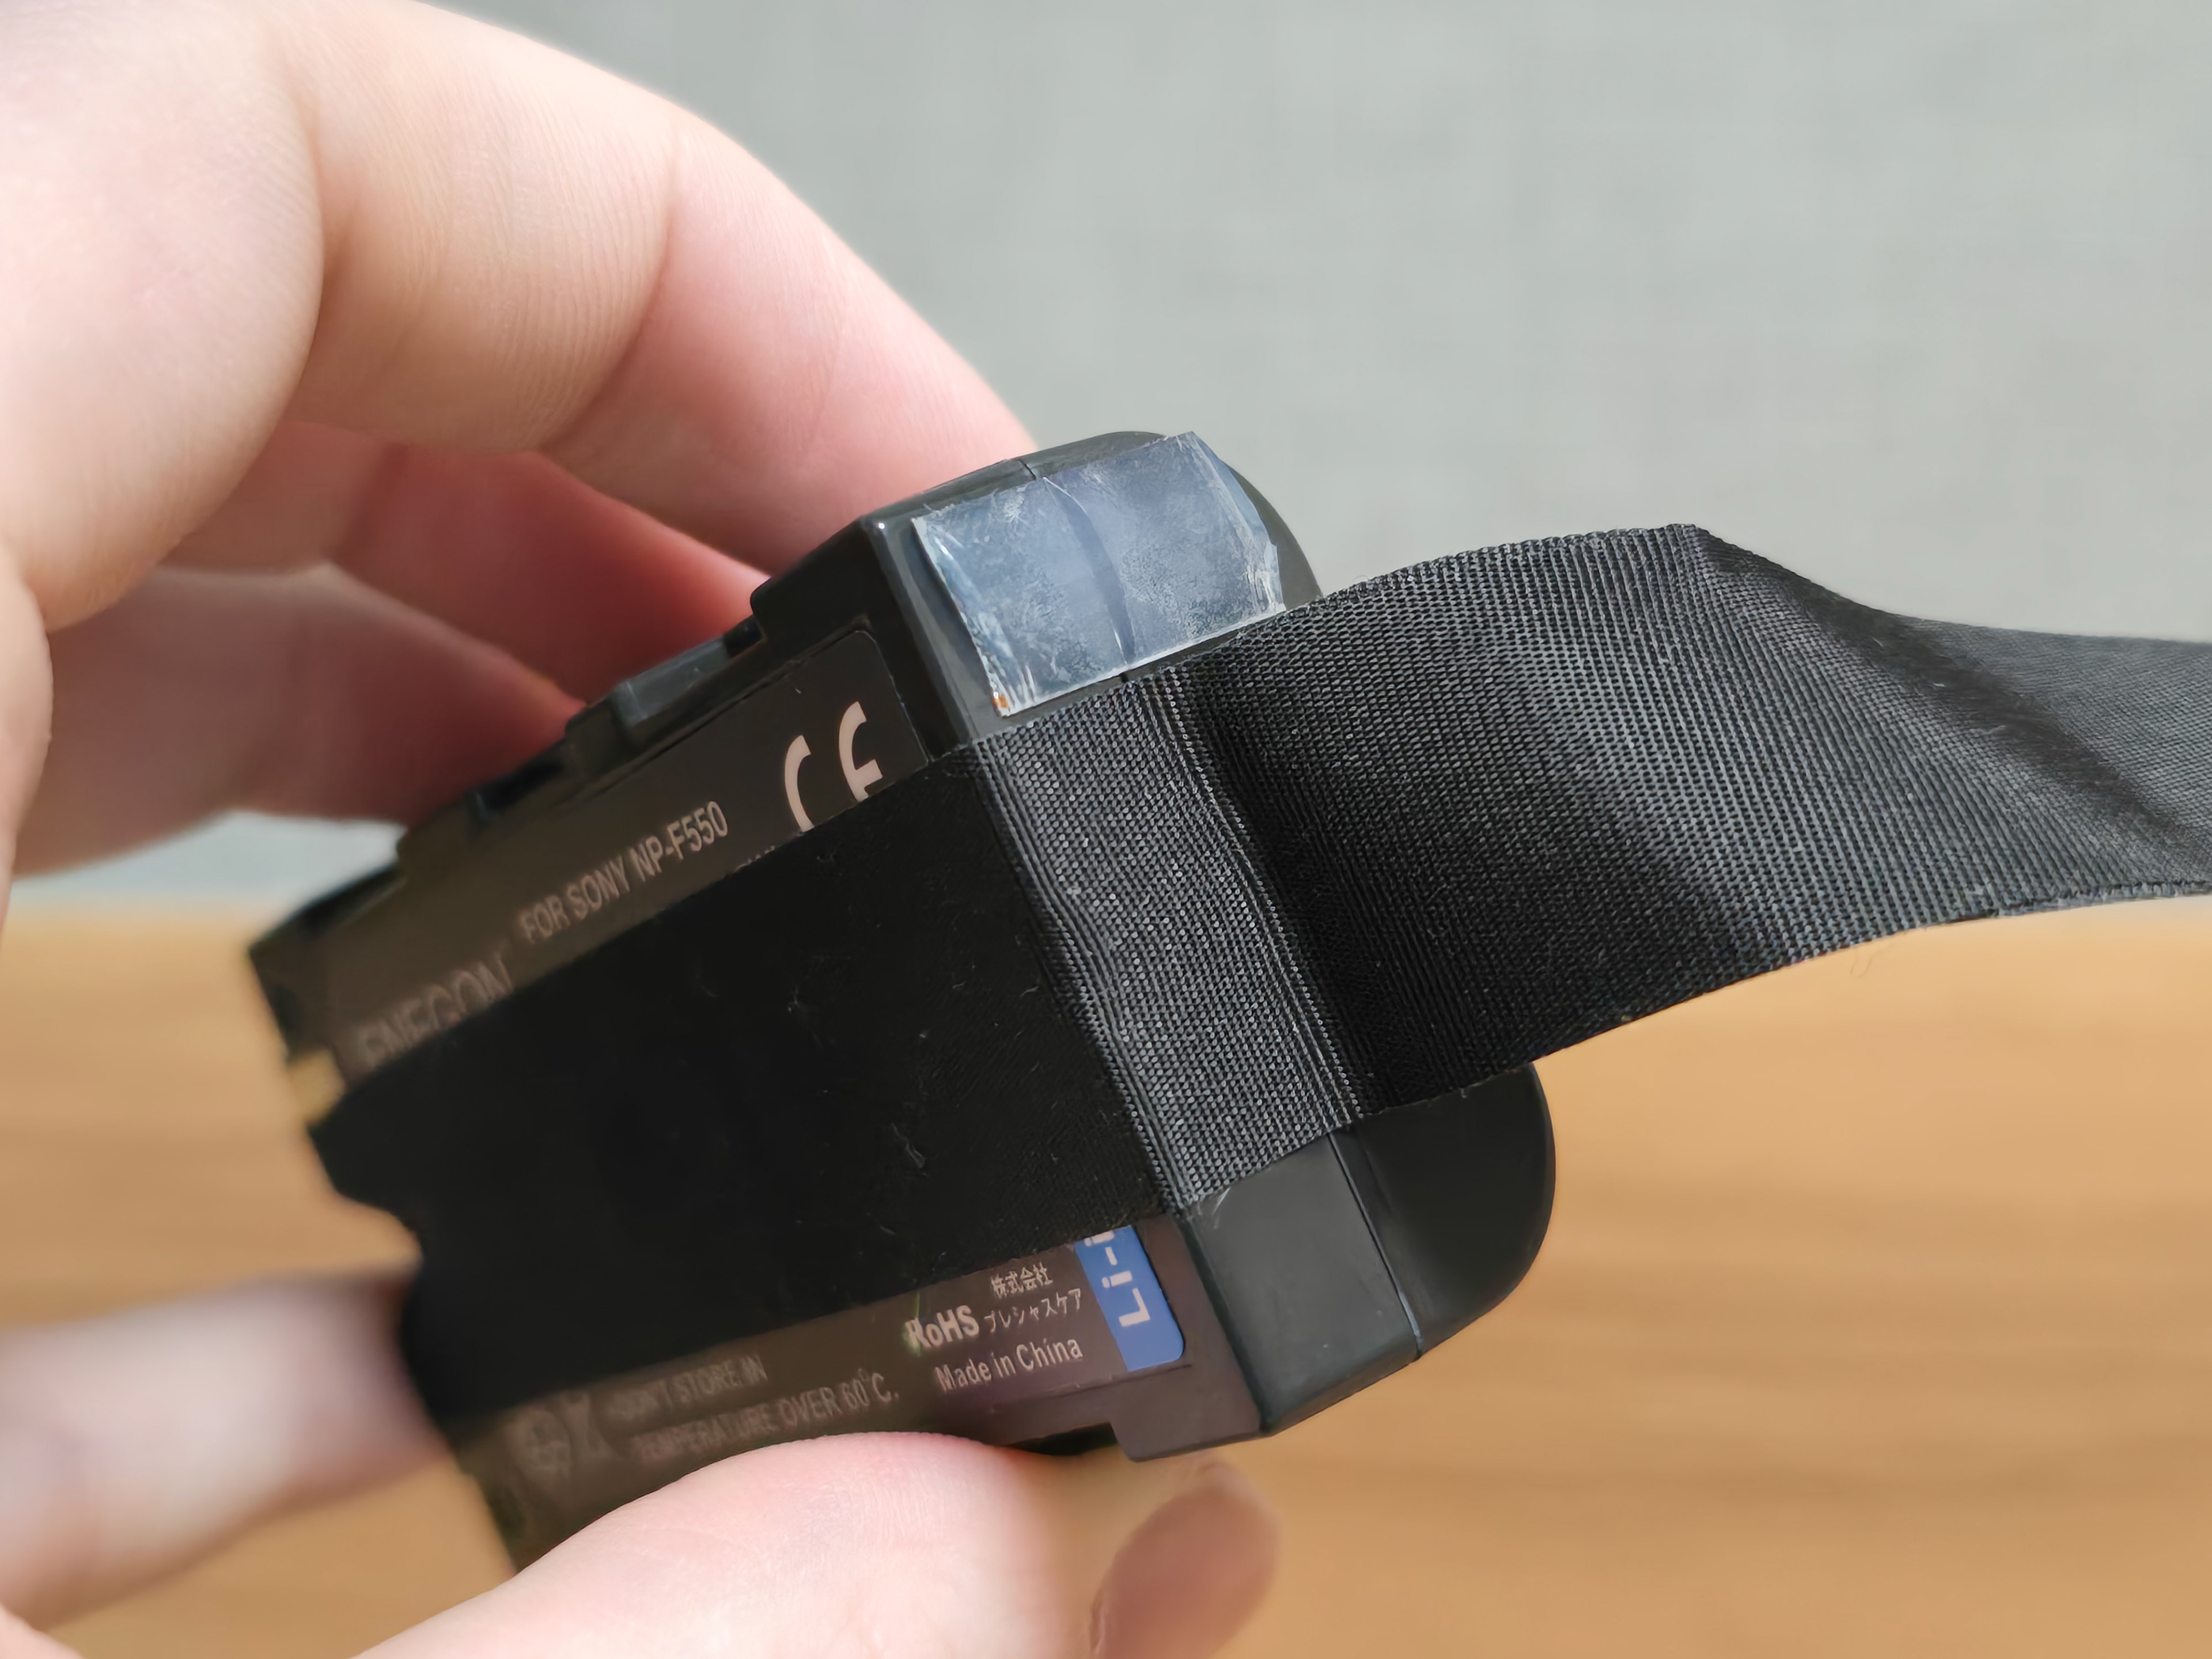
Because the new batteries are shorter than the original ERS-110/111 batteries, we need to make a way to easily pull them out. To do this, cut a long piece of the fabric tape and loop it around the length of the battery, leaving some trail off to act as a handle. I recommend doing this on all batteries so then there are no issues when you want to switch their order around for continued play.
新しい電池はオリジナルのERS-110/111電池よりも短いため、簡単に取り出せるように工夫する必要があります。そのためには、布テープを長めに切り、電池の長さに合わせて巻き付けます。少し余白を残して持ち手として使えます。すべての電池でこの手順を踏むことをお勧めします。そうすれば、遊び続ける際に電池の順番を入れ替える際に問題が発生することはありません。
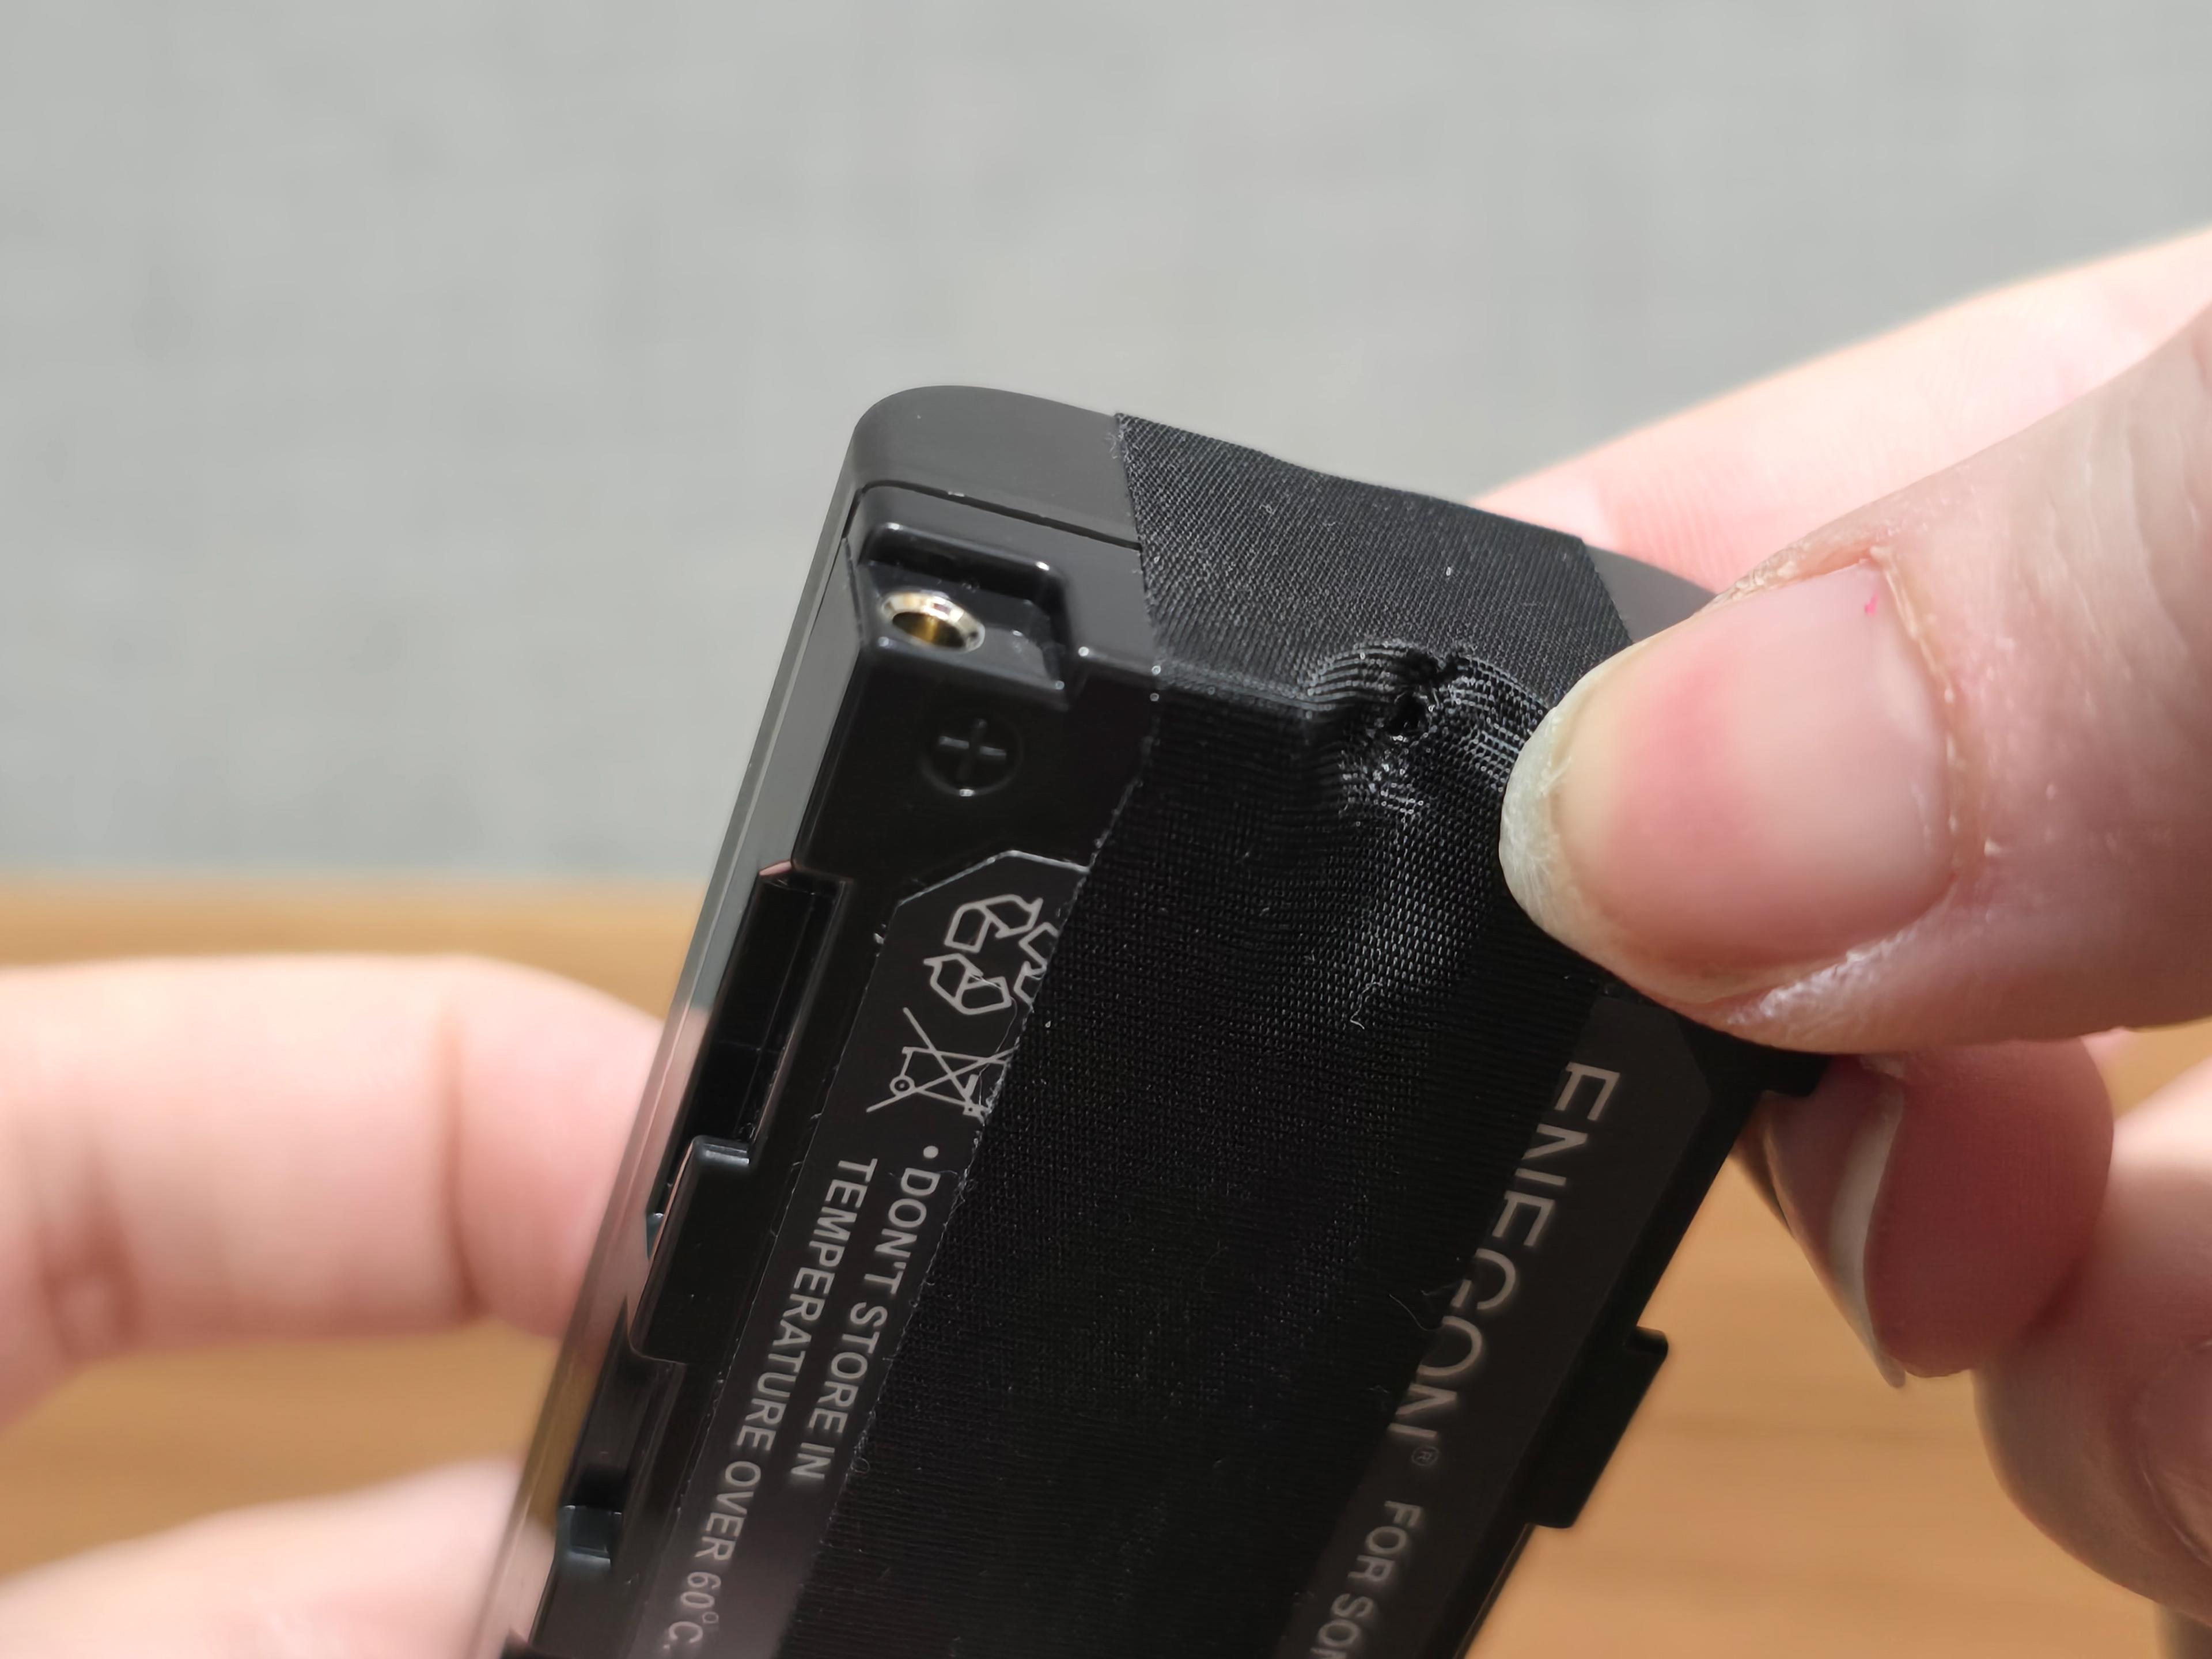
I recommend poking a hole through the tape here to re-establish the gap so that the aibos information pin has somewhere to rest.
ここでテープに穴を開けて隙間を作り直し、aibo の情報ピンが収まる場所を作ることをお勧めします。
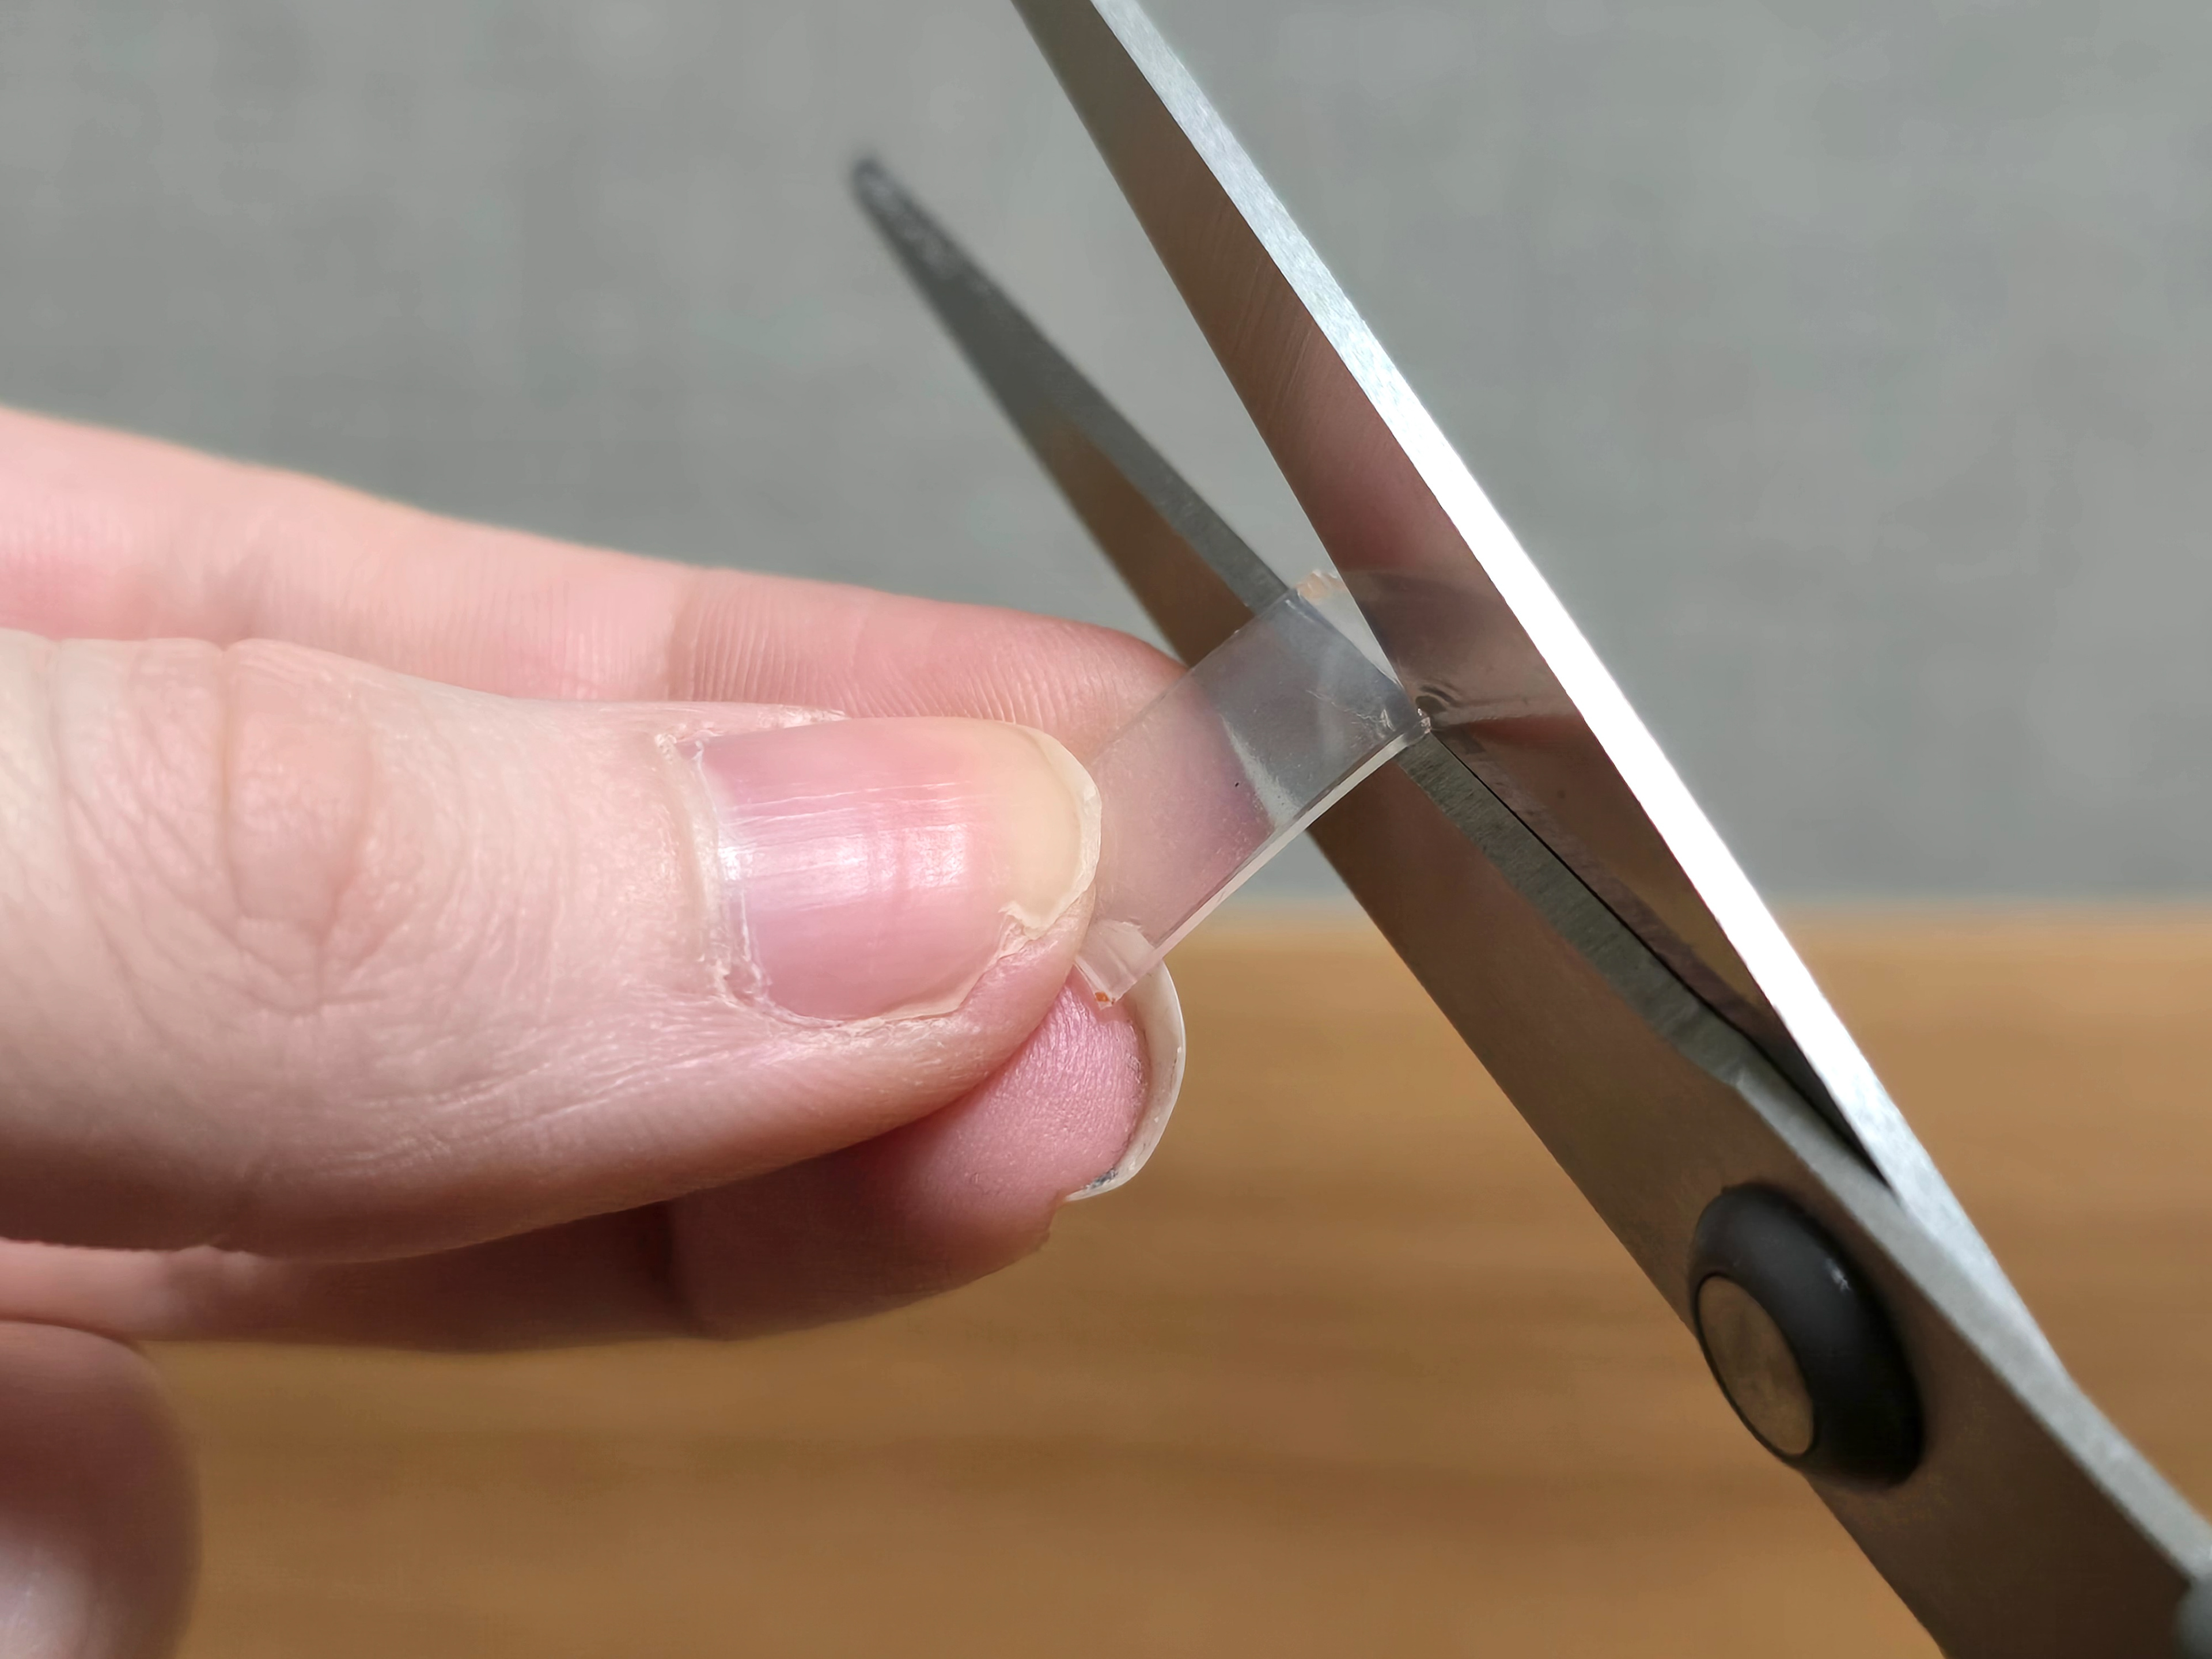
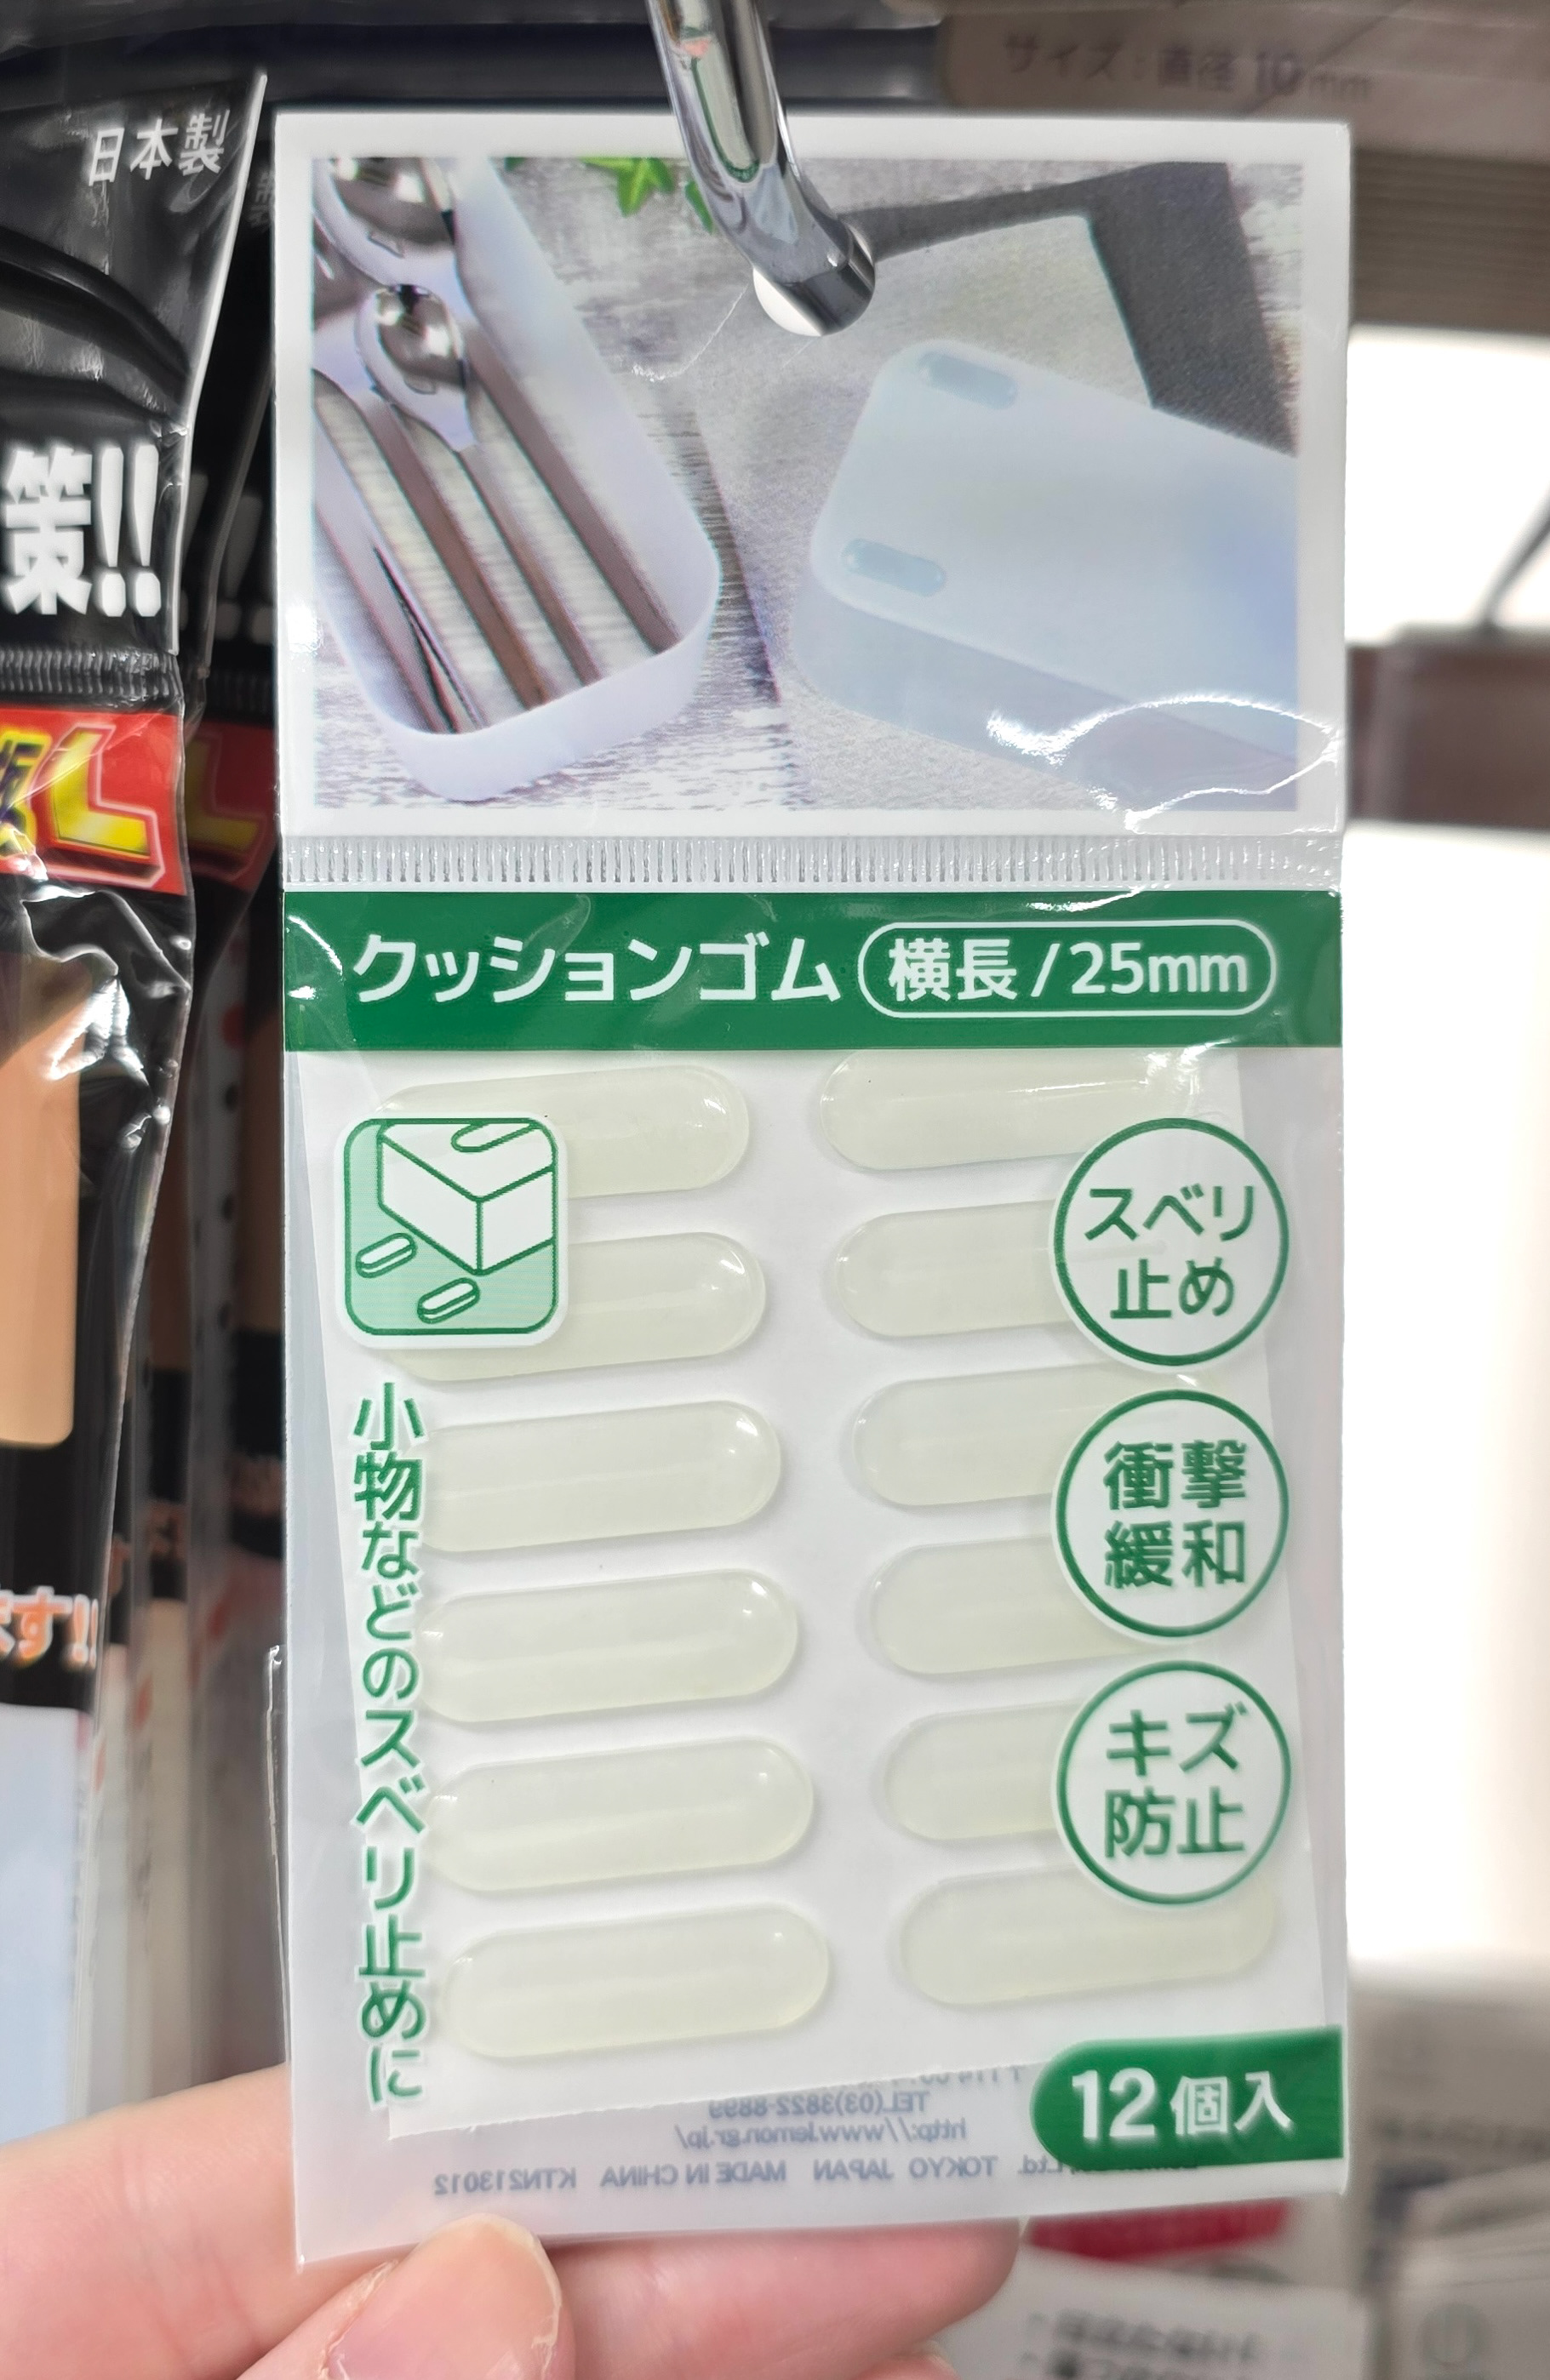
Even with two batteries inside of the aibo's battery bay, there is still space left which could lead to the batteries moving and the pins disconnecting. To solve this we are going use the cushioning rubber stickers to act as spacers on each battery to fill that gap between the batteries and the battery bay latch.
Simply cut the rounded ends off the cushioning rubber stickers and apply to the top section of the battery end as seen in the above photograph. Do this for both batteries. ^^^
aiboのバッテリーベイにバッテリーを2個入れても、隙間が空いてしまうため、バッテリーが動いてピンが外れてしまう可能性があります。この問題を解決するために、各バッテリーにクッション用のゴムシールをスペーサーとして貼り付け、バッテリーとバッテリーベイのラッチの間の隙間を埋めます。
クッション用のゴムシールの丸い端を切り取り、上の写真のようにバッテリー端の上部に貼り付けます。両方のバッテリーにこの作業を繰り返してください。^^^
クッション用のゴムシールの丸い端を切り取り、上の写真のようにバッテリー端の上部に貼り付けます。両方のバッテリーにこの作業を繰り返してください。^^^
The batteries are now ready to be used in your aibo! Don't forget to do a test-run and time to see how long the battery lasts. That way you can figure out when to switch the aibo off and save the process to the stick.
バッテリーはaiboで使えるようになりました!
How to Use (使い方)
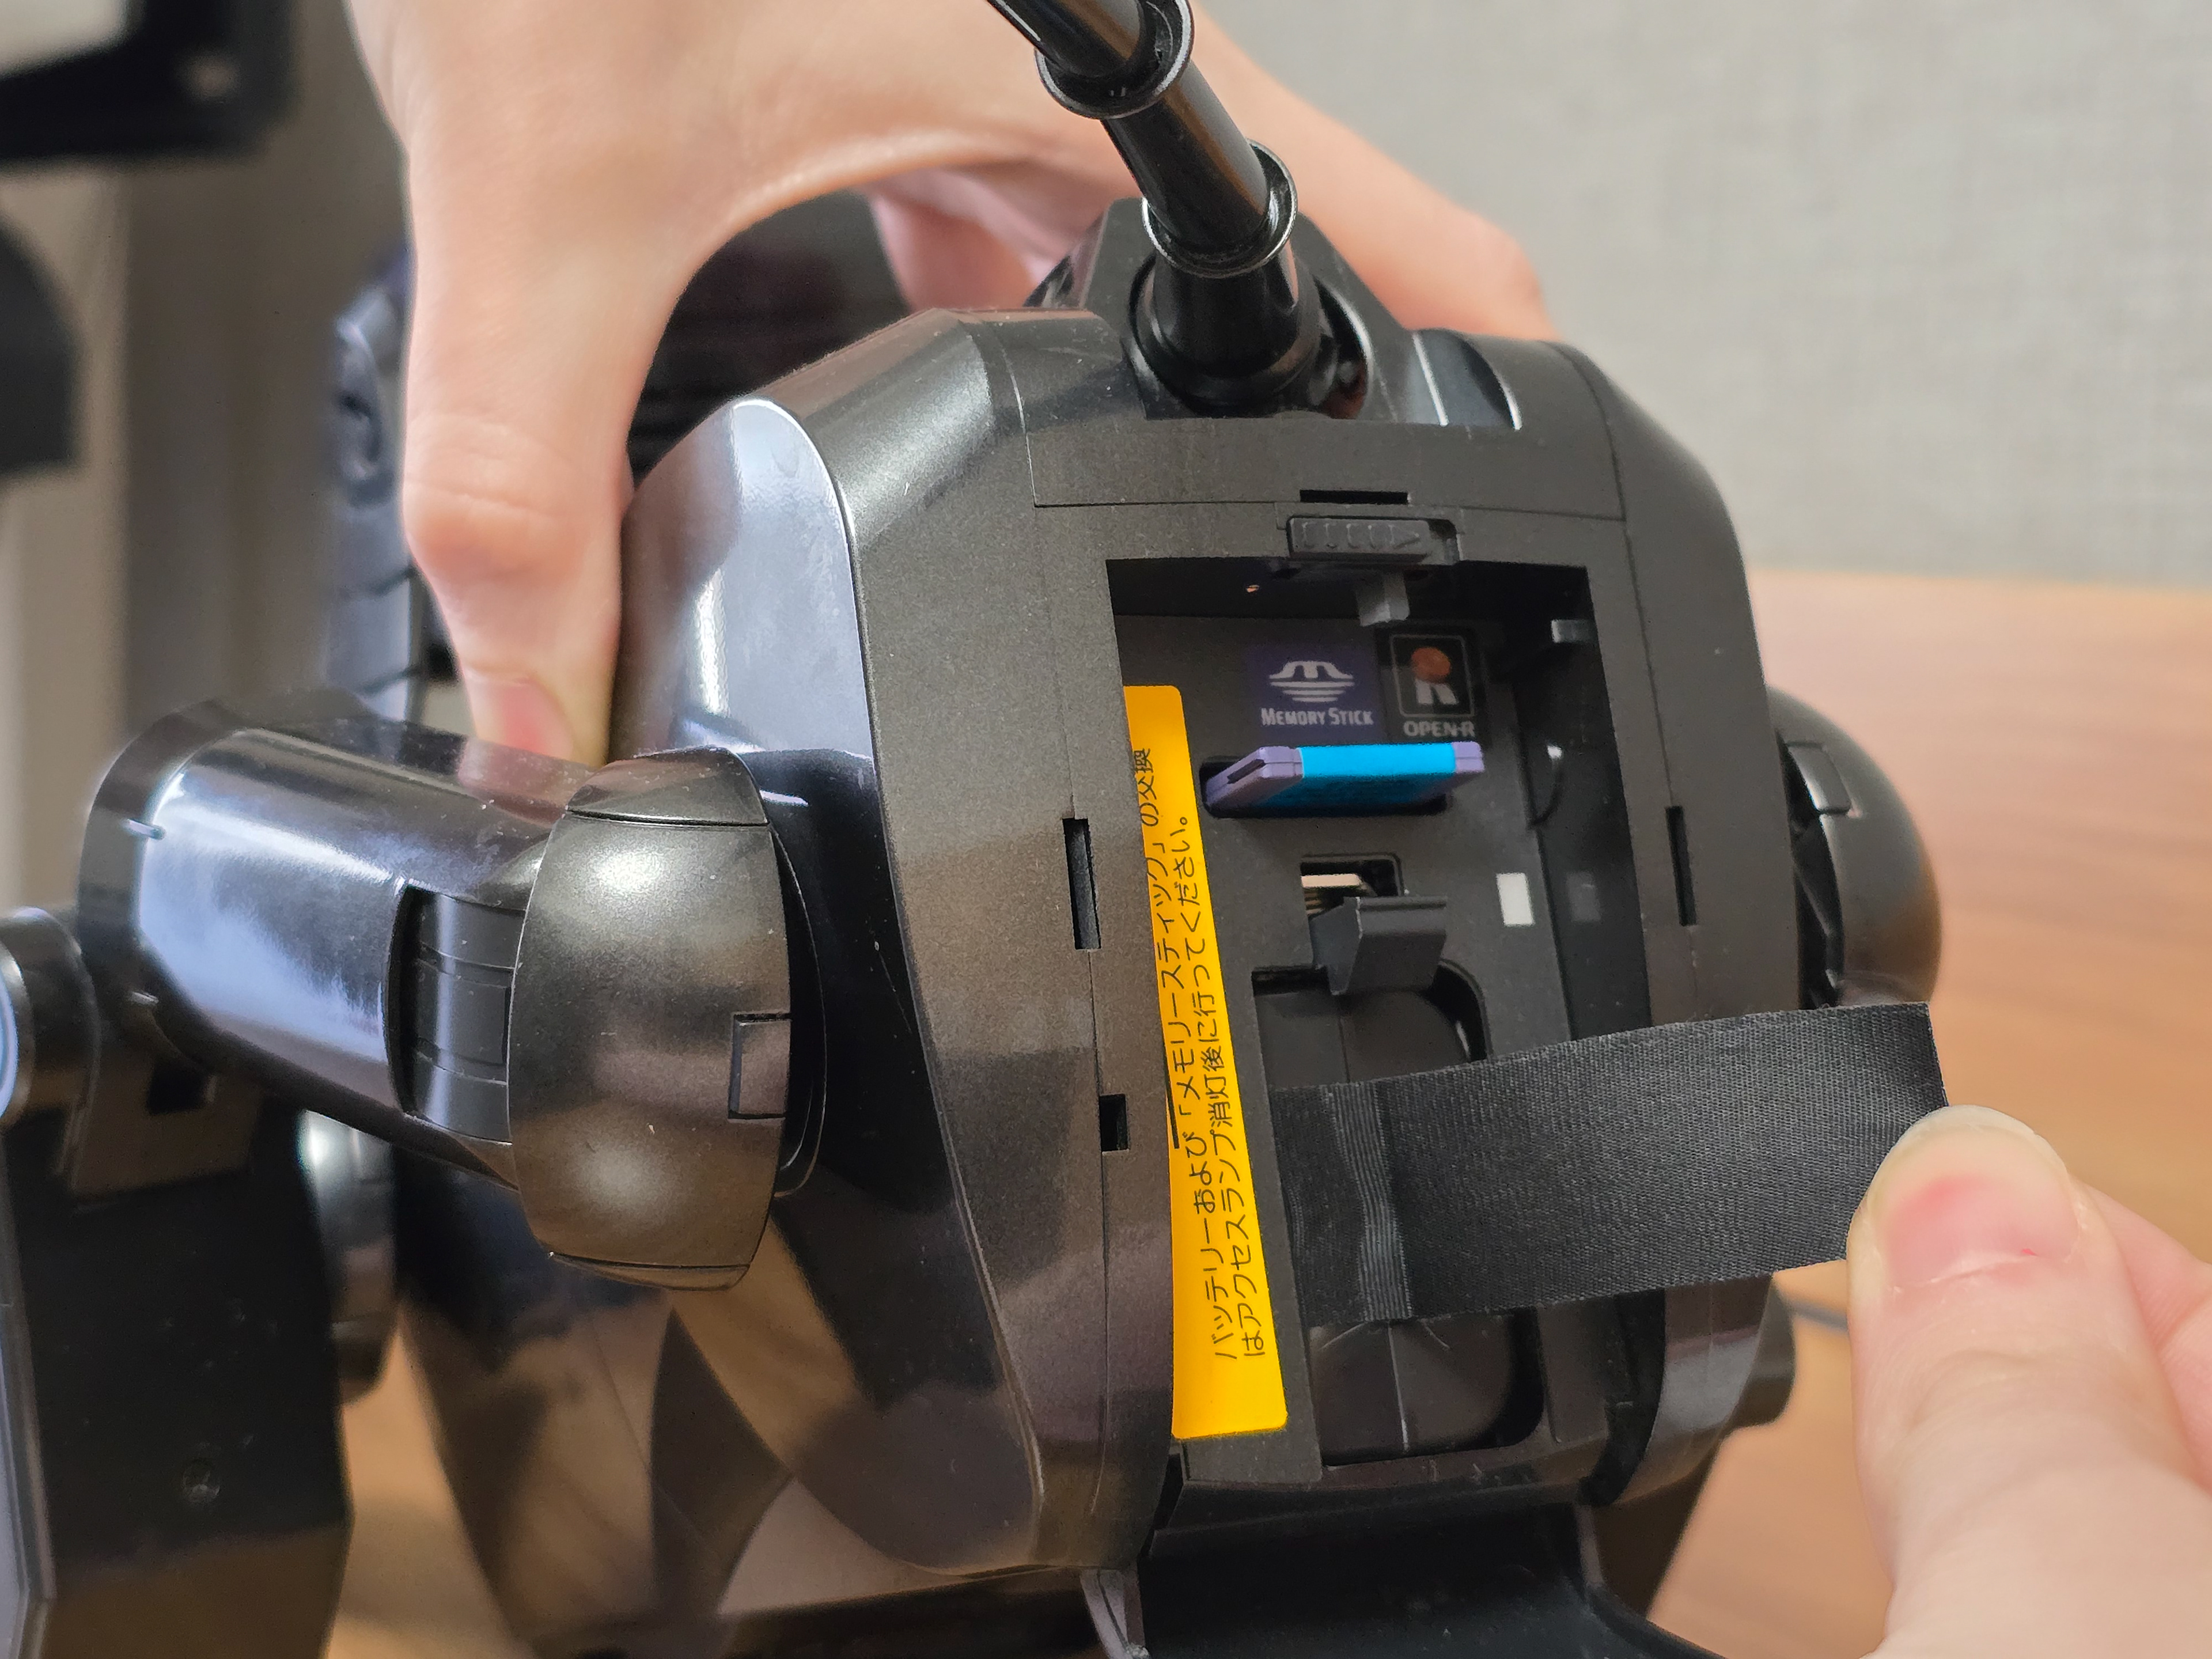
Simply insert two batteries into the aibo's battery bay, ensuring they are snuggly inserted all of the way and close the battery bay door. Press the chest button and your aibo should start up!
aiboのバッテリーベイにバッテリーを2個挿入し、しっかりと奥まで差し込んでバッテリーベイのドアを閉めてください。胸のボタンを押すと、aiboが起動します。
Enjoy! (楽しむ)