
Most Sony Rolly players now fail to dance to music reliably due to a cracked pinion gear which is found both sides and drives the Rolly wheel. Because the crack widens the small pinion gear, it stops the gears from being driven and creates a signature clicking sound. While not perfect, there does exist a fix for this that you can try to (hopefully) get your Rolly dancing again.
I made this guide to give clear step by step instructions on how to do this and point out tricky parts you will have to look out for. The rally colour may change throughout the instruction pictures, so please ignore that.
現在、ほとんどのソニー製Rollyプレーヤーは、Rollyホイールを駆動するピニオンギア(両側)の亀裂が原因で、音楽に合わせて安定して踊ることができなくなりました。亀裂によって小さなピニオンギアが広がり、ギアの駆動が停止し、カチカチという独特の音が発生します。完璧ではありませんが、この問題を解決する方法があり、(うまくいけば)Rollyを再び踊らせることができるようになります。
このガイドは、その方法を分かりやすく段階的に説明し、注意すべき点を指摘するために作成しました。説明画像の中ではRollyの色が変わる場合がありますが、無視してください。
このガイドは、その方法を分かりやすく段階的に説明し、注意すべき点を指摘するために作成しました。説明画像の中ではRollyの色が変わる場合がありますが、無視してください。
Tools:
- JIS 000 + screwdriver
-Coin (to remove the battery)
- 2-part epoxy
- Scalpel
工具:
- JIS 000番以上のドライバー
- コイン(バッテリー取り外し用)
- 2液性エポキシ接着剤
- メス

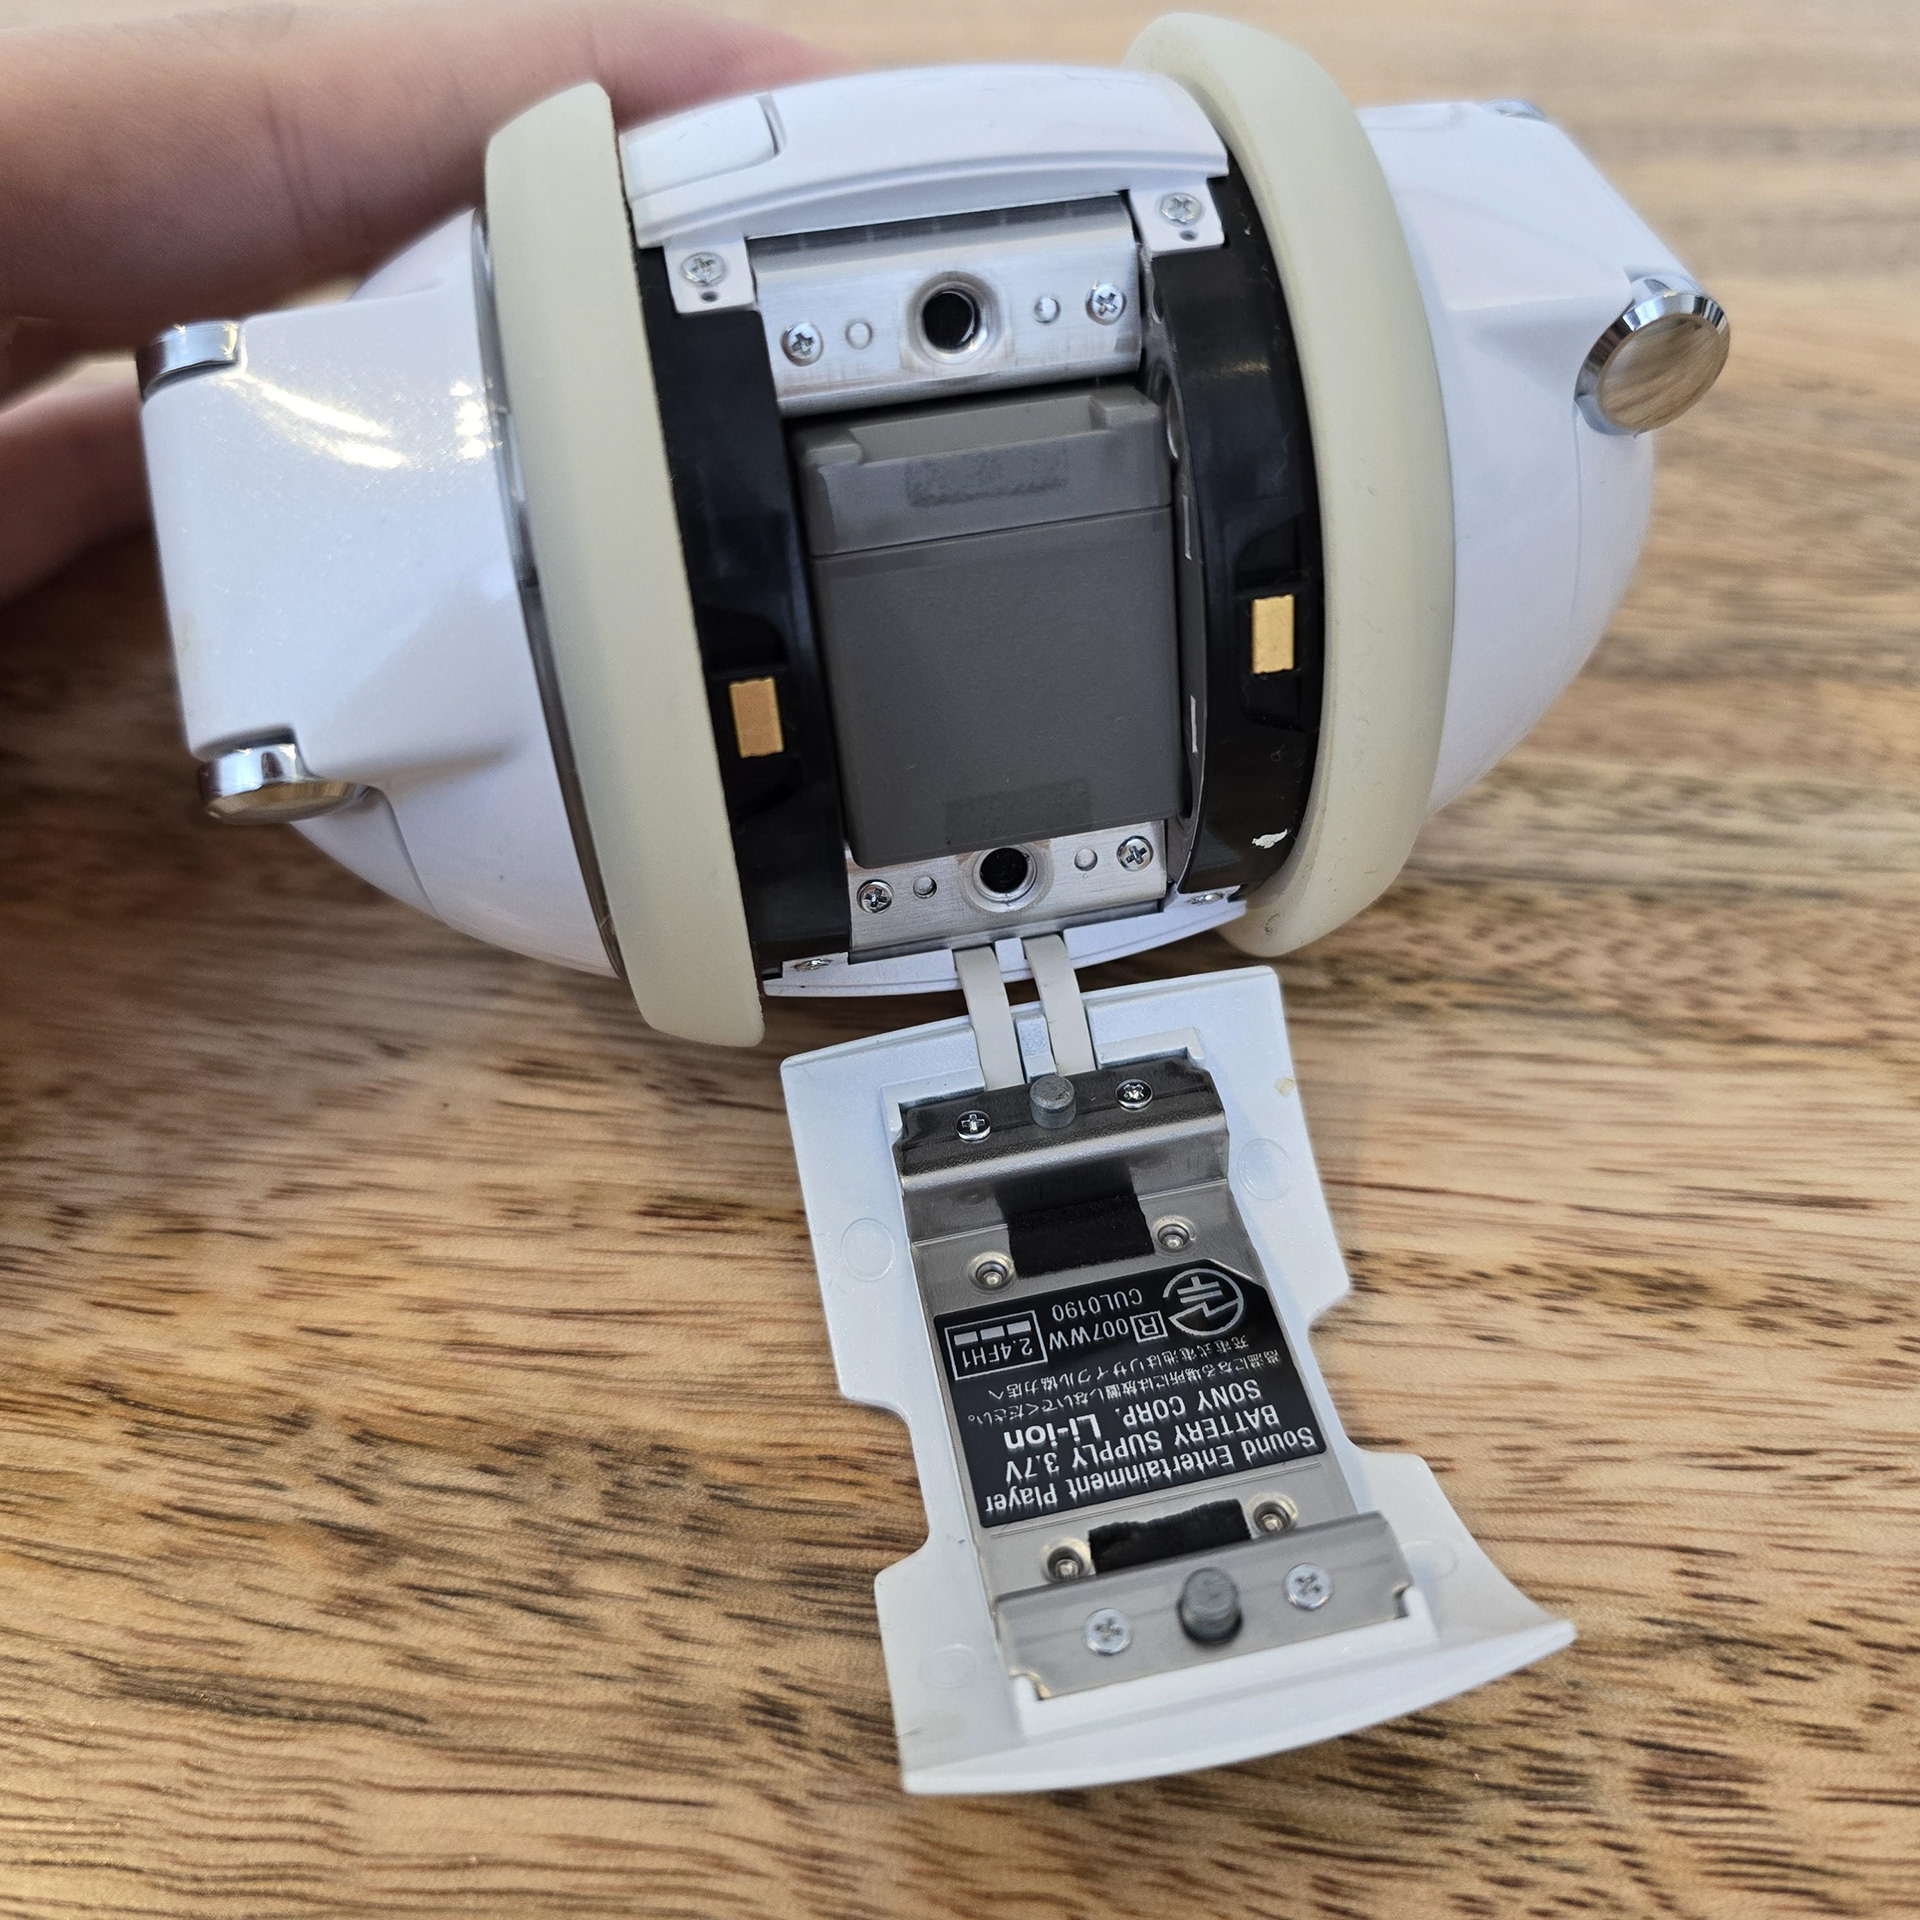
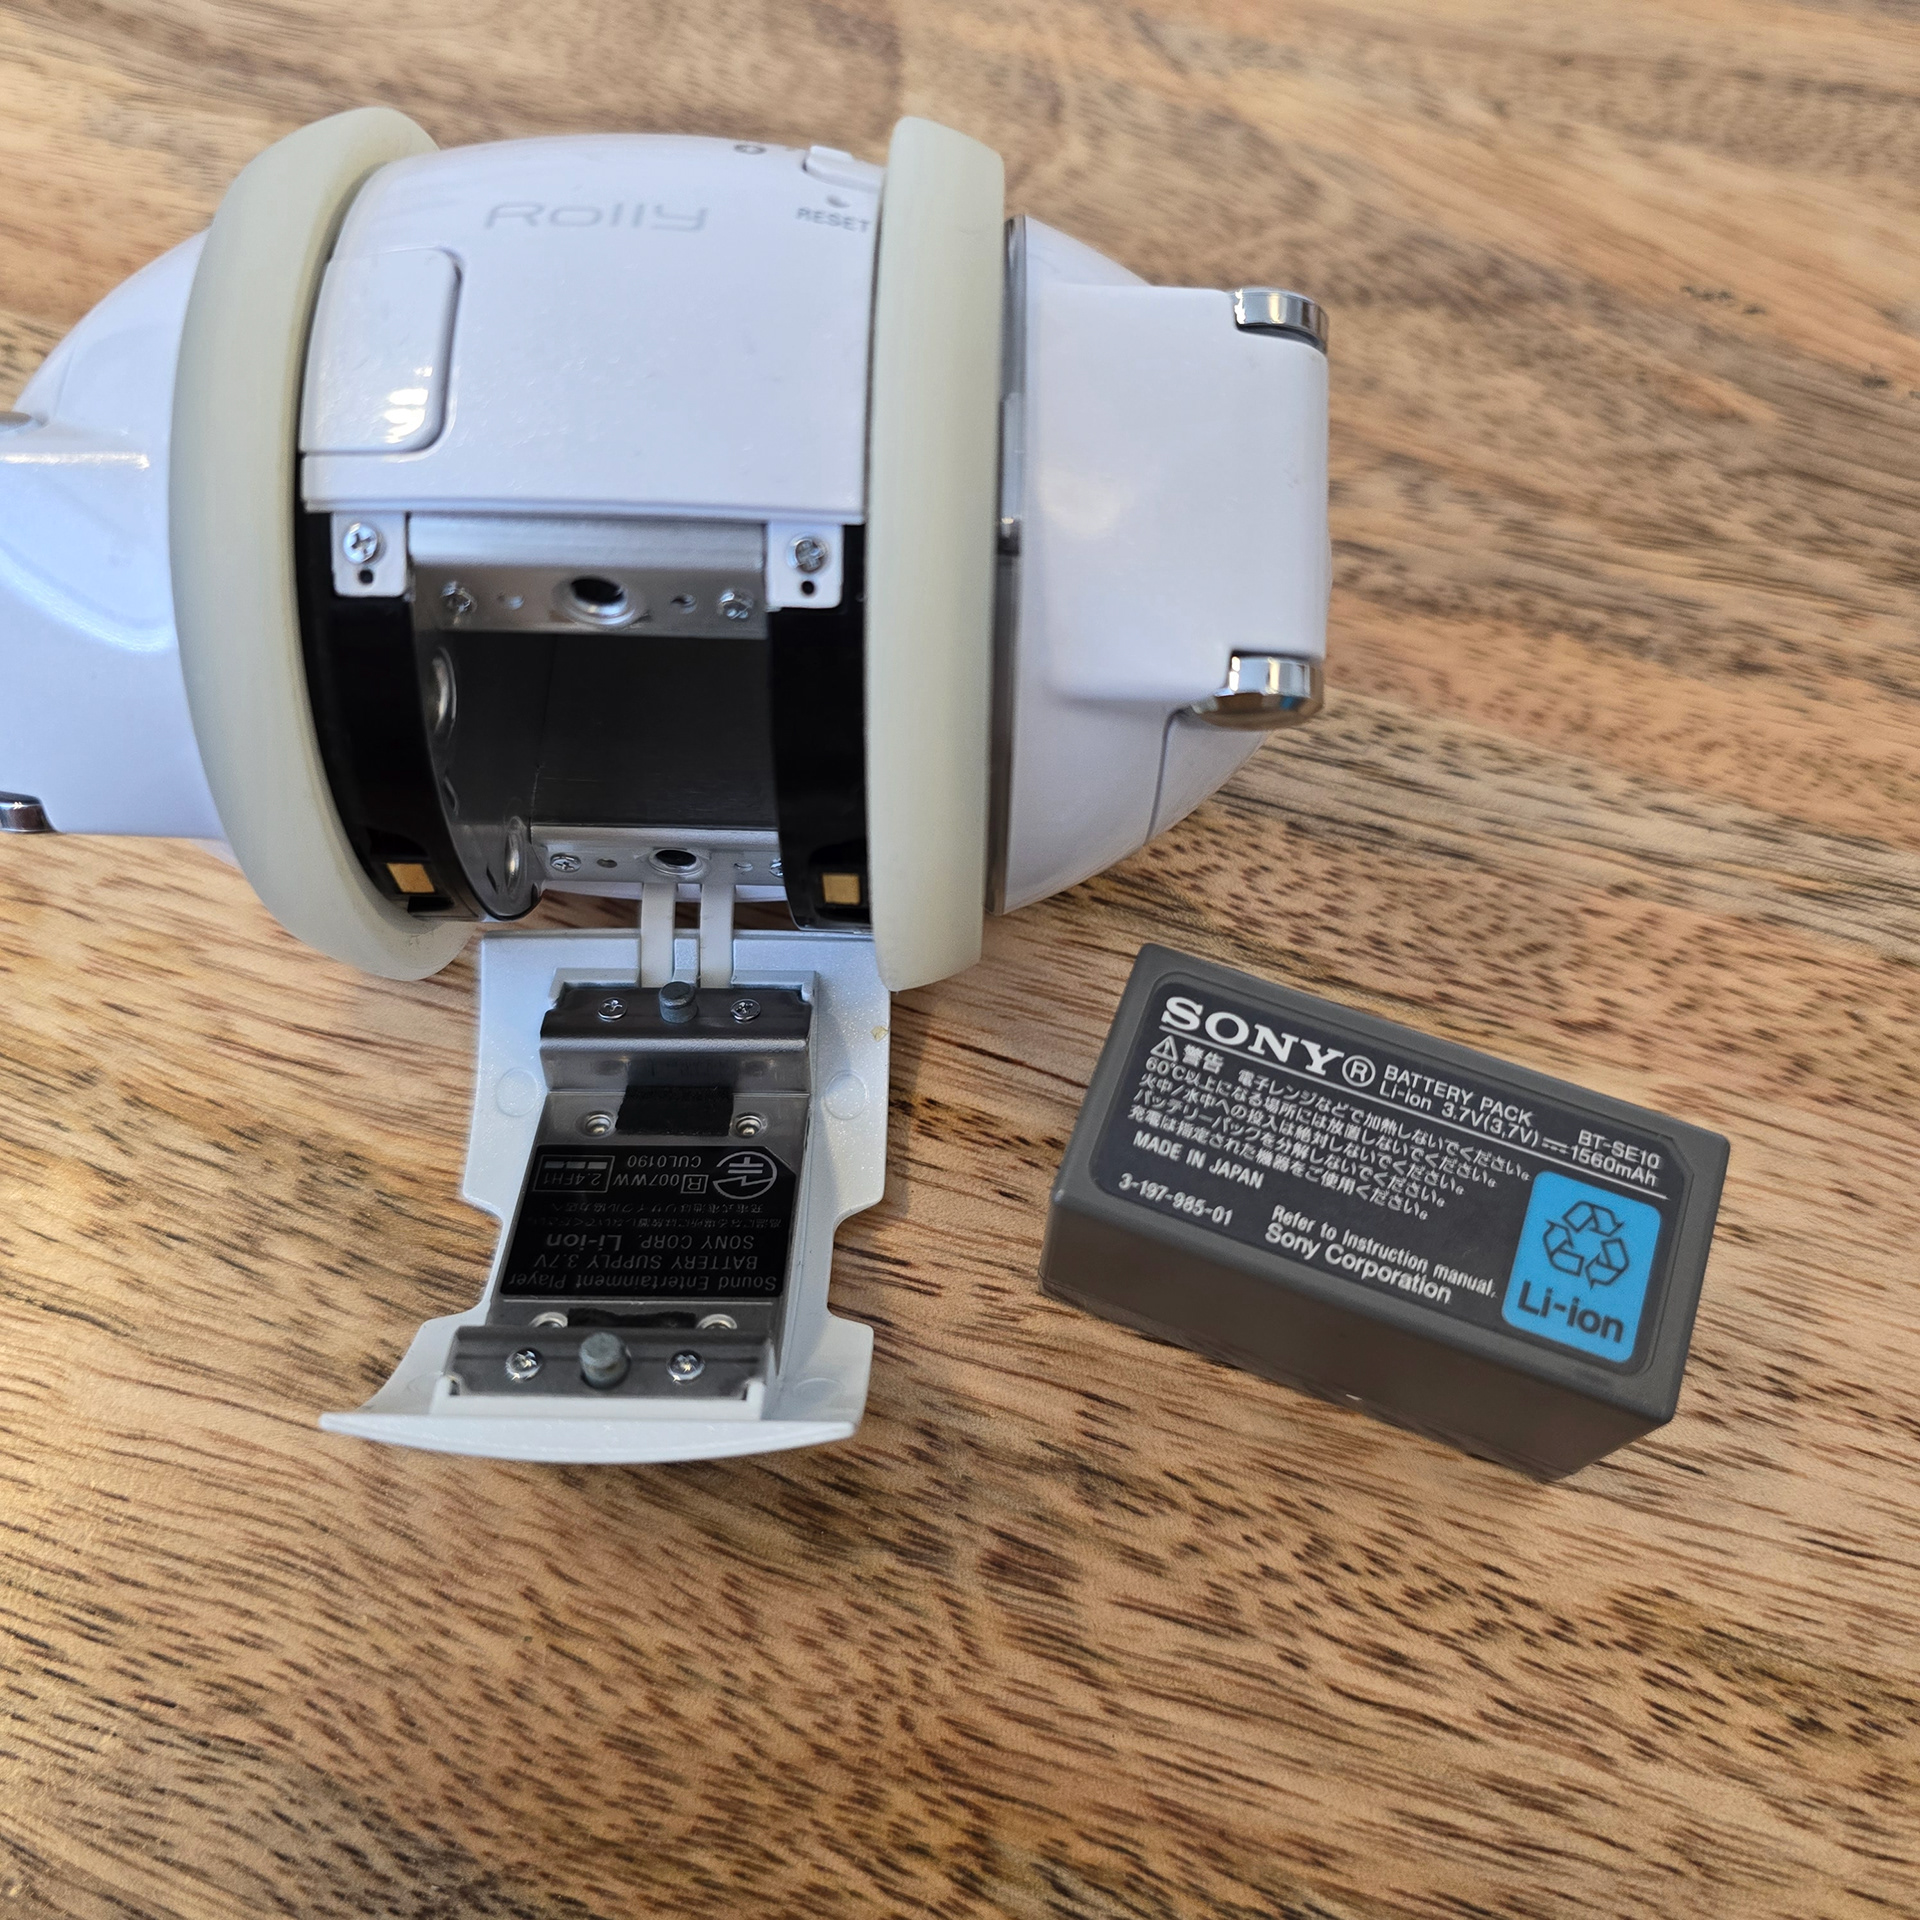
First, use a coin to turn the lock on the battery bay and remove the battery.
まず、コインを使用してバッテリーベイのロックを回し、バッテリーを取り外します。
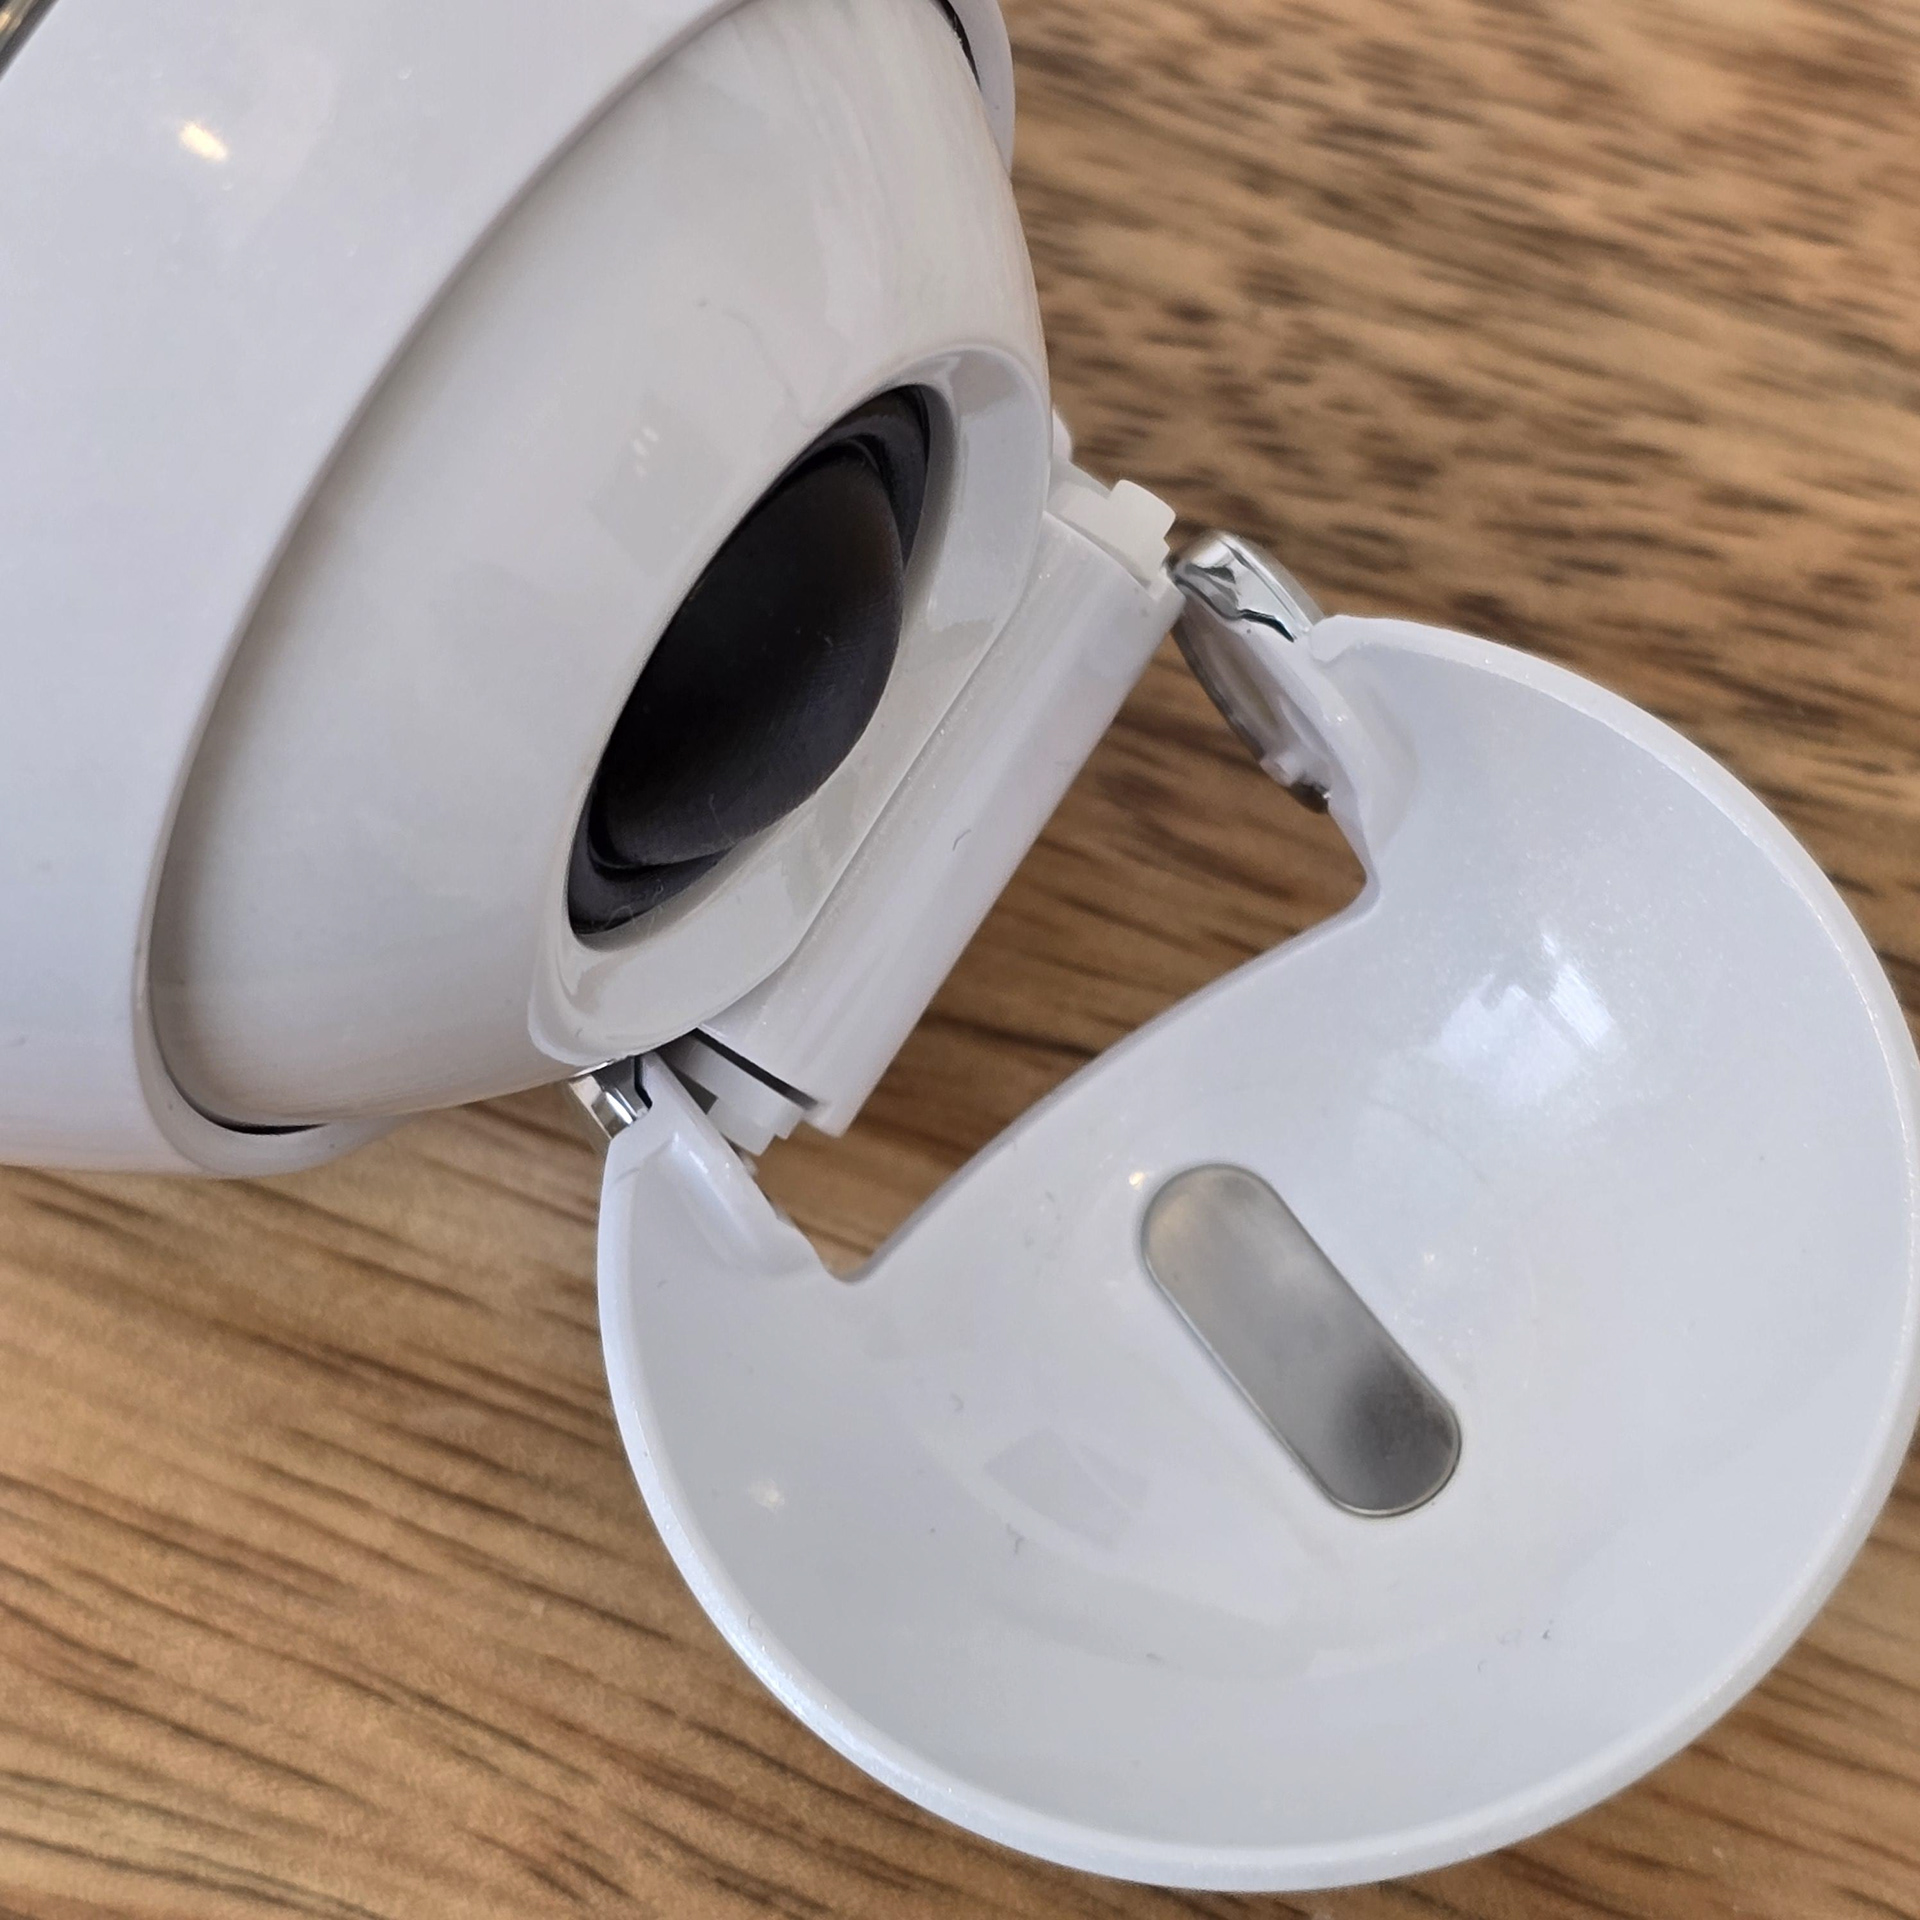
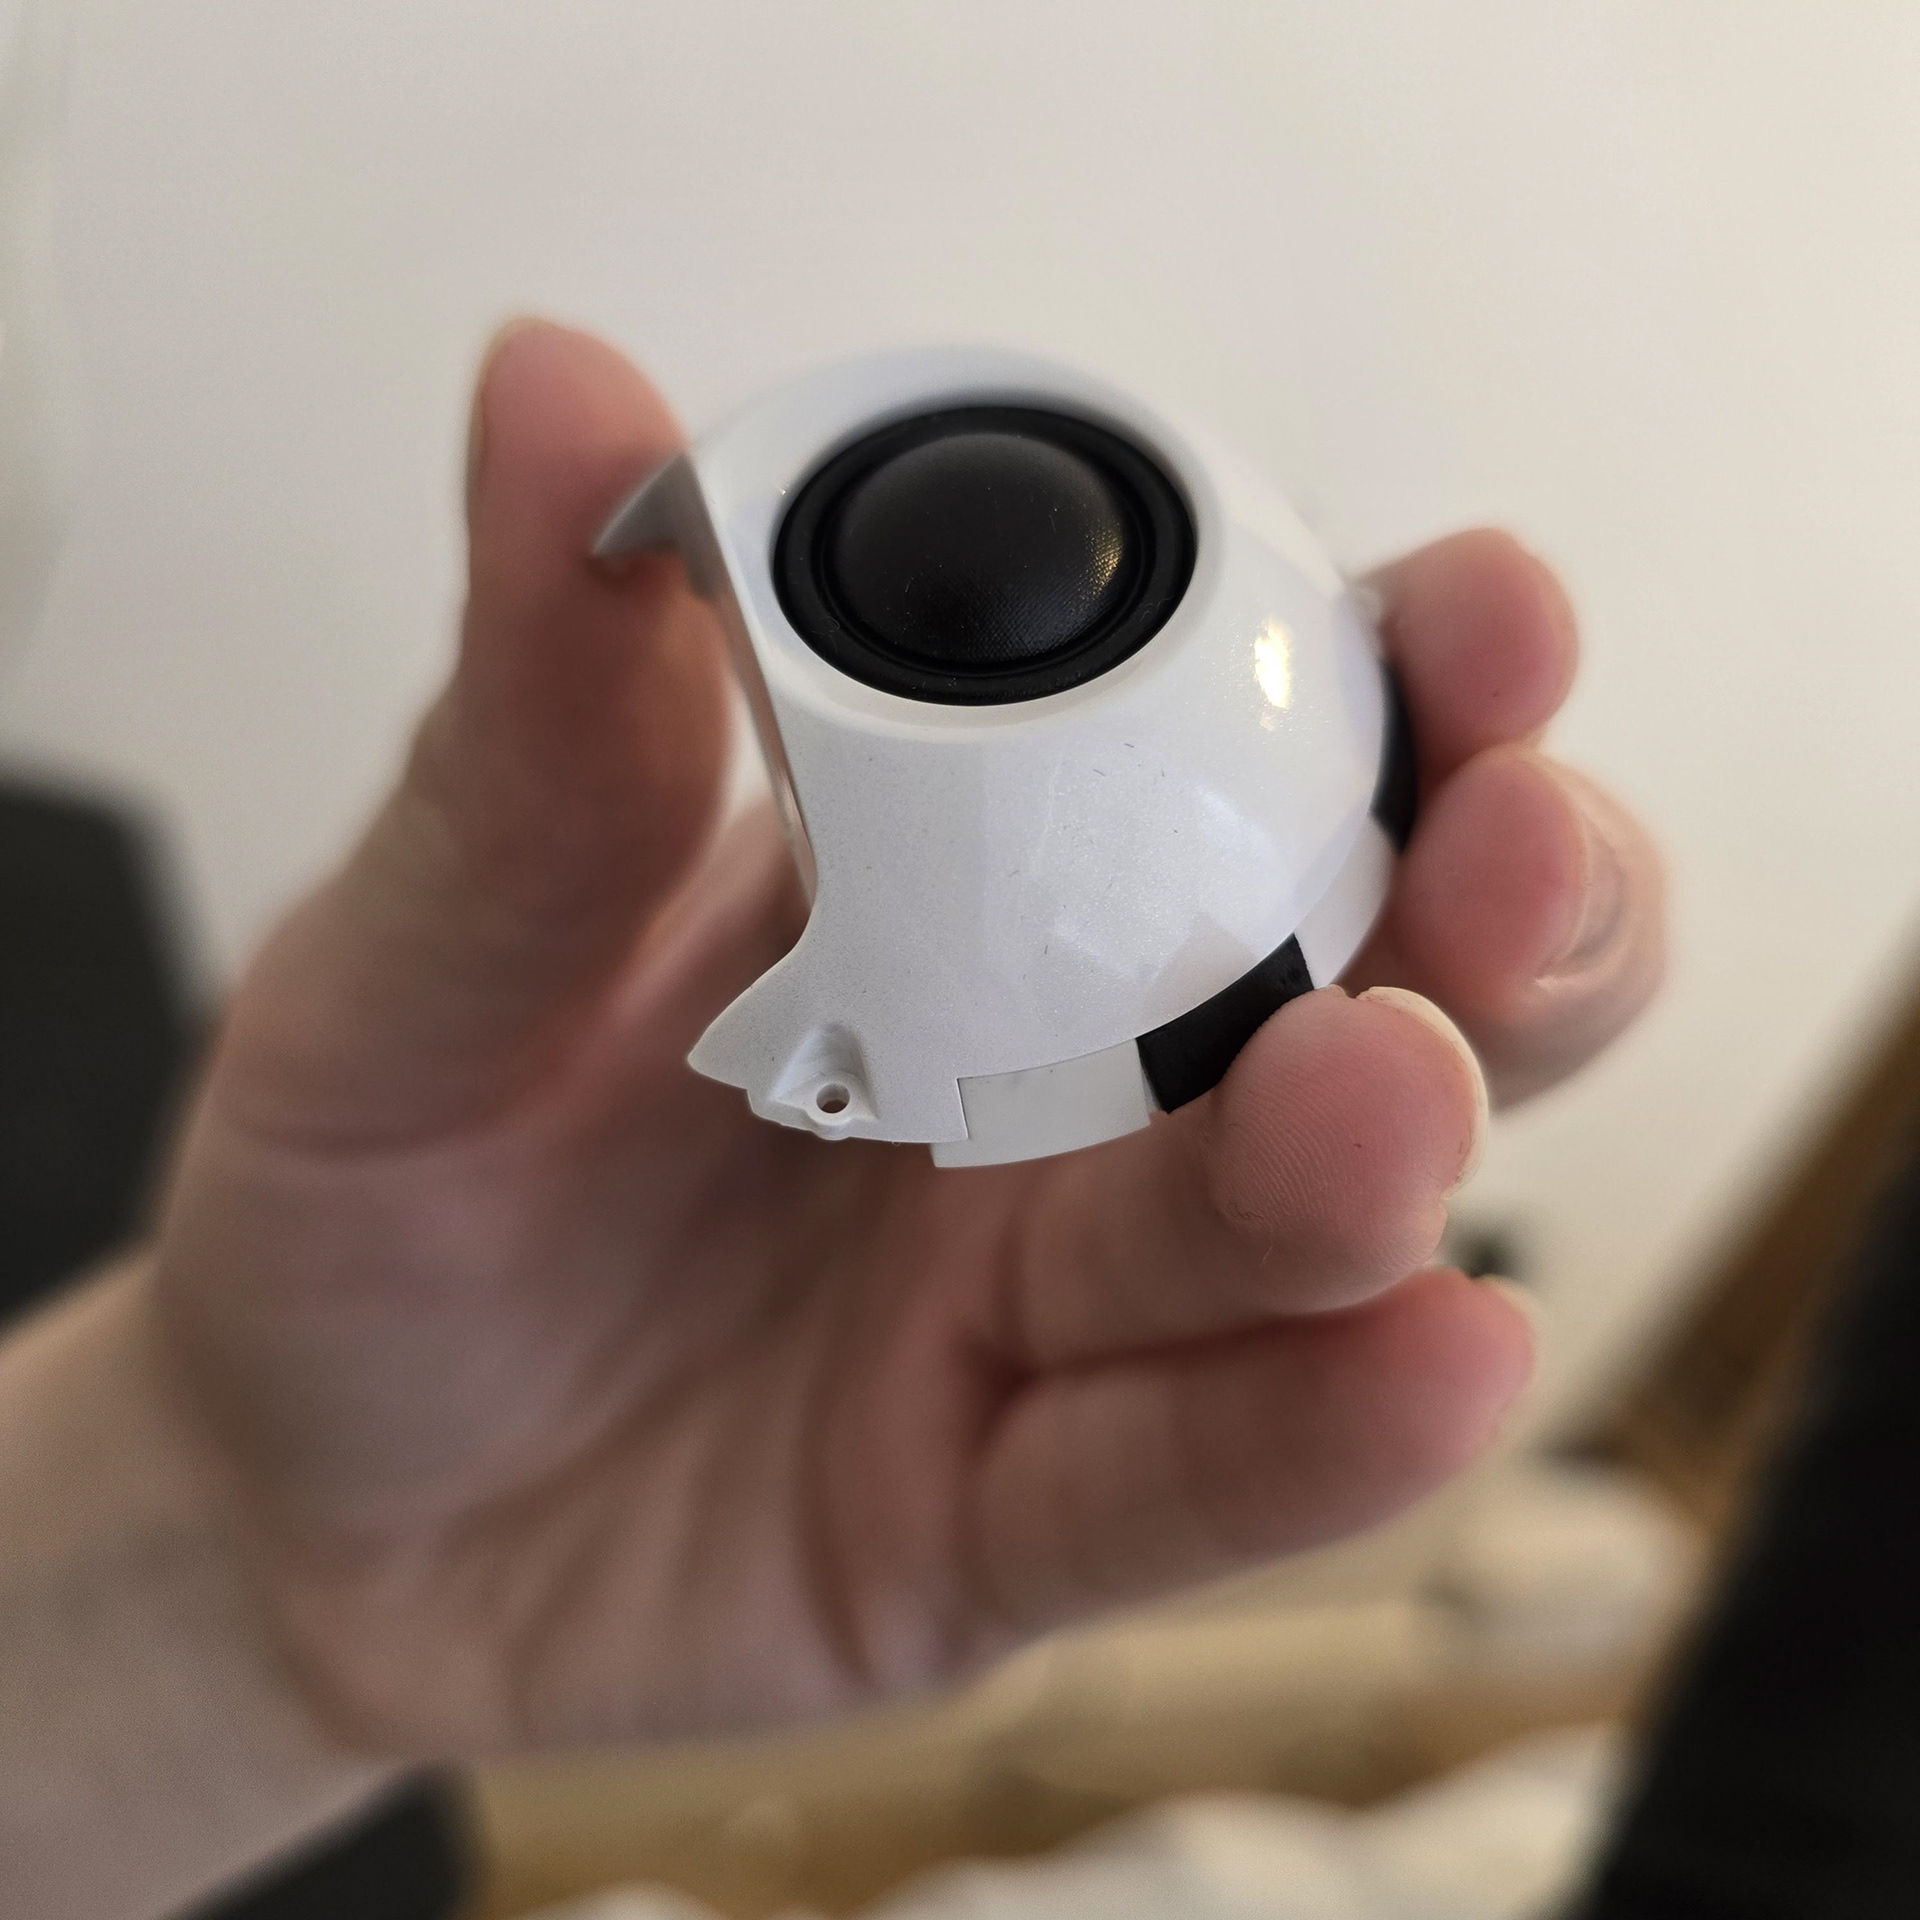
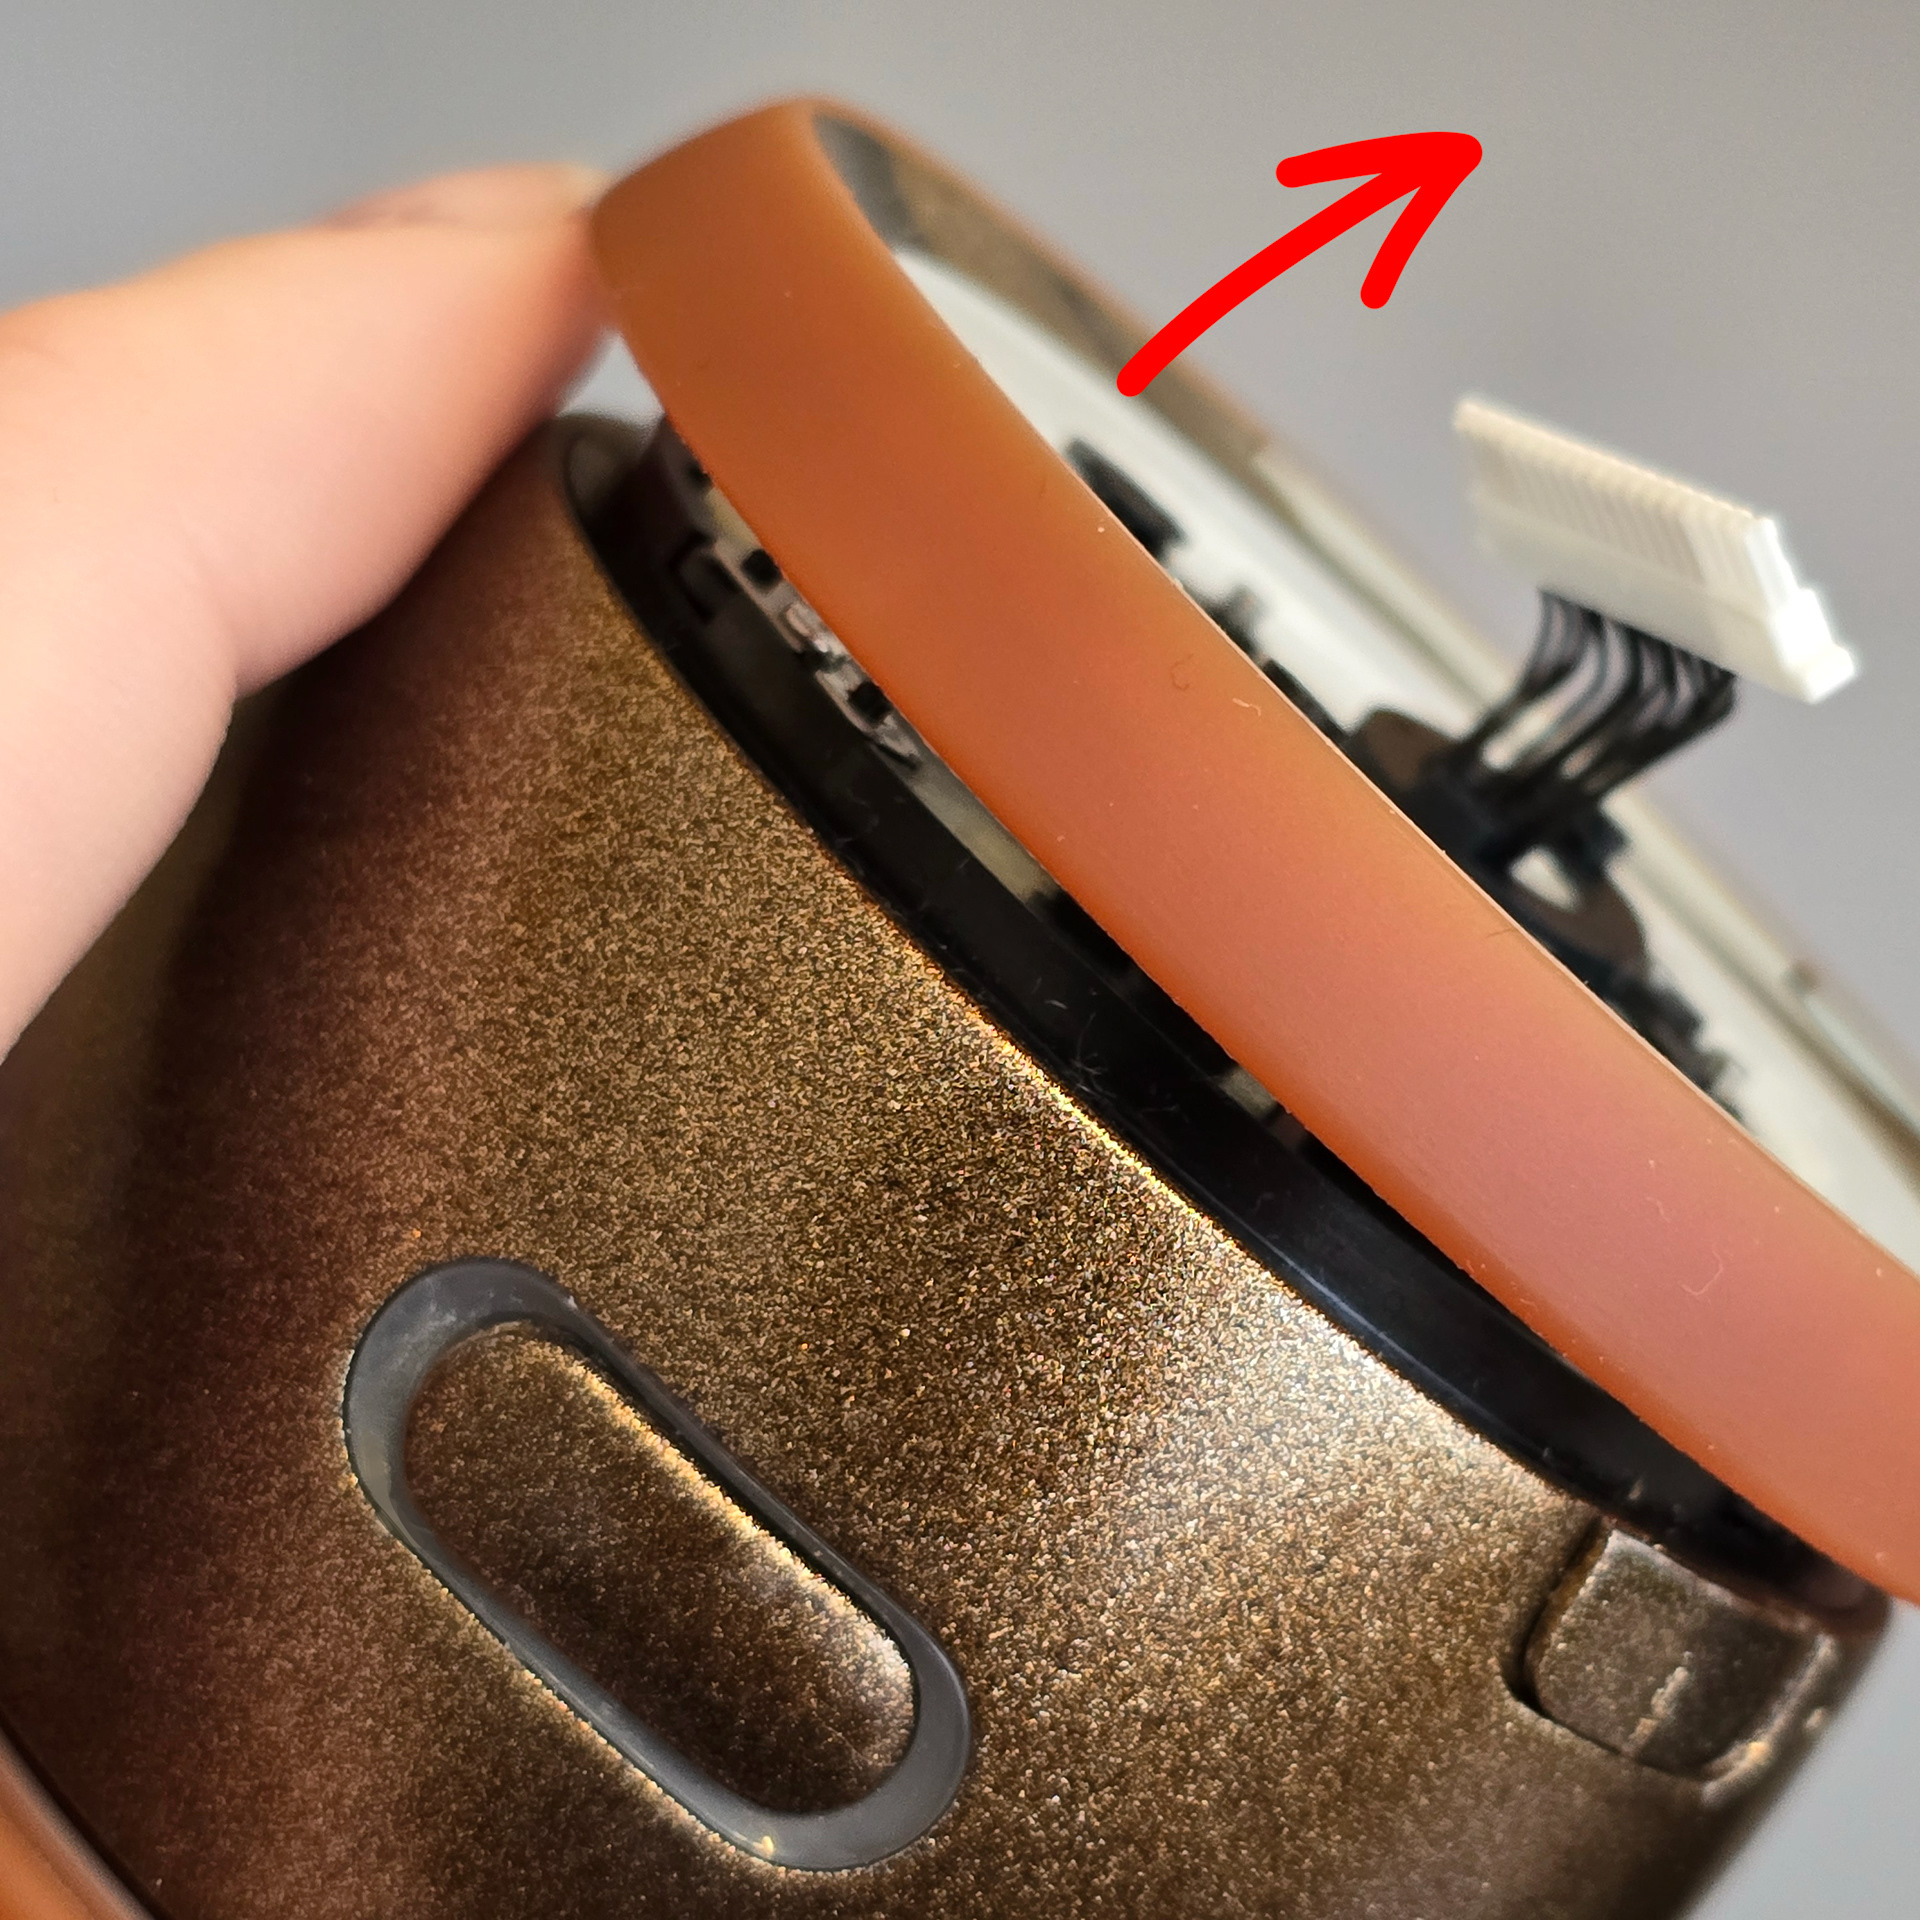
Then remove the Rolly wings. You should see 2 silver screws near where the wings clip onto the Rolly servo clips. Take both screws out and then pull the plastic up. You may need to reposition the servo wing clips to give the plastic clearance.
次に、Rollyの翼を取り外します。翼がRollyのサーボクリップにクリップされている場所の近くに、銀色のネジが2本あります。両方のネジを外し、プラスチックを上に引き上げます。プラスチックとの隙間を作るために、サーボの翼クリップの位置を調整する必要があるかもしれません。
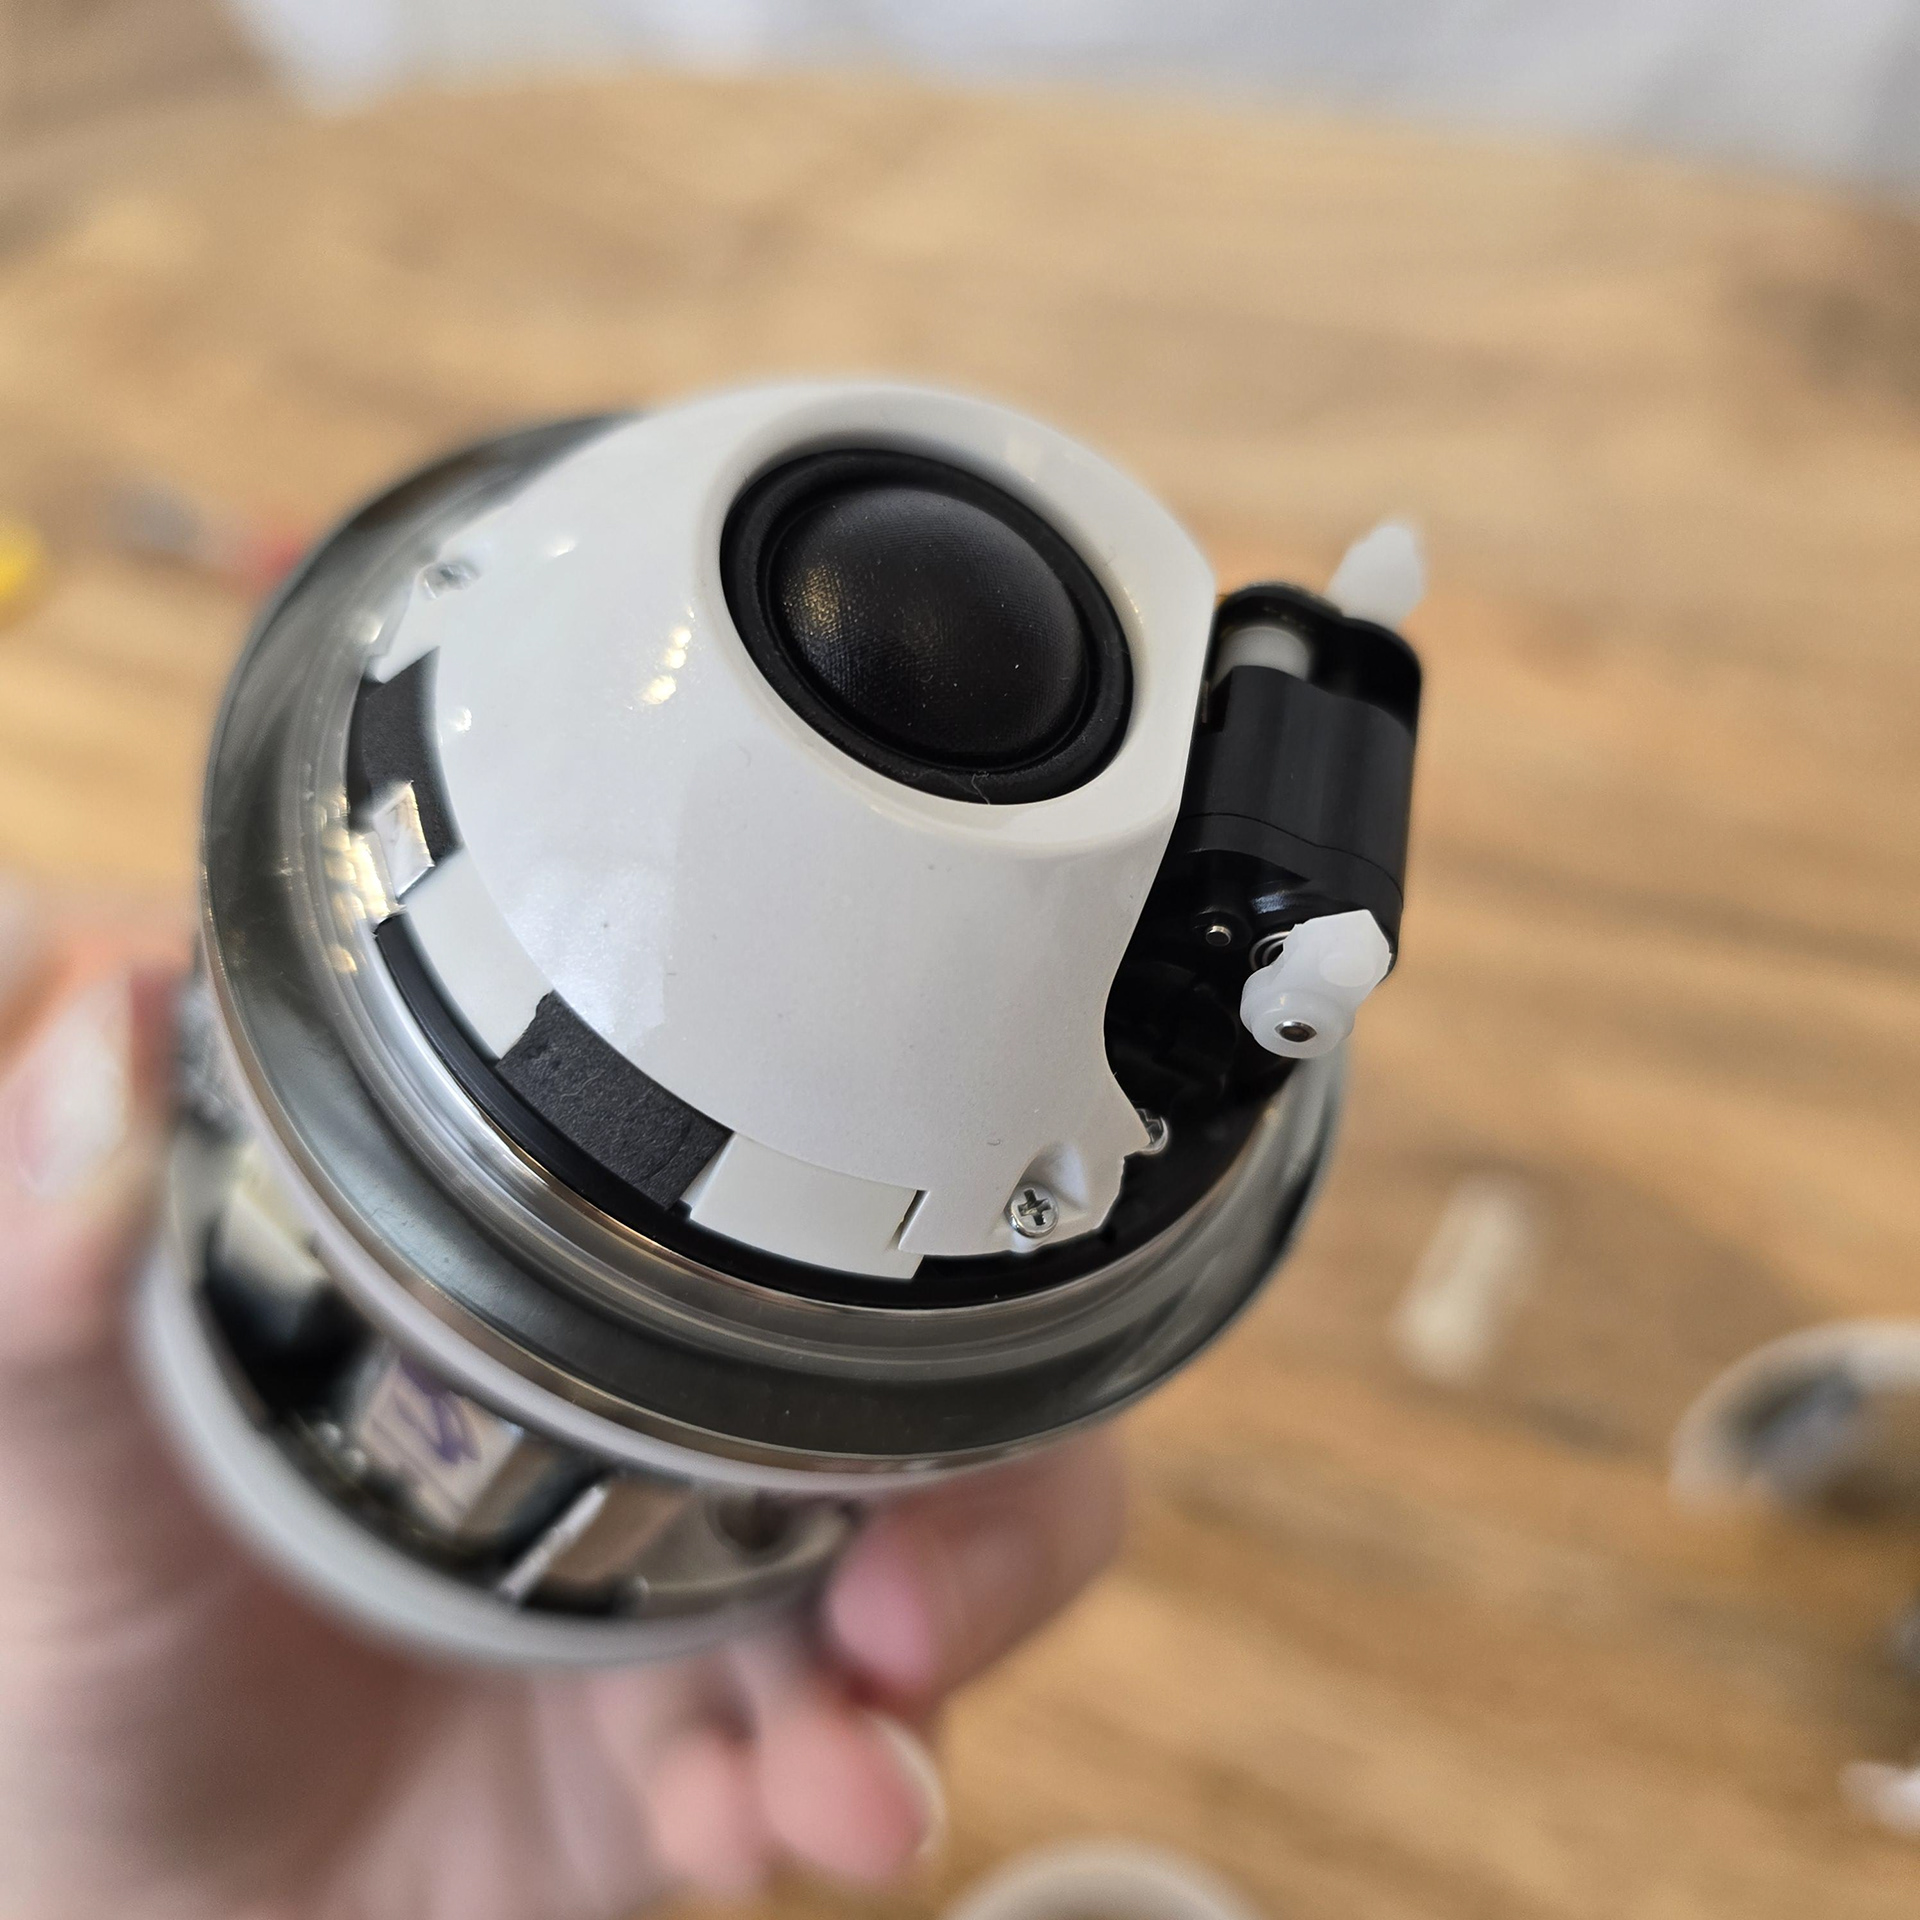
We are going to remove the speaker module. To do this, remove the 3 screws. You should be able to lift the speaker up once the screws are removed. The speaker is connected to the board on the black plastic piece, so unplug the speaker to free it.
スピーカーモジュールを取り外します。3本のネジを外してください。ネジを外すとスピーカーを持ち上げられるはずです。スピーカーは黒いプラスチック部分の基板に接続されているので、プラグを抜いて取り外してください。
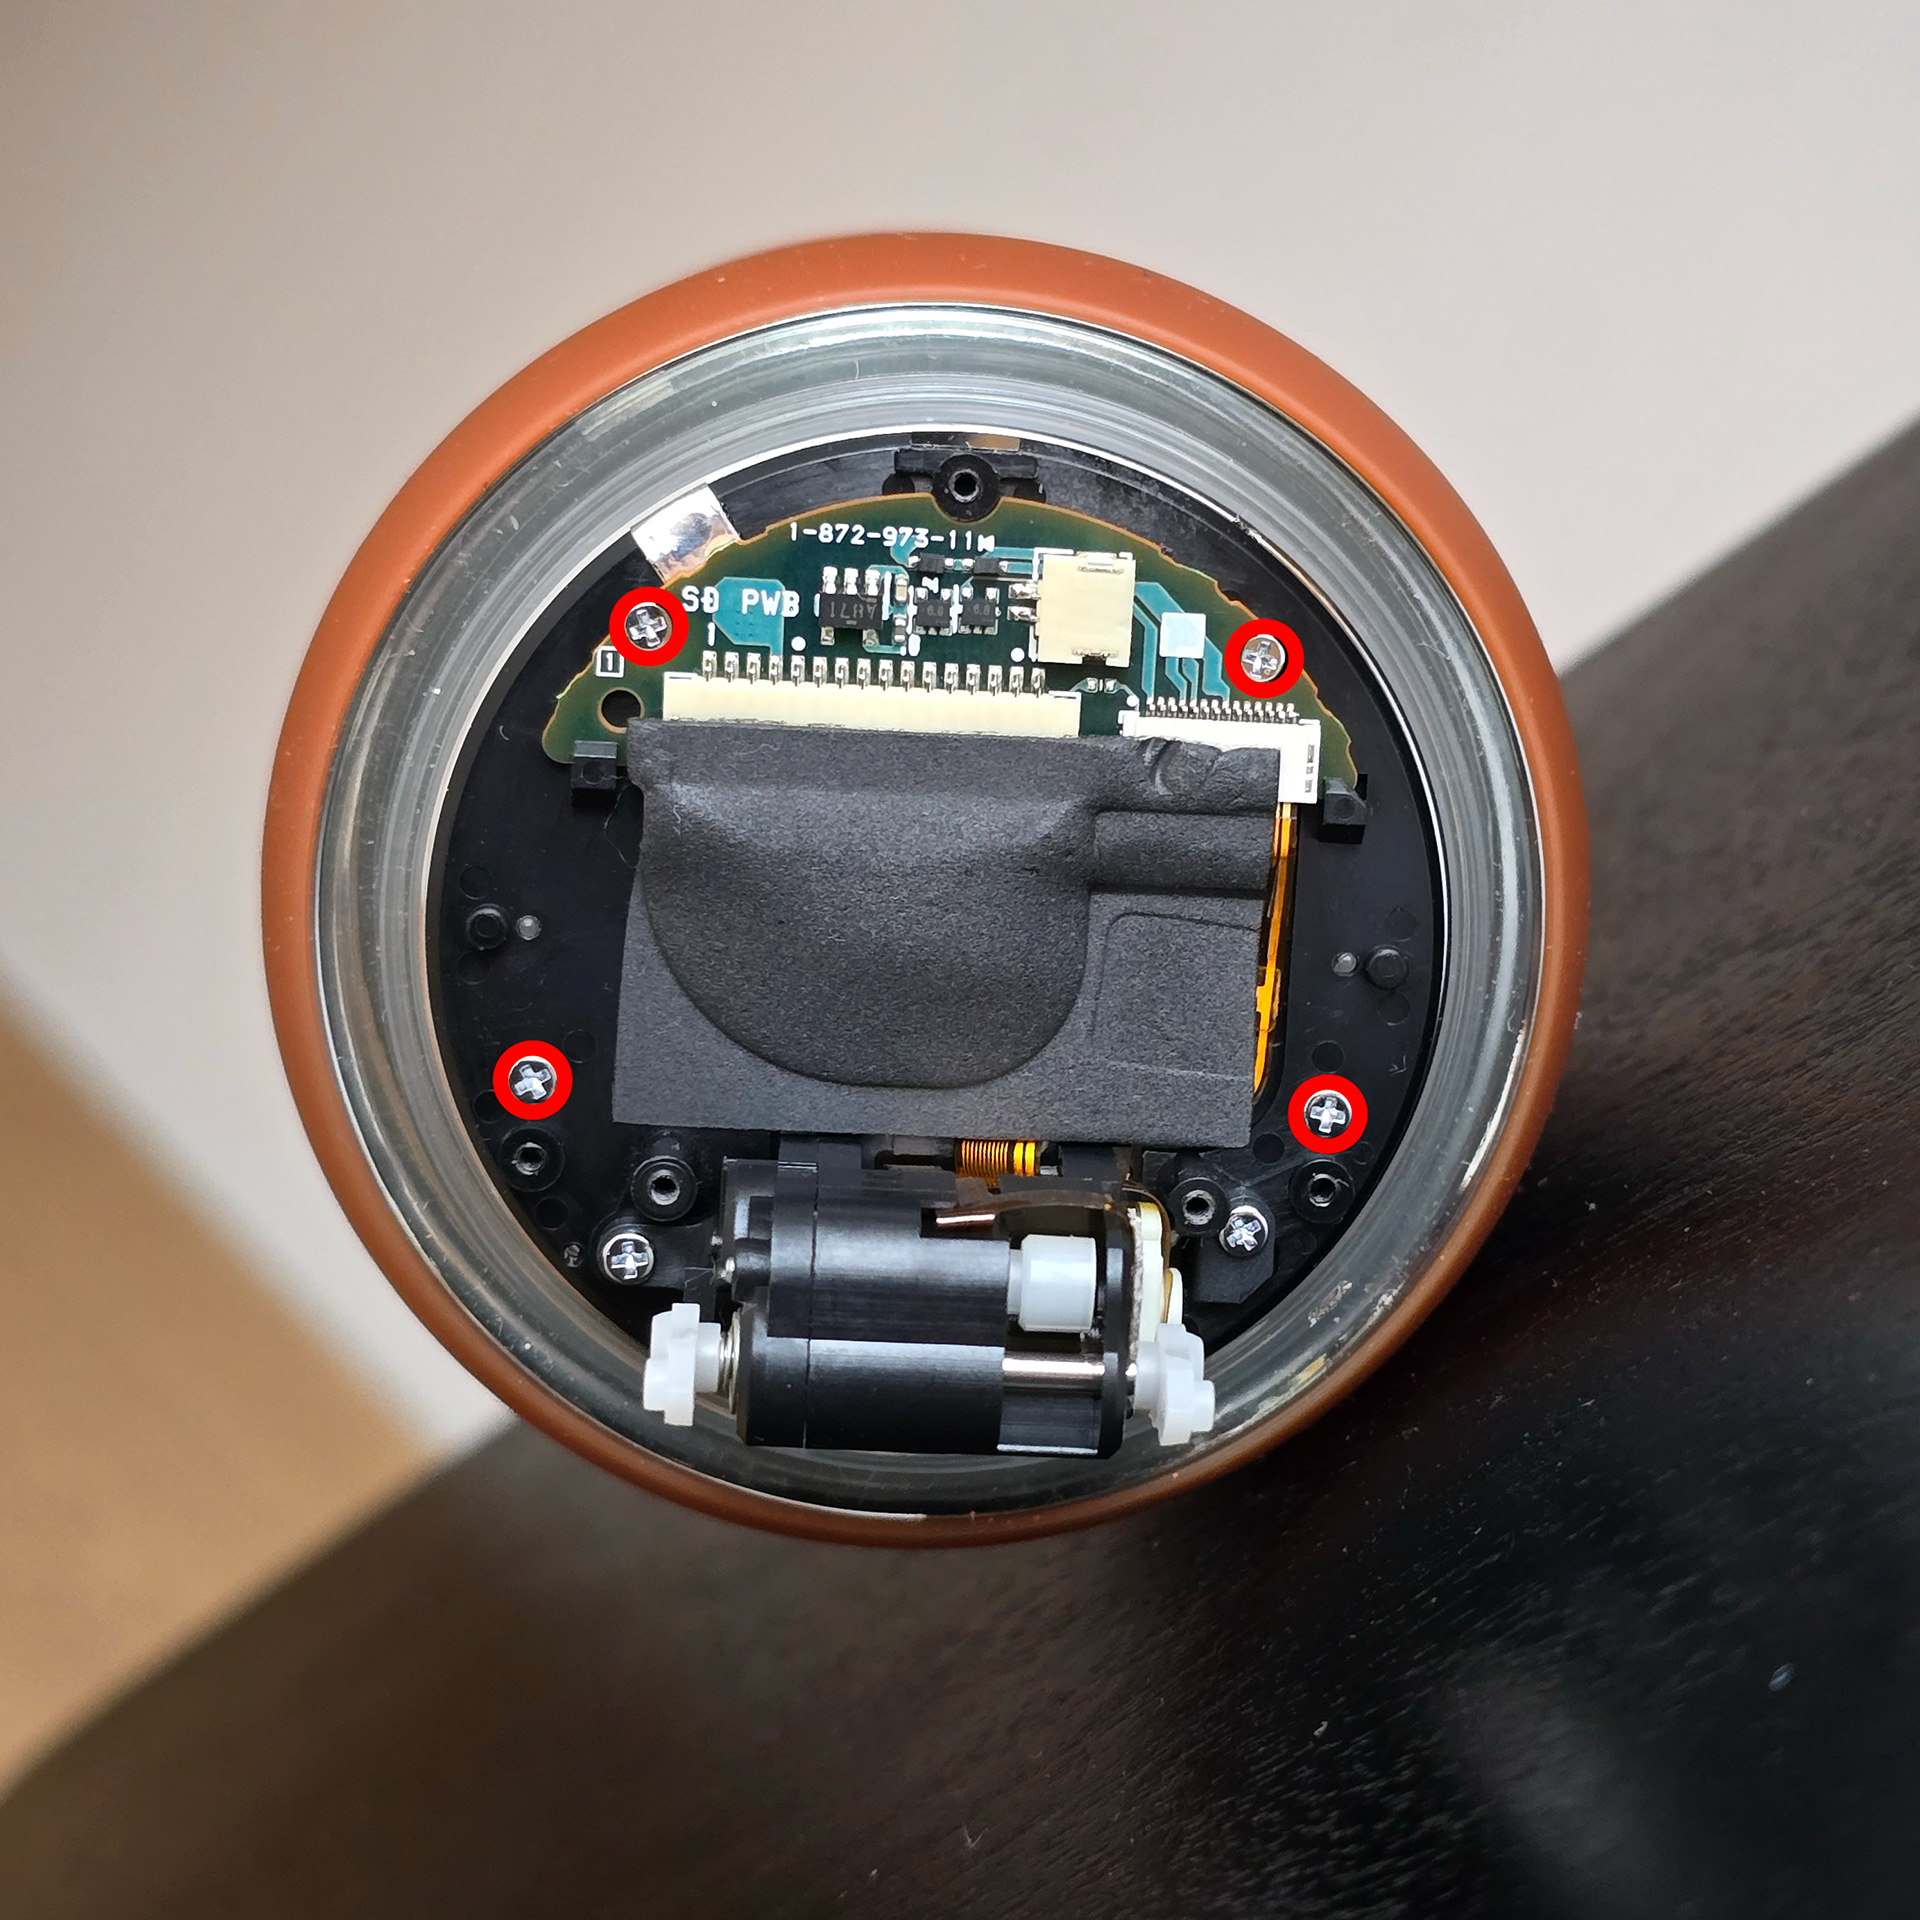
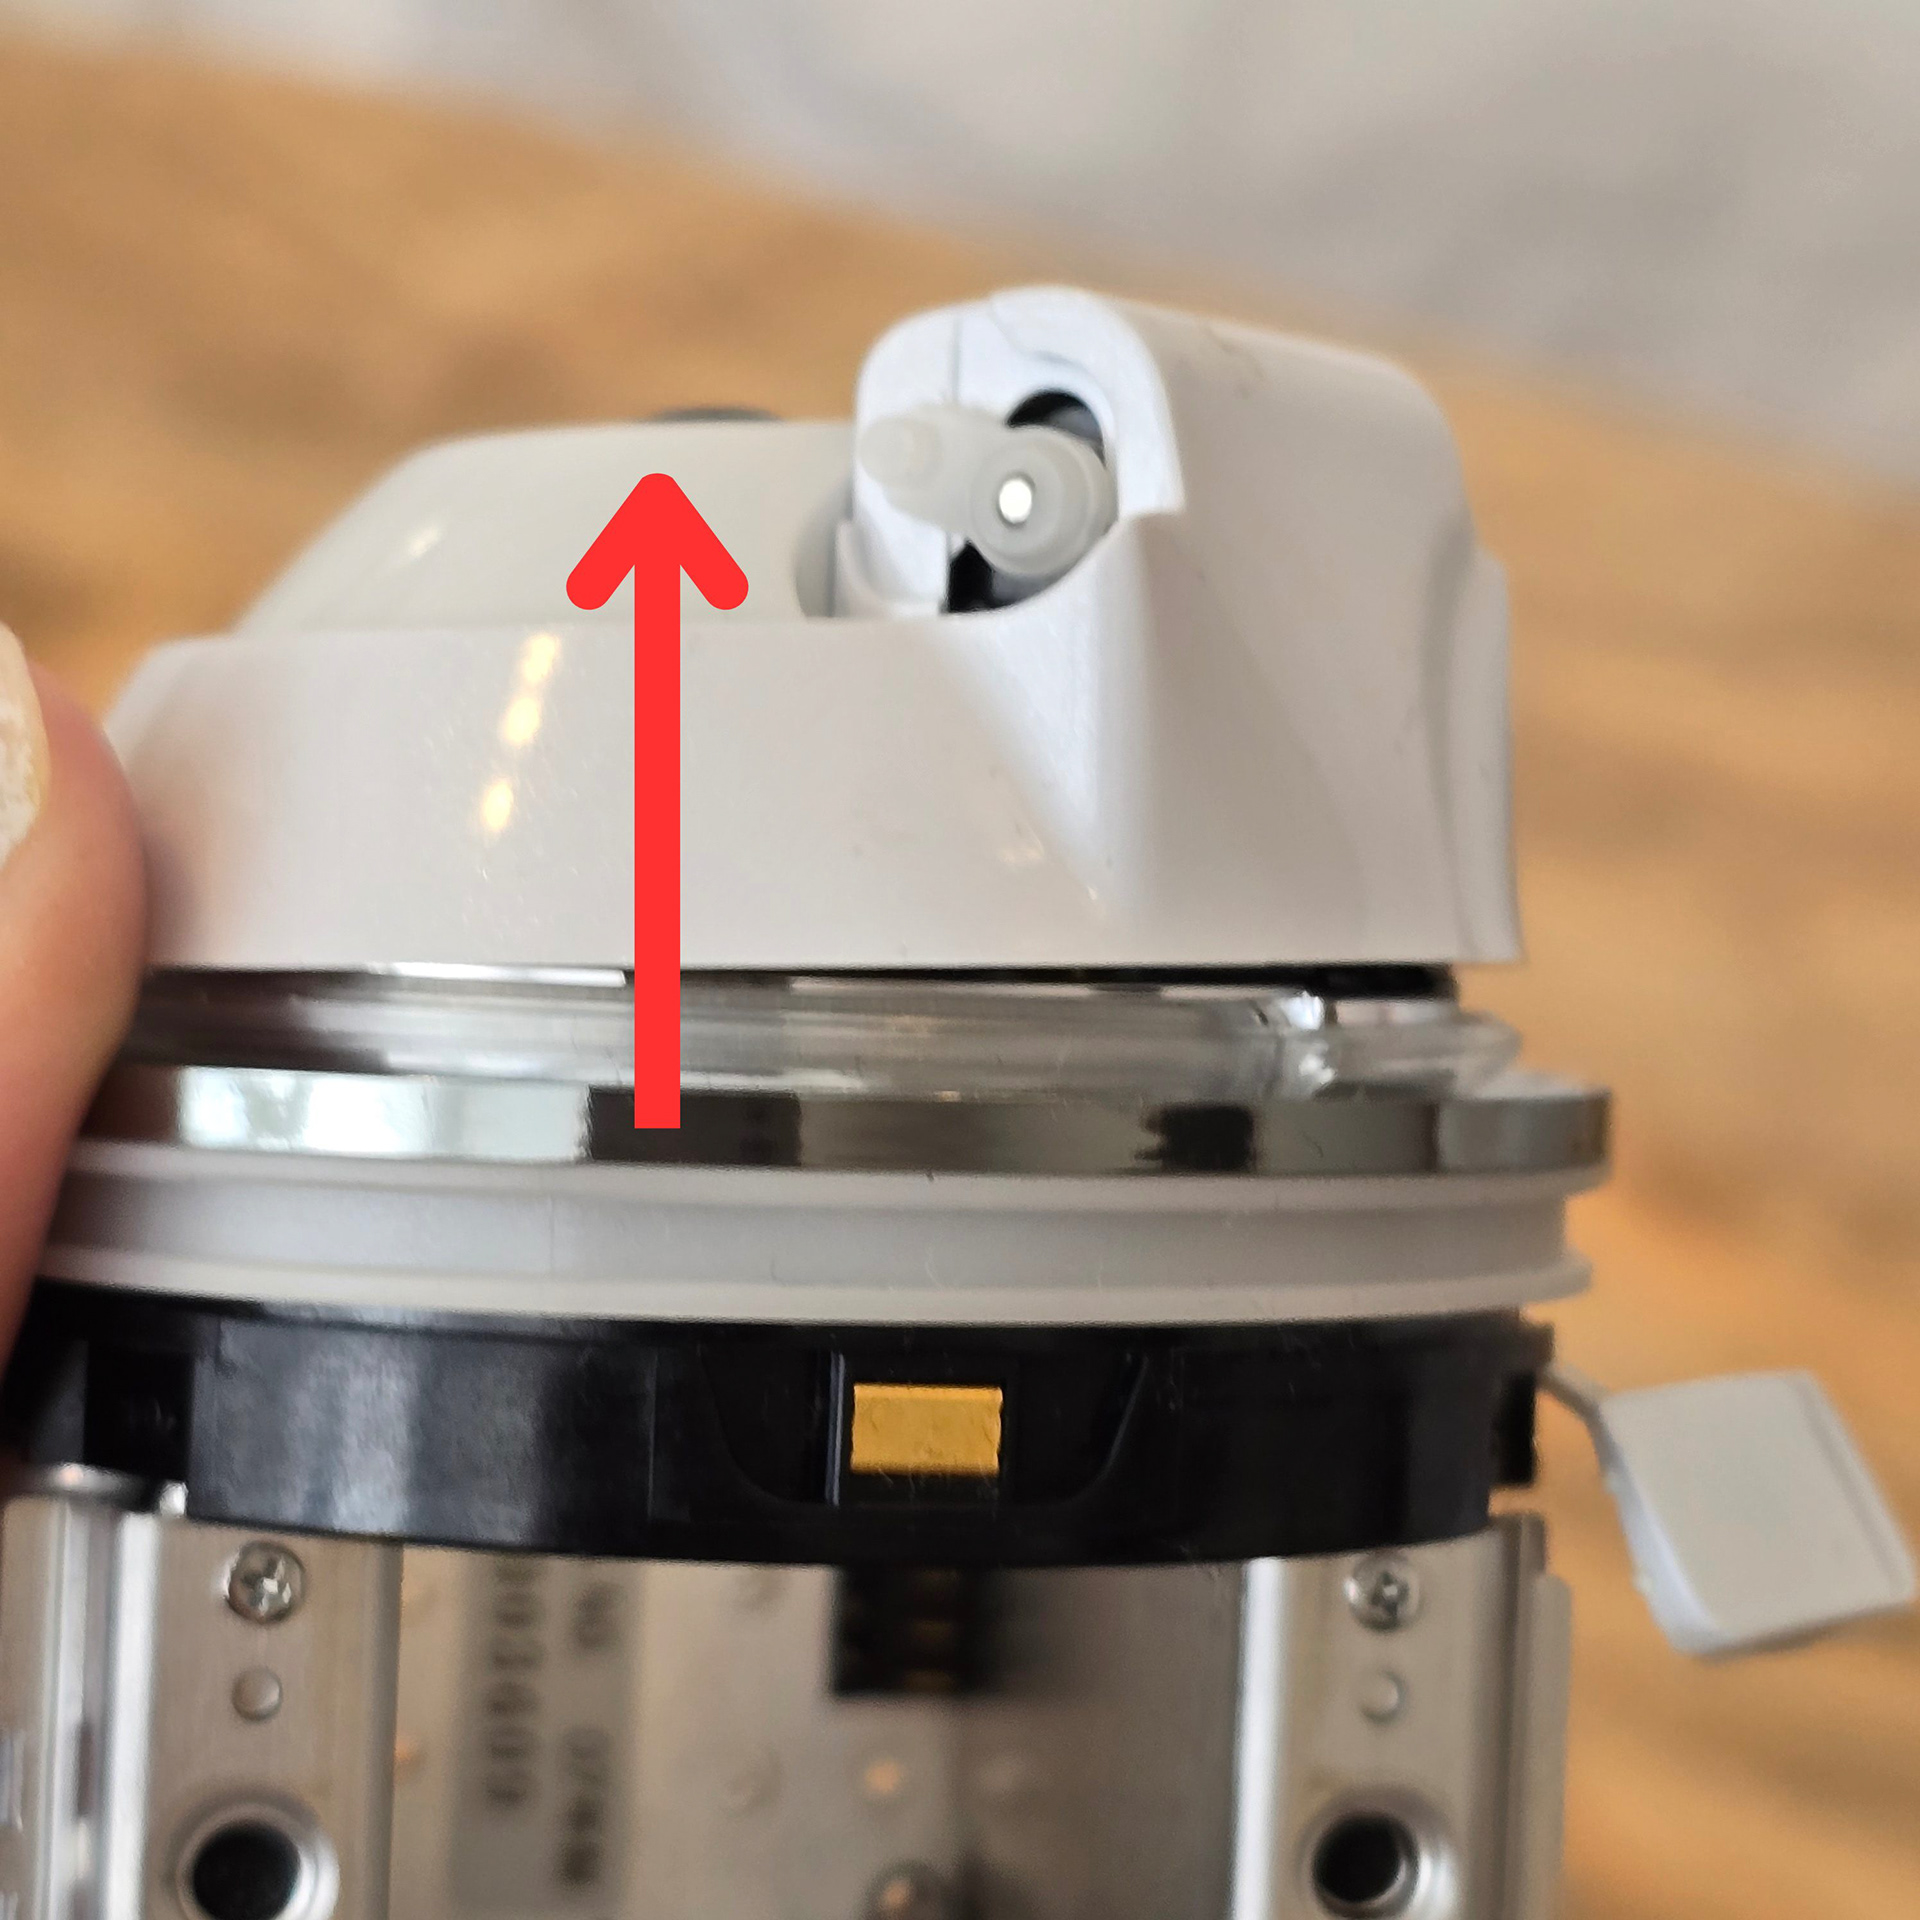
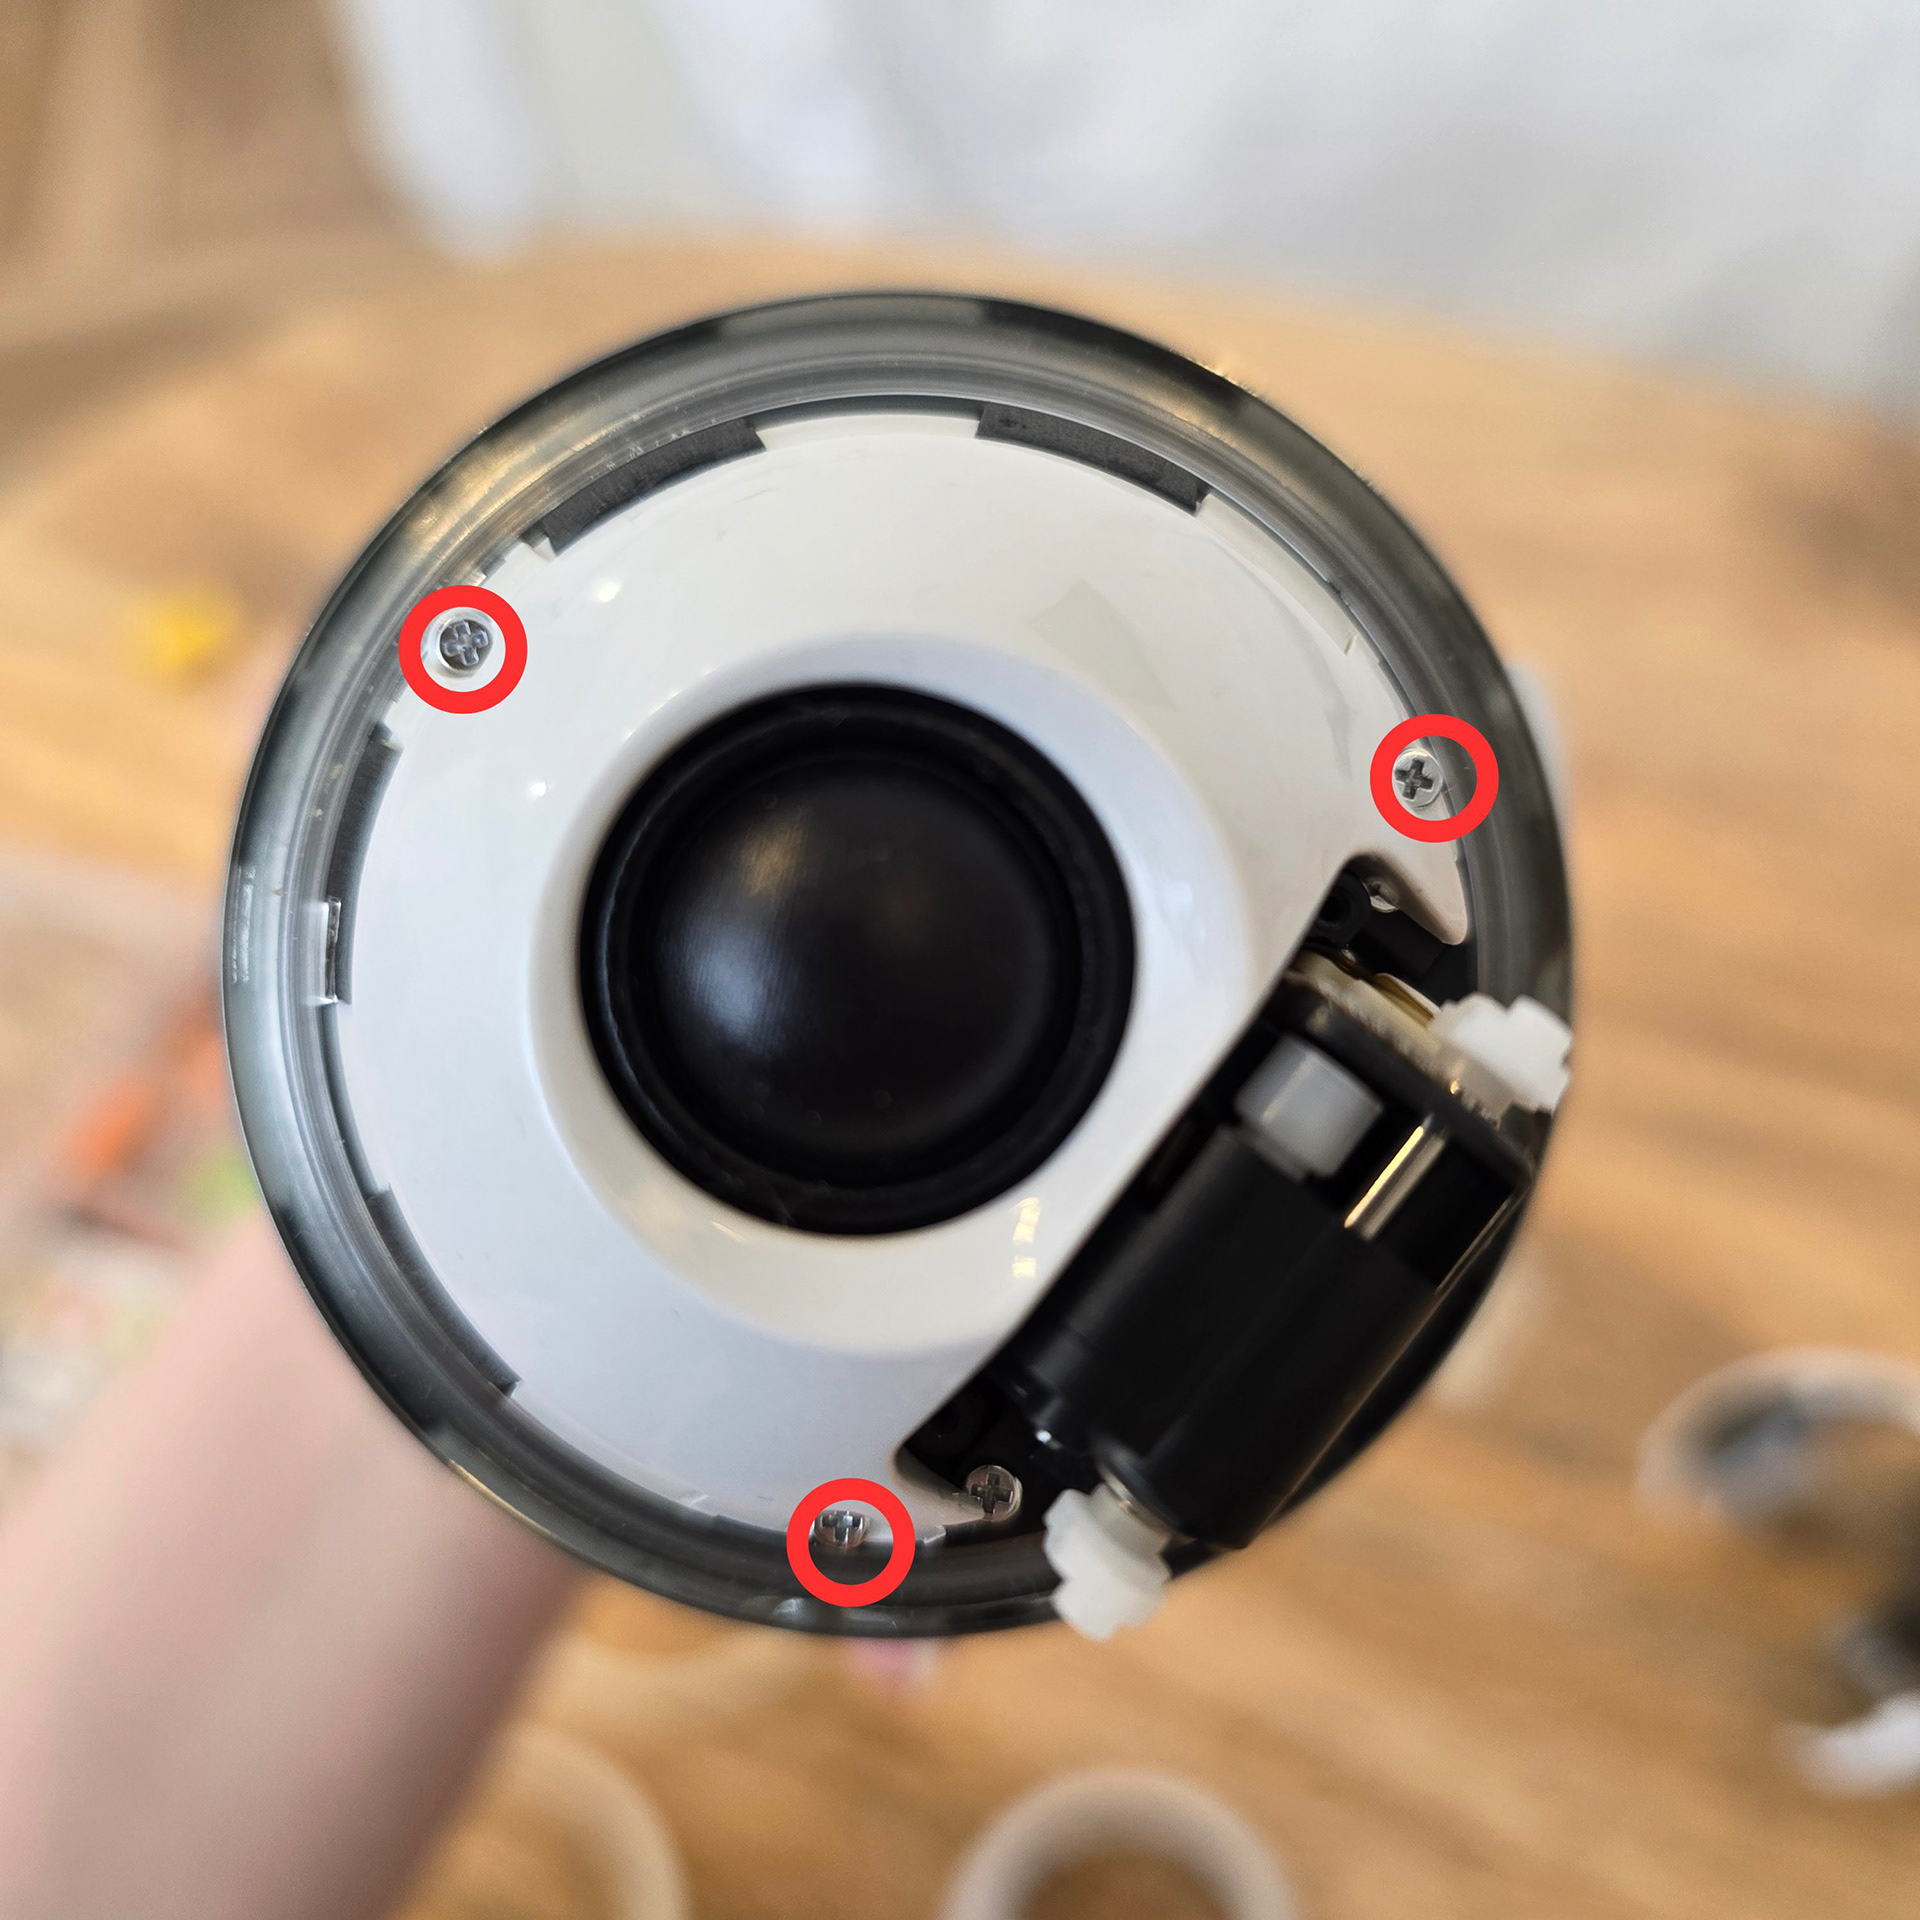
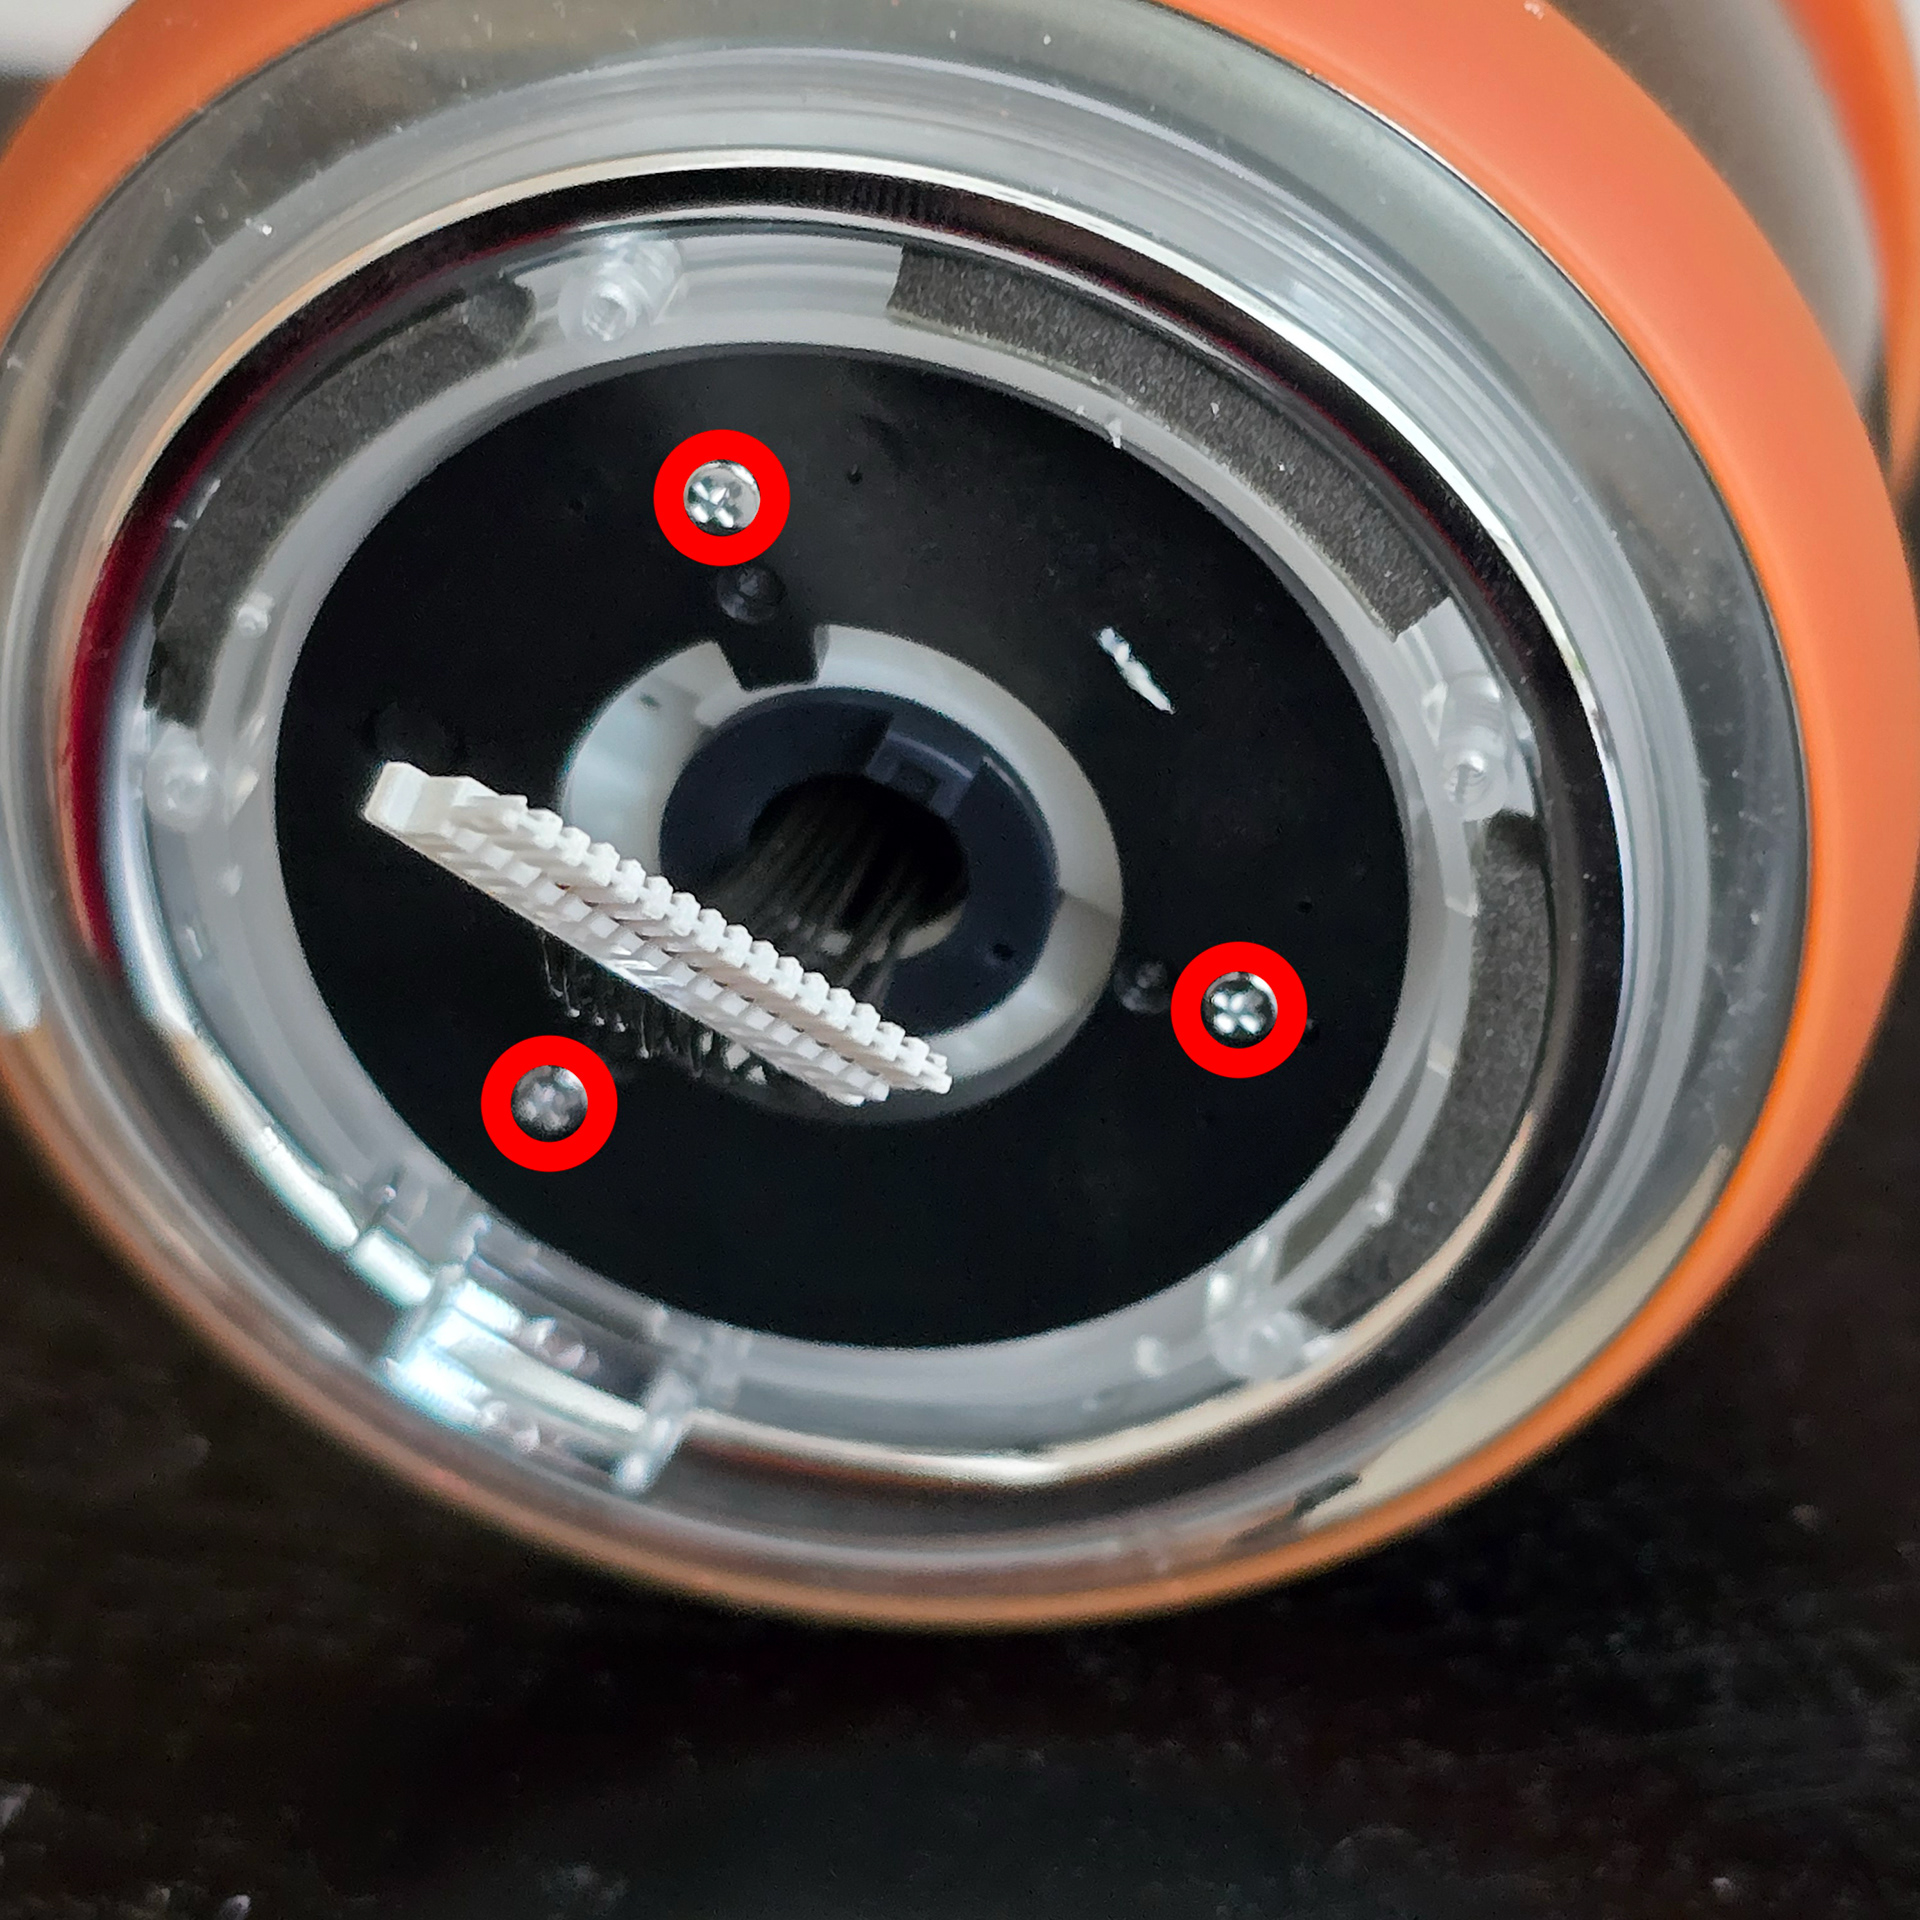
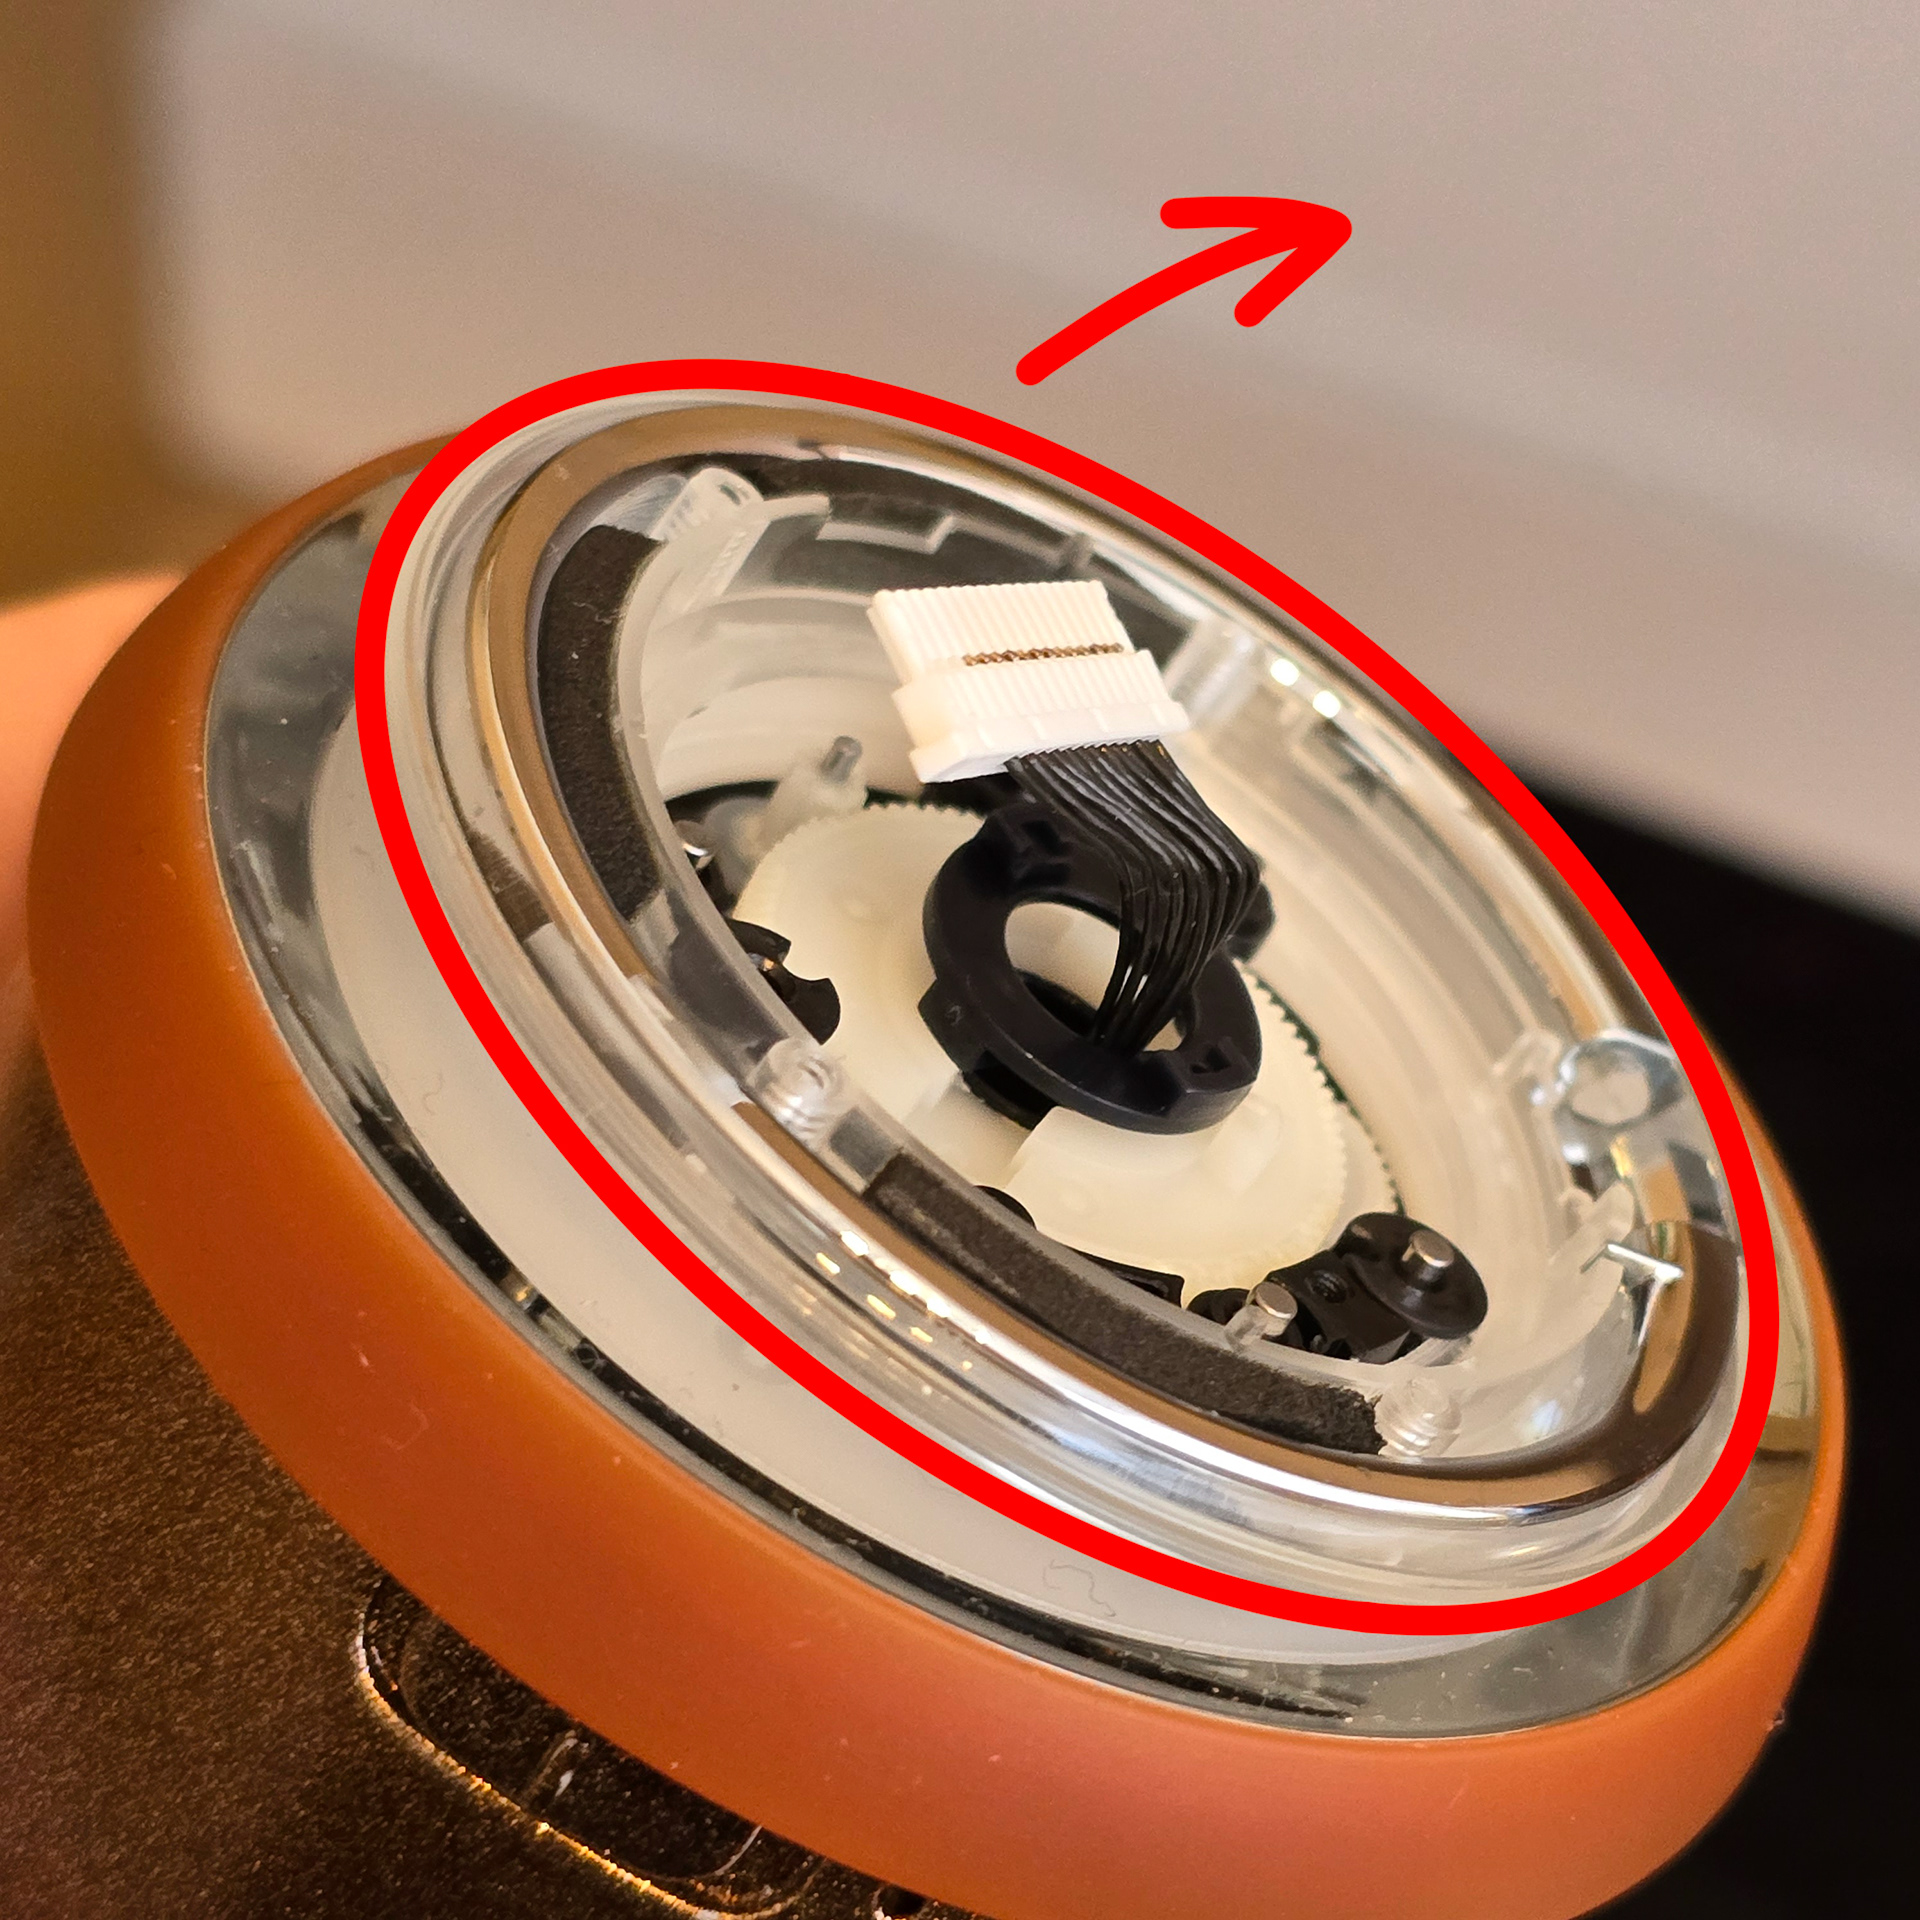
Take out the 4 screws circled in the first picture. Then carefully peel back the foam sticker. This sticker can tear a lot of the time, but it's not a major problem if it does. Then unplug the long white connector.
最初の写真で丸で囲まれた4本のネジを外します。次に、フォームシールを慎重に剥がします。このシールは破れやすいですが、大きな問題にはなりません。次に、長い白いコネクタを外します。
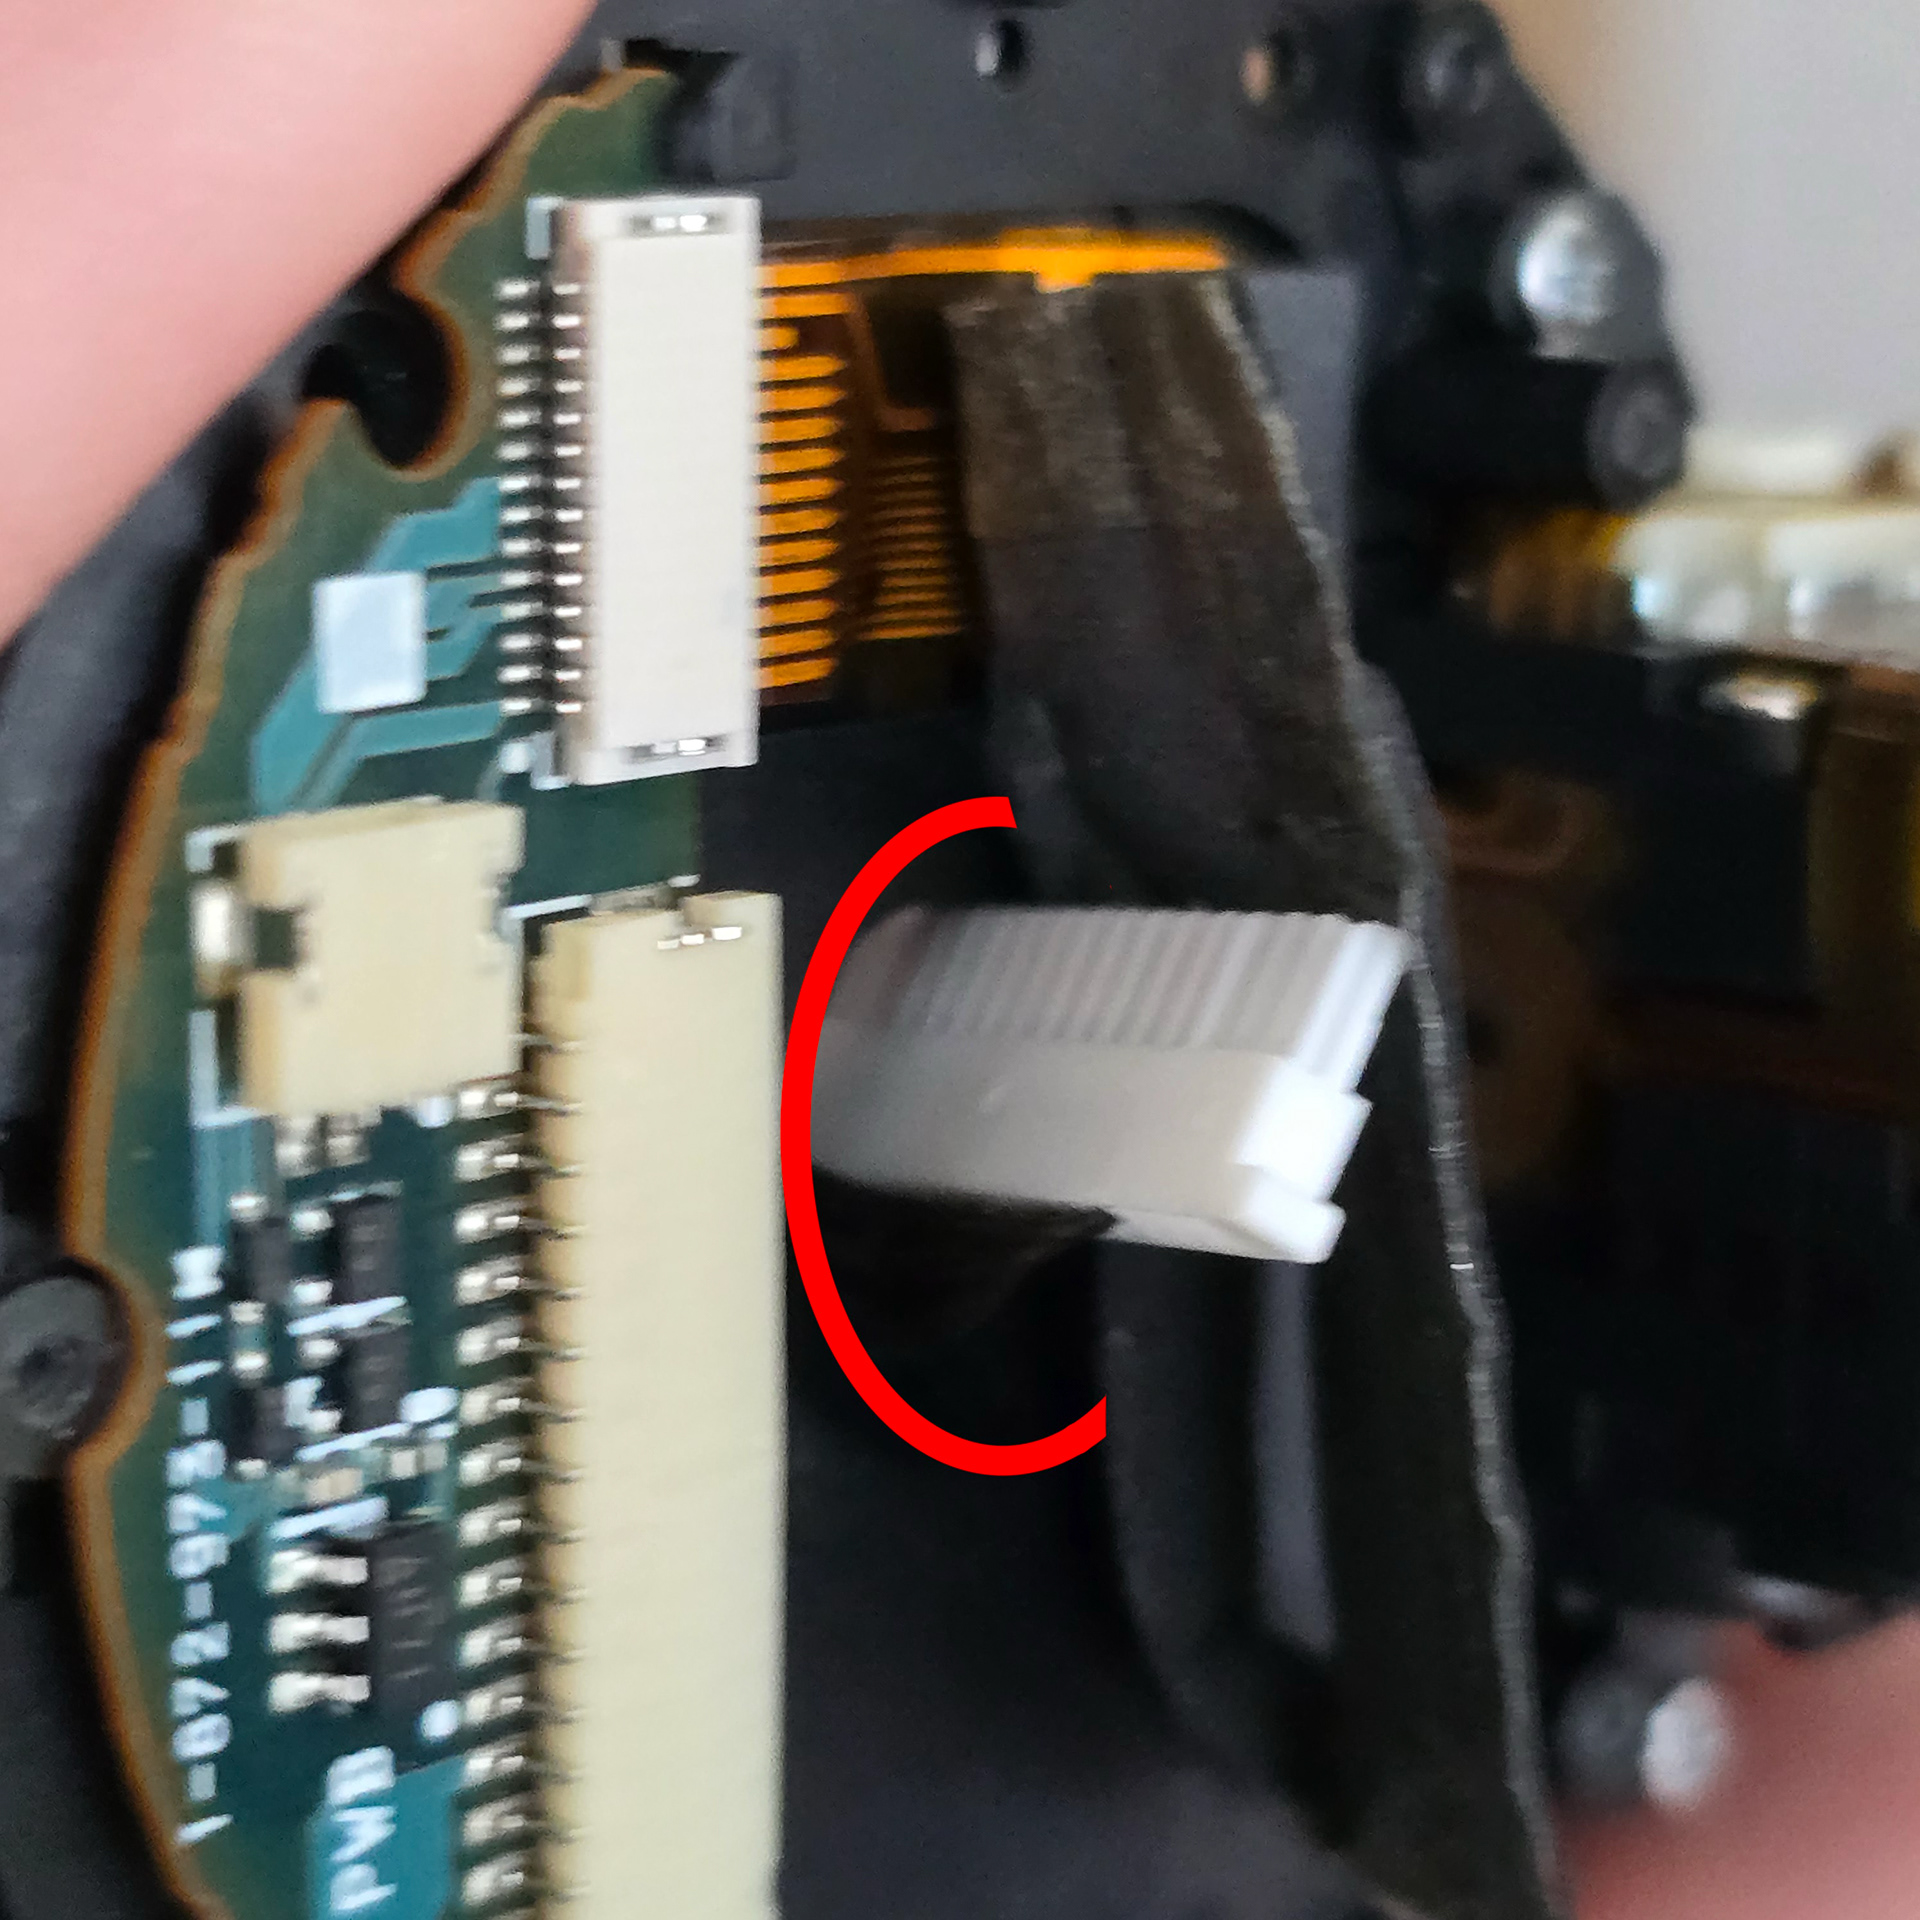
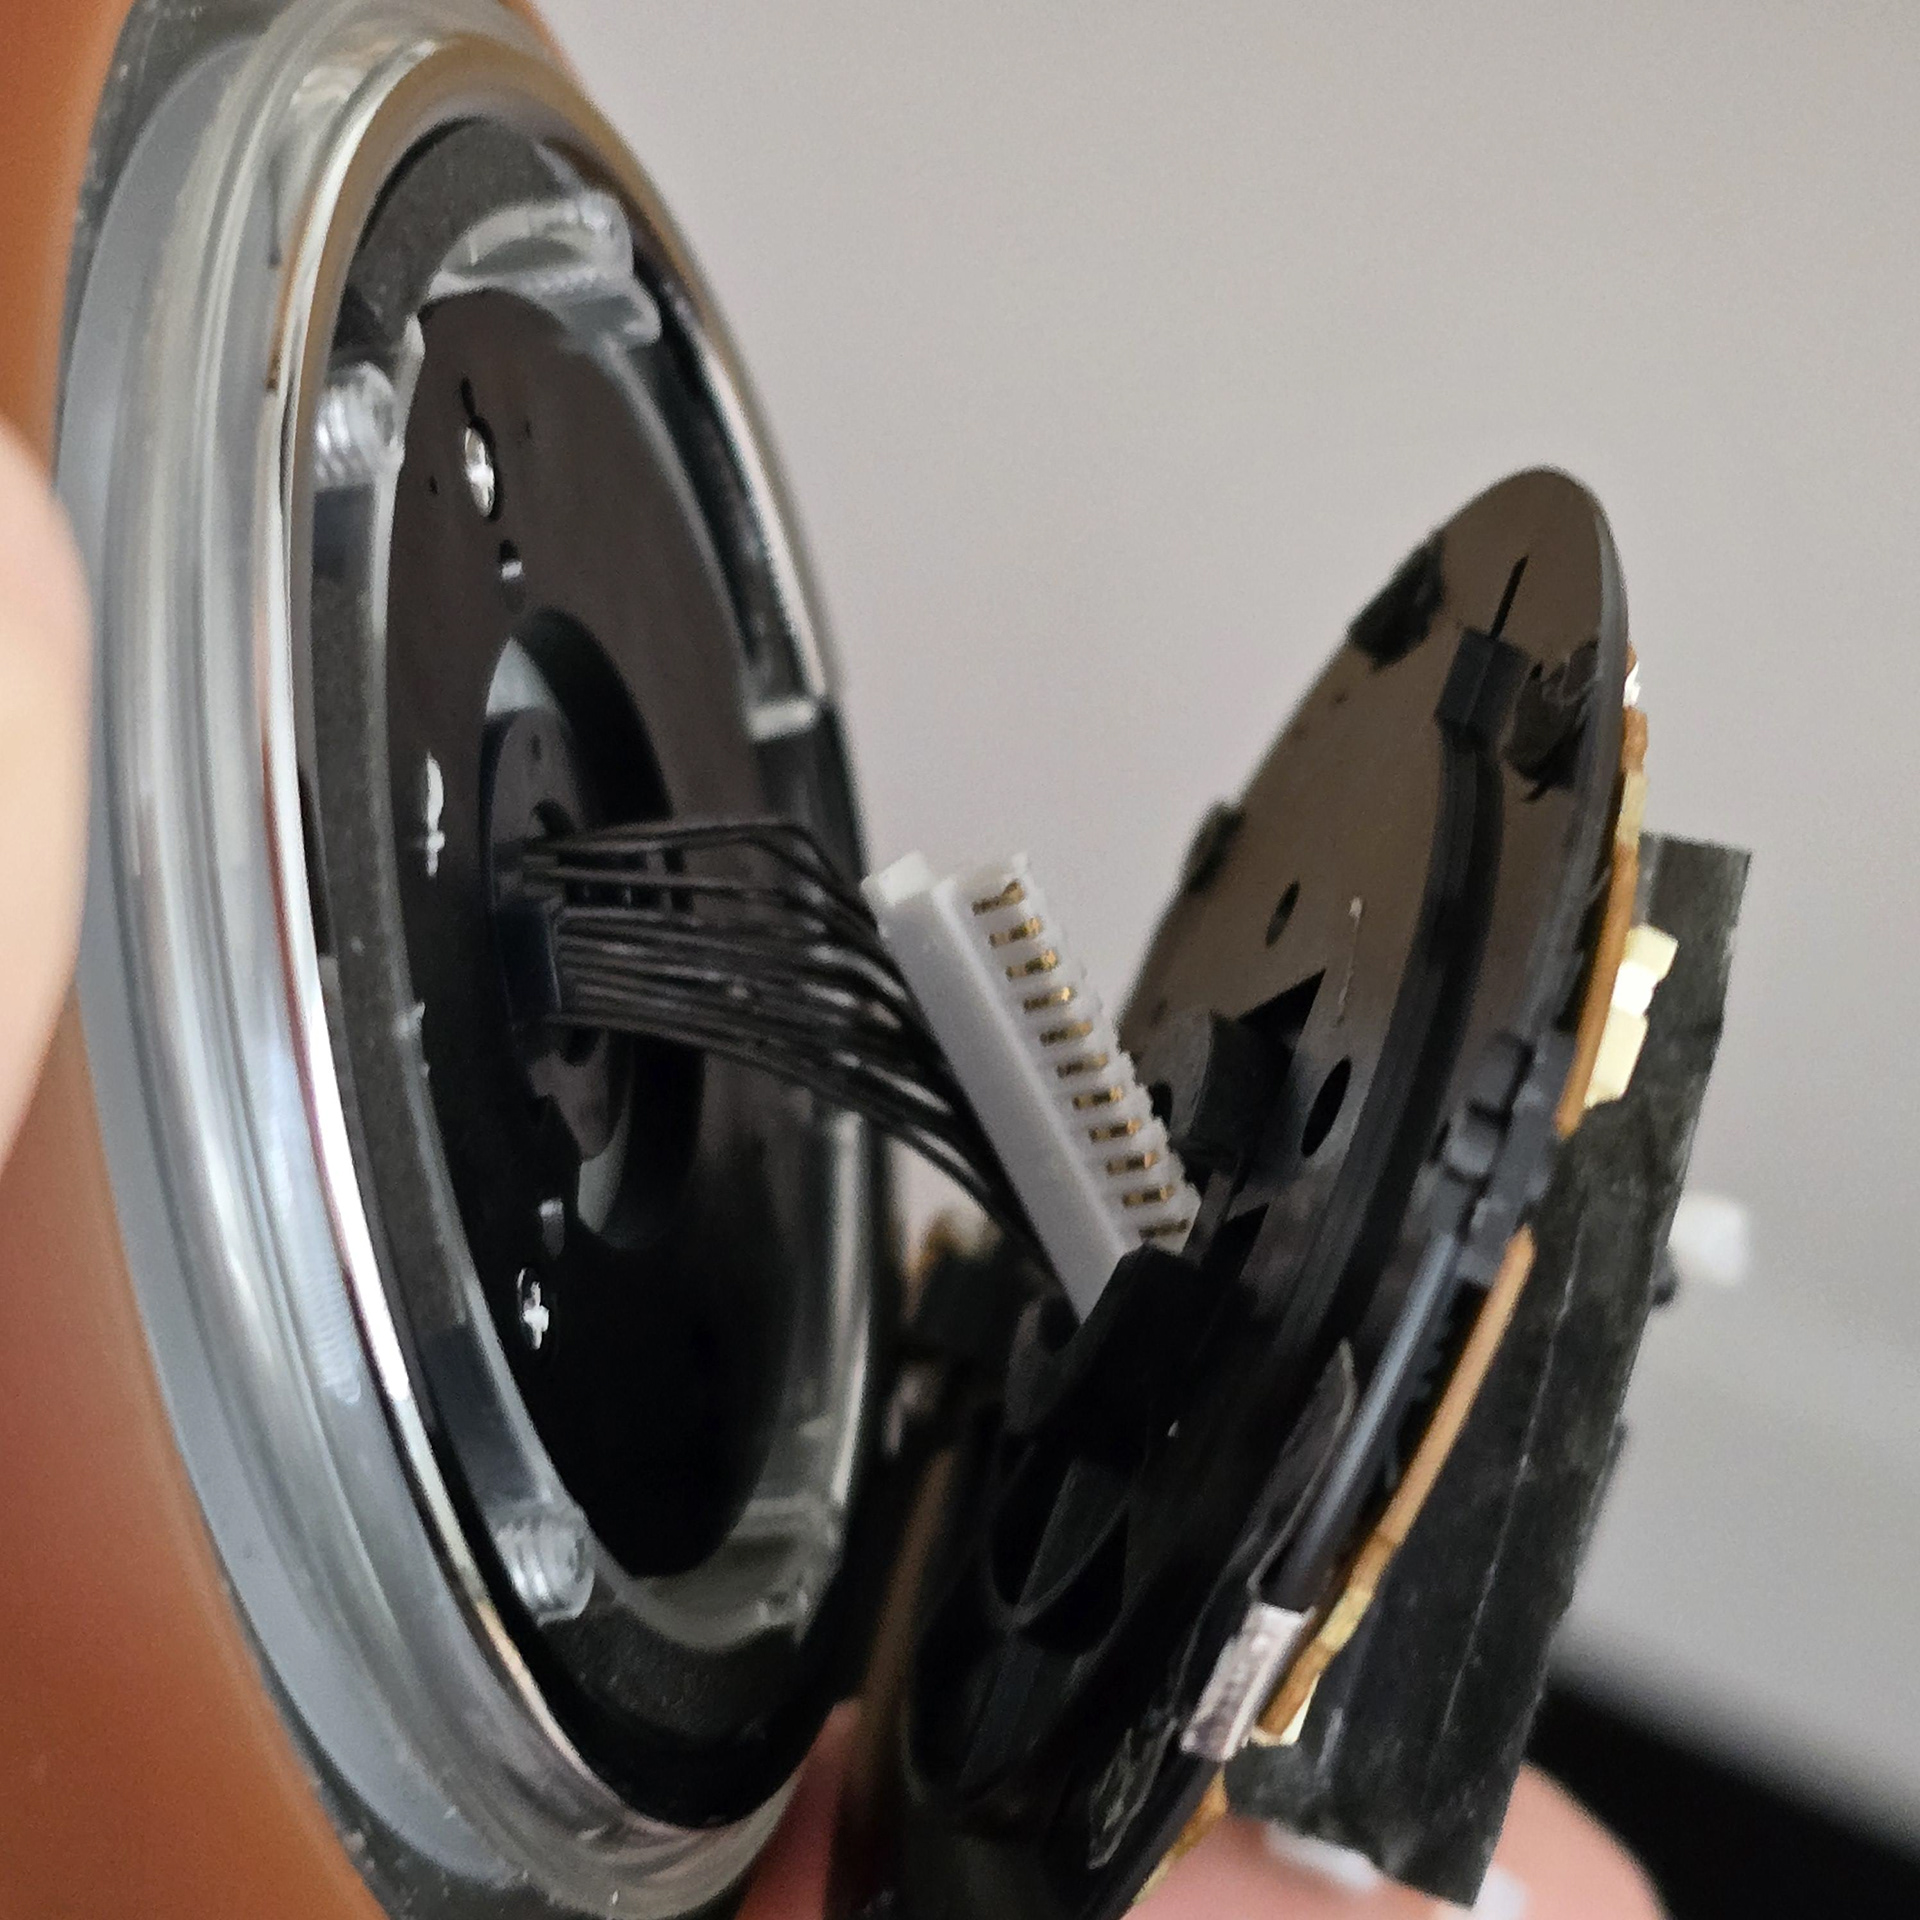
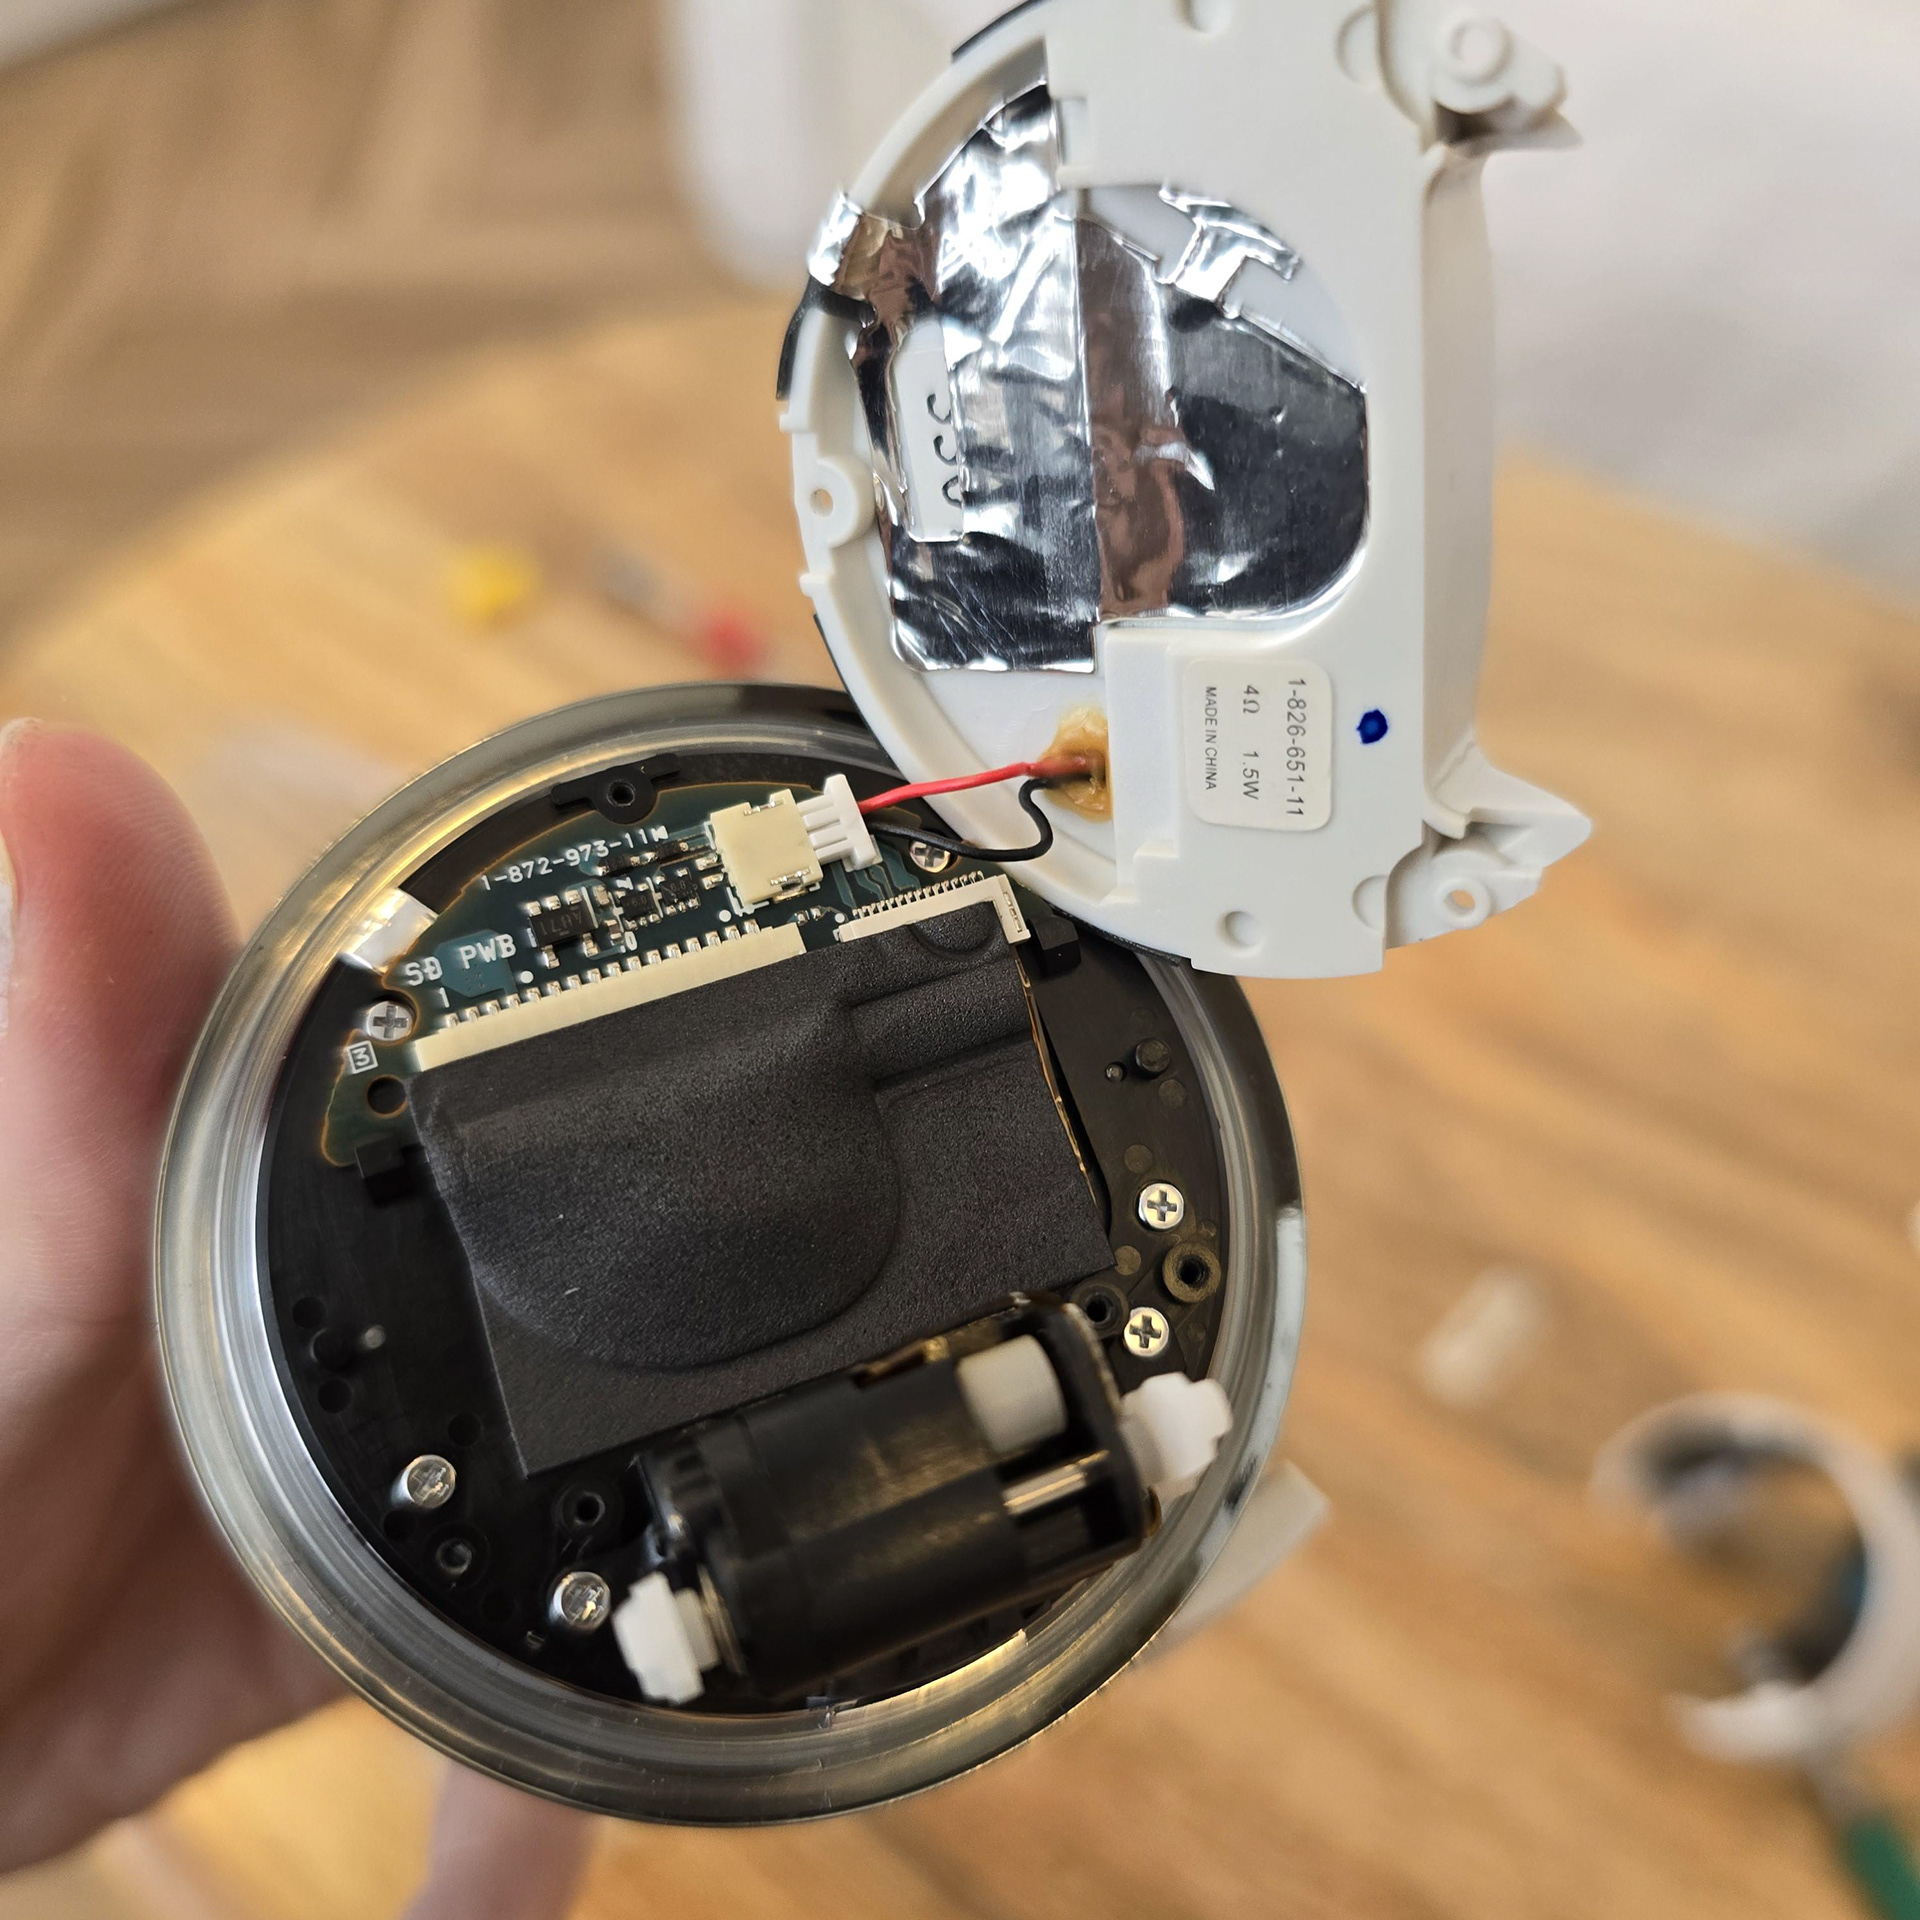
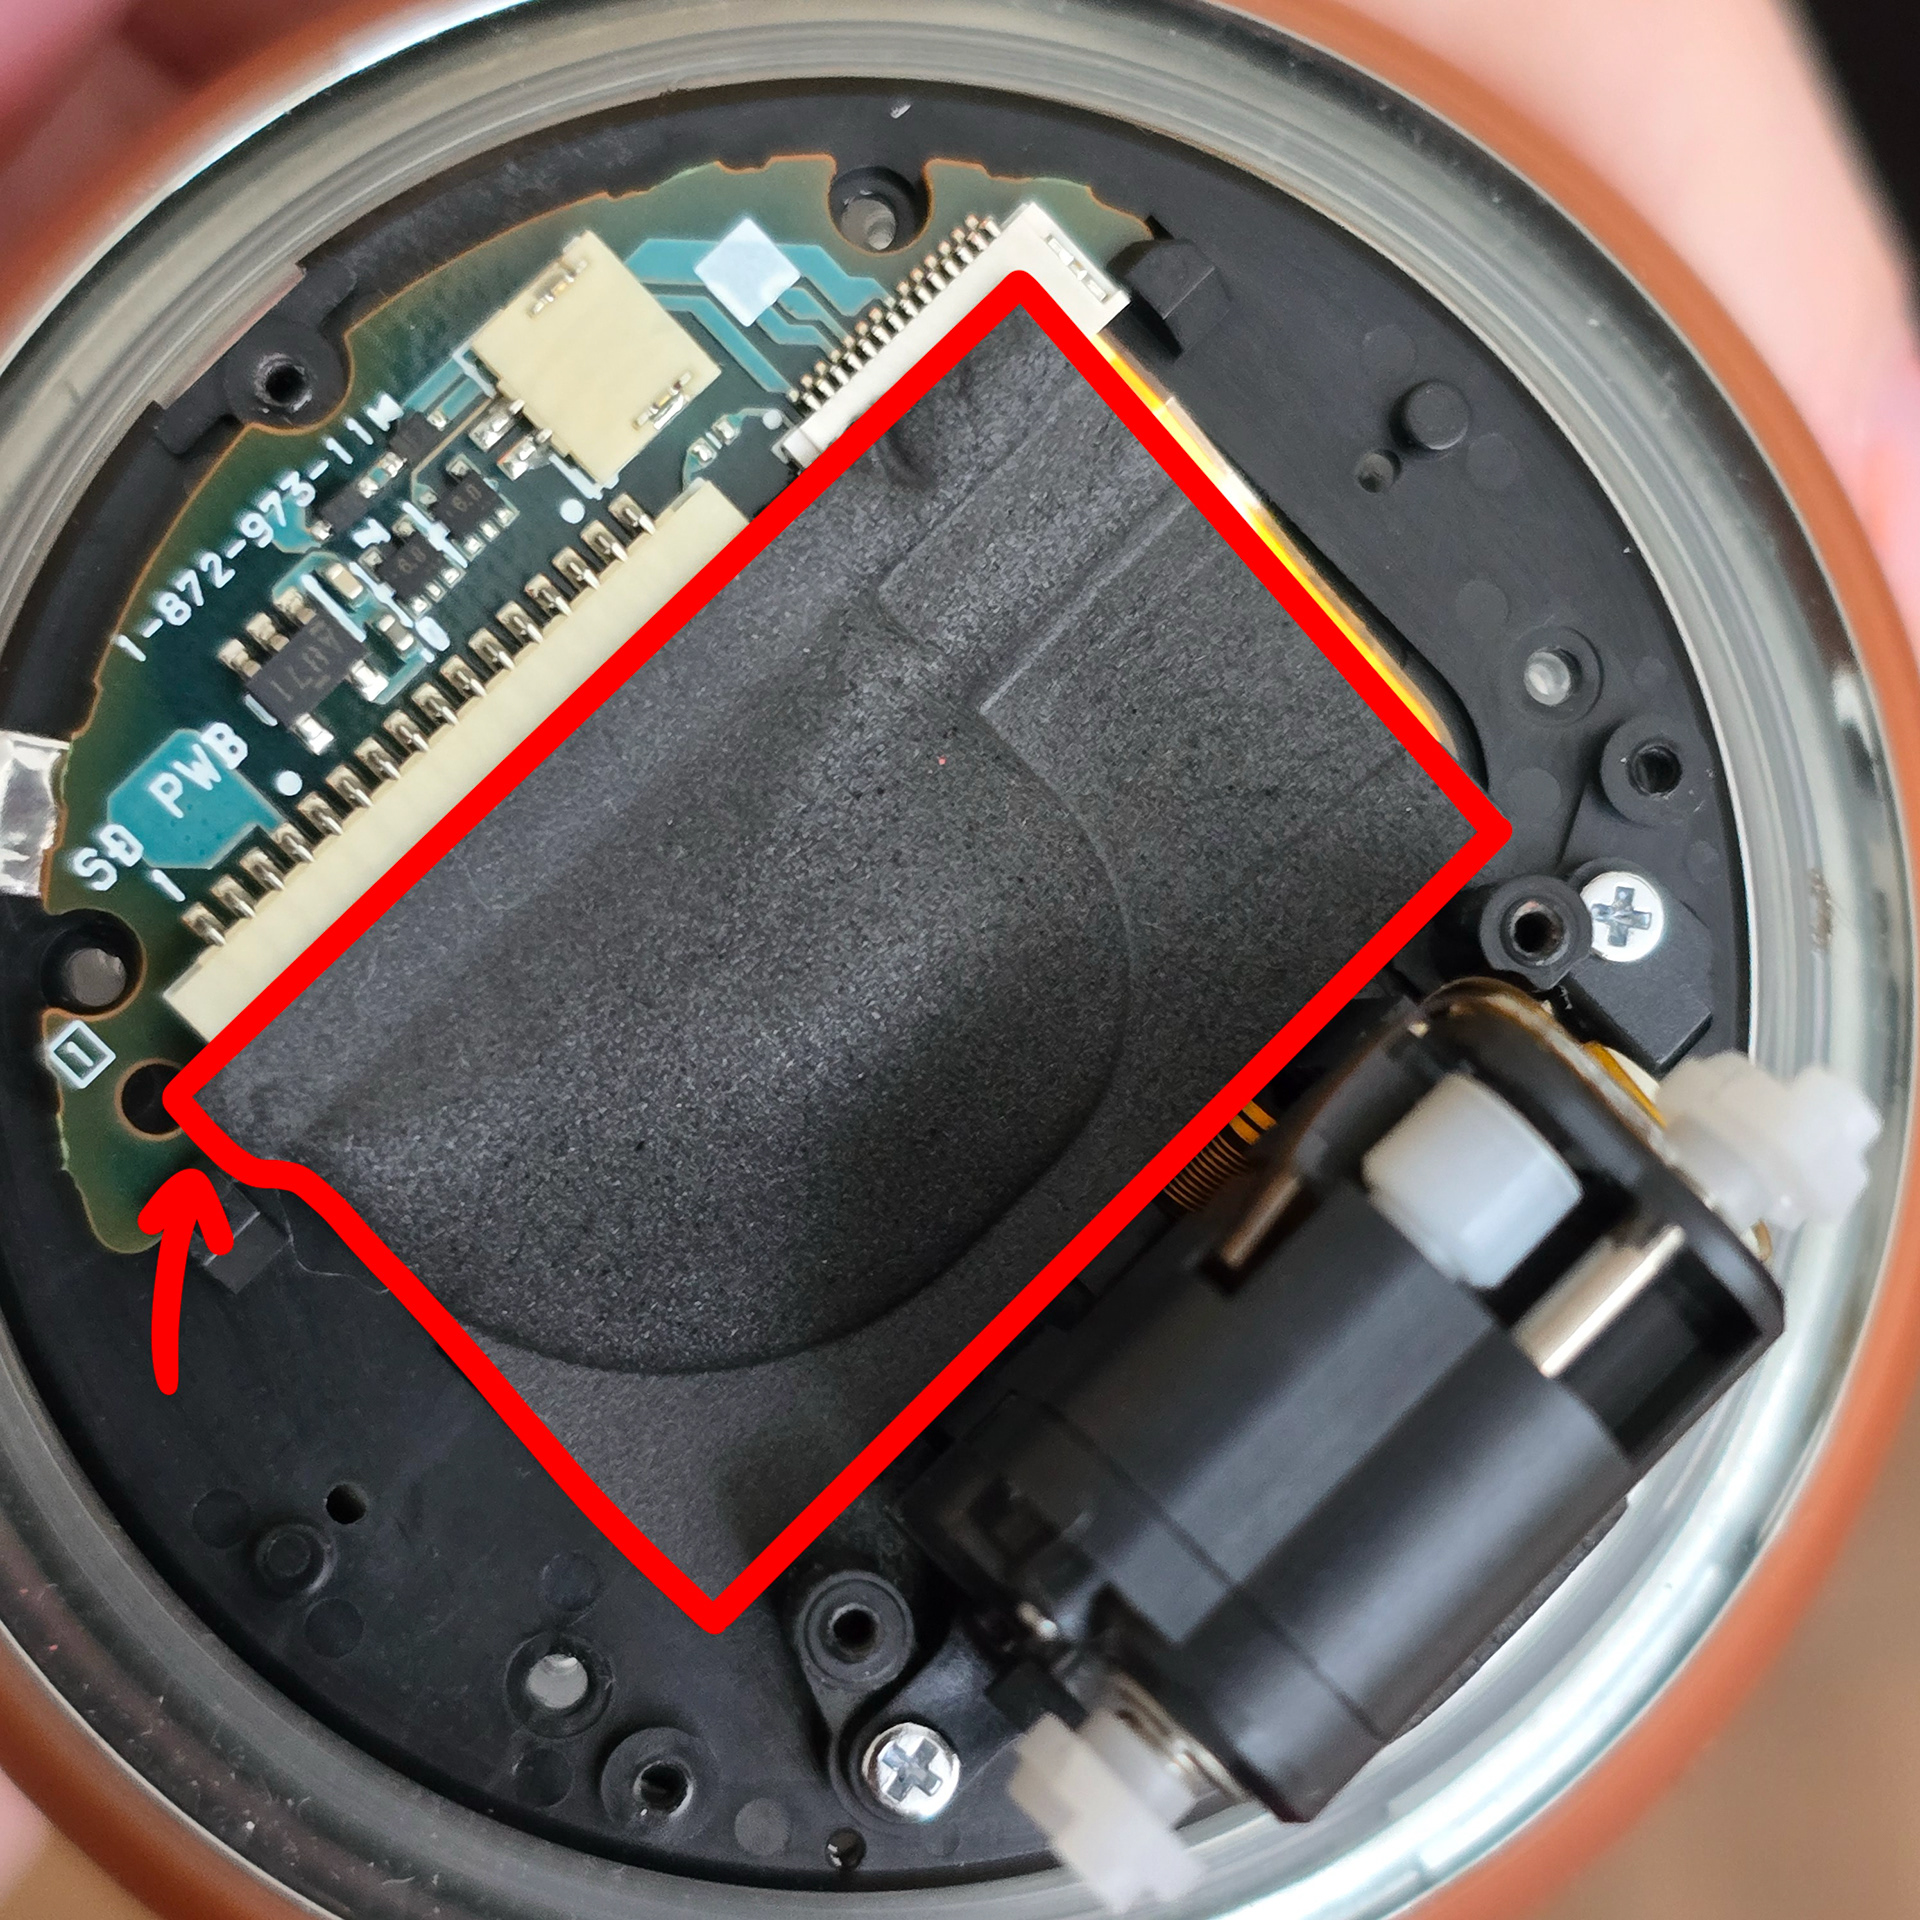
Push the long connector through the centre hole sideways - doing so will allow you to remove the black plastic layer with the circuit board from the body. Once that's done, remove the three silver screws.
長いコネクタを中央の穴に横向きに差し込みます。そうすることで、回路基板が入った黒いプラスチック層が本体から取り外せます。取り外せたら、銀色のネジ3本を外します。
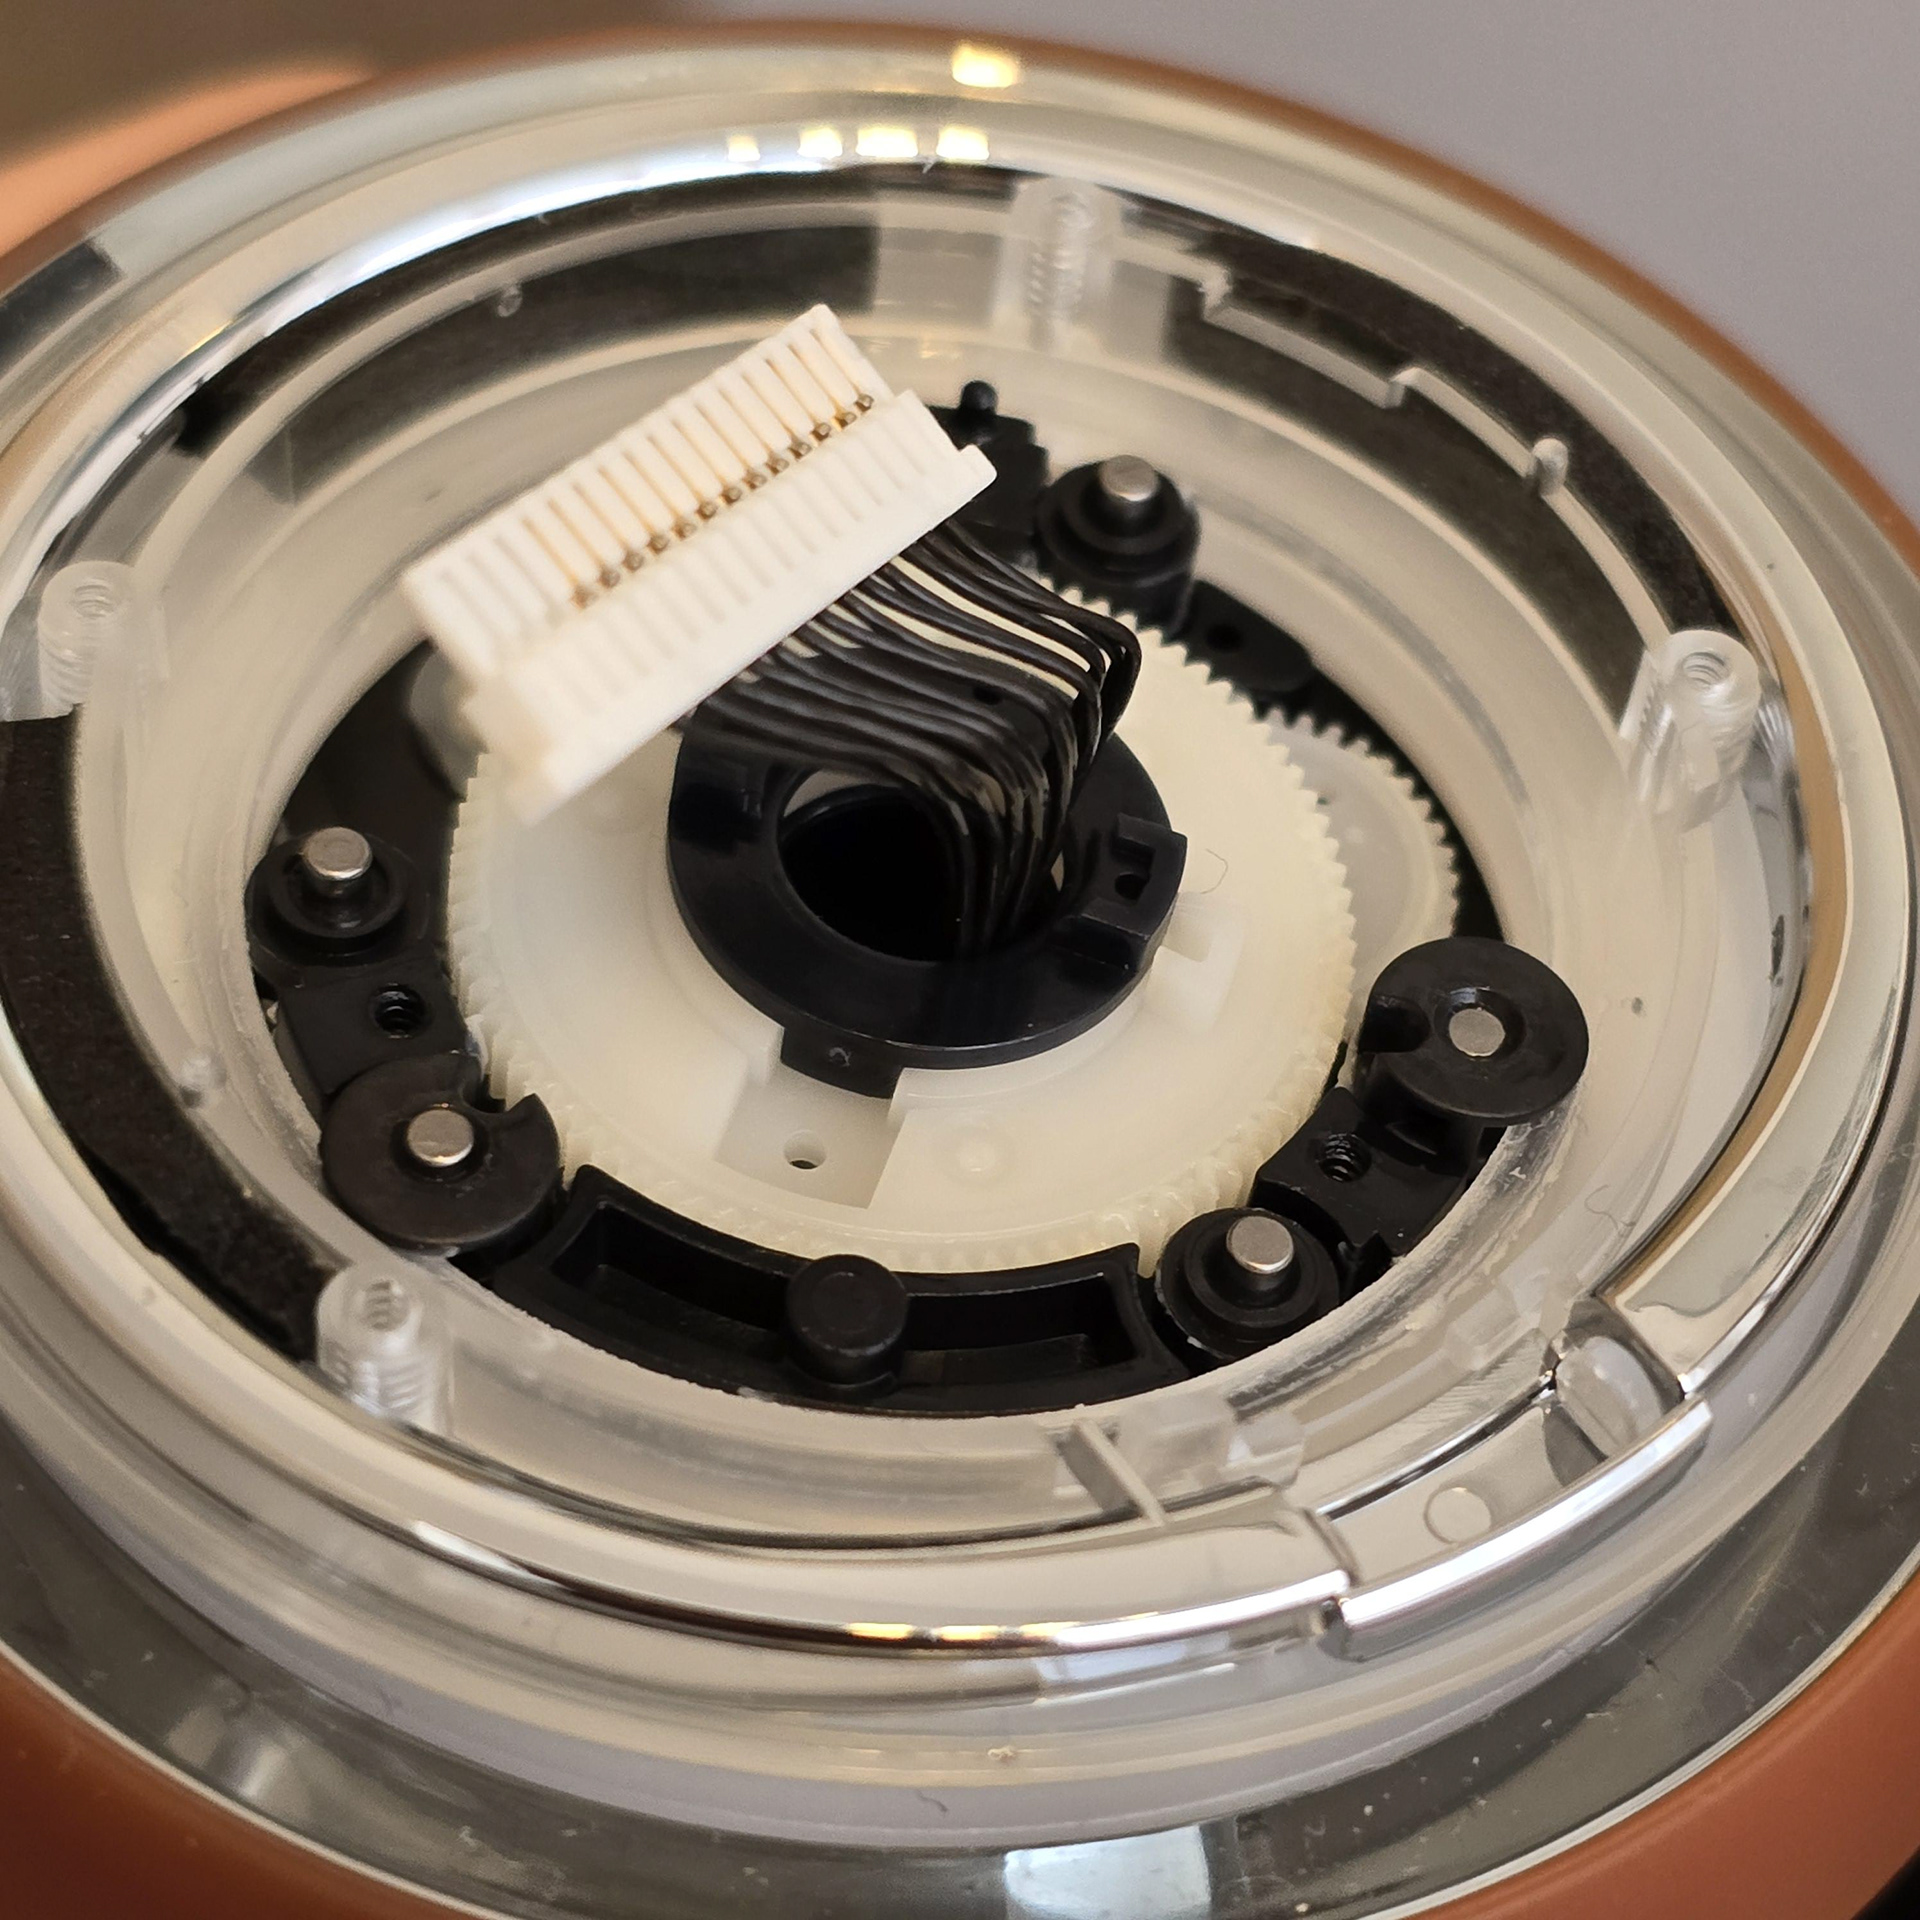
Once the screws are removed you can lift the black disc up and off. This will reveal the first of two layers that make up the Rolly's wheel. When removing these it is crucial to make sure the small spacers do not get dropped/lost because they are crucial for reassembly. Slowly lift up the wheel disc and put it and the spacers in a nearby tray.
ネジを外したら、黒いディスクを持ち上げて取り外すことができます。これで、Rollyのホイールを構成する2層のうちの最初の層が現れます。これらを取り外す際は、小さなスペーサーを落としたり紛失したりしないように注意してください。再組み立てに不可欠なためです。ホイールディスクをゆっくりと持ち上げ、スペーサーと一緒に近くのトレイに置きます。
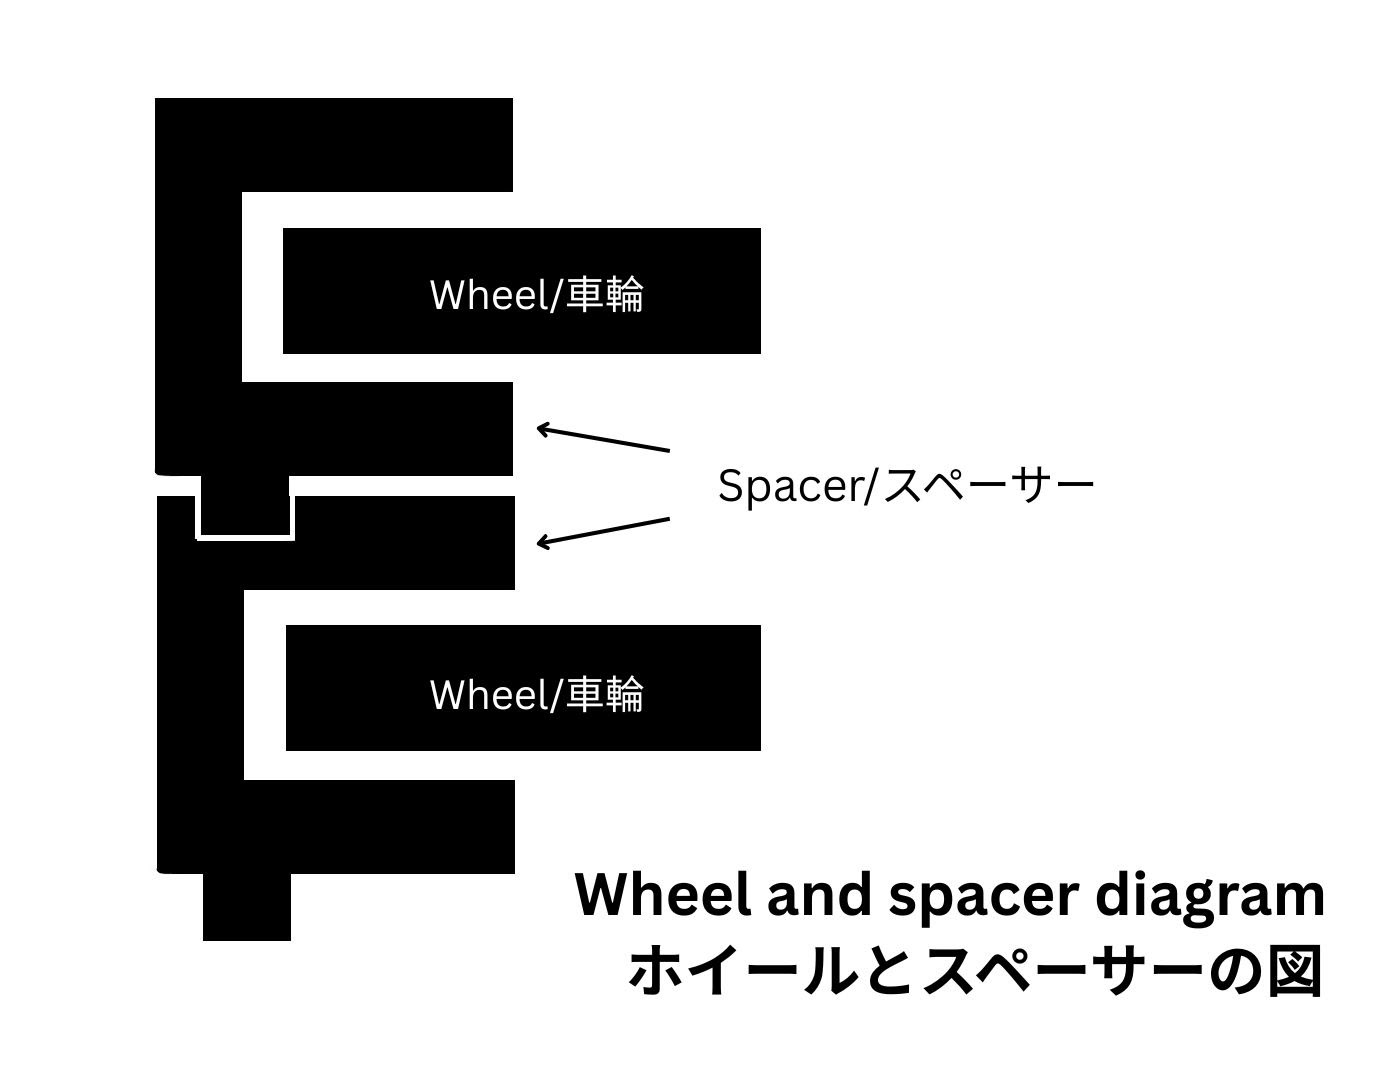
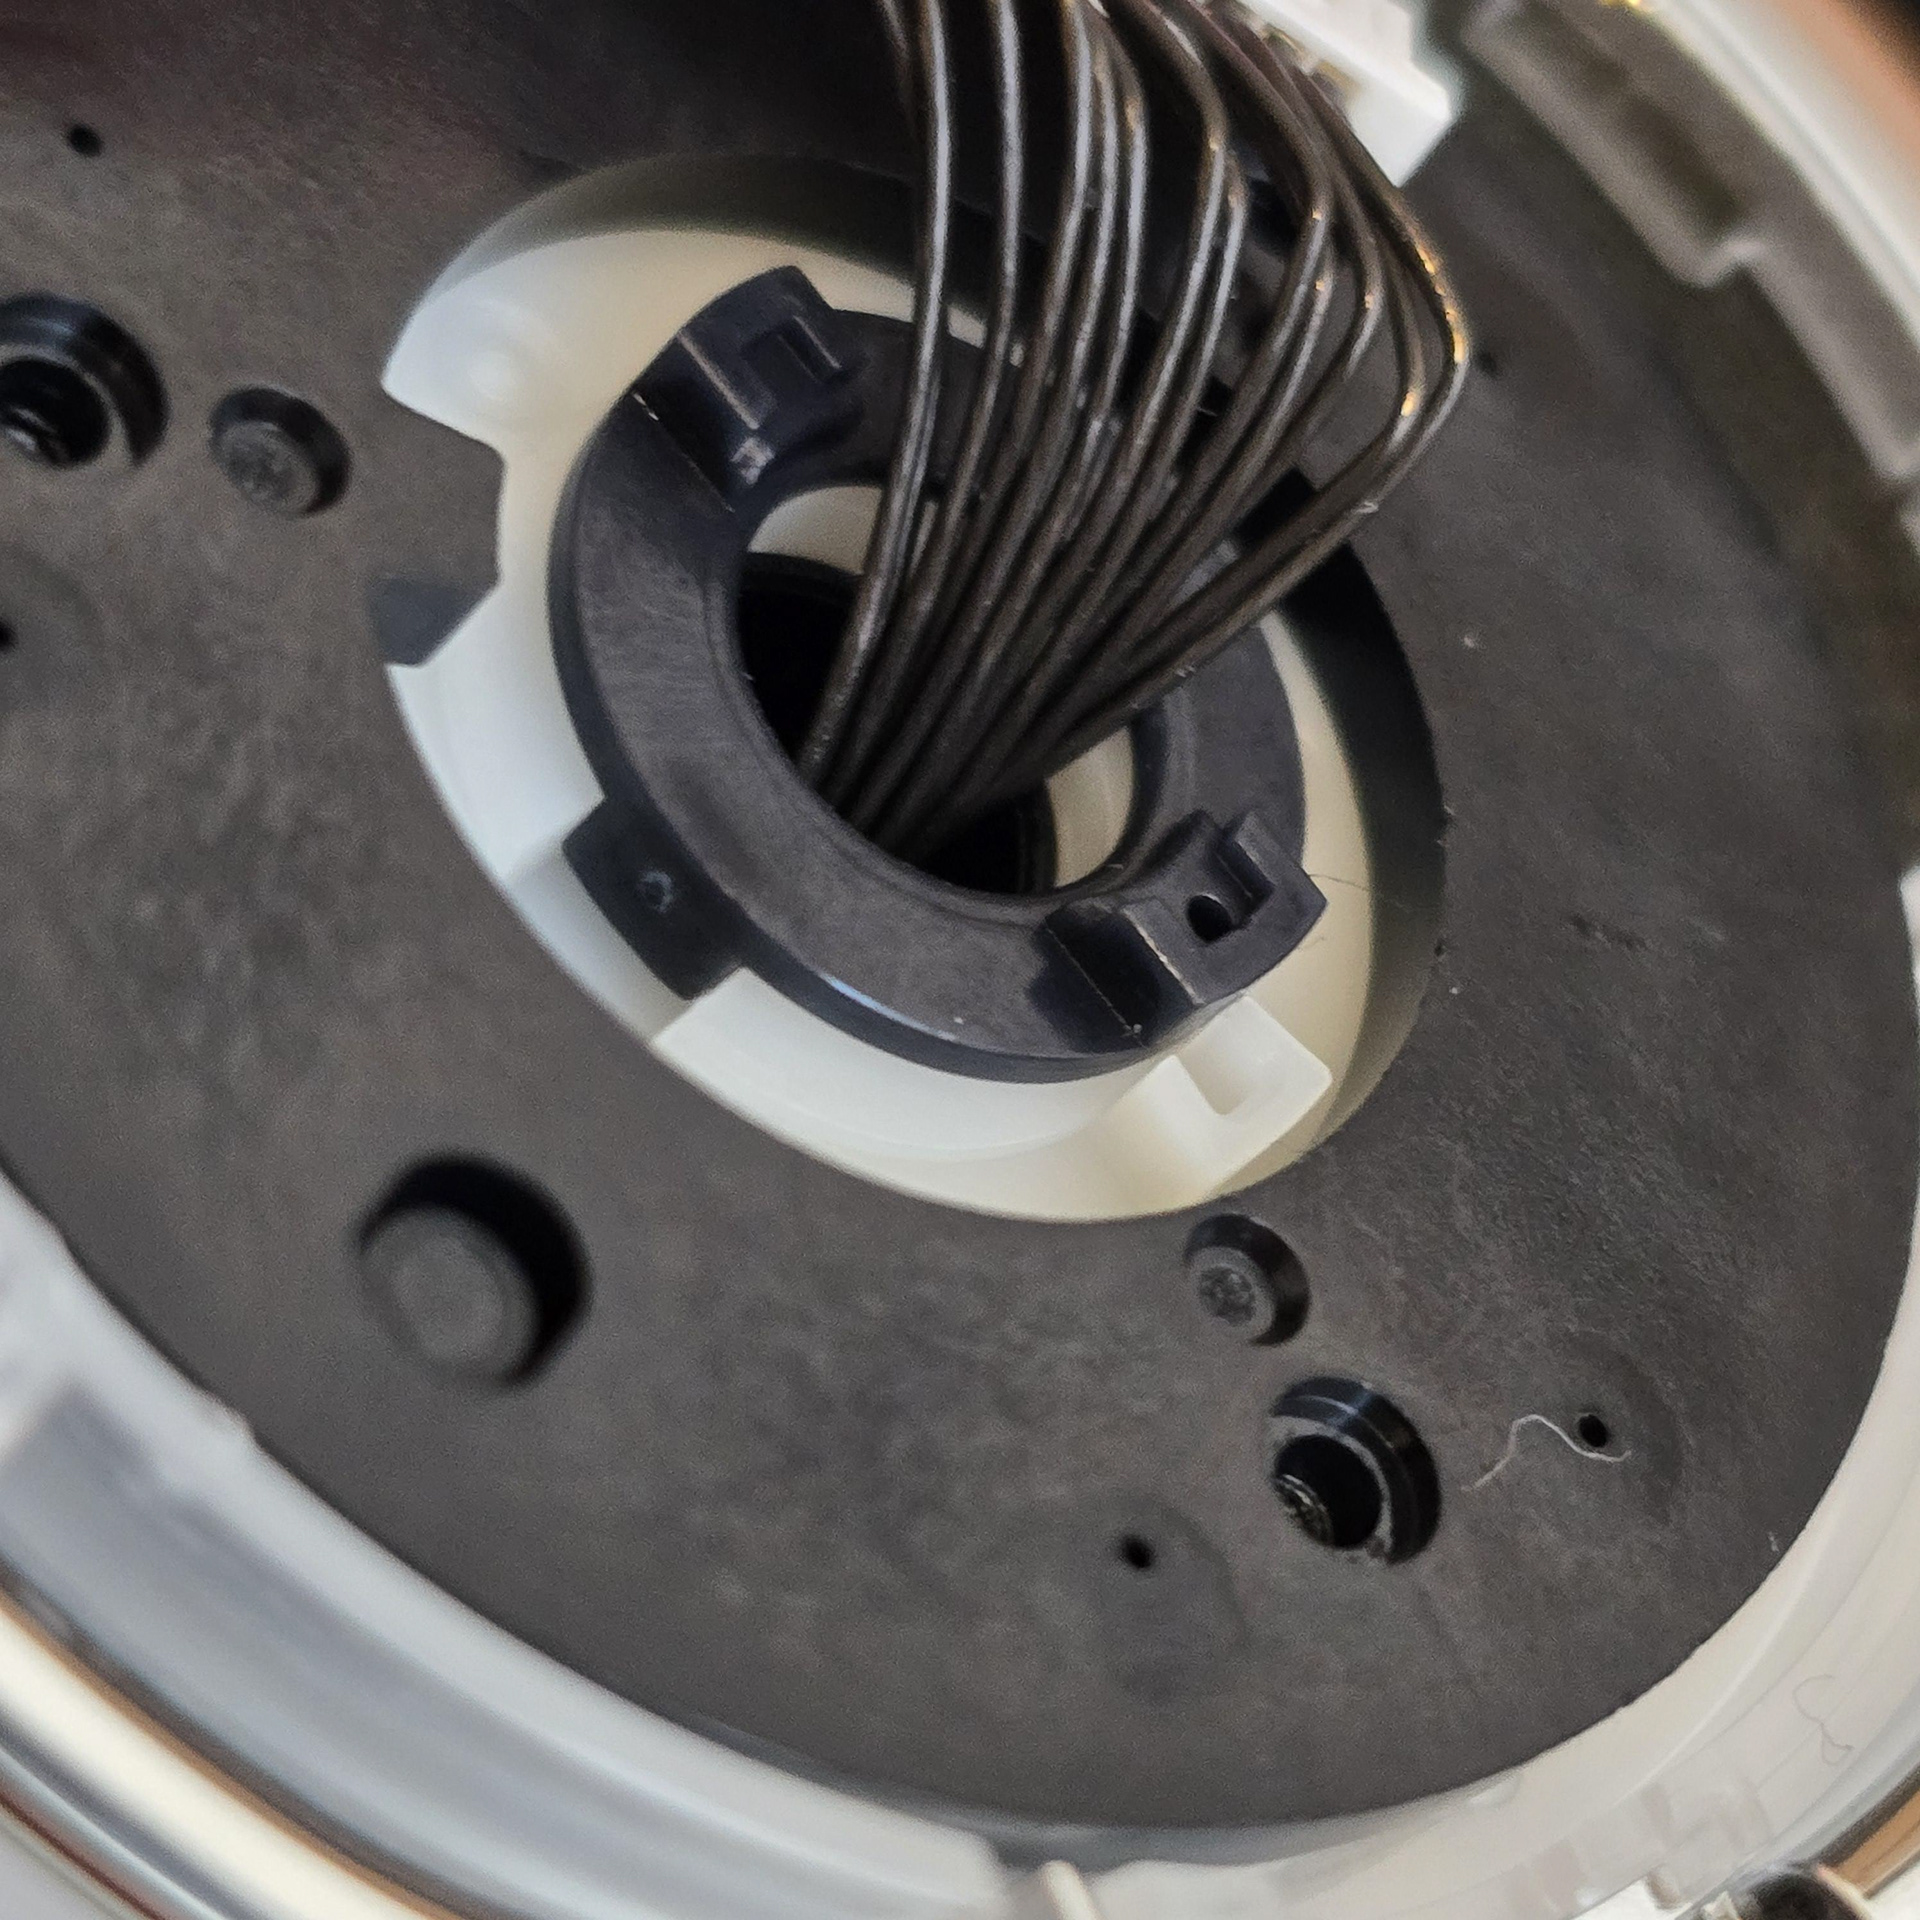
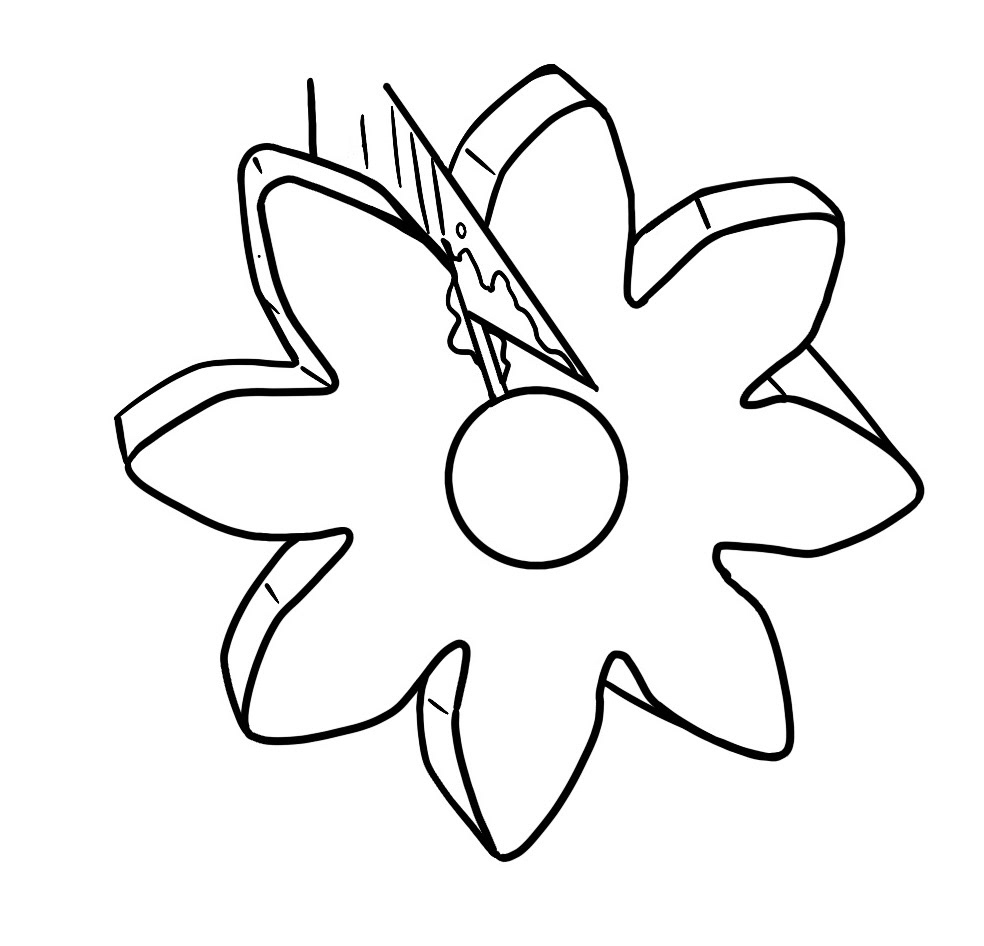
Notice on reassembly: As you have probably noticed, each wheel layer has 6 spacers of two types - circle spacers and circle spacers that have downward facing pegs. When reassembling the layers the round spacers can just be added without concern. However the spacers that have the pegs on them first need to have their side gaps slotted onto the wheel layer at the right location. Then layered down onto the metal rods. You must ensure that the downward facing pegs interlock with the holes on the below layer - otherwise the Rolly wheel assembly will not go back together correctly.
It is really hard to explain, so hopefully this diagram helps.
再組み立ての注意: お気づきかもしれませんが、各ホイール層には 2 種類のスペーサーが付属しています。丸型スペーサー 3 個と、側面に隙間があり下向きのペグが付いた丸型スペーサー 3 個です。層を再組み立てするときは、丸型スペーサーをそのまま追加するだけです。ただし、ペグ付きのスペーサーの場合は、最初にホイール層の正しい位置にあるスペーサー側面の隙間にホイールを挿入する必要があります。次に、それらを金属棒の上に積み重ねます。これはかなり難しいです! 下向きのペグが下の層の穴にぴったり収まることを確認してください。そうしないと、Rolly ホイール アセンブリが正しく組み立てられません。
これは説明するのが非常に難しいので、この図が役立つと思います。
これは説明するのが非常に難しいので、この図が役立つと思います。
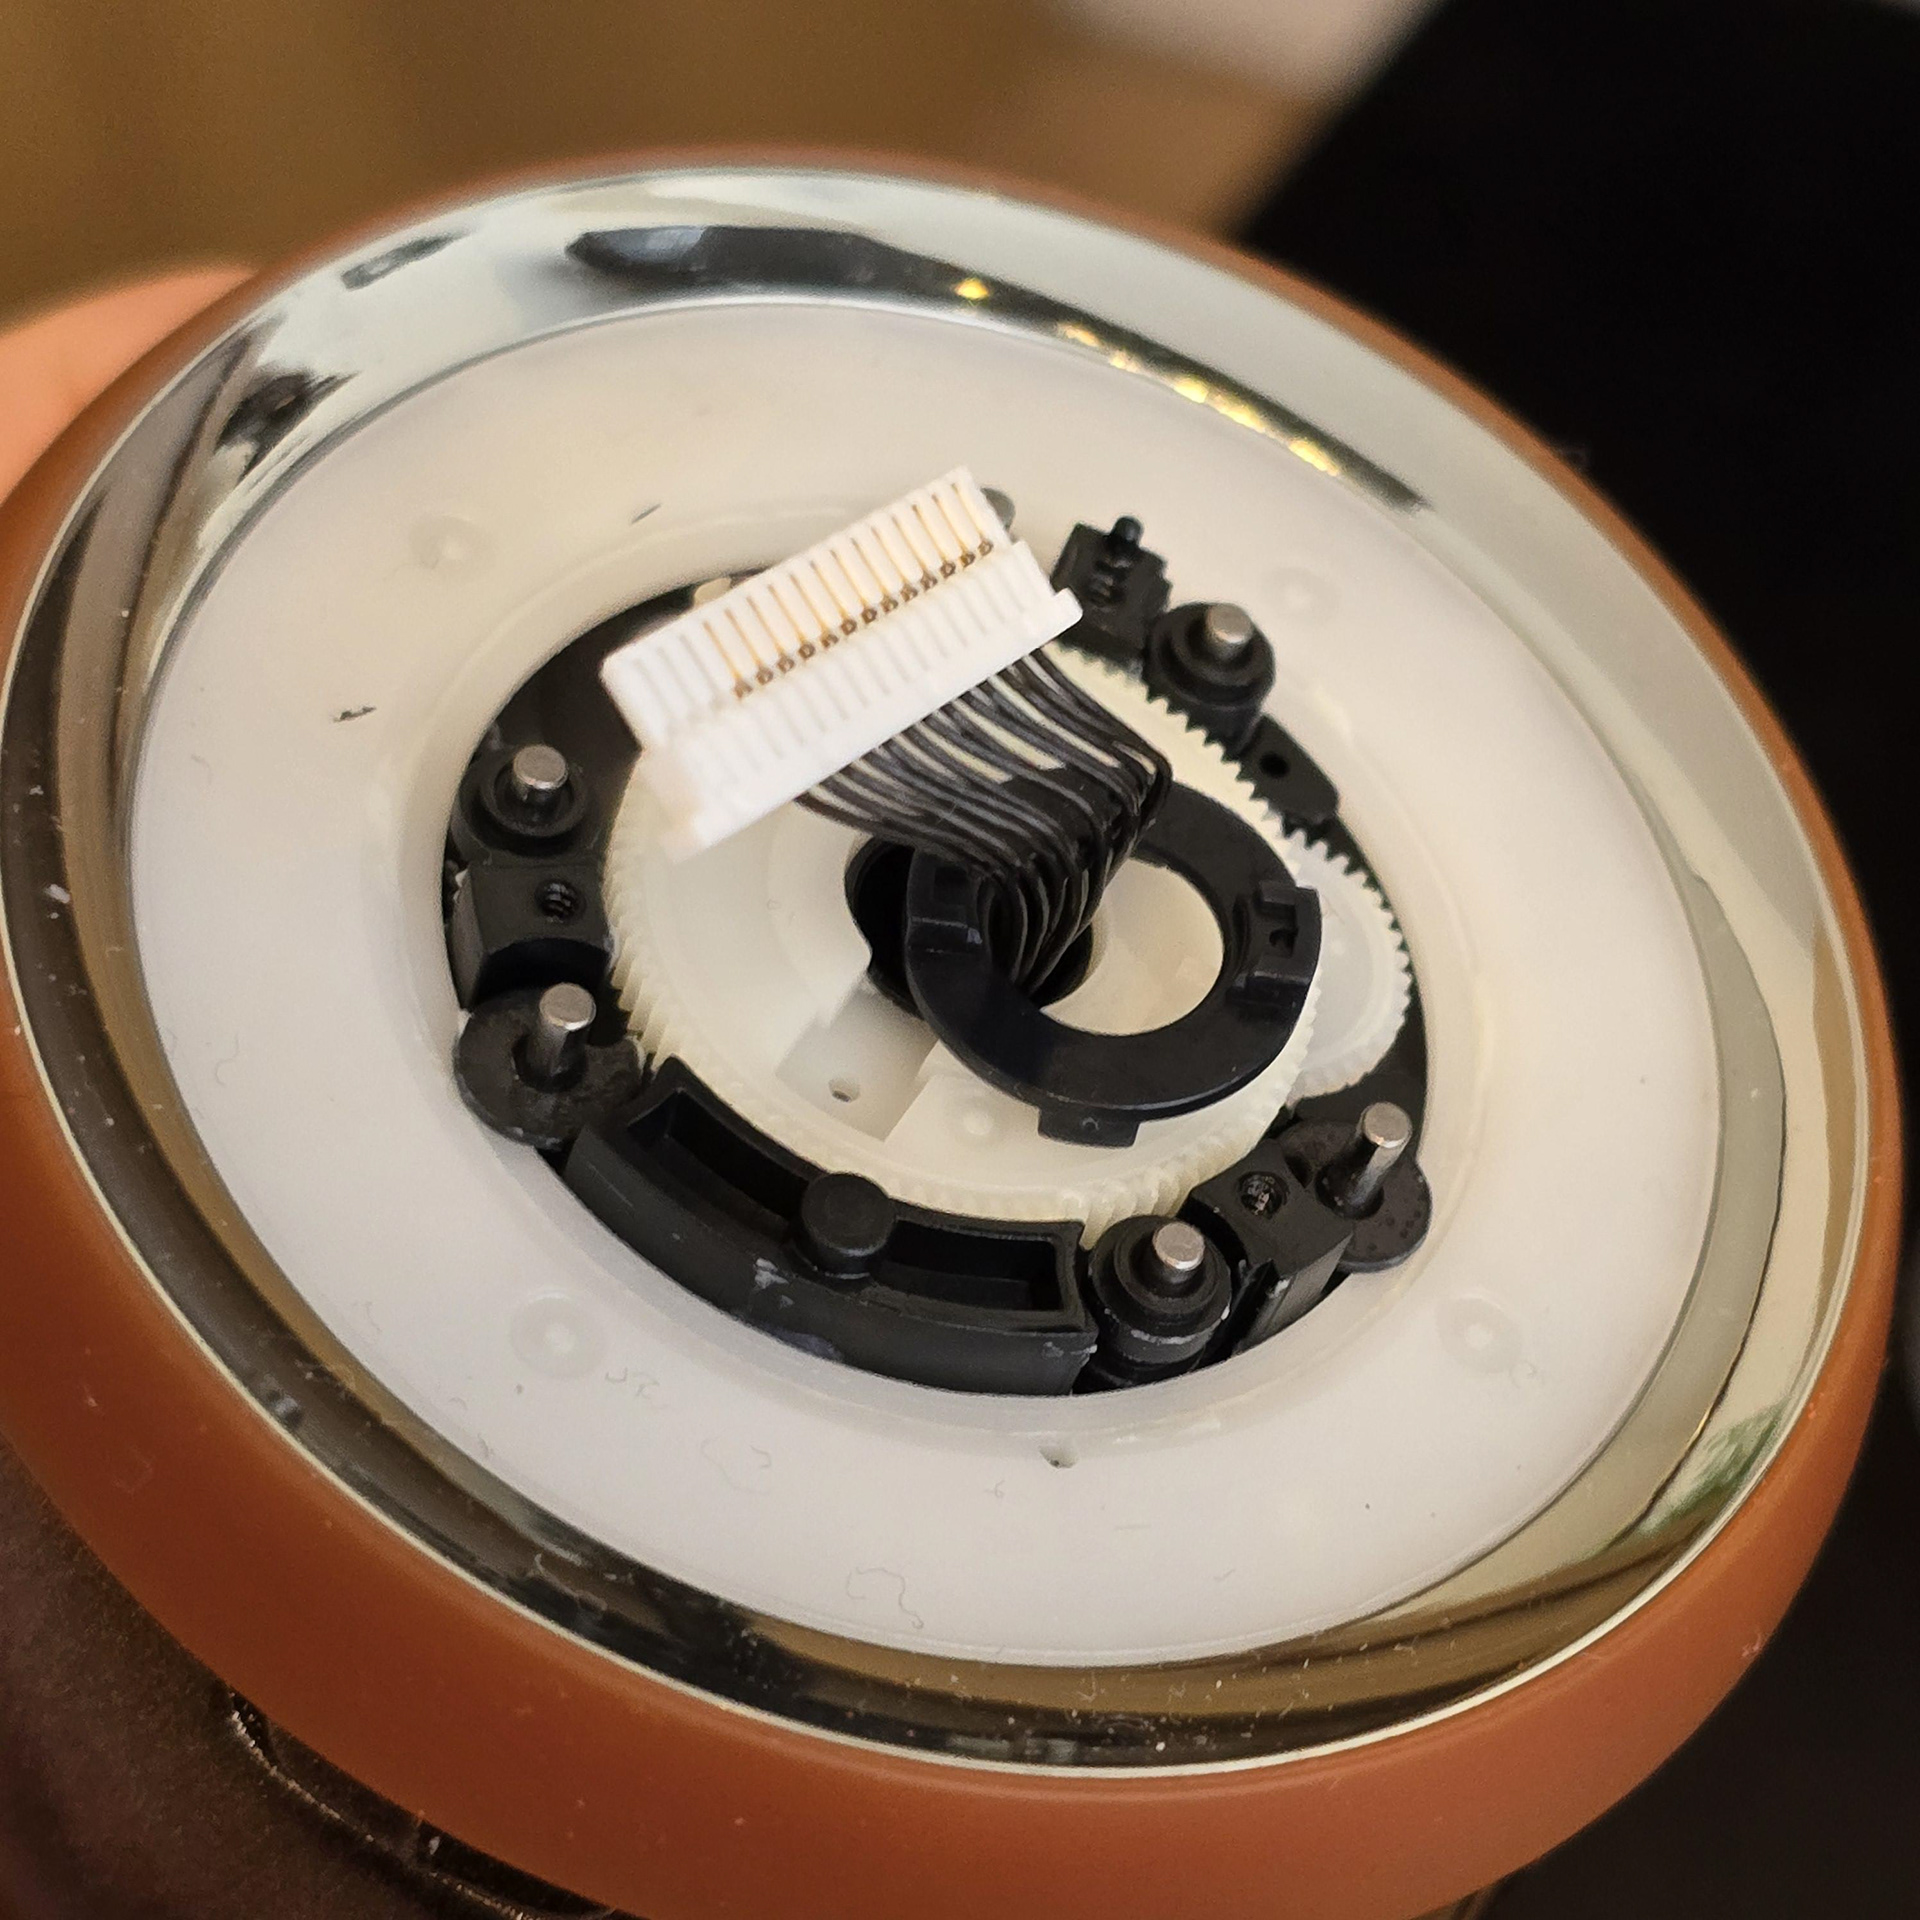
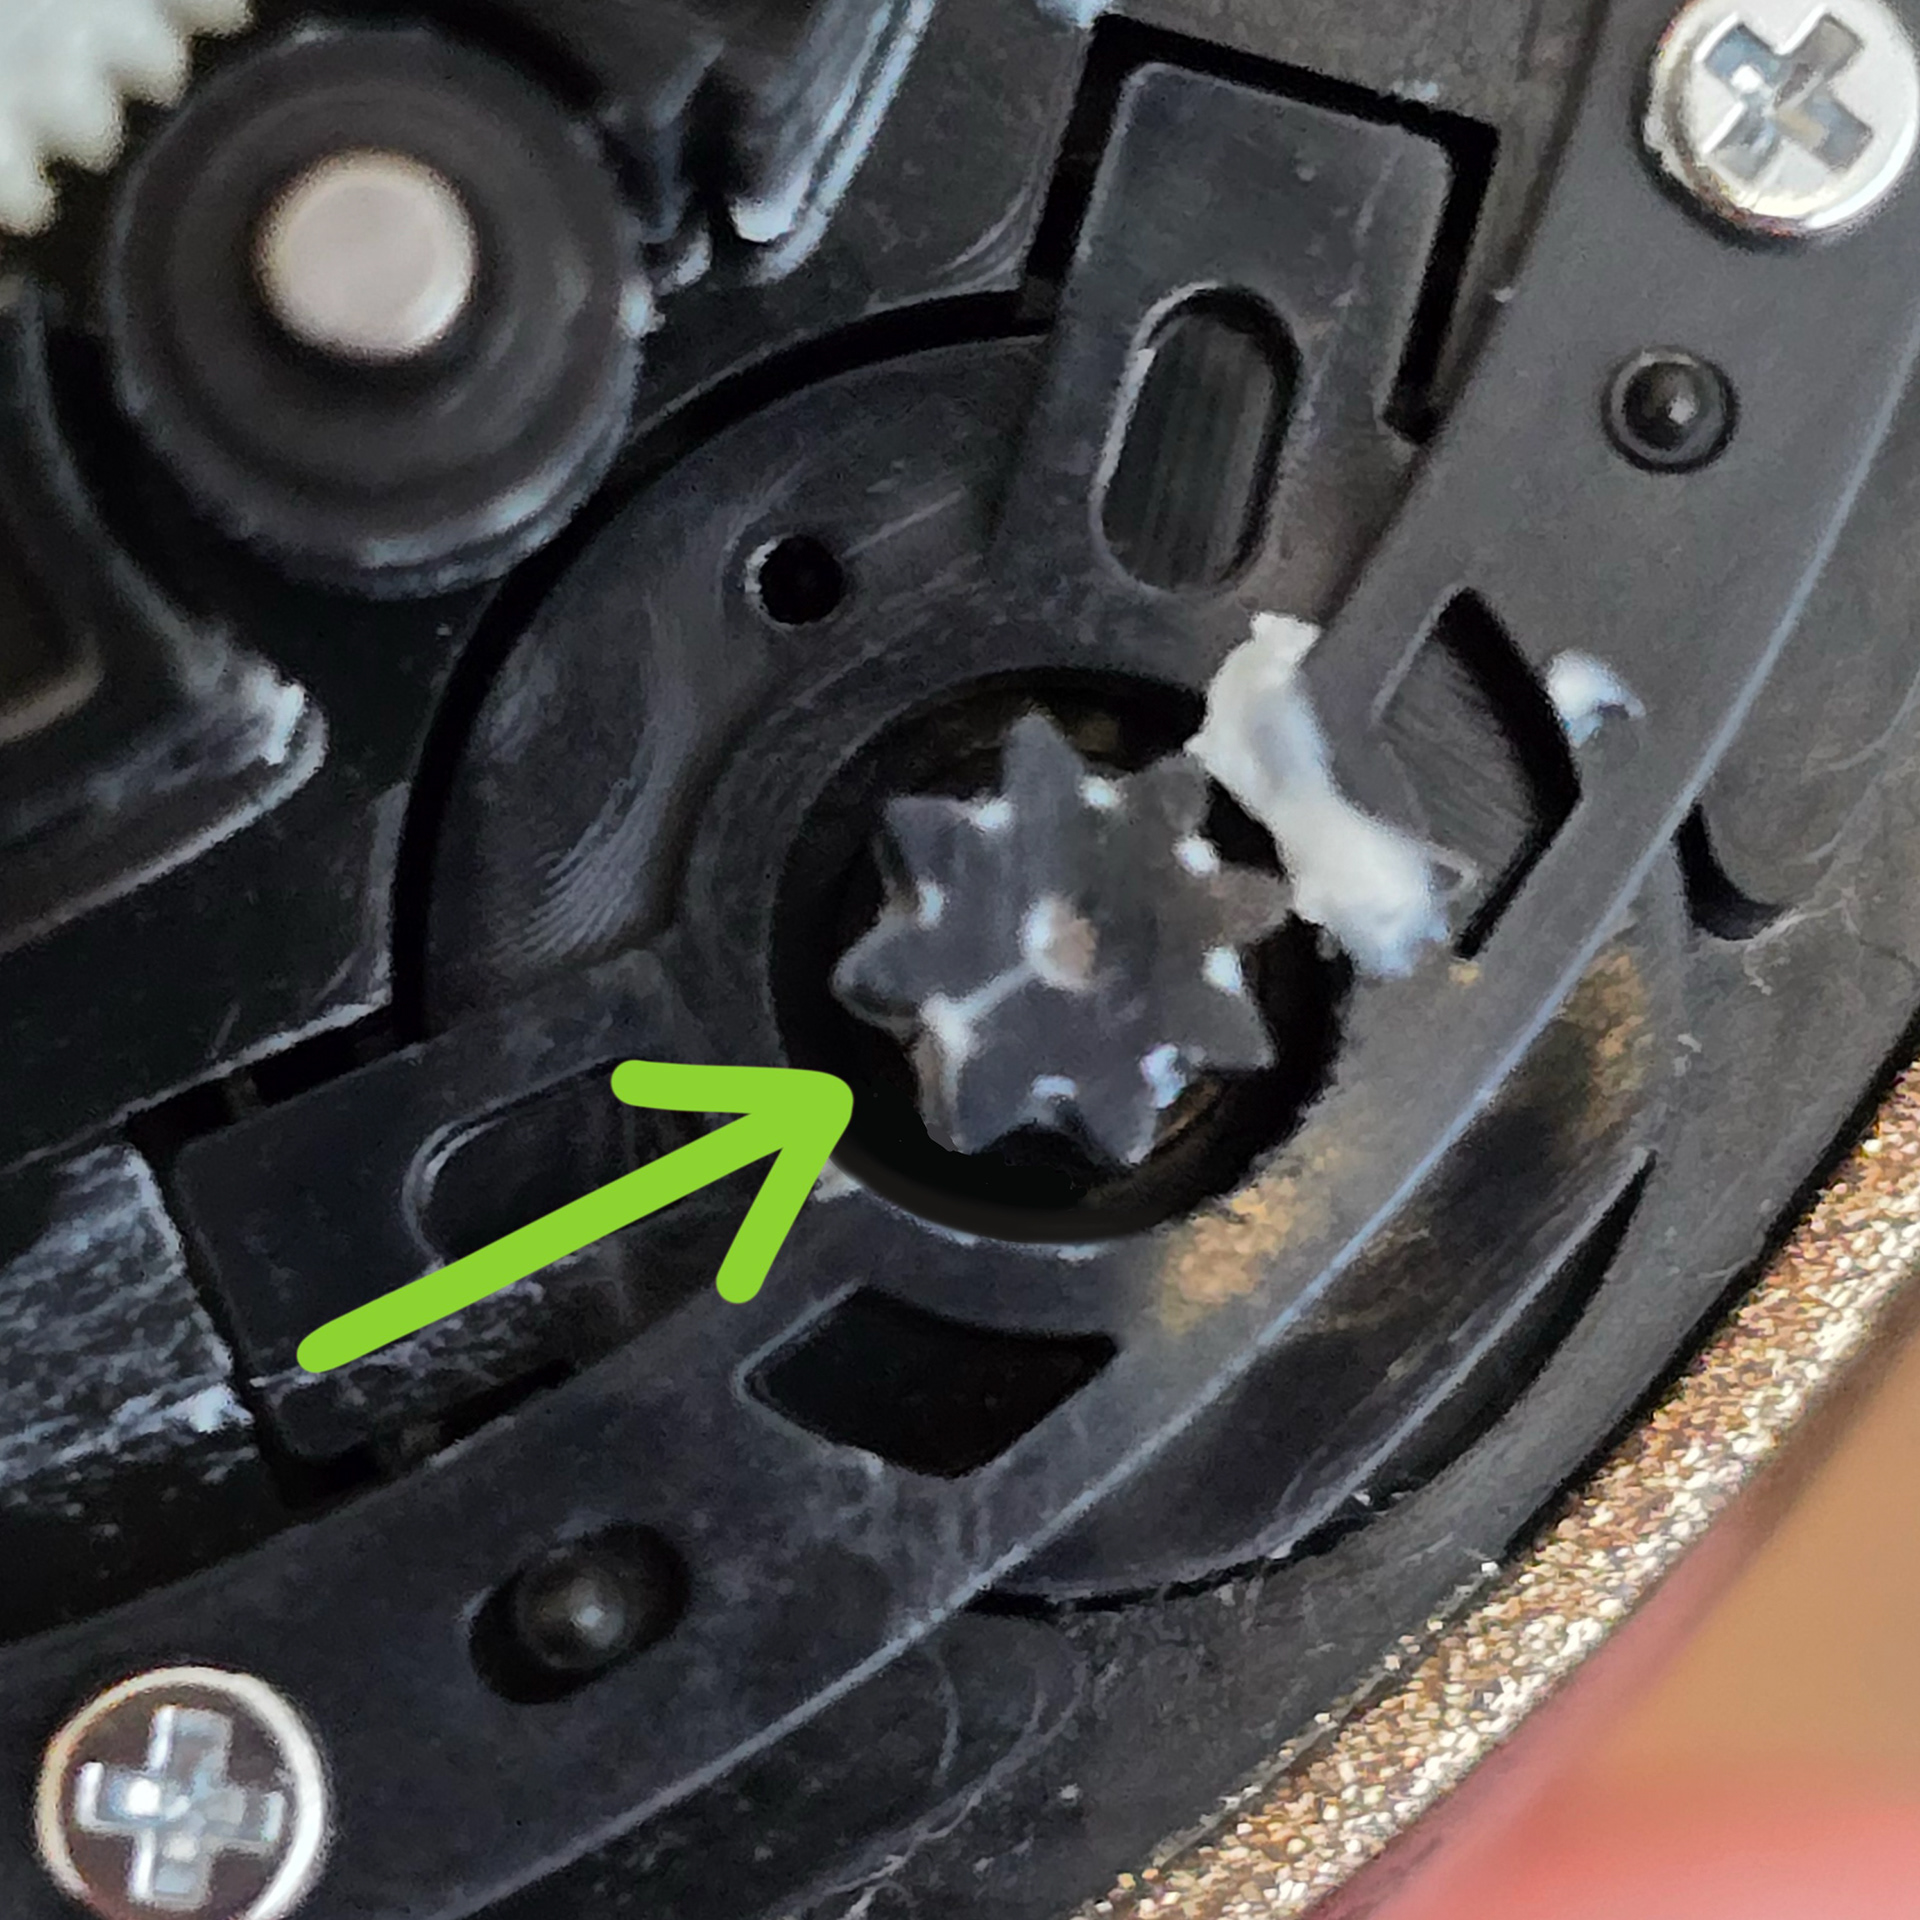
Lift up and remove the wheel layer that has the Rolly's tyre attached. Be careful not to drop and loose the spacers. Once this is removed we can clearly see the pinion gear. If you look closely you should see a line (or more) running through it. This is the crack.
Rollyのタイヤが取り付けられているホイールレイヤーを持ち上げて取り外します。スペーサーを落として緩めないように注意してください。これを外すと、ピニオンギアがはっきりと見えます。よく見ると、そこに線(またはそれ以上)が走っているのが見えるはずです。これが亀裂です。
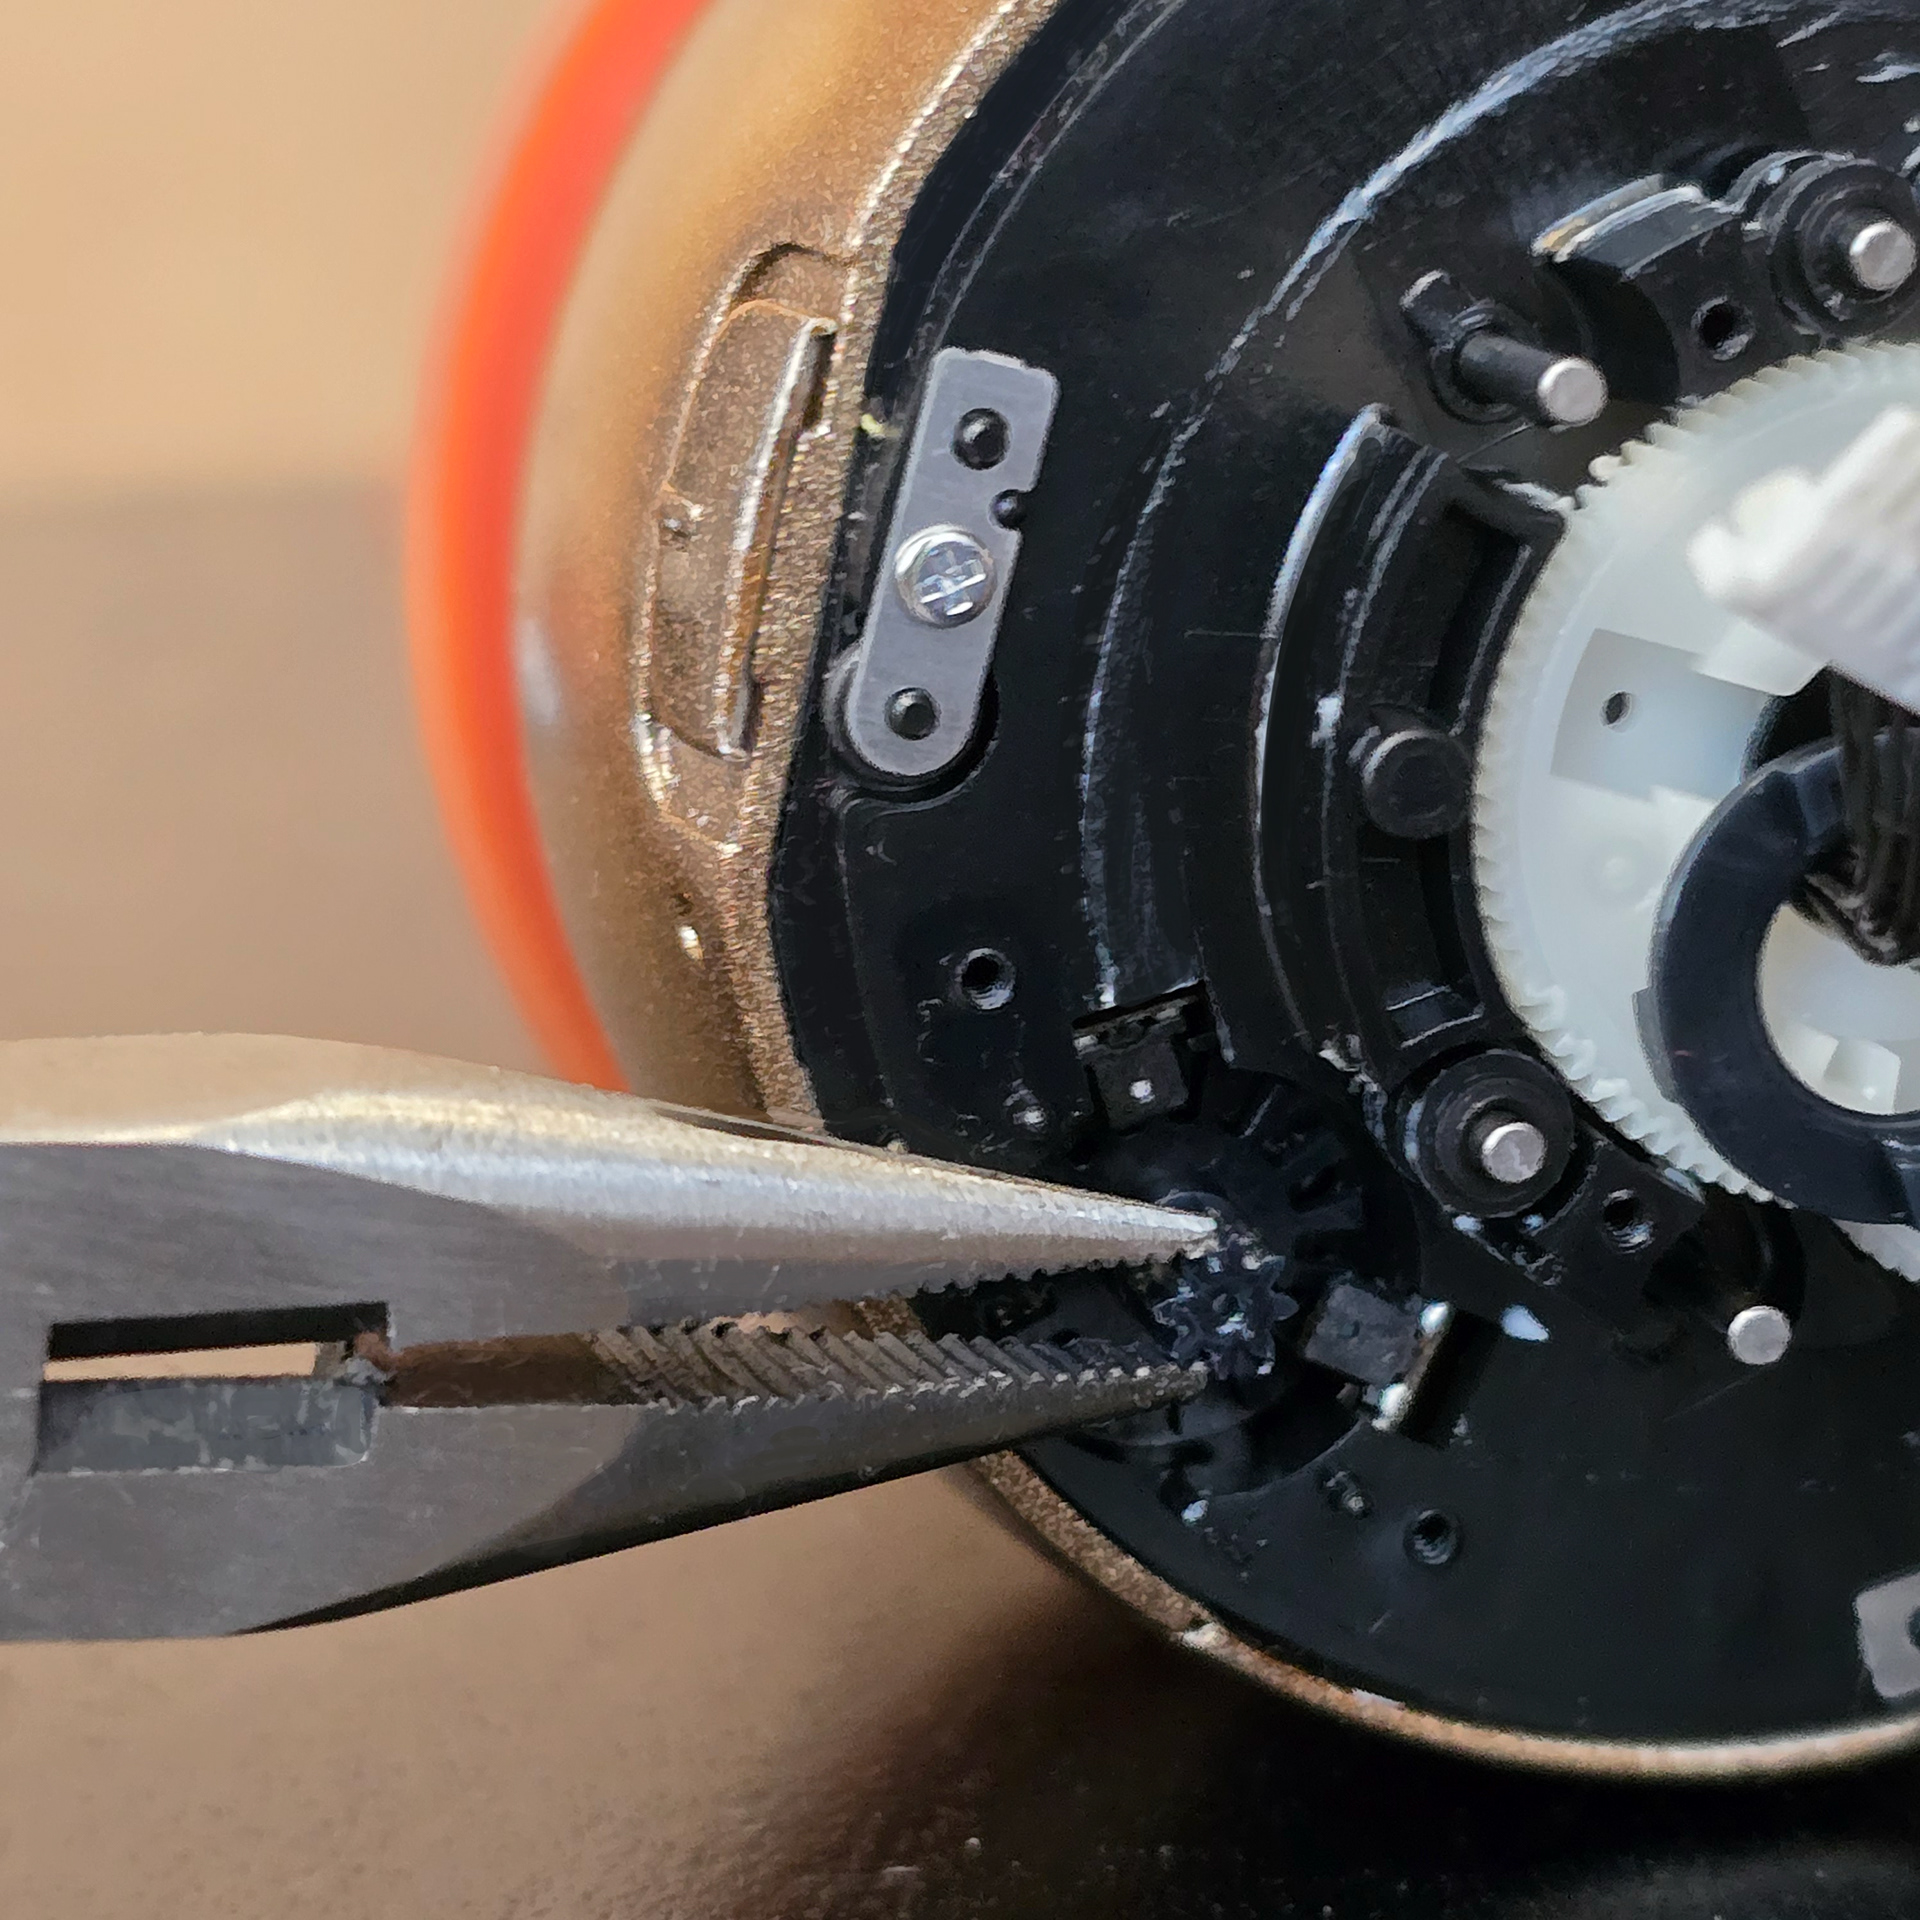
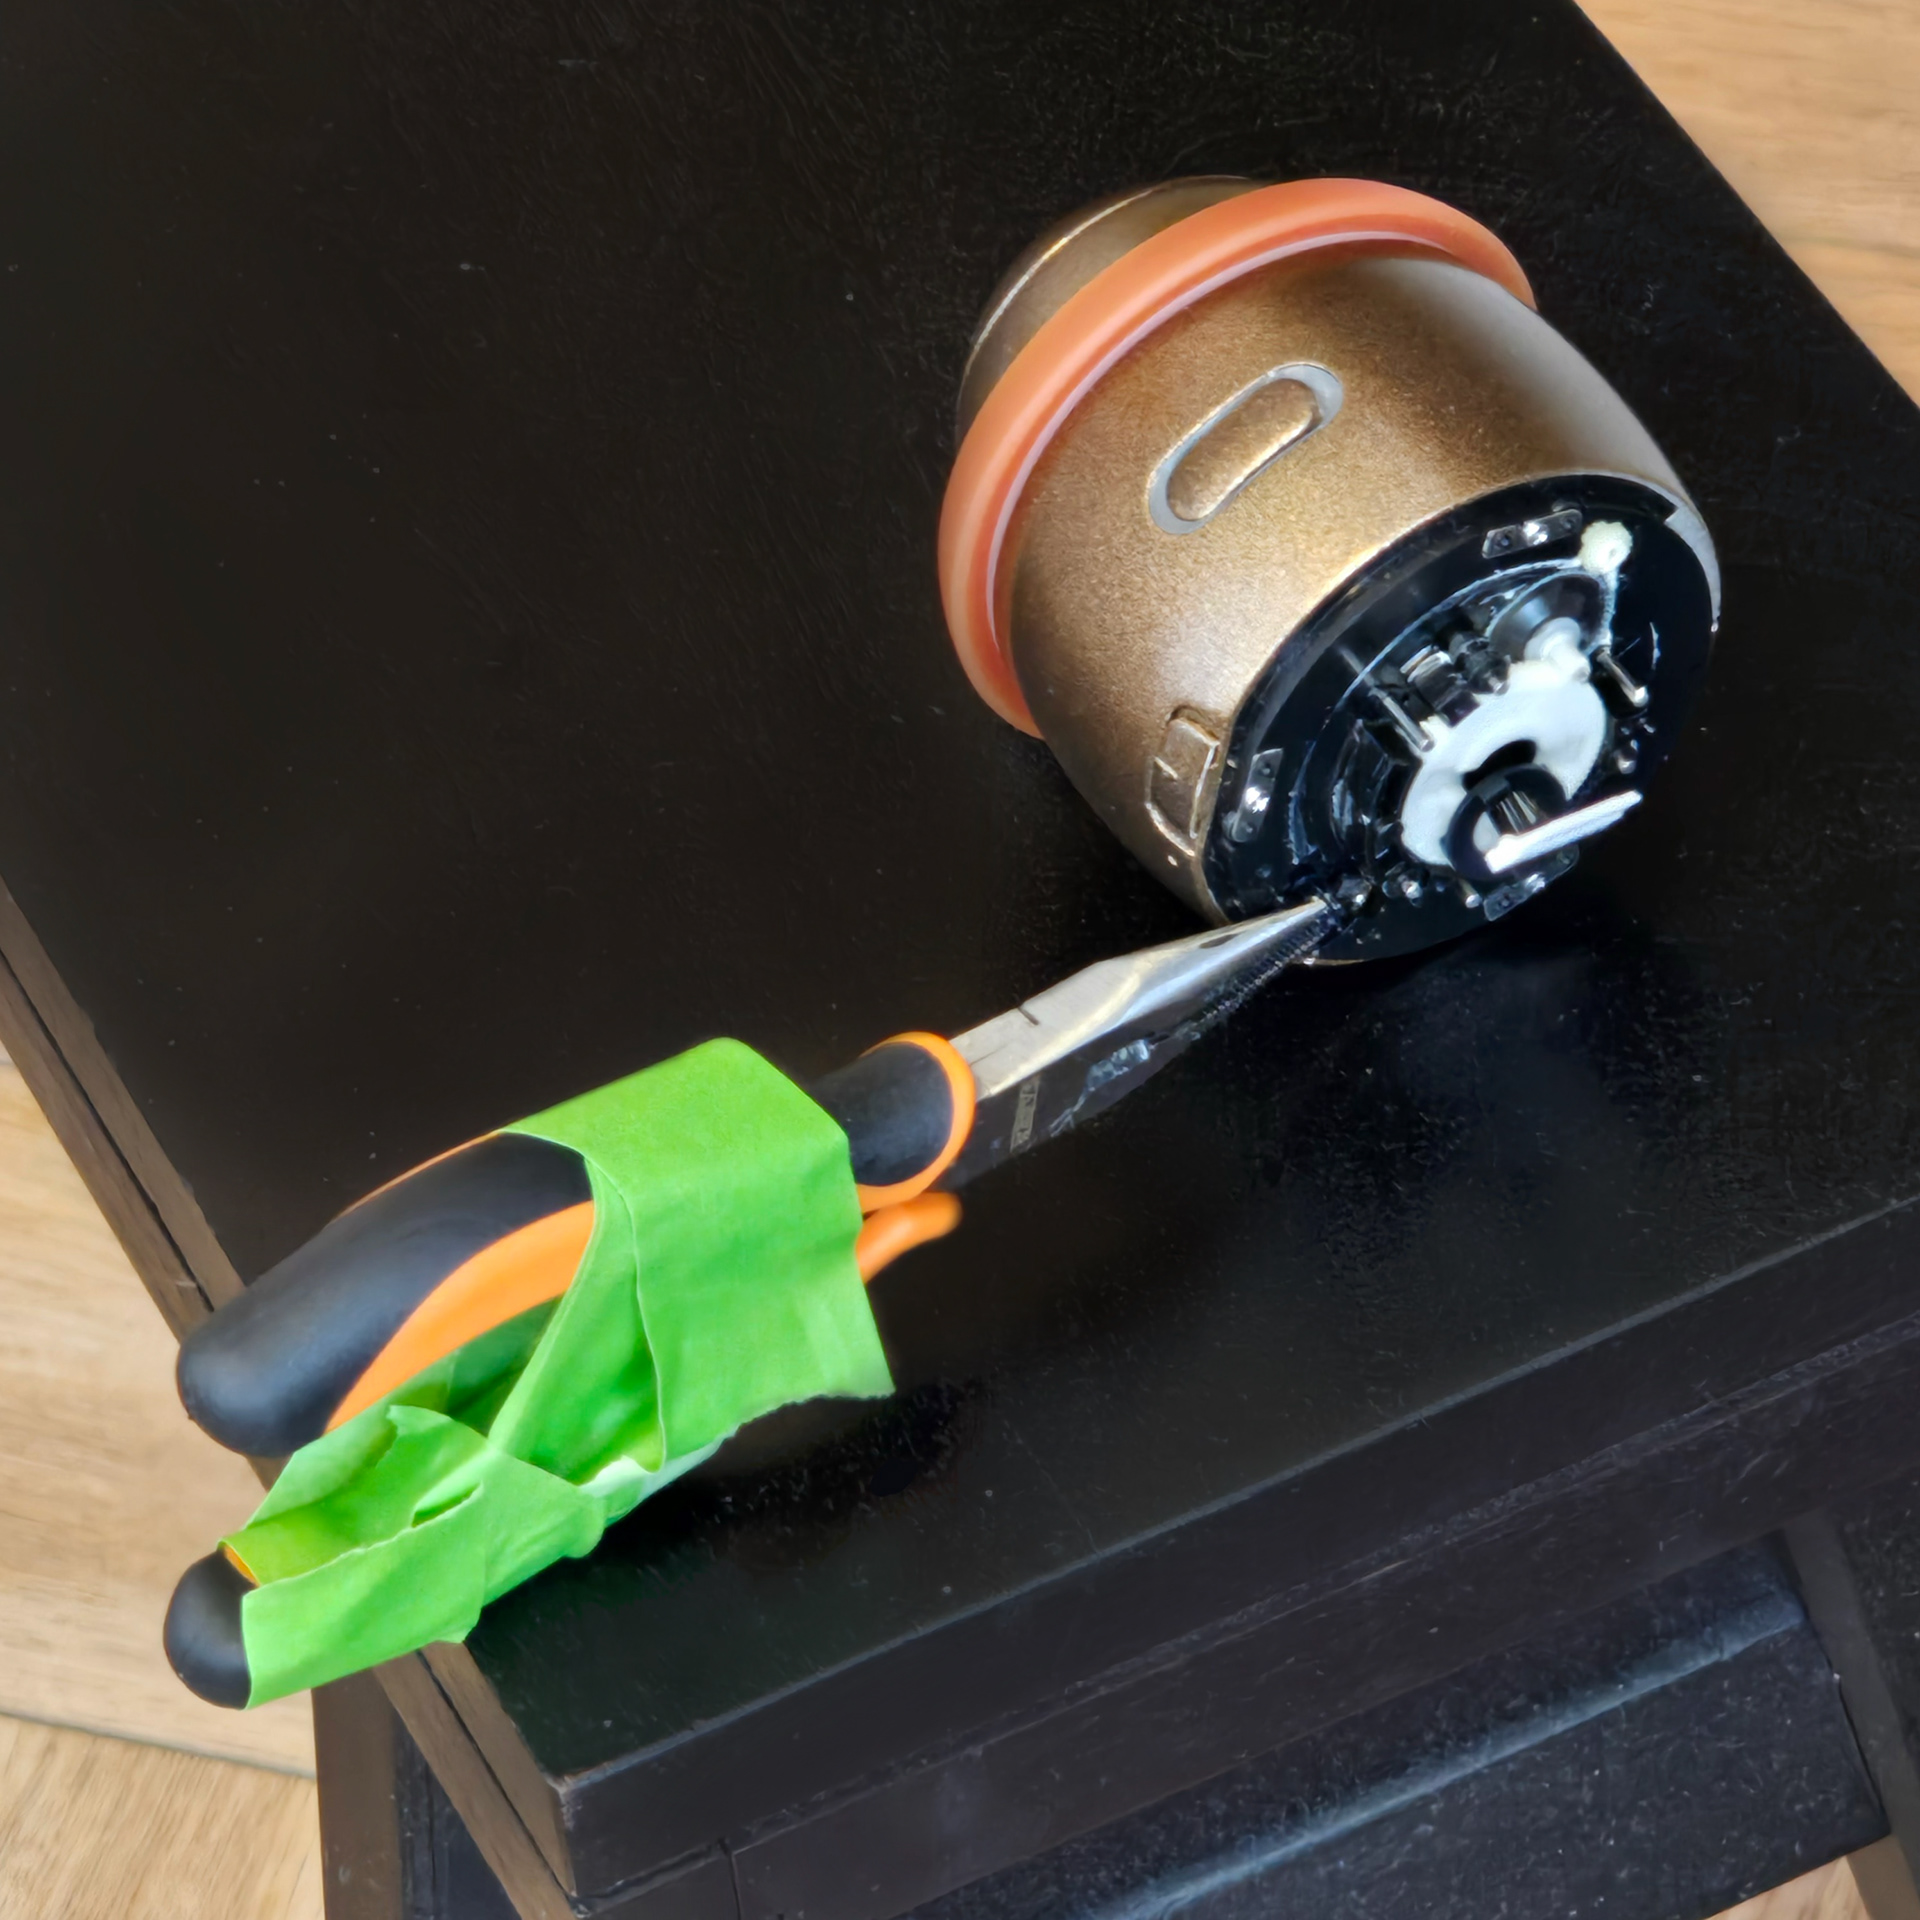
Use a scalpel to put 2-part epoxy glue into the crack, clamp the gear together and leave for 24-hours. You may need to sand excess glue away to ensure the gear meshes well with other gears and turns.
There may still be sound/resistance once the gear is repaired, but it should be fixed enough for the Rolly to operate.
メスを使って2液性エポキシ接着剤を亀裂に注入し、ギアをしっかりと固定して24時間放置します。ギアが他のギアとしっかりと噛み合って回転するように、余分な接着剤をやすりで削り取る必要があるかもしれません。
ギアの修理後も音や抵抗が残る場合がありますが、Rollyが動作するには十分に修復されているはずです
ギアの修理後も音や抵抗が残る場合がありますが、Rollyが動作するには十分に修復されているはずです
From my experience this method only works some of the times, and even when it does work it's still not 100% perfect. It really depends on the gear's condition and how many cracks it has. When dealing with something so small, it is hard to get it to the right size again. I would say try this method, but really I think for long term a replacement part should be made.
私の経験上、この方法はうまくいく場合とうまくいかない場合があり、うまくいったとしても100%完璧ではありません。ギアの状態やひび割れの数によって大きく左右されます。これほど小さな部品の場合、元のサイズに戻すのは困難です。この方法を試してみるのも良いと思いますが、長期的な視点で考えると、交換部品を作る方が良いと思います。
Hopefully, once you reassemble the Rolly correctly it should be able to now dance without stopping. I think Janus Cycle came up with this repair method, so I'm going to credit him with it!
Rolly を正しく組み立てれば、止まることなく踊り回れるようになるはずです。この修理方法は Janus Cycle が考案したと思いますので、彼に功績を認めてもらいます。