
Here is a simple guide on how to remove the ERS-110 and ERS-111 ear hub for rebuilding or head access. I would recommend using a small flat object and tweezers to make things easier.
ERS-110およびERS-111イヤーハブをリビルドやヘッドアクセスのために取り外す方法の簡単なガイドをご紹介します。作業を容易にするために、小さく平らな物とピンセットを使用することをお勧めします。

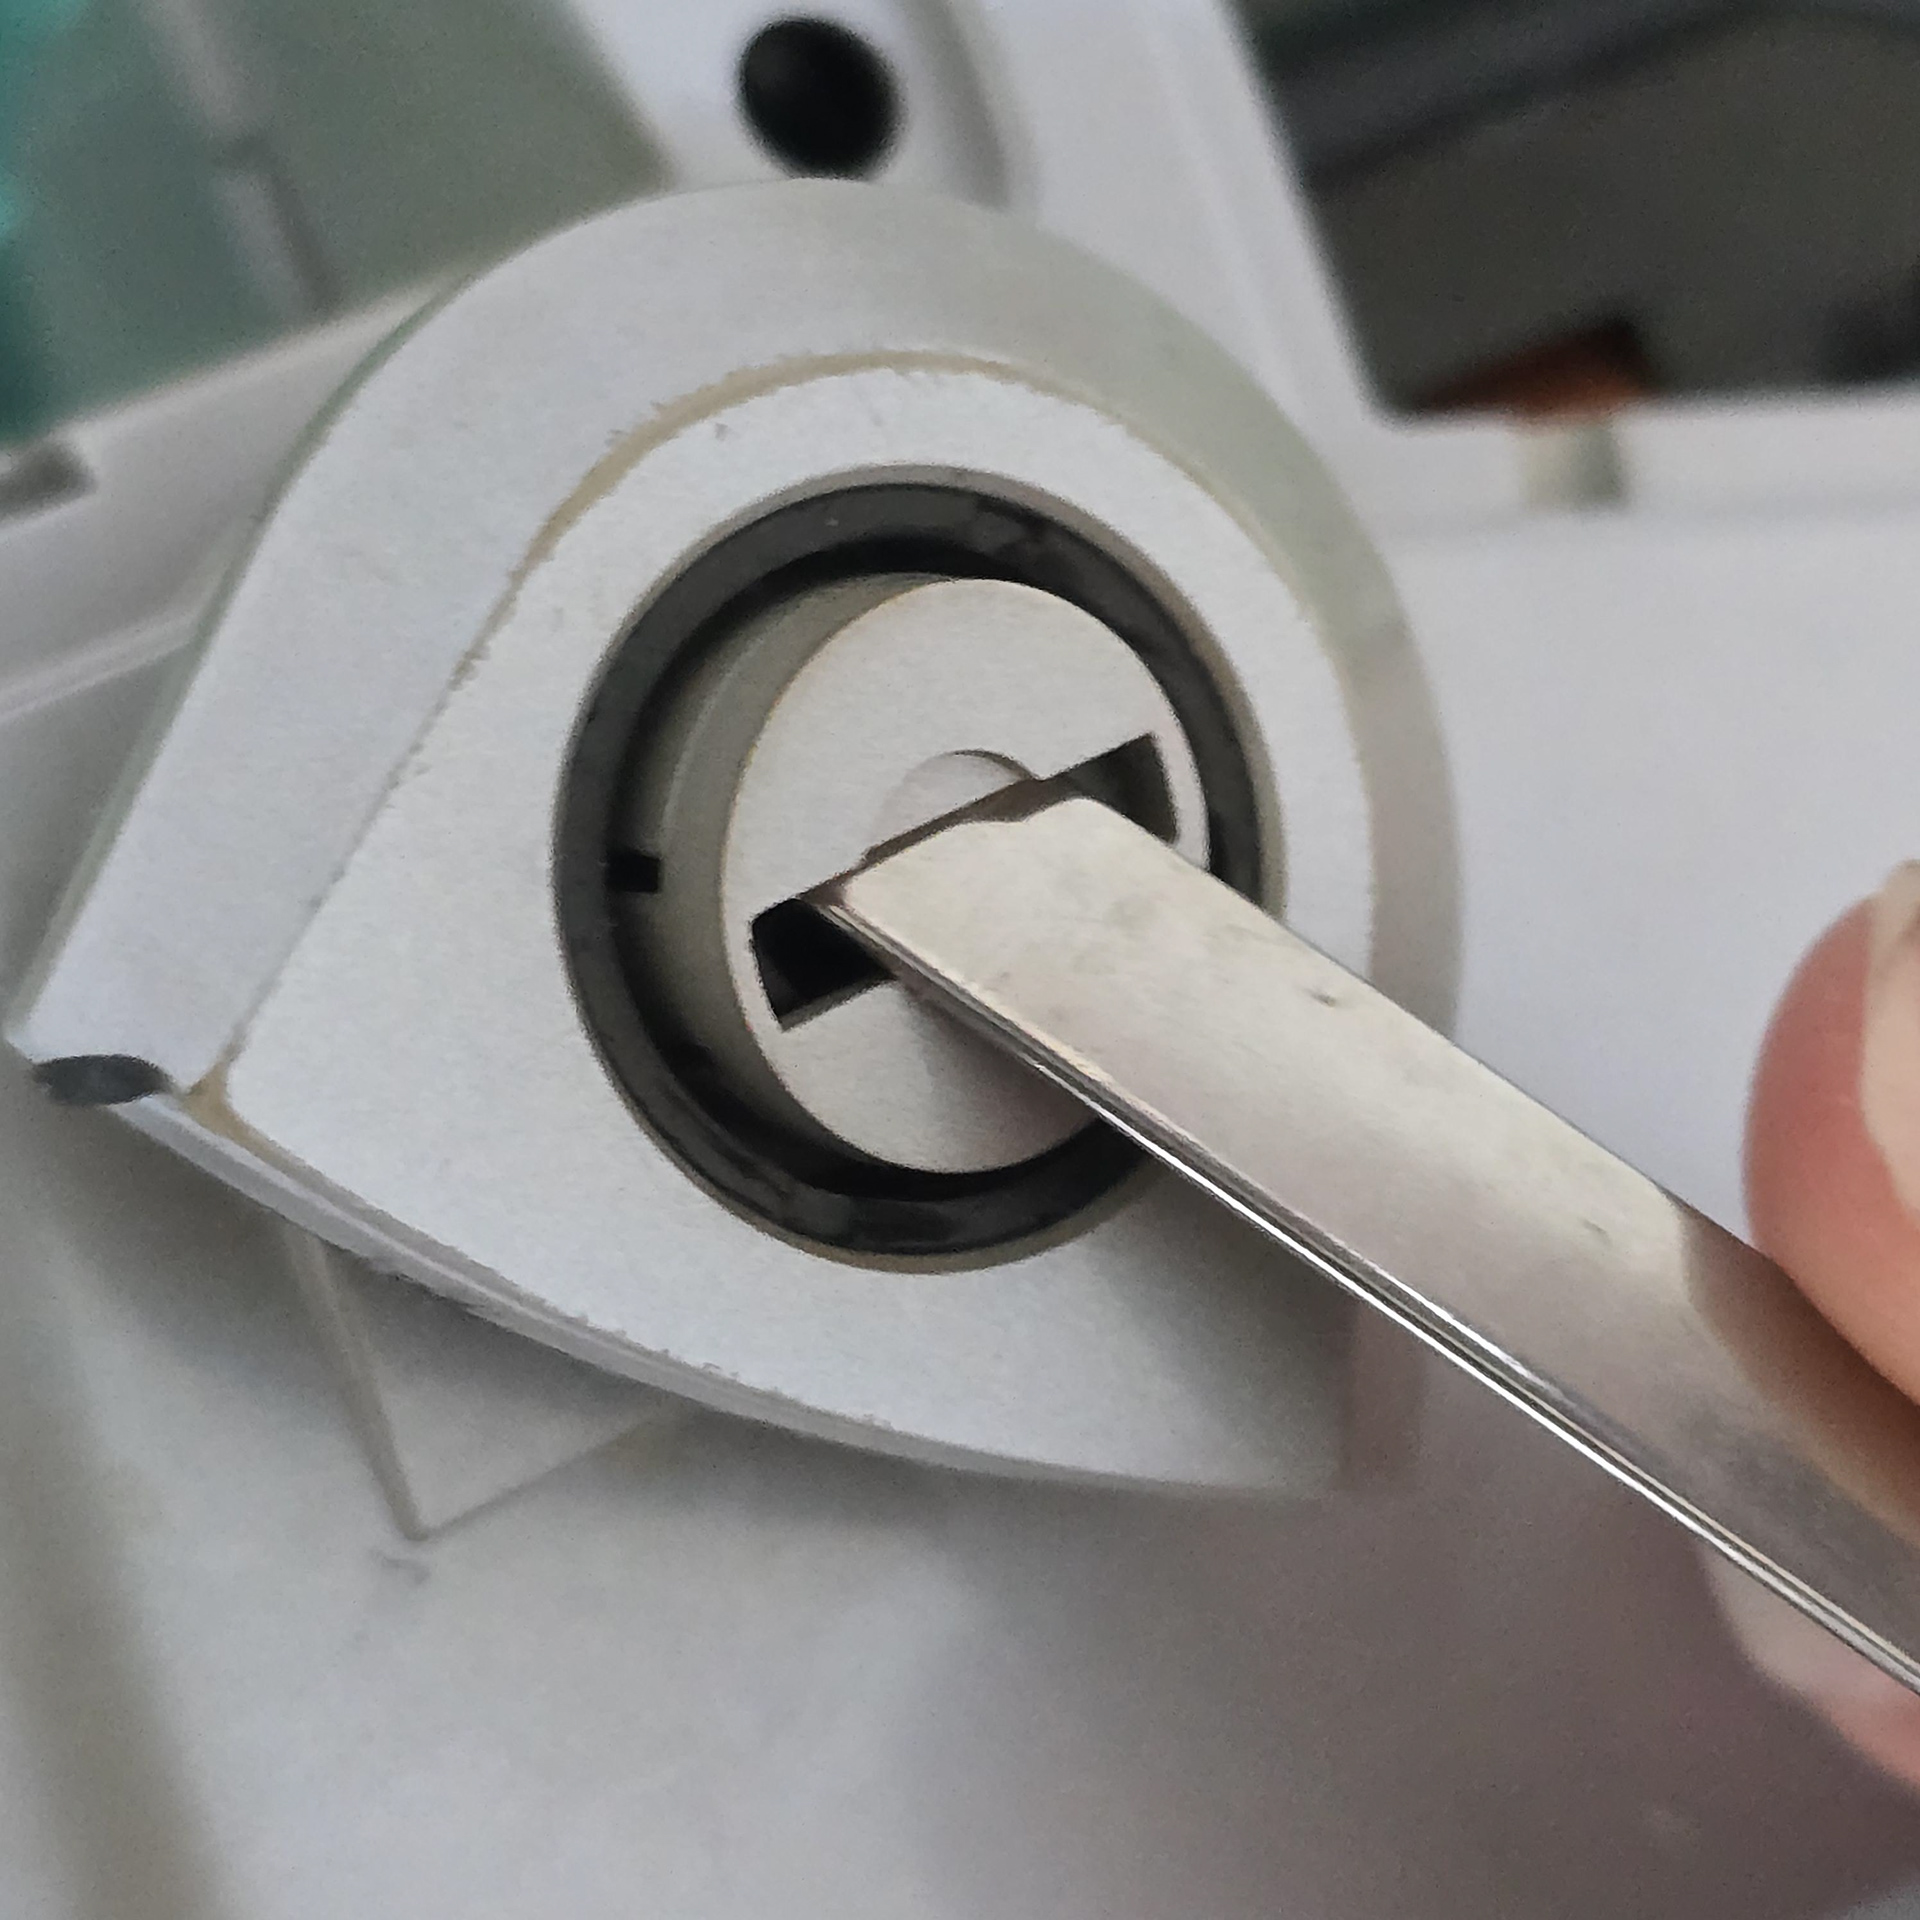
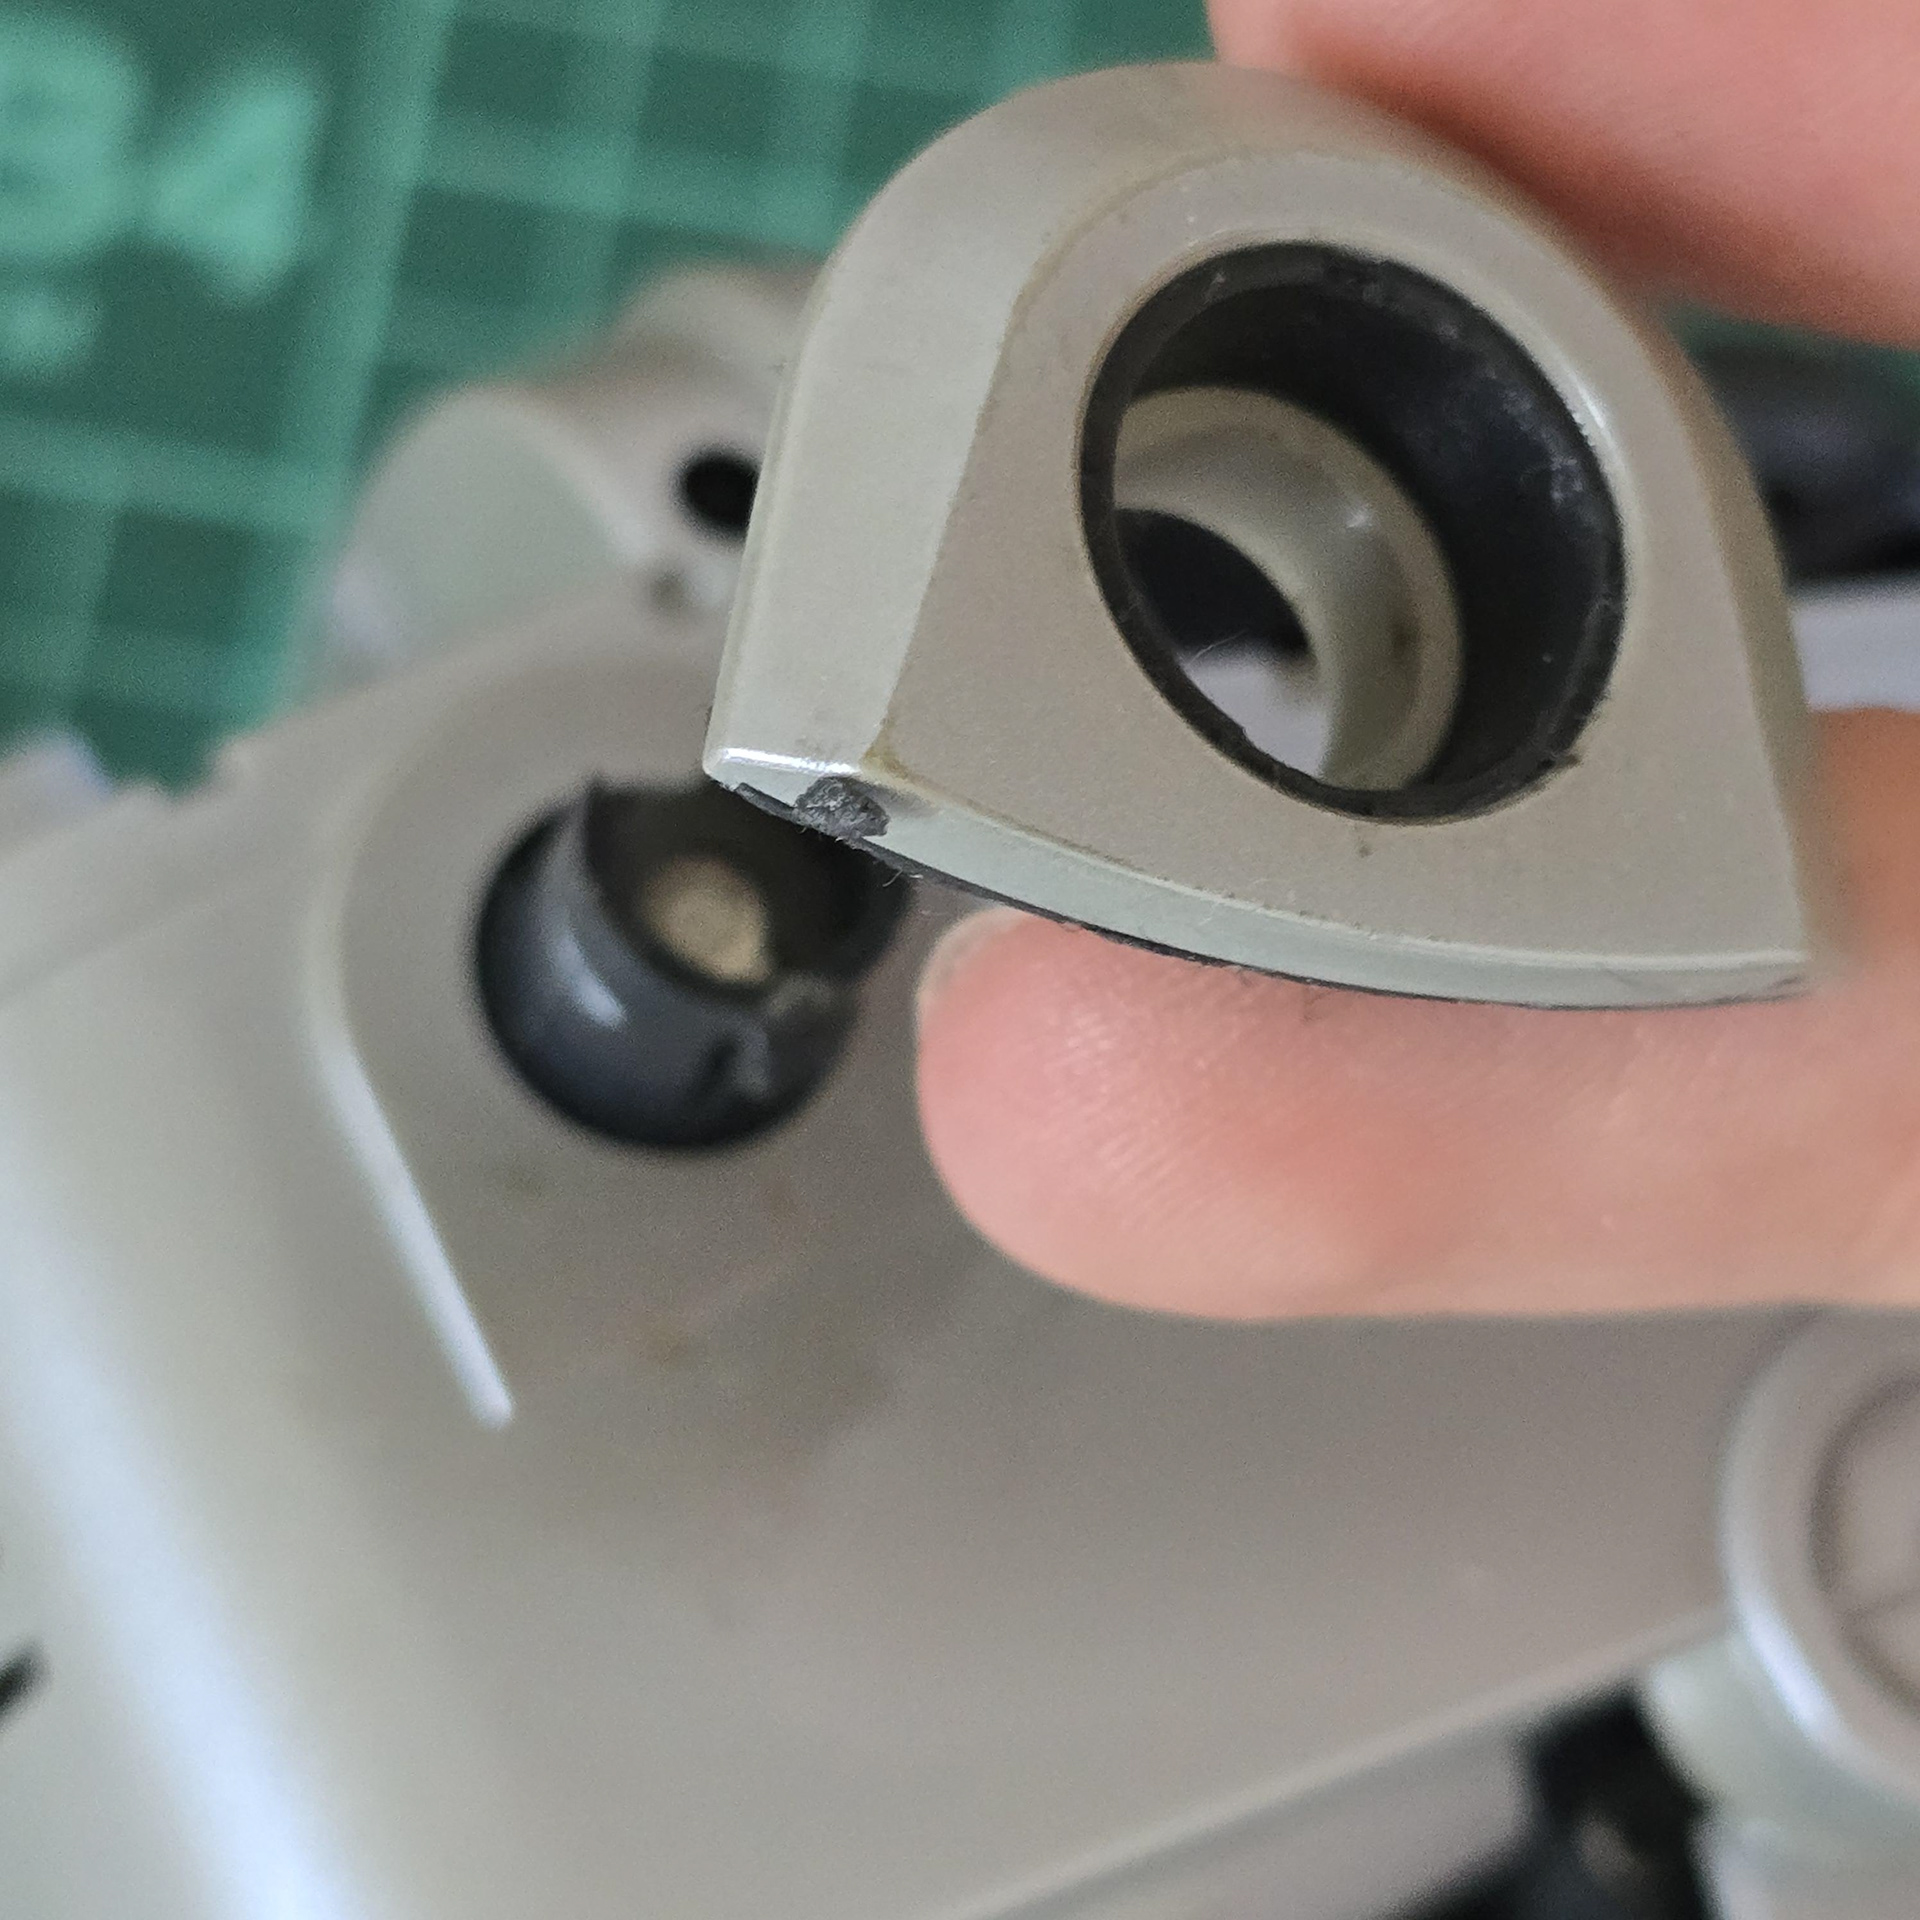
First, insert the flat tool into the middle microphone gap at and angle and pull the plastic forward.
まず、平らなツールを中央のマイクの隙間に斜めに挿入し、プラスチックを前方に引きます。
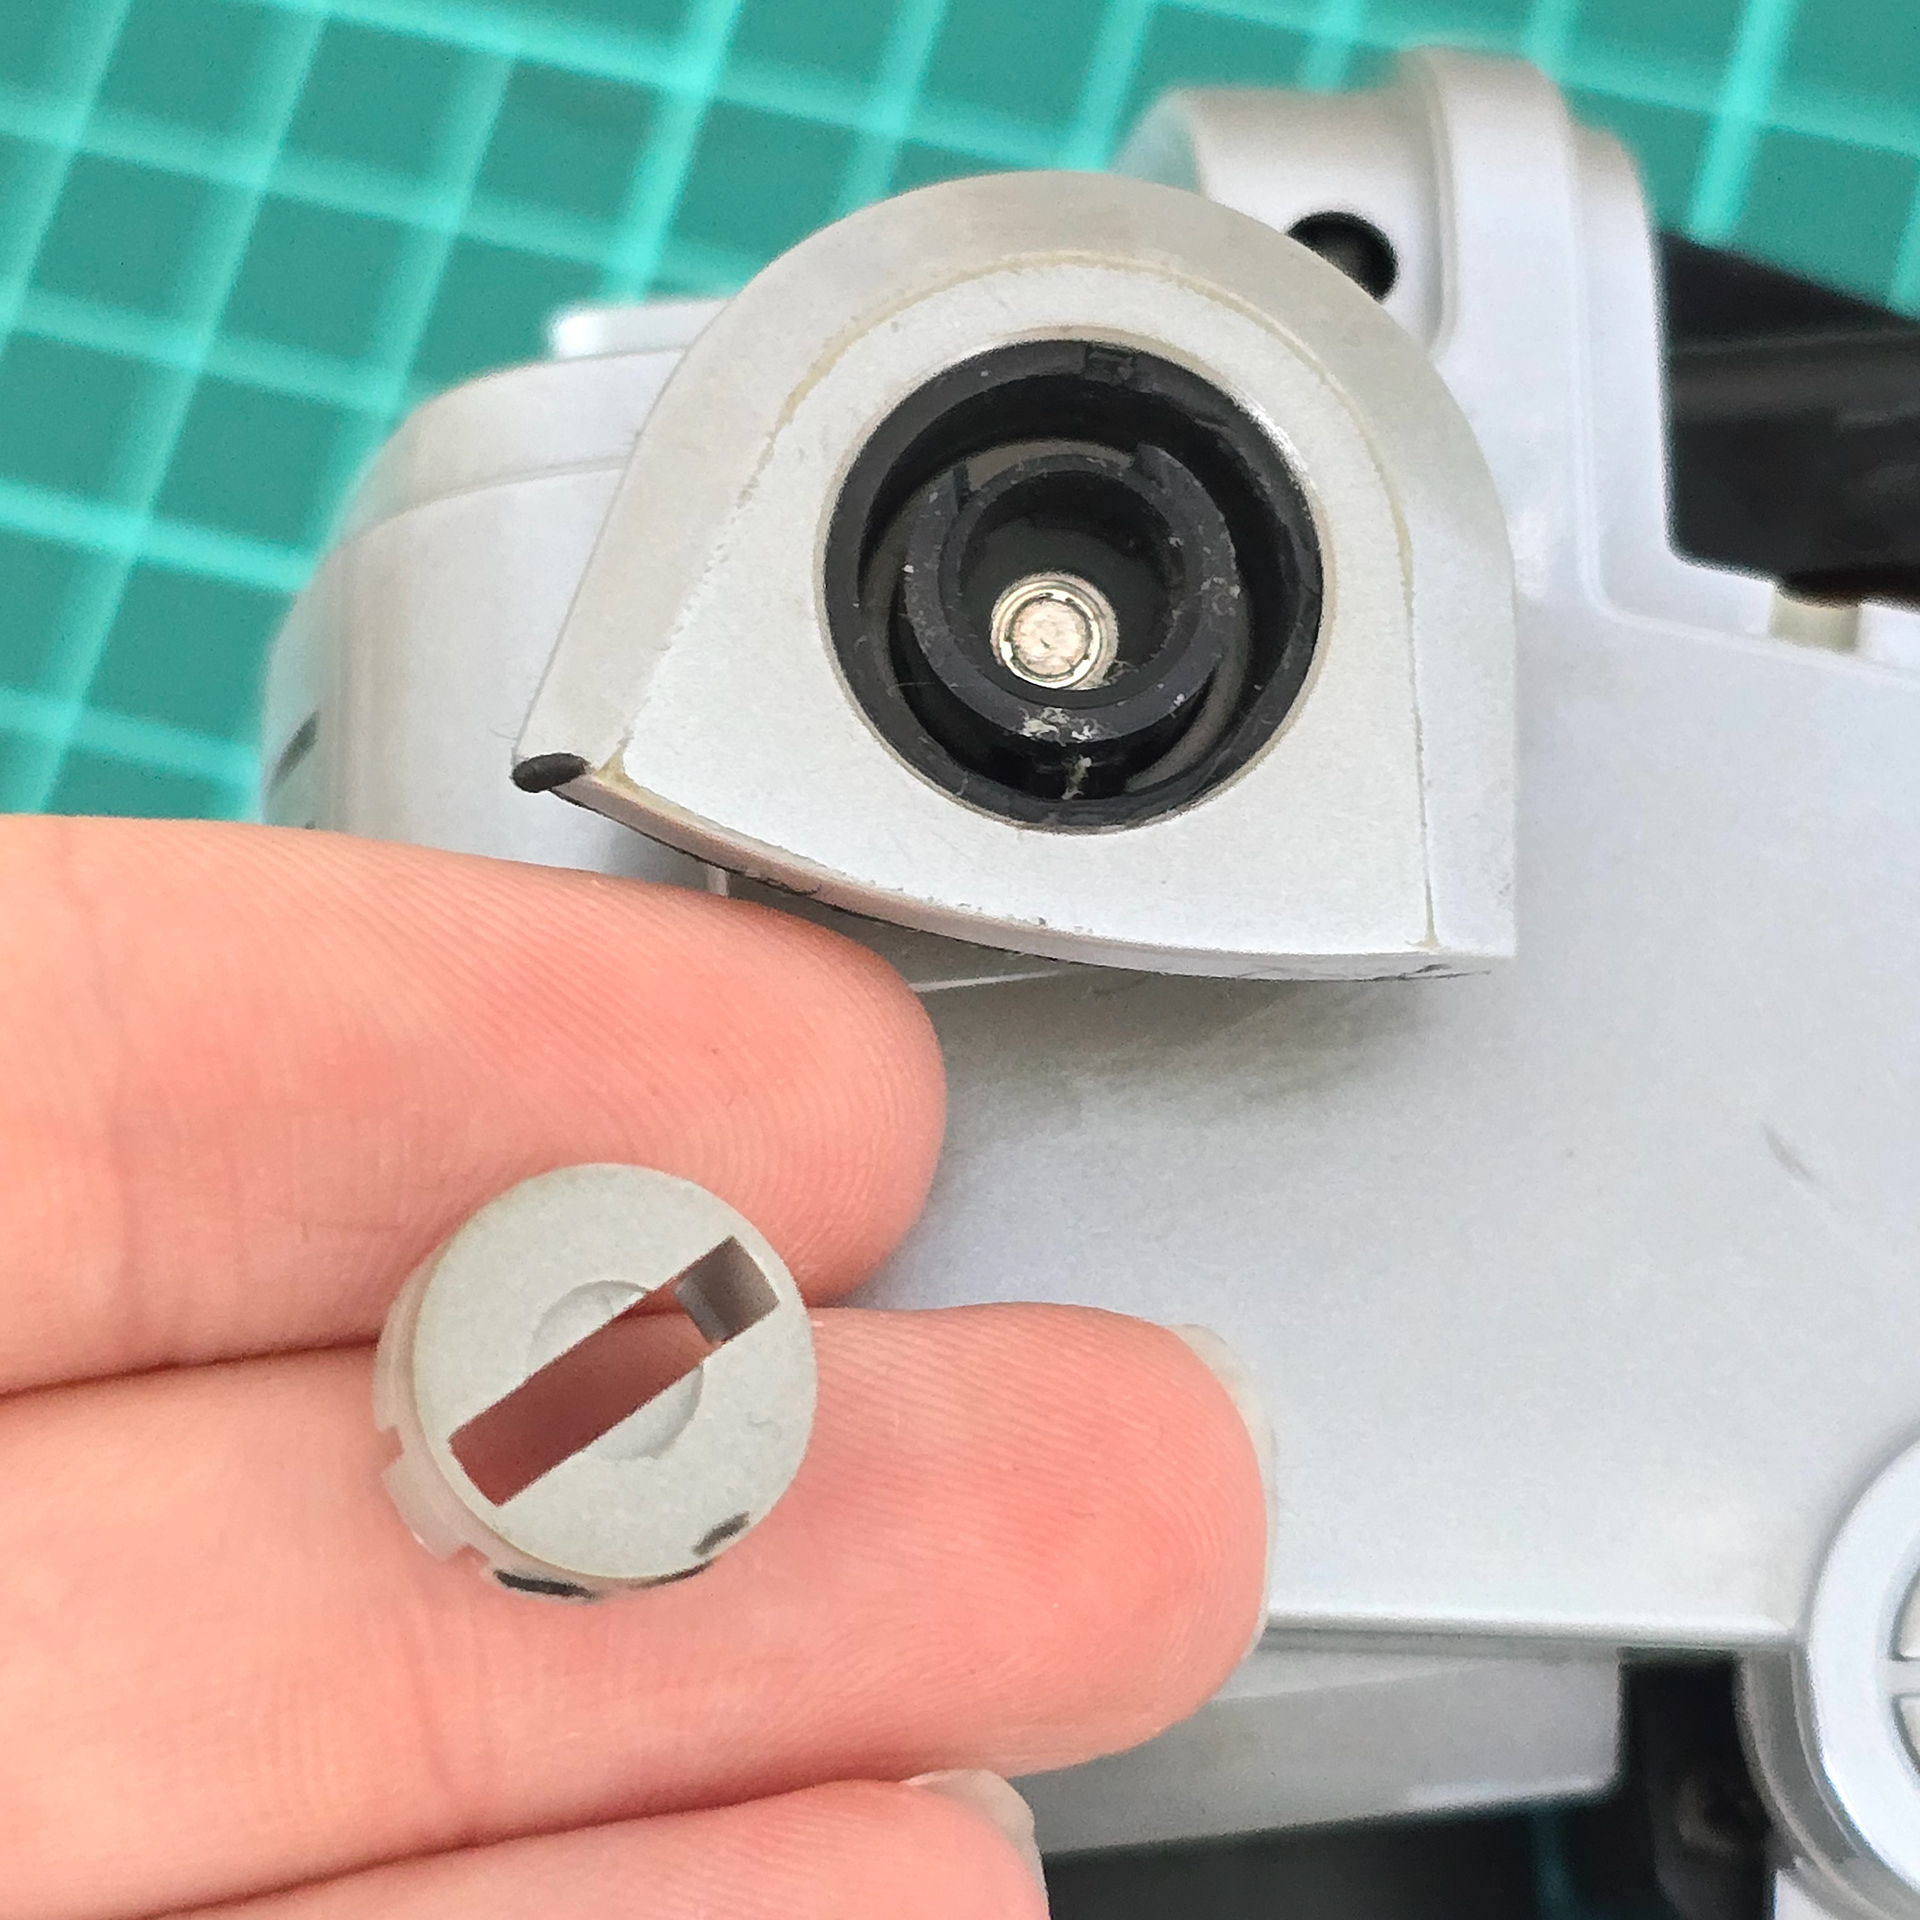
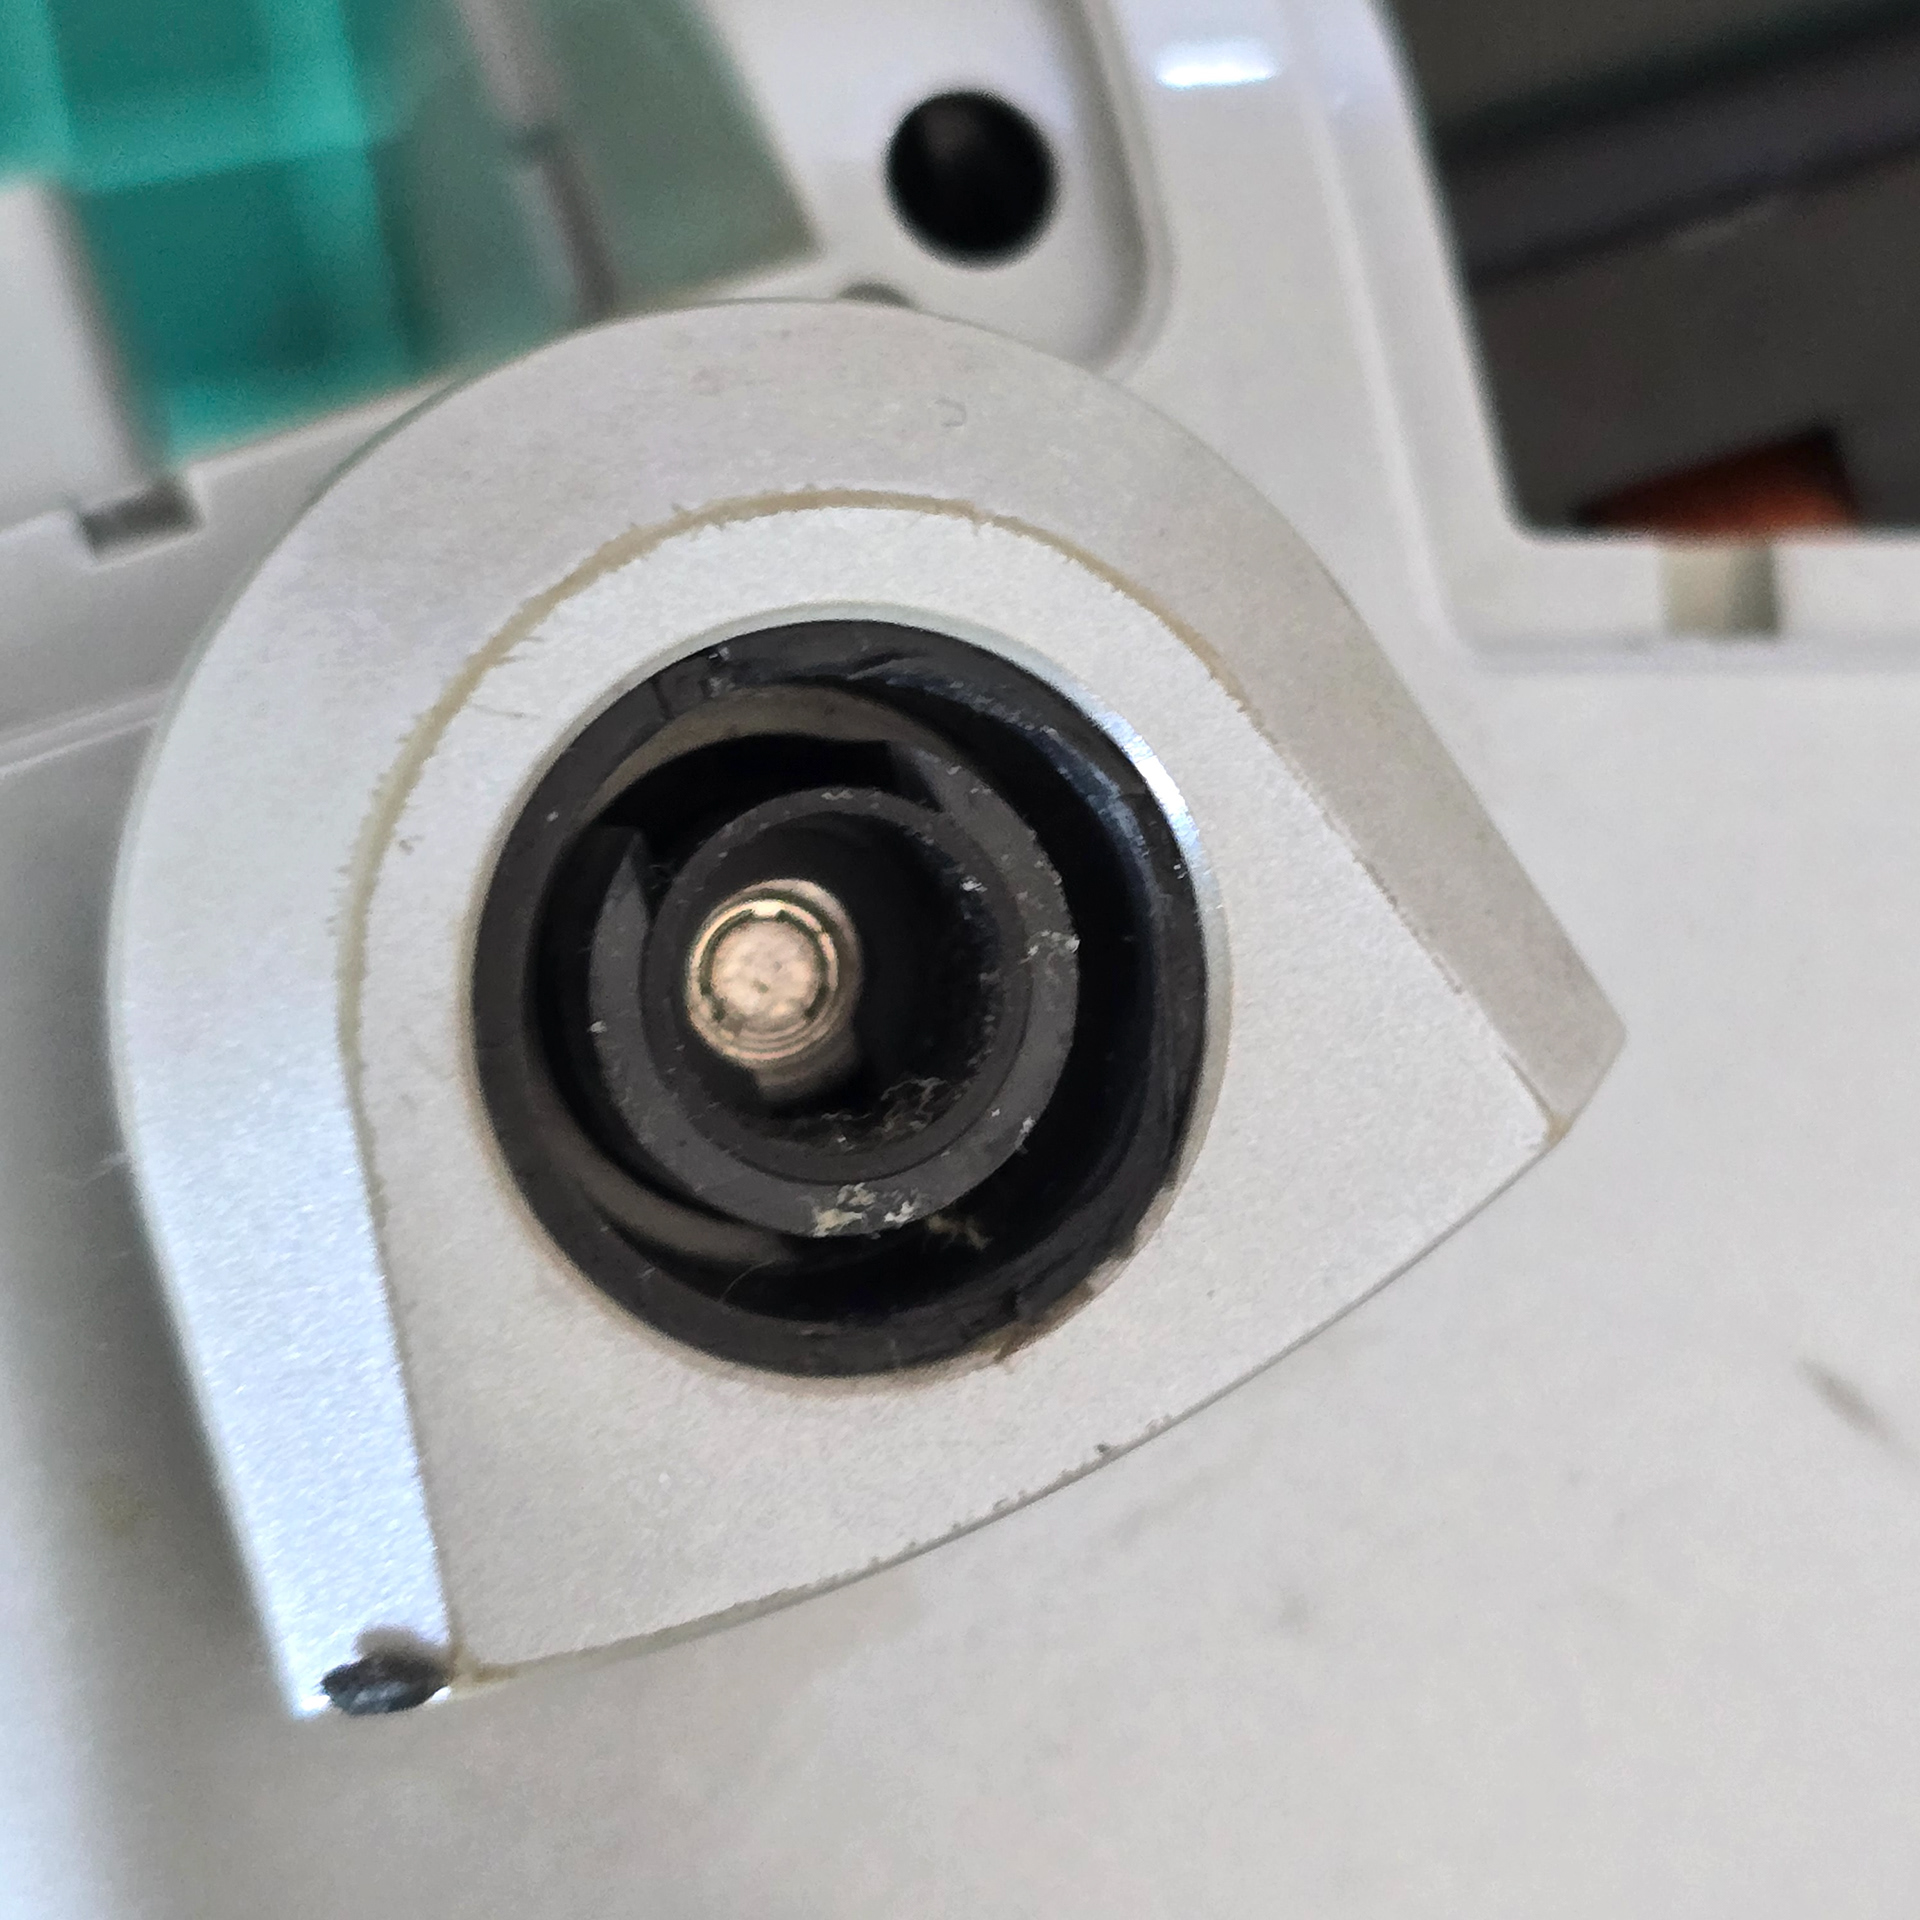
The middle plastic painted part should pop out. Next, if you look into the centre, you will see two layers of black rings - the outer ring which has a gap in it at the top and the centre ring that fits snuggly inside of it.
中央のプラスチックの塗装部分が飛び出します。次に、中央を覗くと、2層の黒いリングが見えます。外側のリングは上部に隙間があり、中央のリングは内側にぴったりと収まっています。
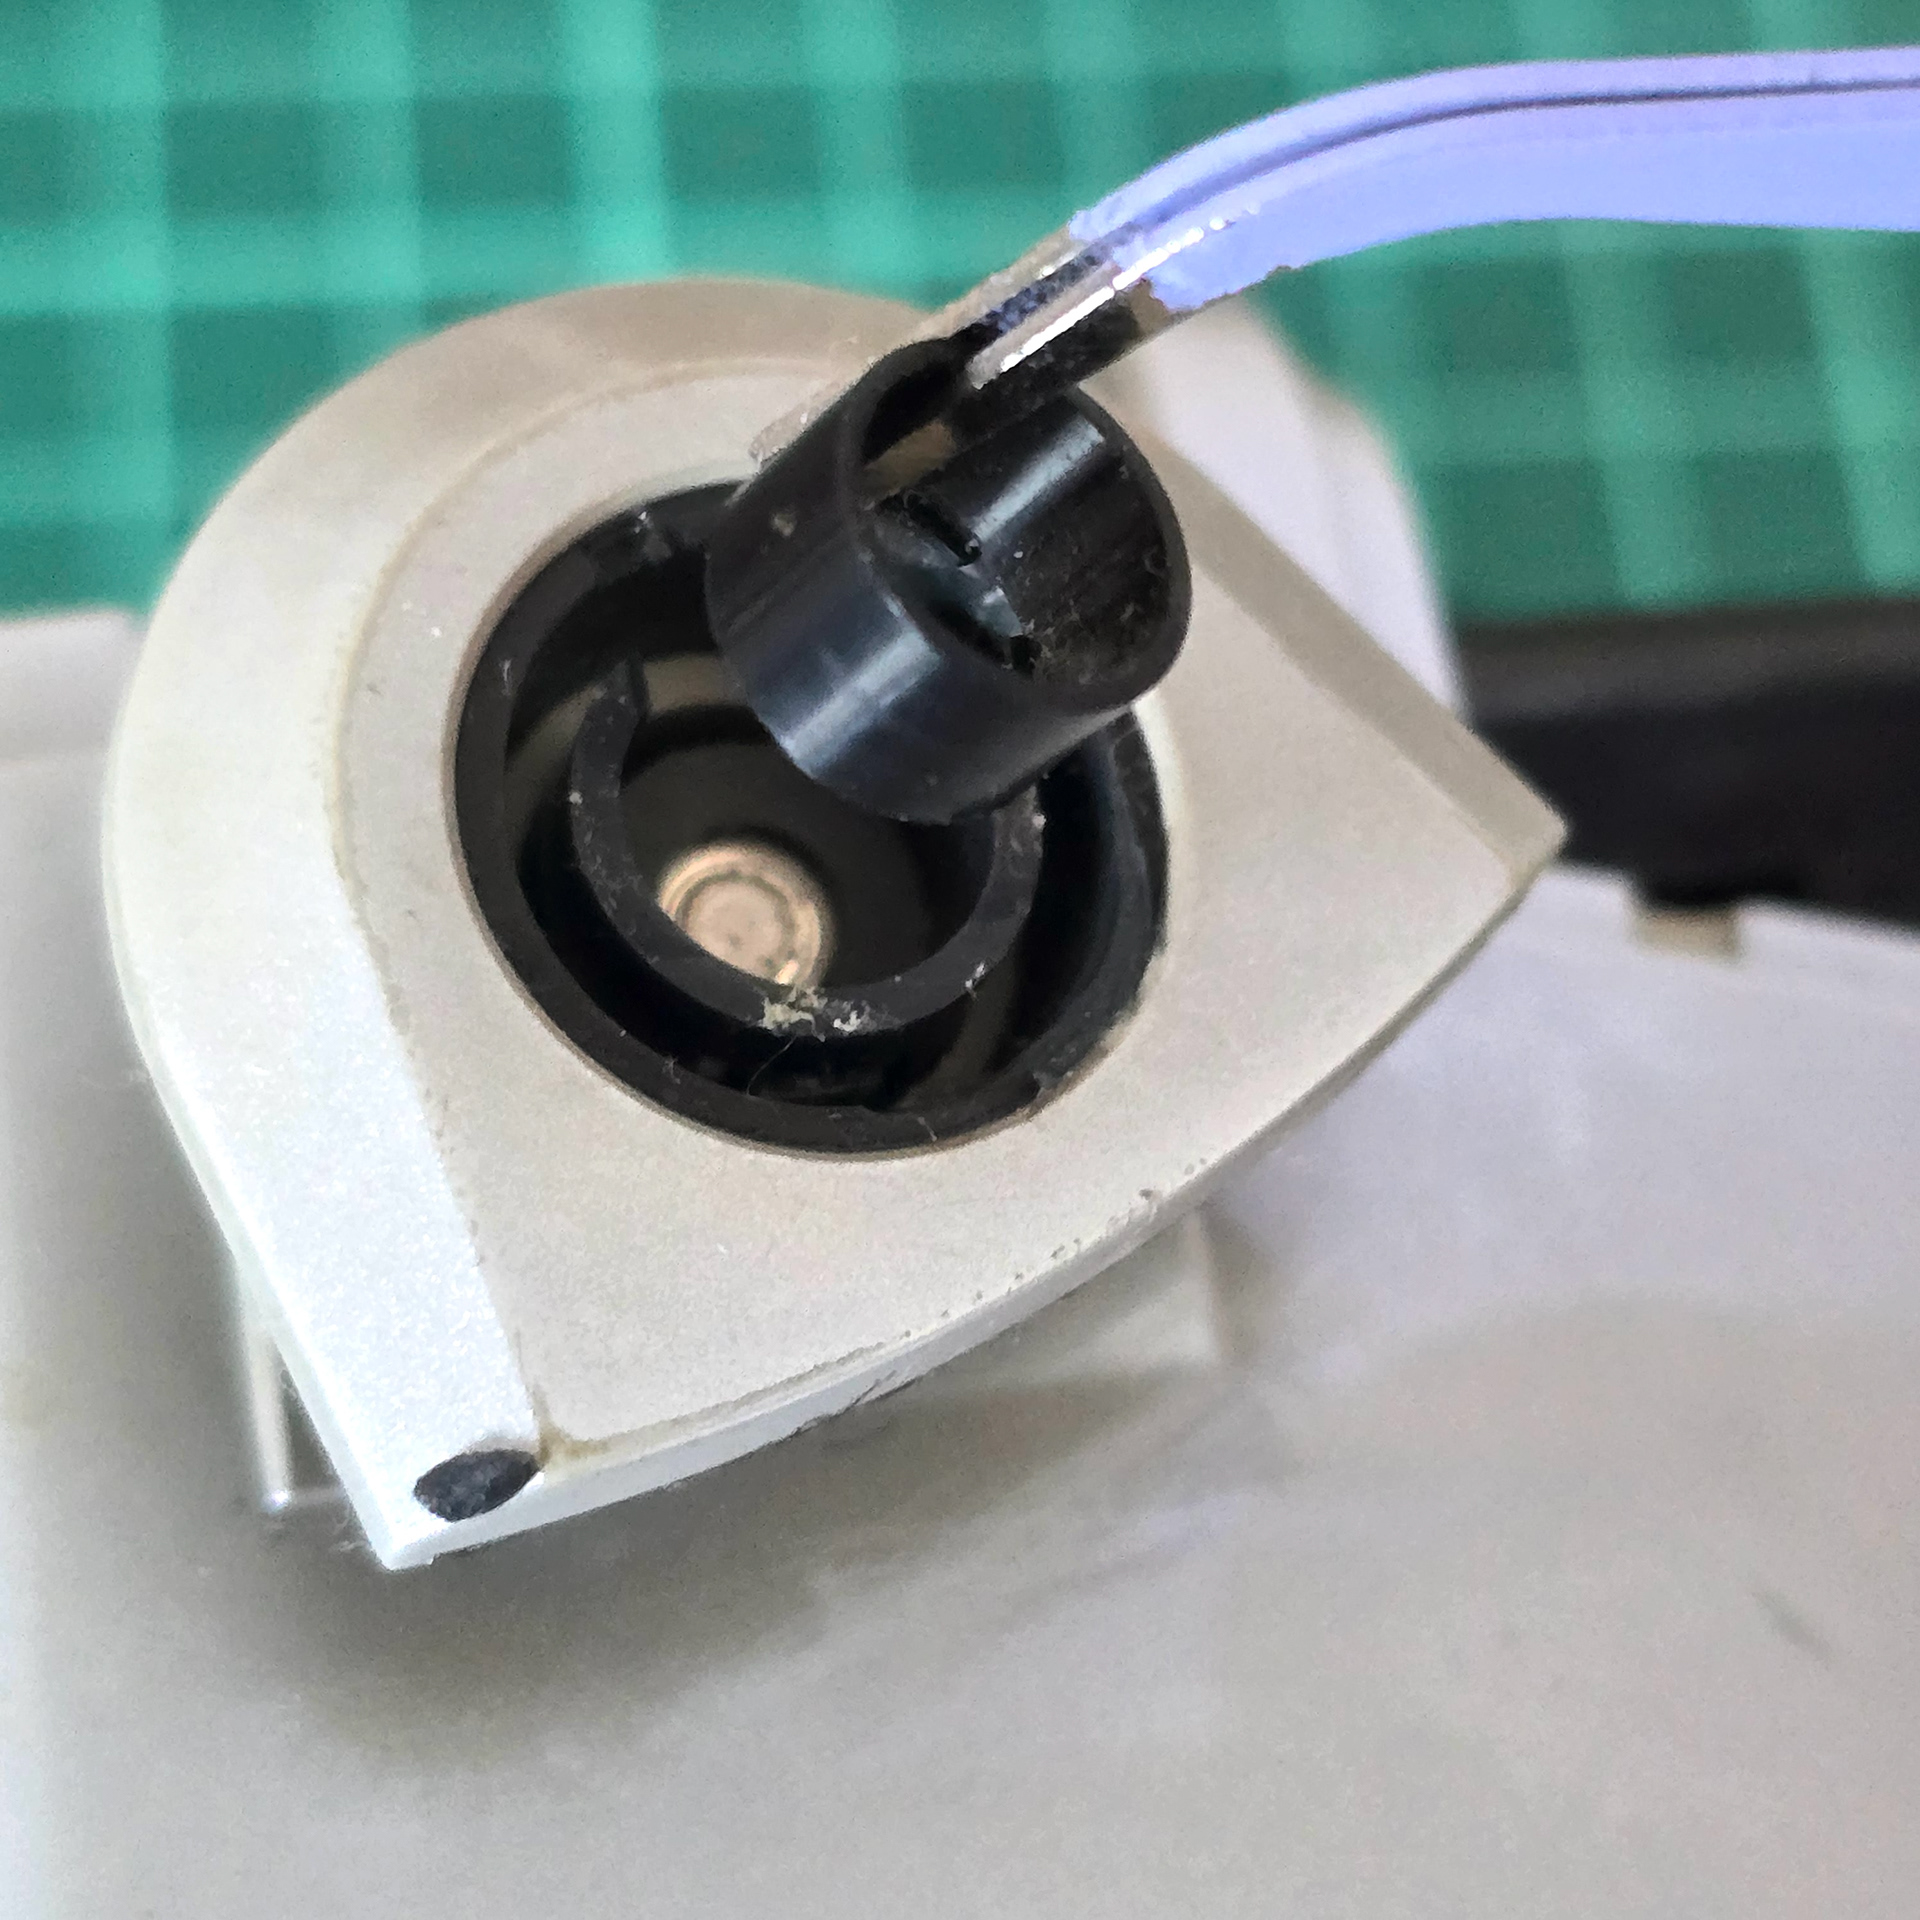
Using tweezers, grab the centre ring at the top and pull it out. Then you should be able to remove the painted ear hub plastic.^
ピンセットを使って、上部の中央のリングをつかんで引き抜きます。そうすると、塗装されたイヤーハブのプラスチックが取り外せるはずです。^