
The ERS-1000 is designed to hide its access screws, so it can be confusing on how to open it for repair and customisation such as painting. Going in blindly can result in things being broken by accident, so in this guide I will lead you through how to open the robot's body correctly, pointing out problematic areas in disassembly and how to navigate around these points.
(Please note, the robot colour may change throughout the guide because I went back and reshot pictures in better quality, Rest assured, there is no difference in disassembly procedure.)
ERS-1000はアクセスネジを隠すように設計されているため、修理や塗装などのカスタマイズを行う際にどのように開けるかが分かりにくい場合があります。盲目的に開けると、誤って壊してしまう可能性があります。そこで、このガイドでは、ロボット本体を正しく開ける方法、分解時に問題となる箇所、そしてそれらの箇所を回避する方法を解説します。
(ロボットの色がガイド全体で変更されている場合があります。これは、写真を後から高画質で再撮影したためです。分解手順に変更はありませんのでご安心ください。)
(ロボットの色がガイド全体で変更されている場合があります。これは、写真を後から高画質で再撮影したためです。分解手順に変更はありませんのでご安心ください。)
Tools you will need:
- JIS00 or JIS0 + Screwdriver
- Torx 5 Screwdriver
- Masking or Electrical Tape
必要なツール:
- JIS00またはJIS 0 +ドライバー
- トルクス5ドライバー
- マスキングテープまたは絶縁テープ

First place the aibo on its back and remove the chest cover.
まずはaiboを仰向けにして、胸のカバーを取り外します。
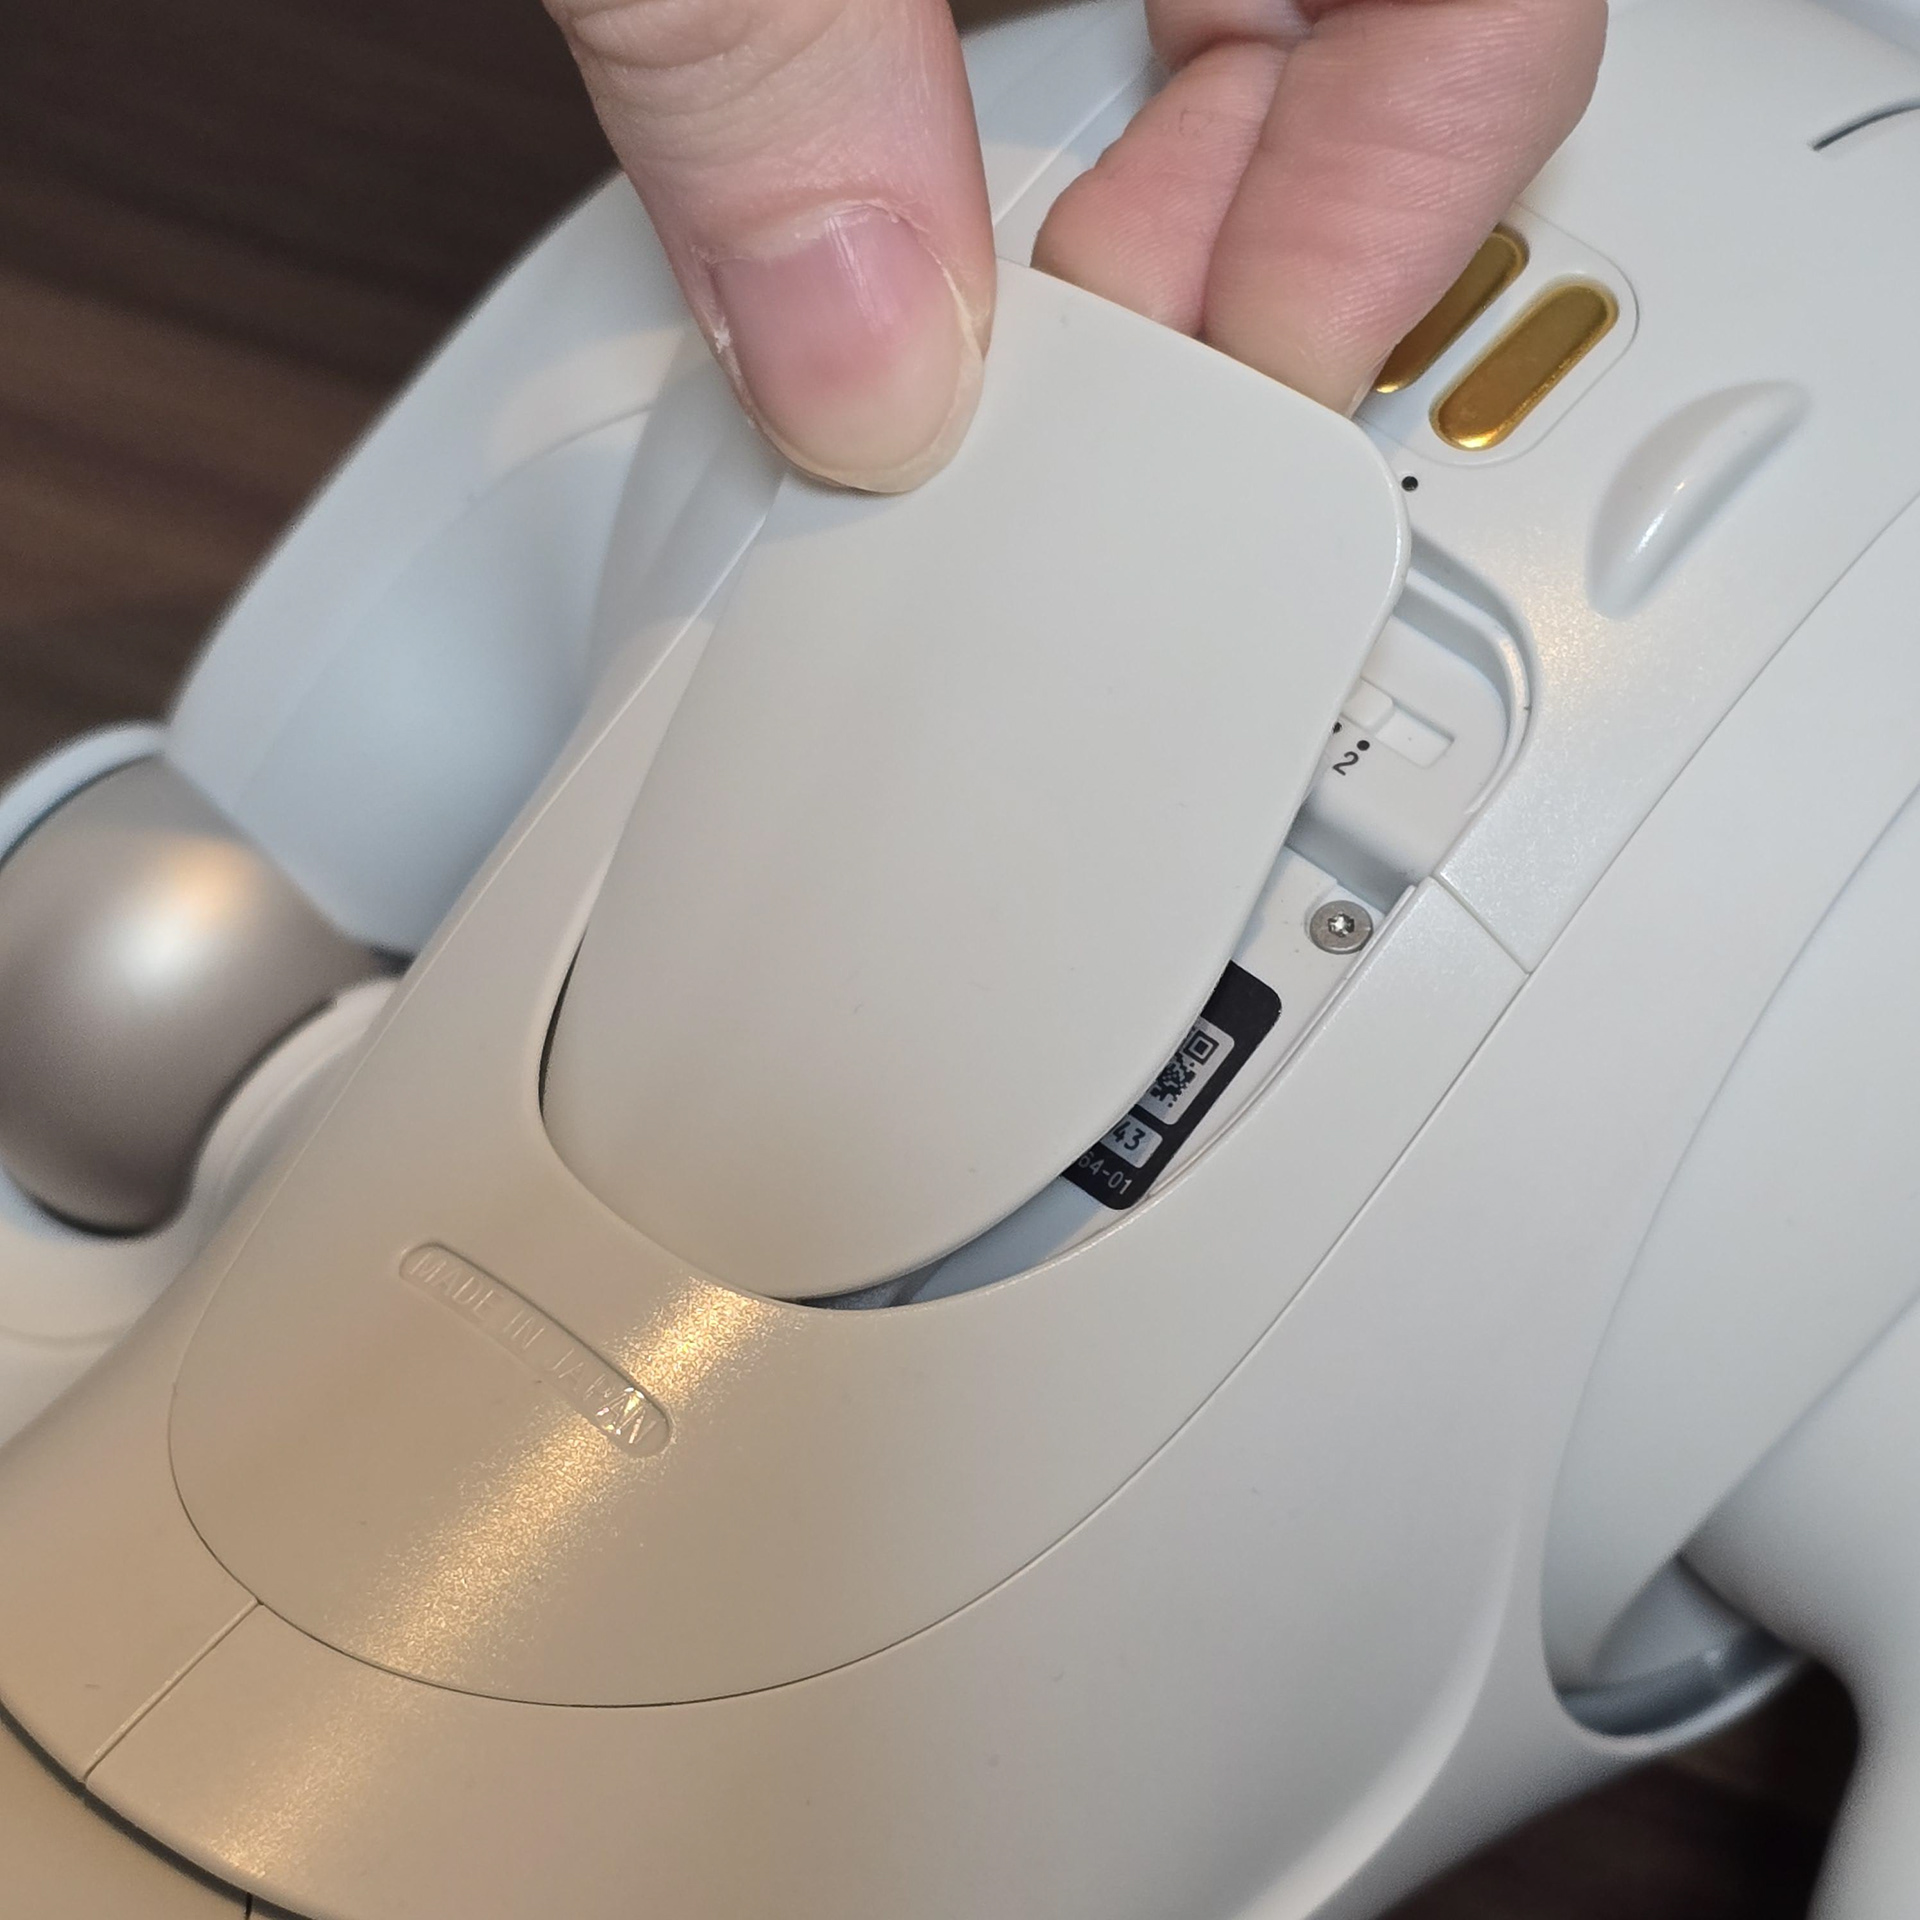
In the chest compartment (where the serial number sticker is located), there are two Torx 5 screws. Take both out and then use your nail to pry the panel up from the top right corner.
チェストコンパートメント(シリアル番号ステッカーが貼られている場所)には、トルクス5ネジが2本あります。両方を外し、爪を使って右上隅からパネルをこじ開けます。
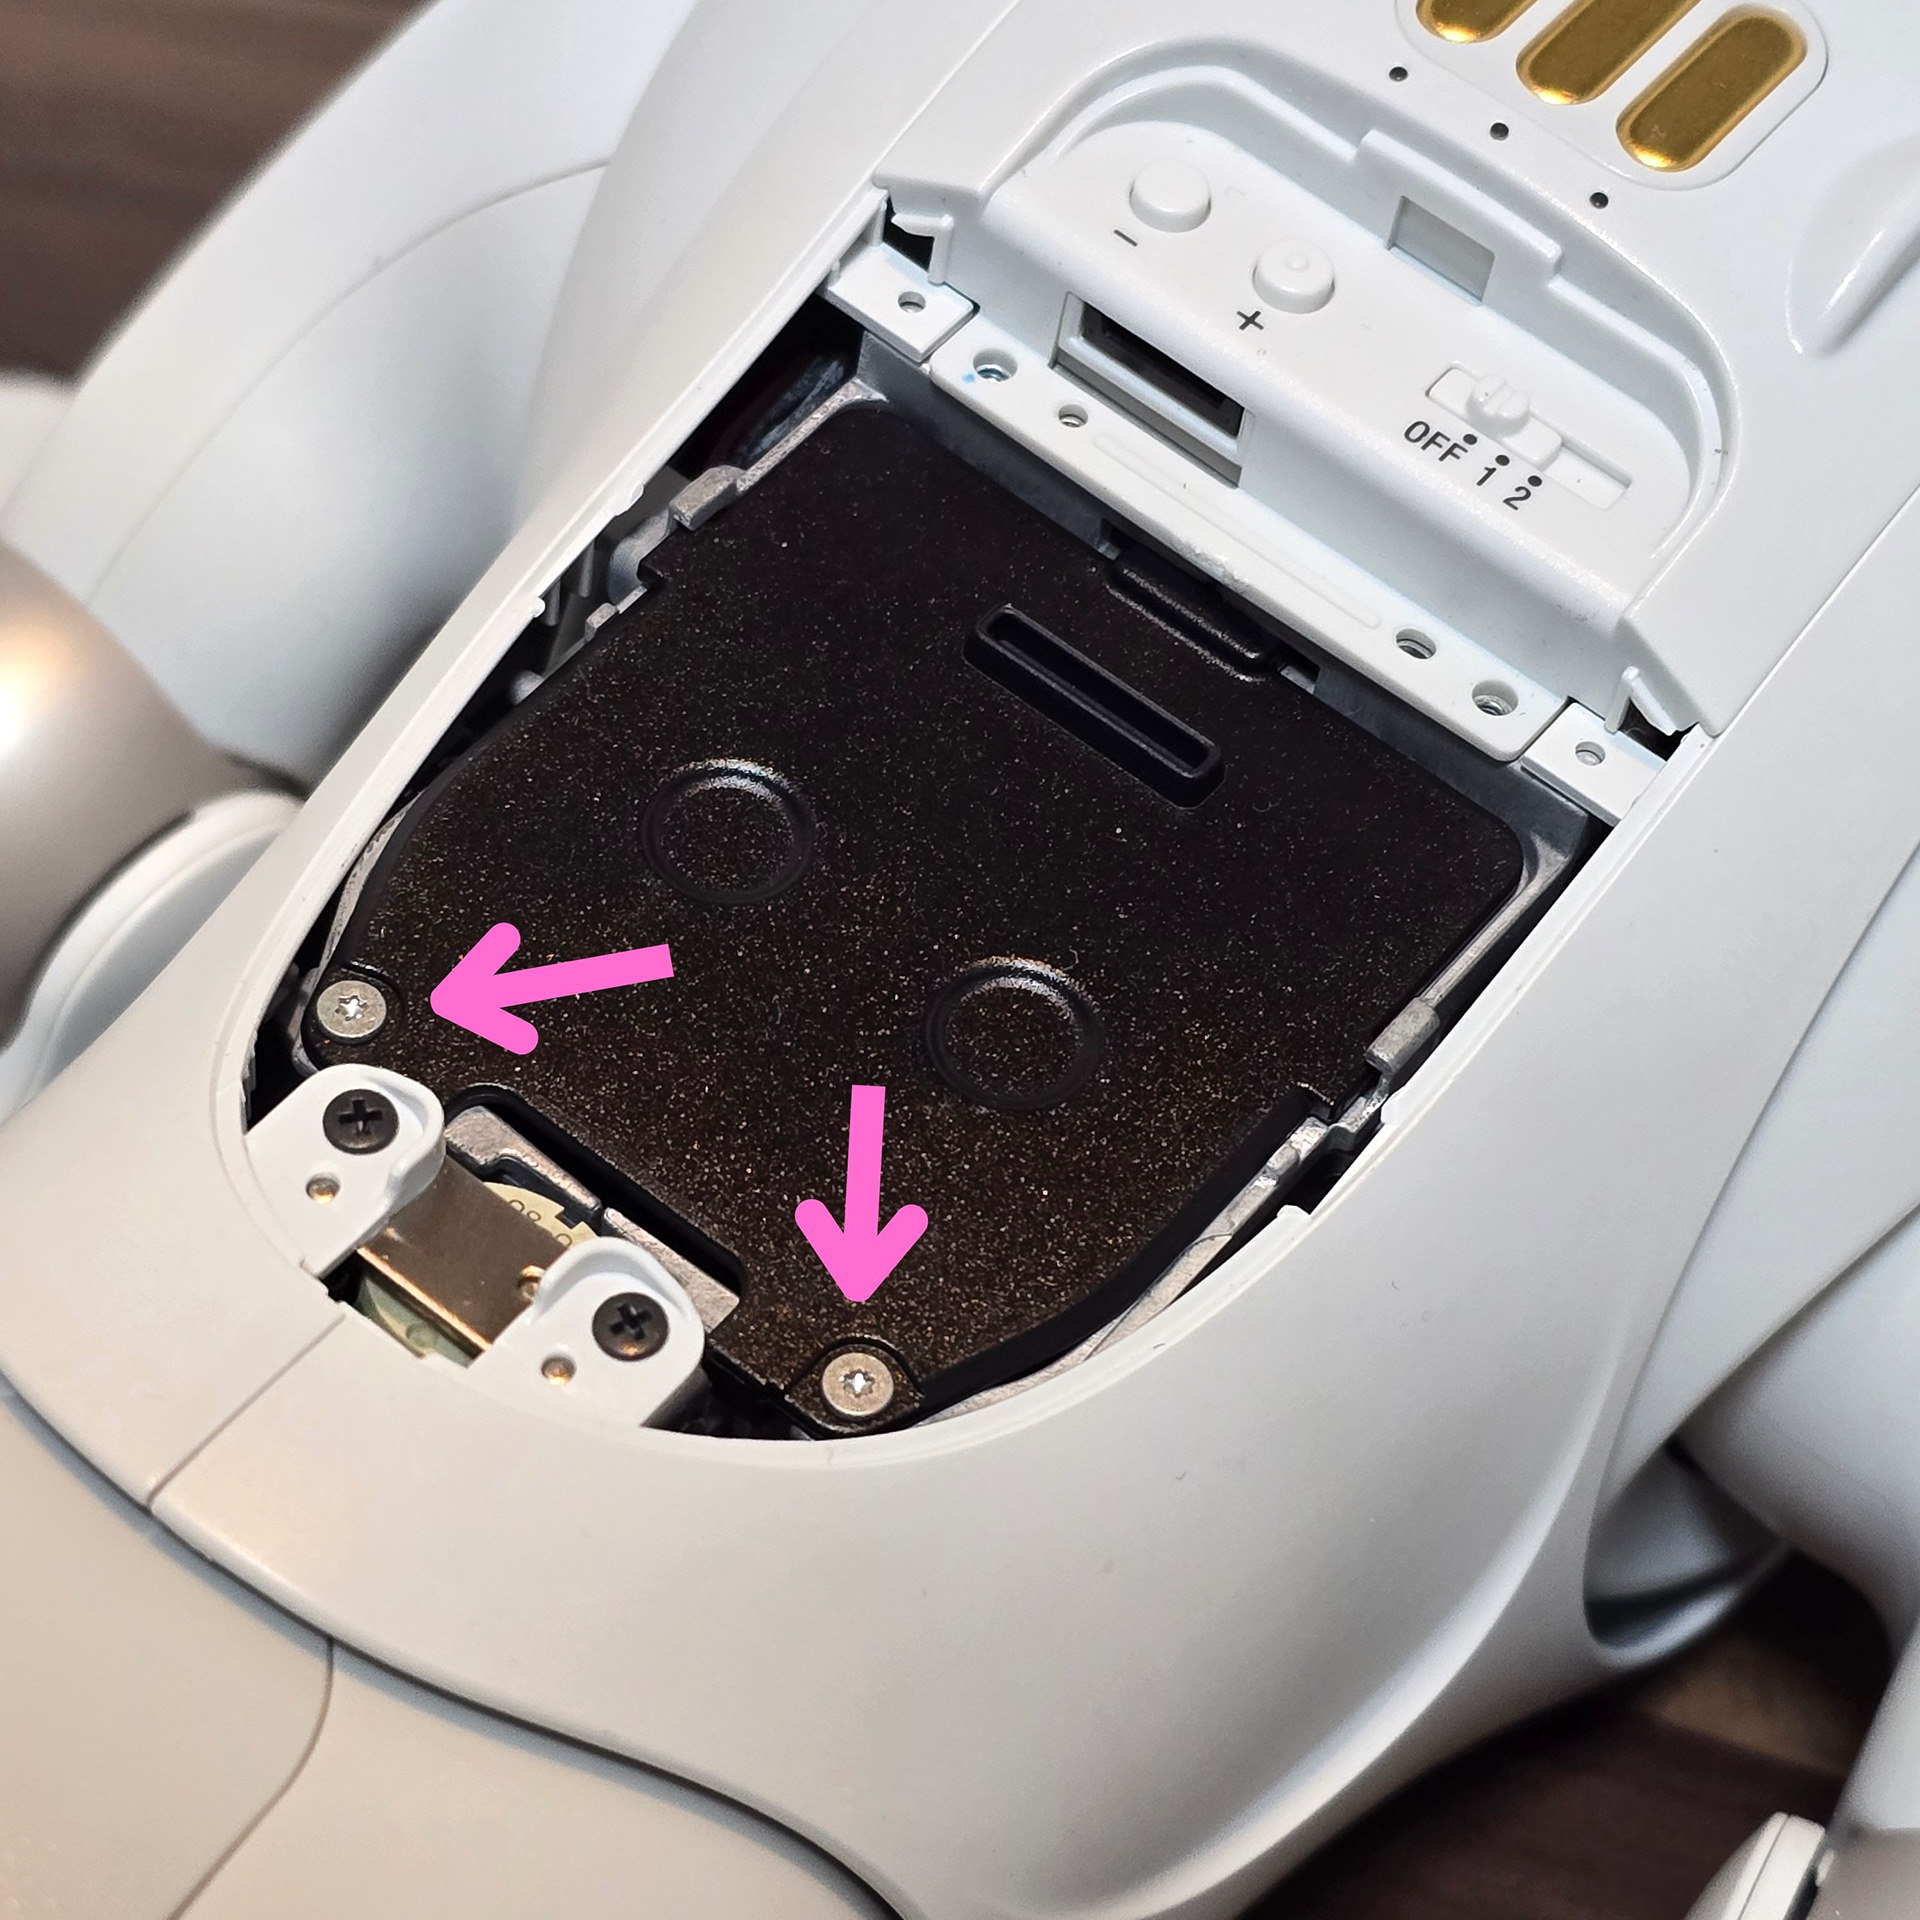
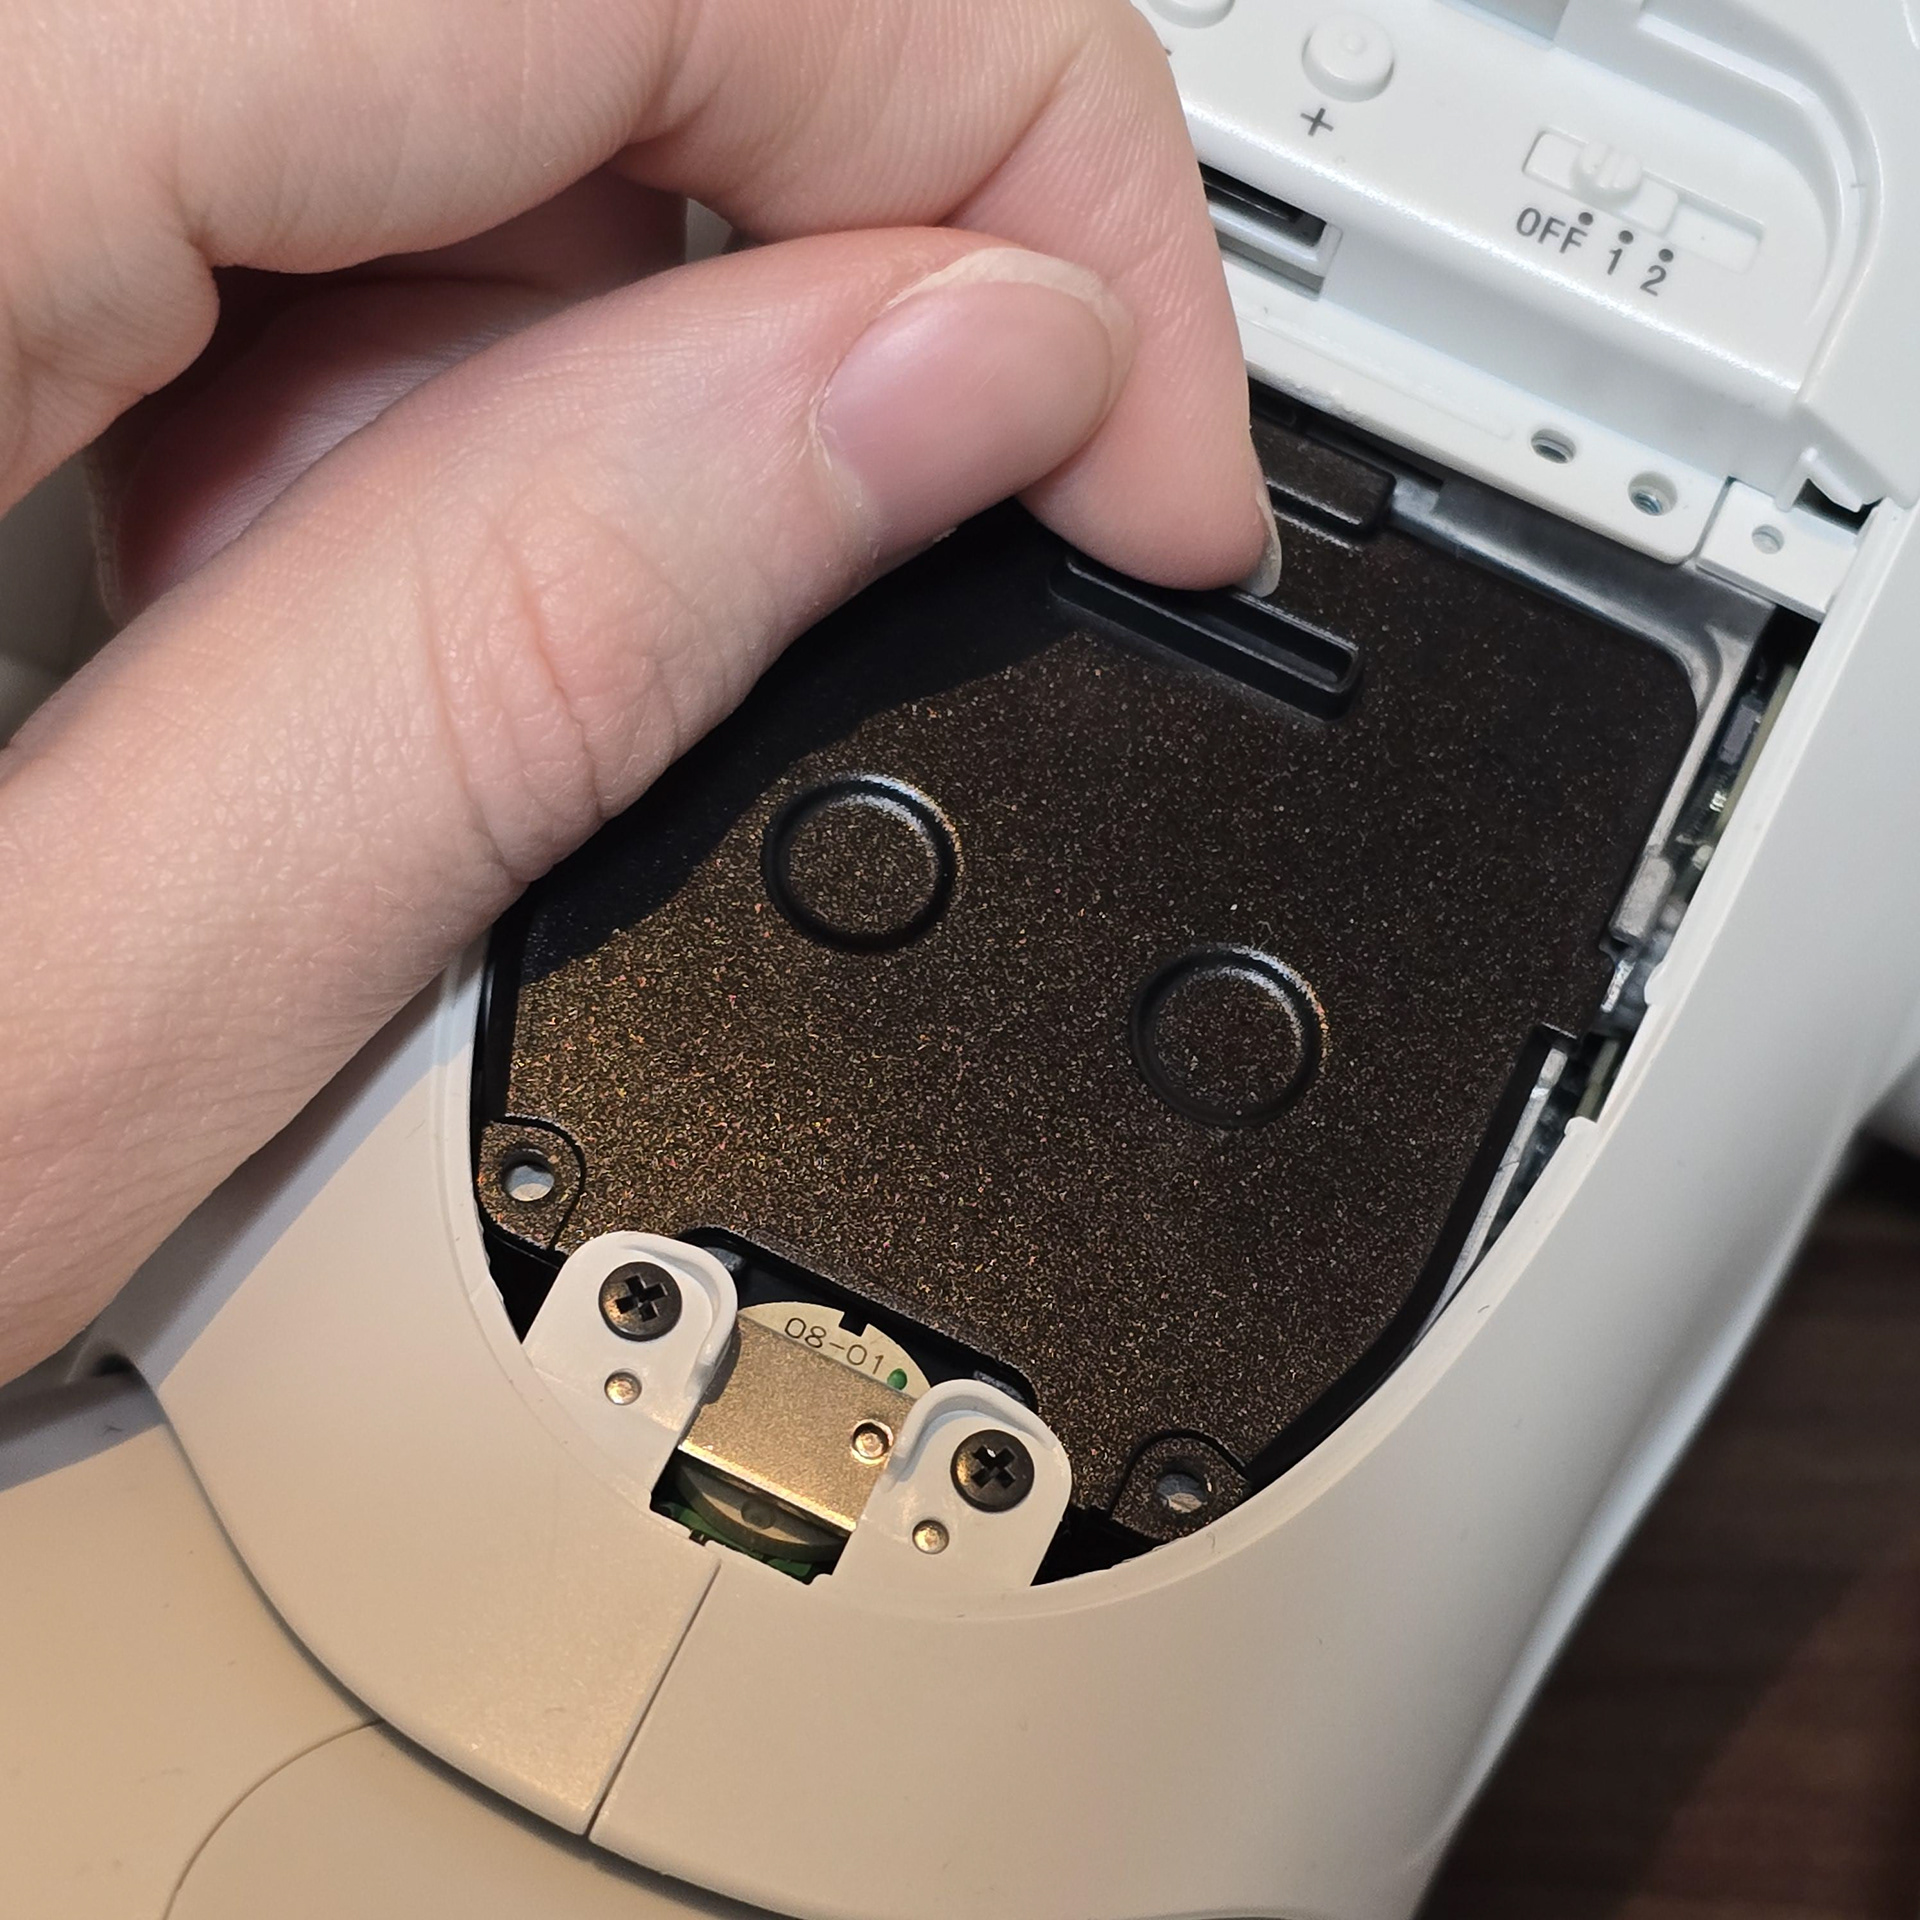
There is a metal panel that holds the battery in place. Remove the two Torx 5 screws and then pull the metal panel back using the bump.
バッテリーを固定している金属パネルがあります。2本のトルクス5ネジを外し、突起部分を使って金属パネルを引き戻します。
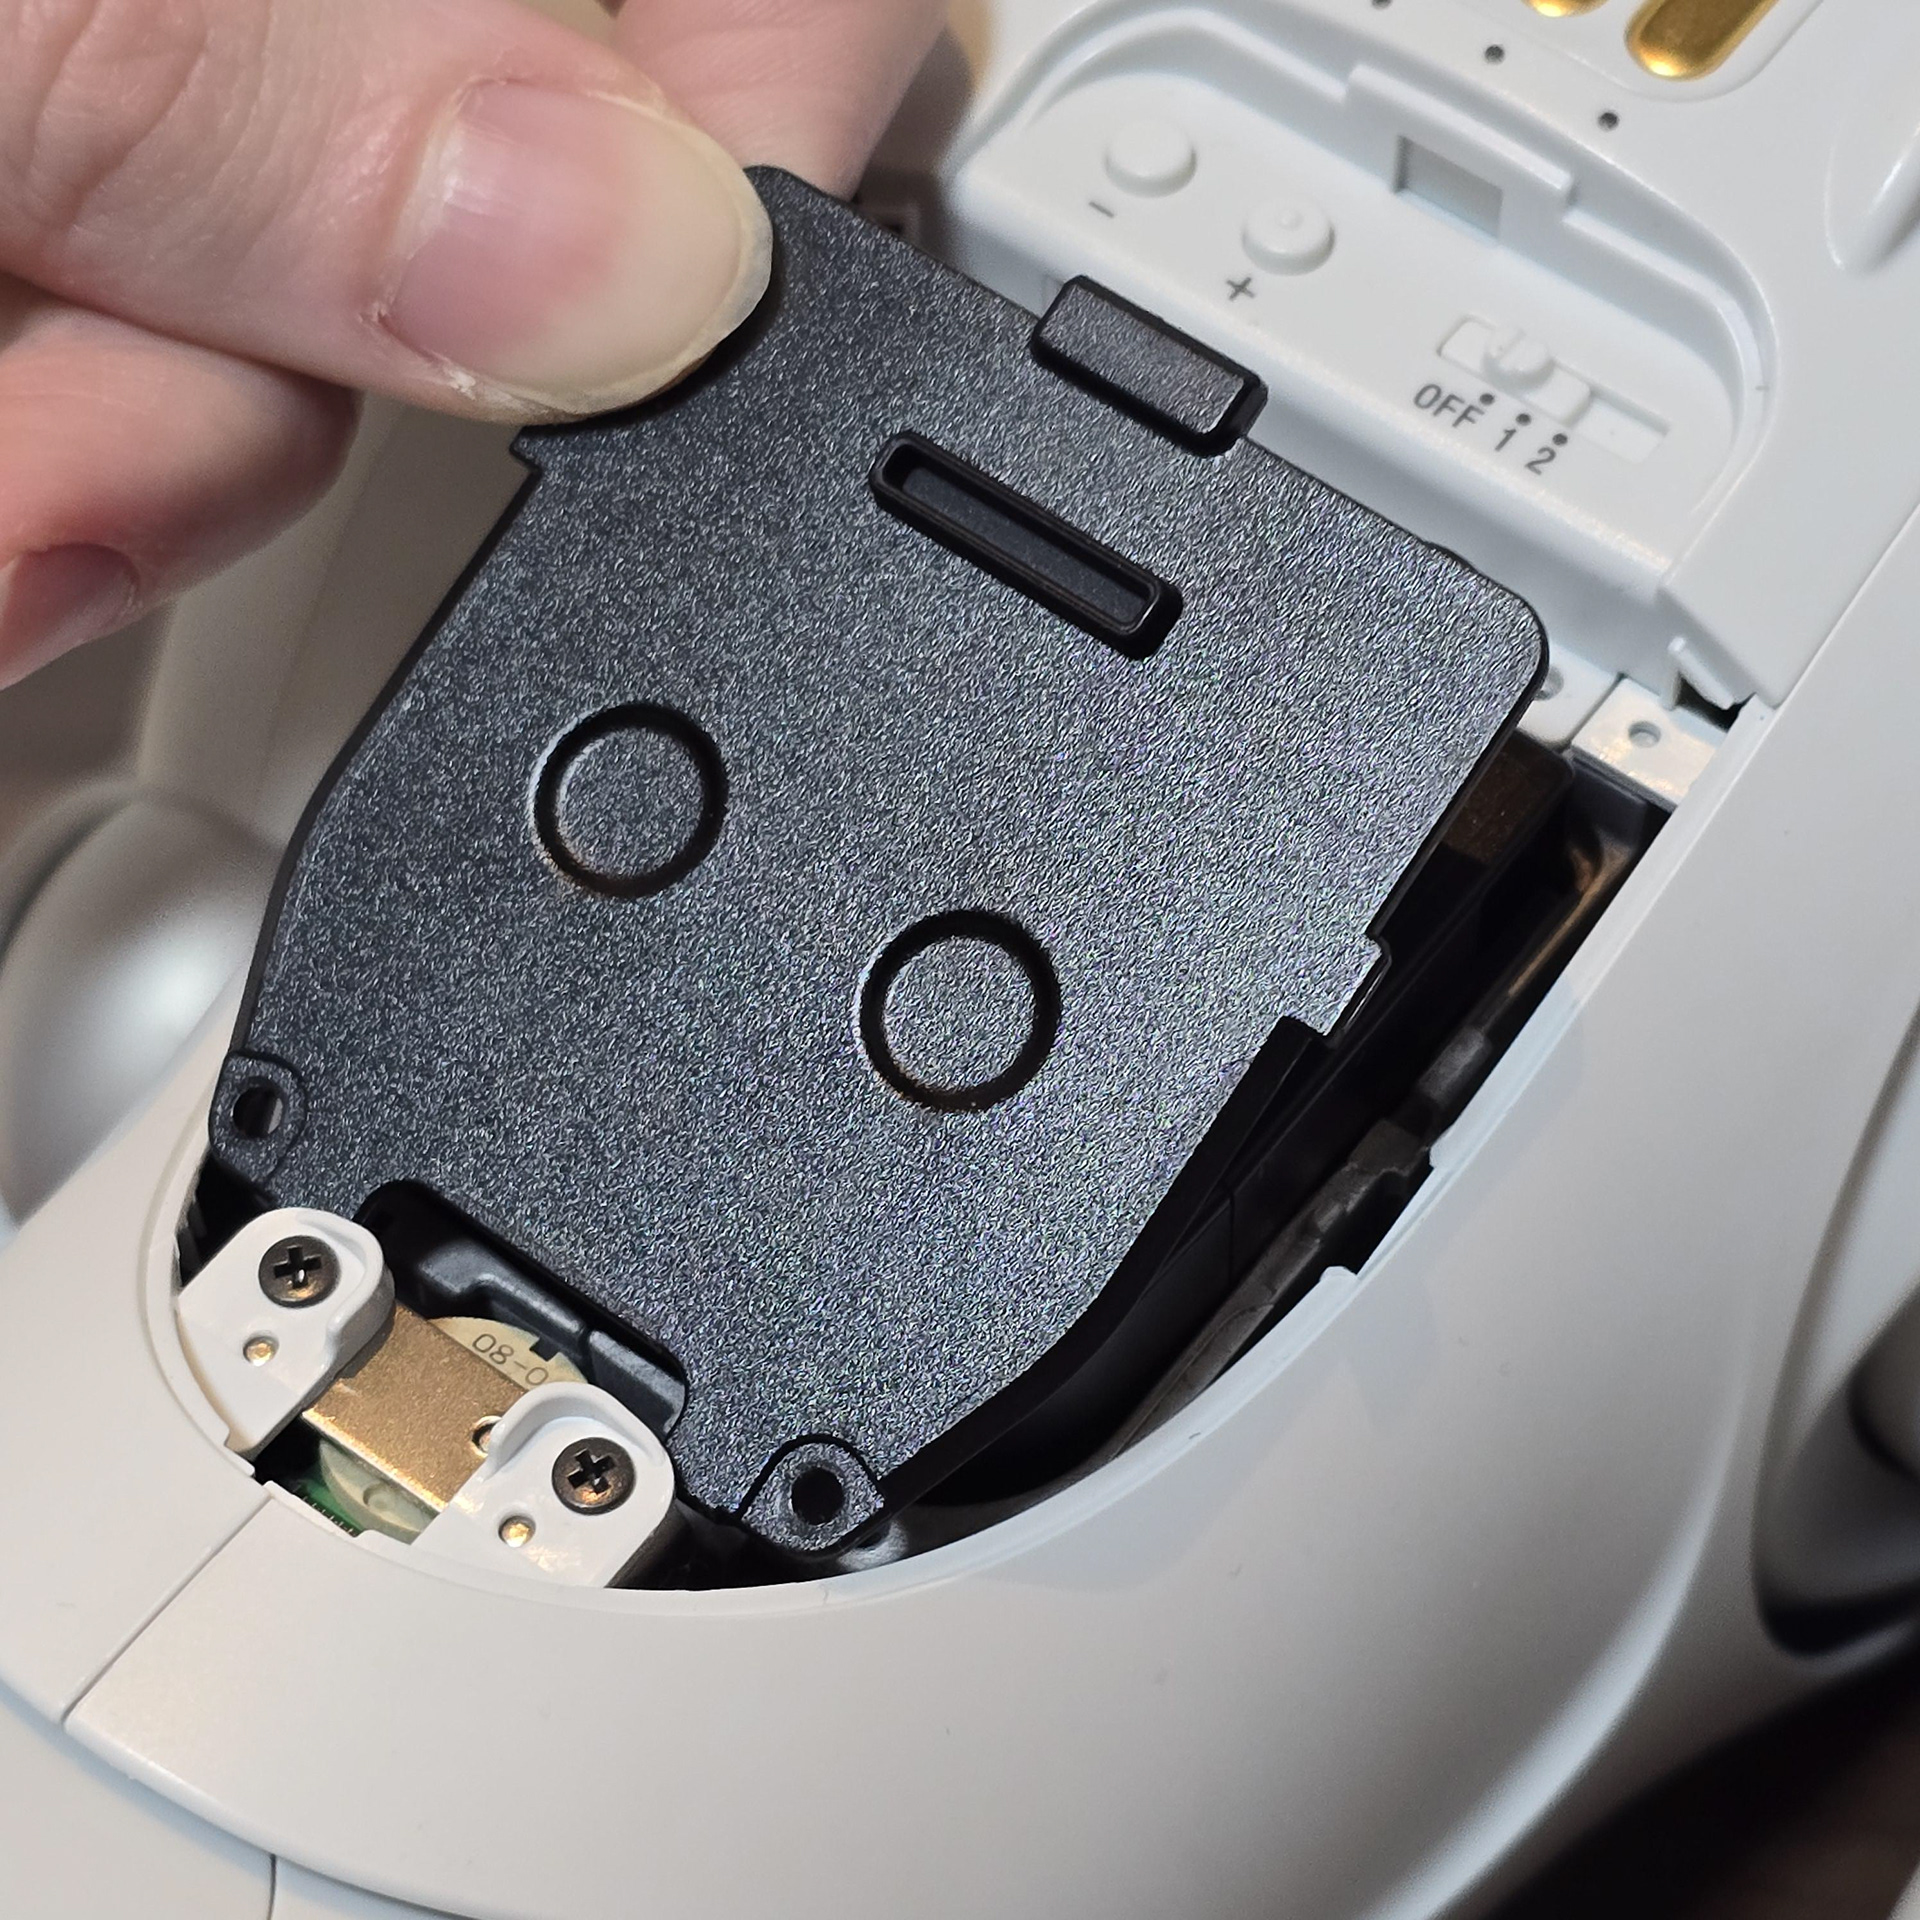
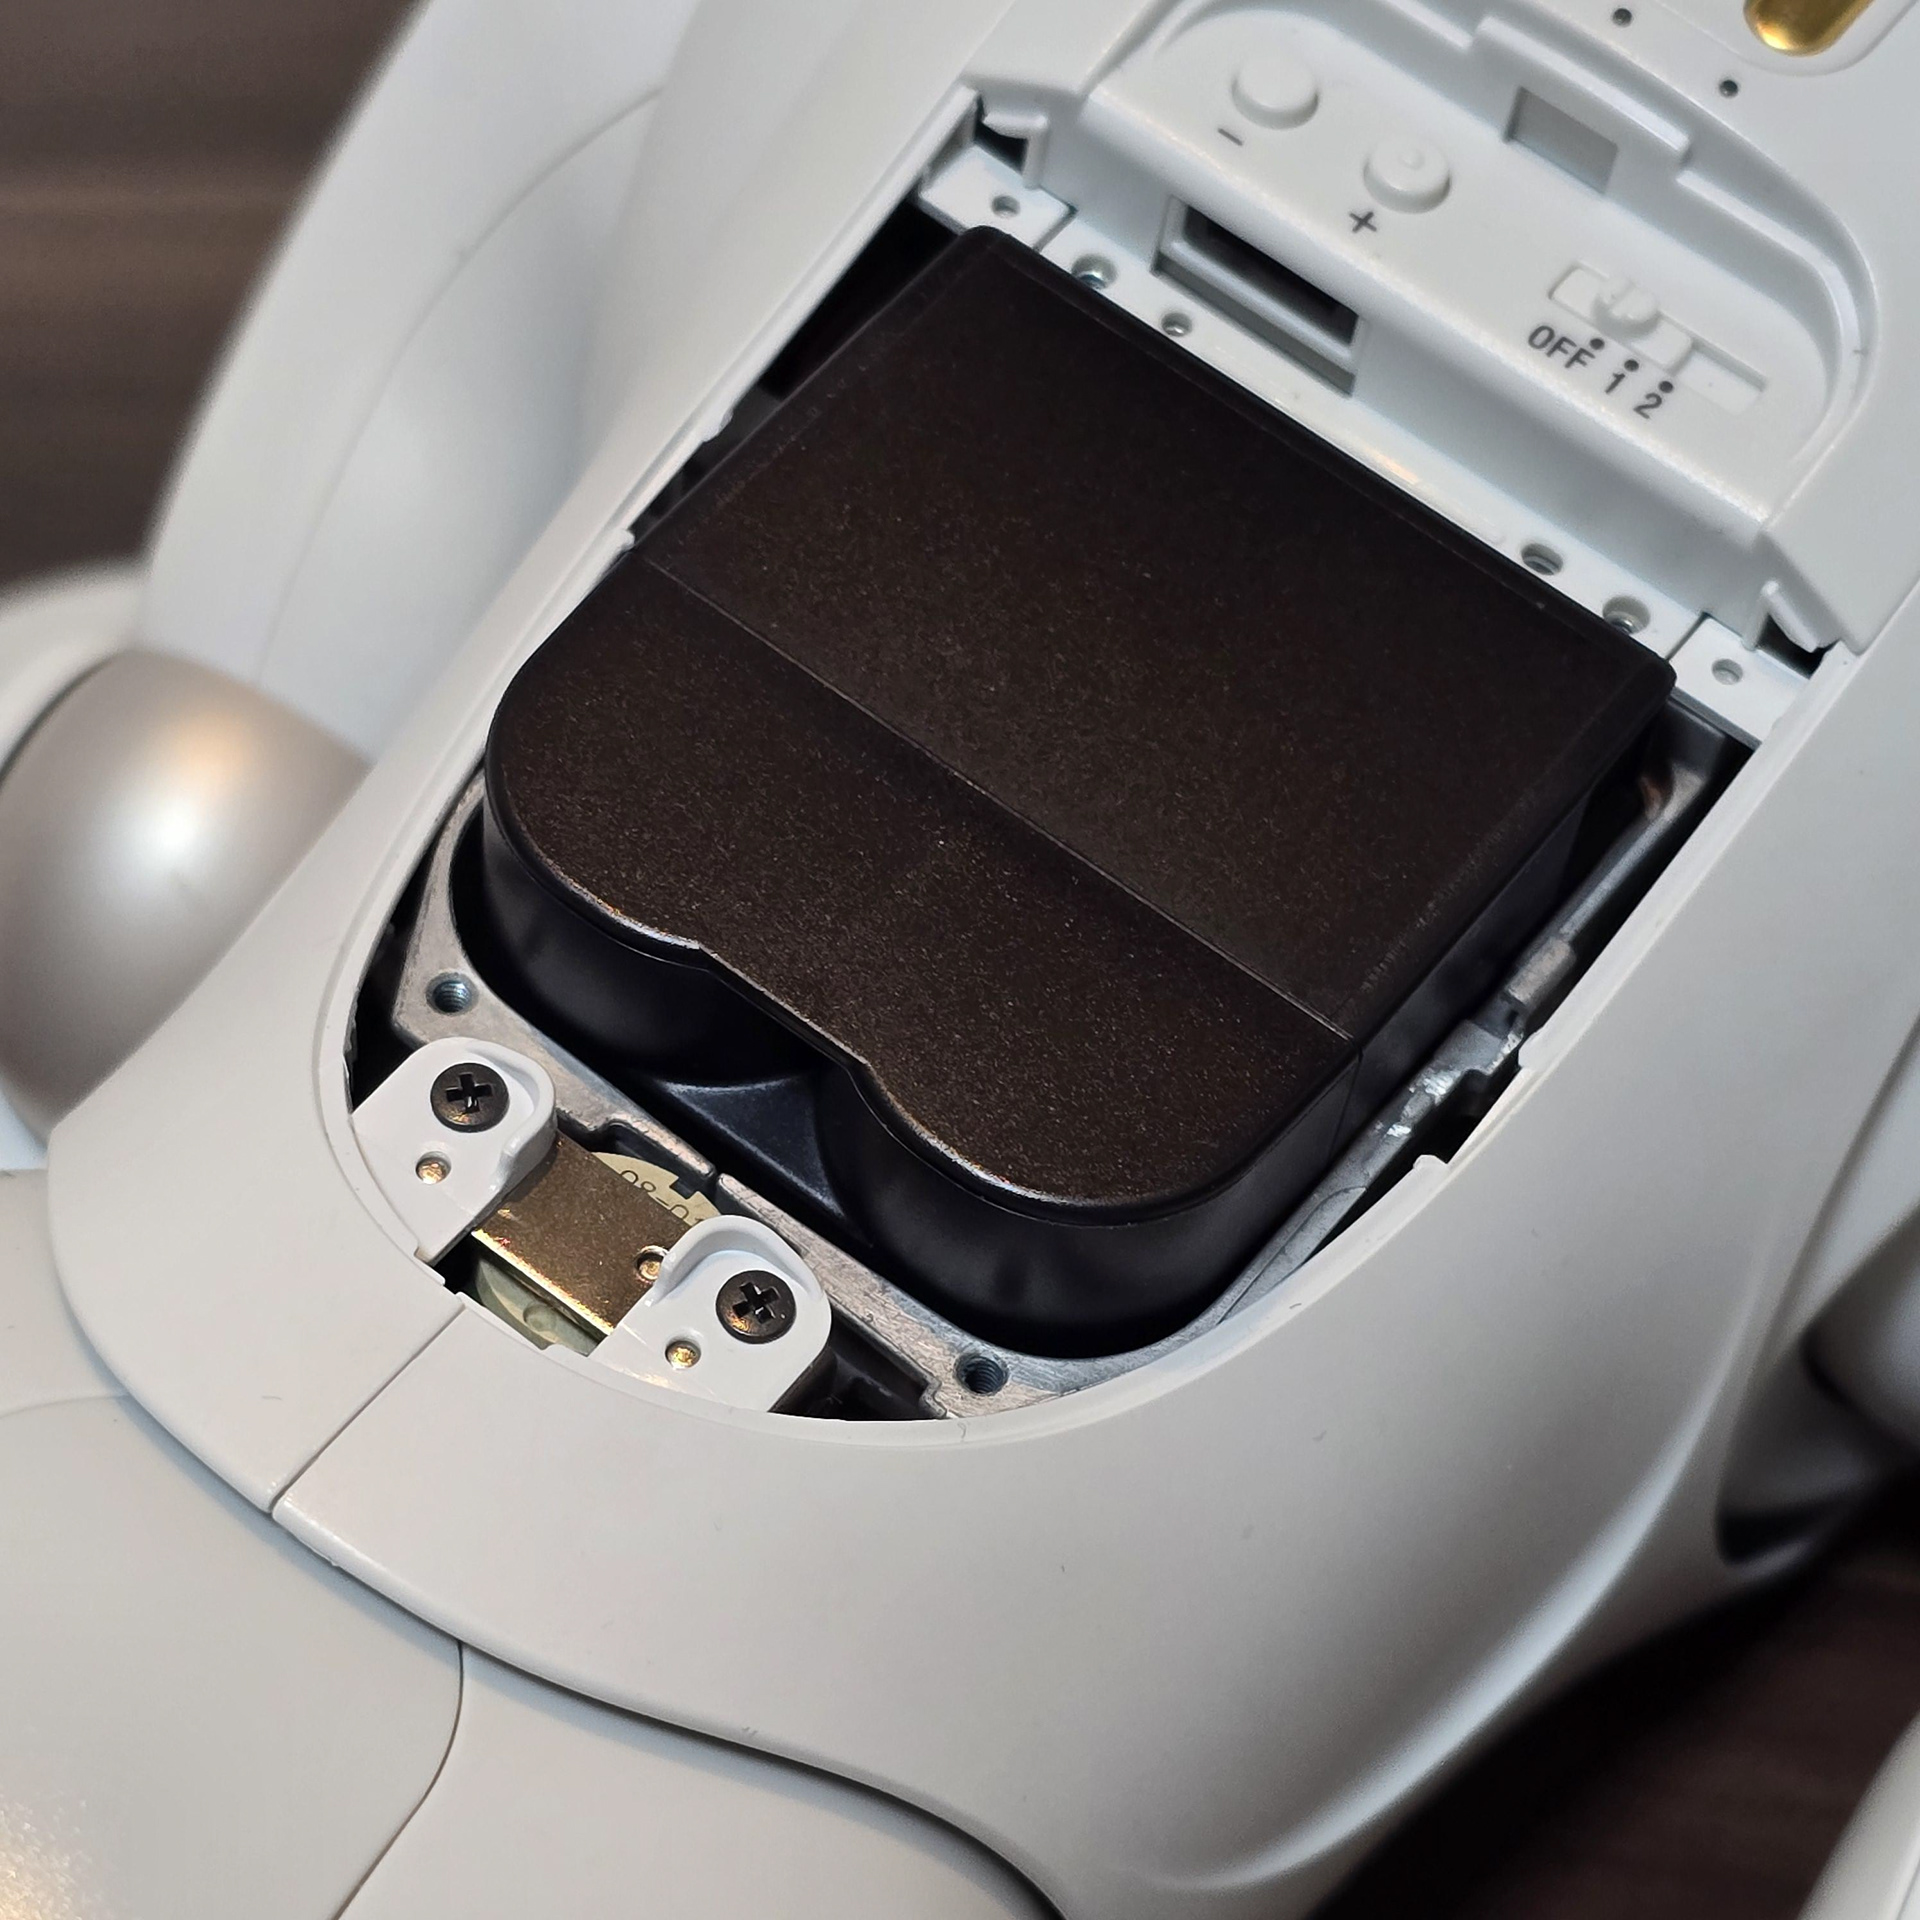

The panel will free itself and the battery will spring up once the panel is removed. Grab and pull the battery out.
パネルを外すとパネルが自然に外れ、バッテリーが跳ね上がります。バッテリーを掴んで引き抜いてください。
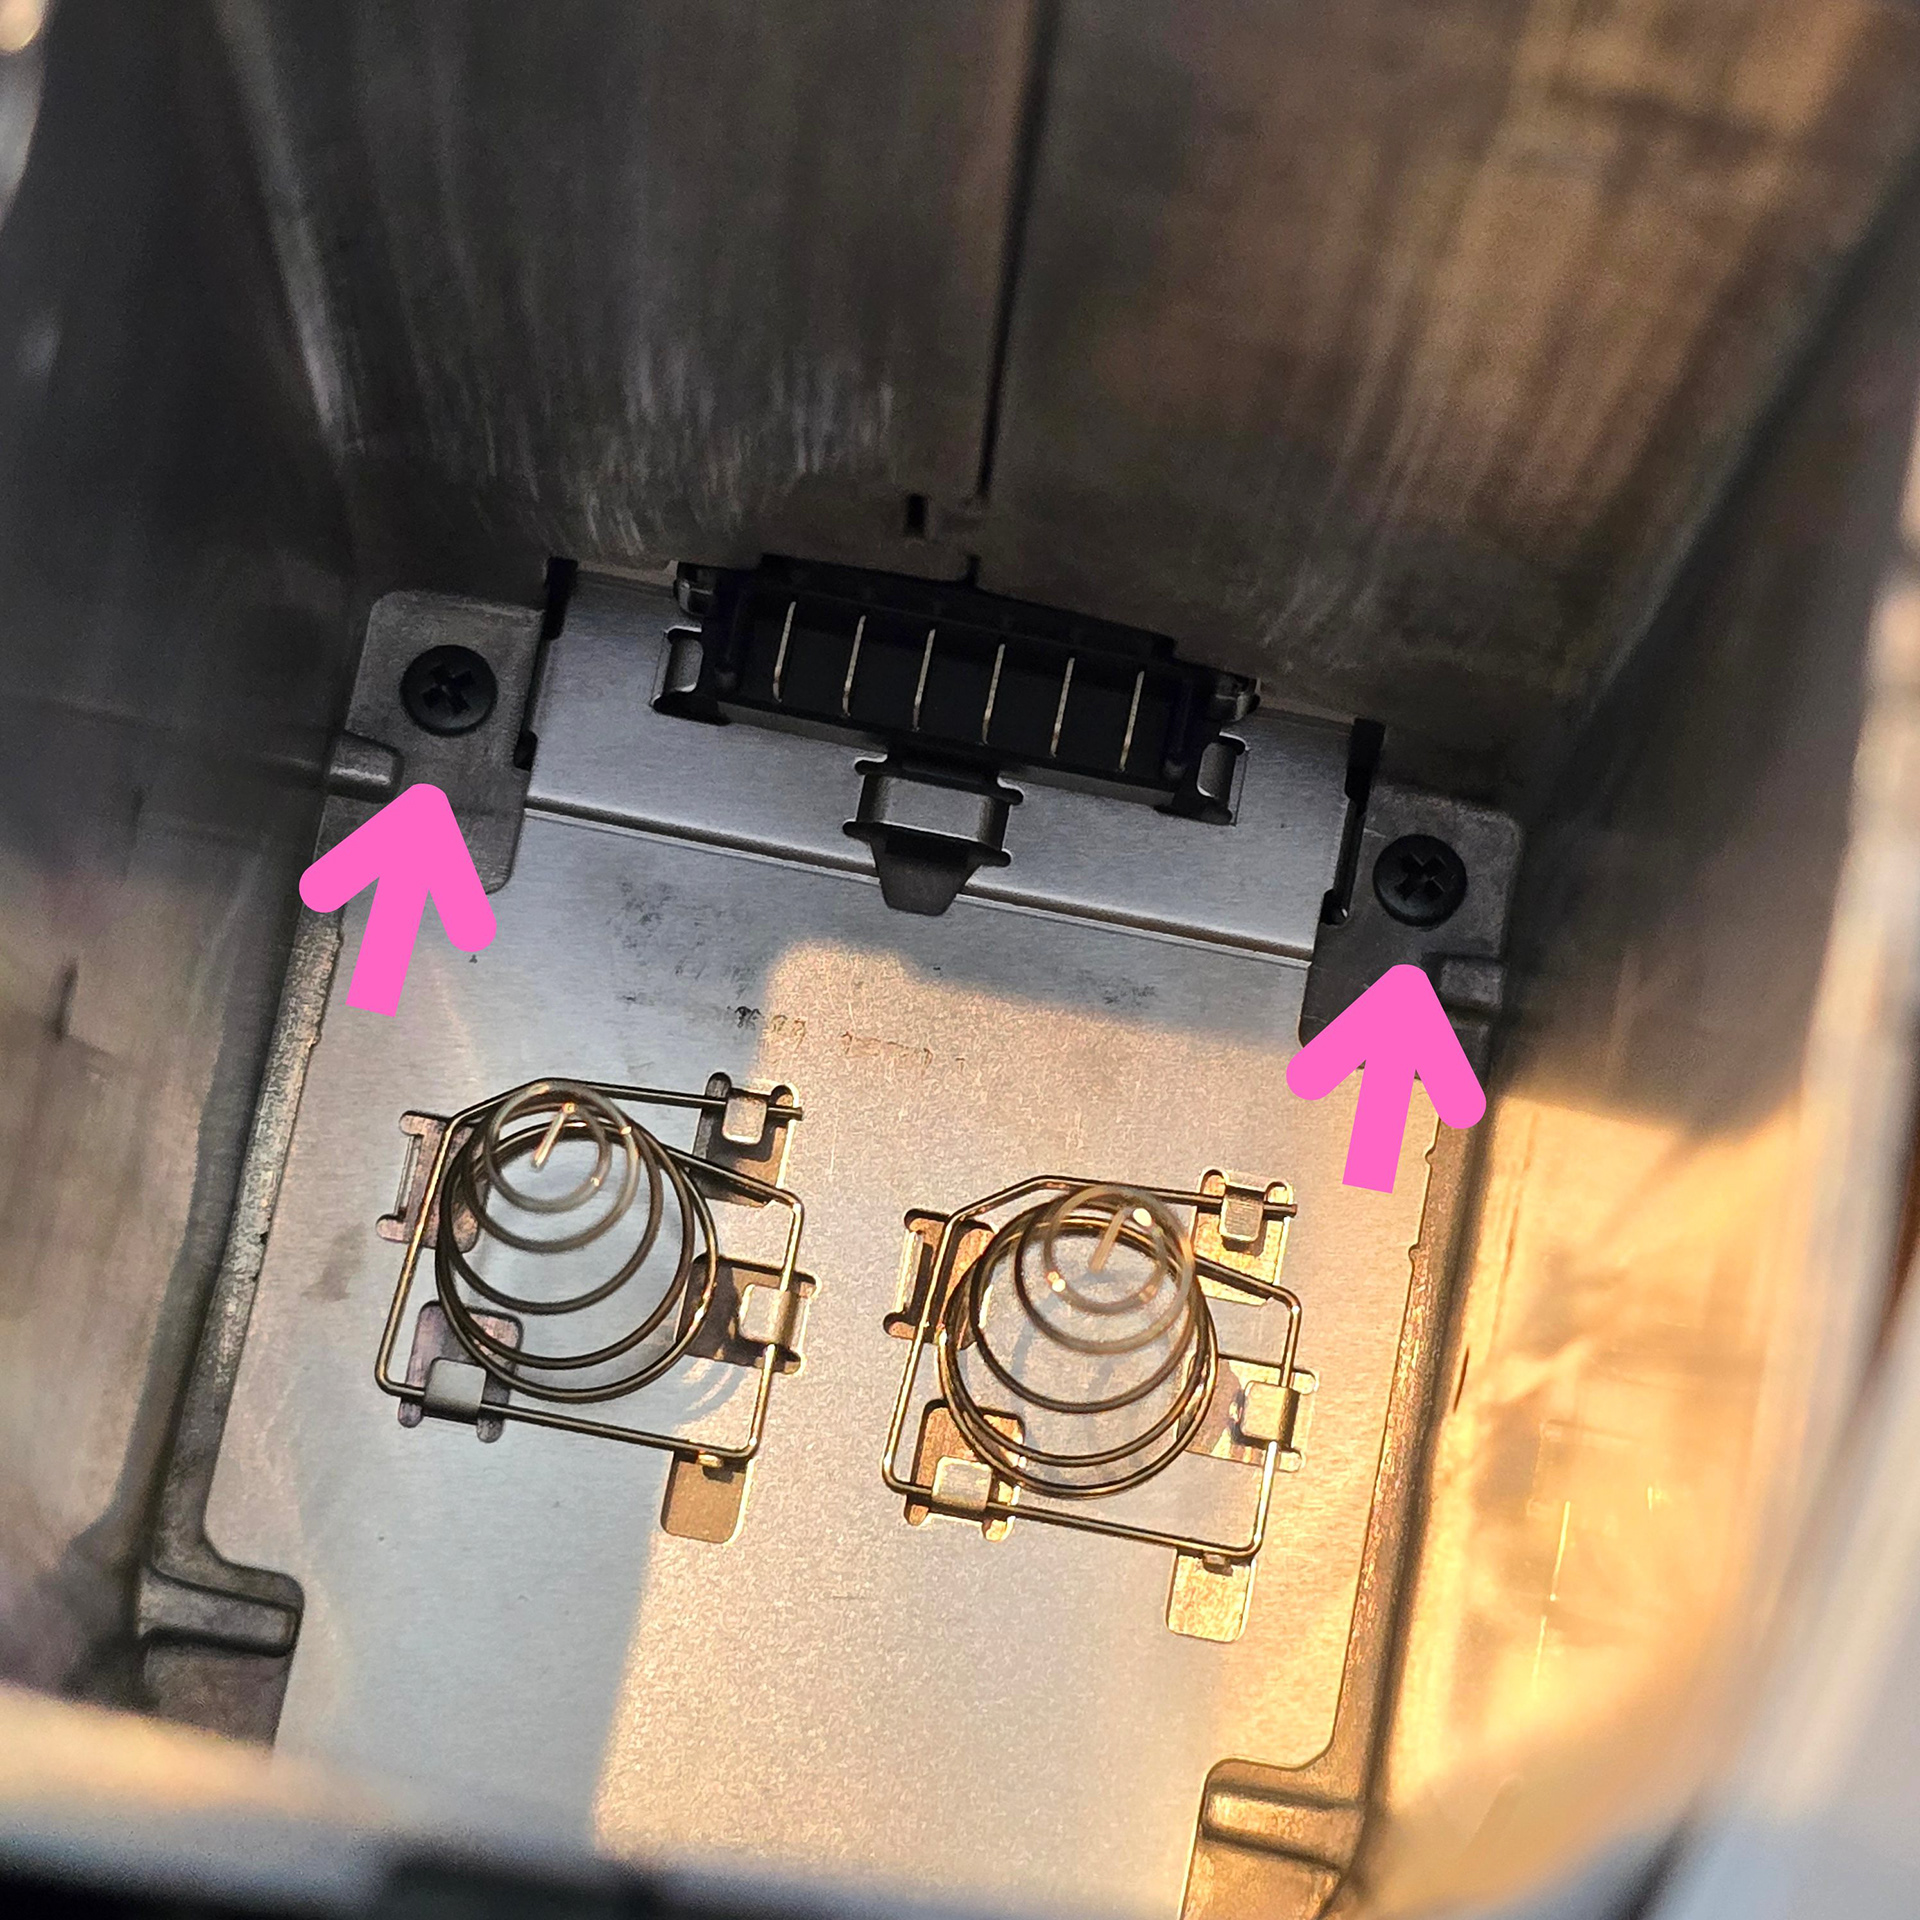
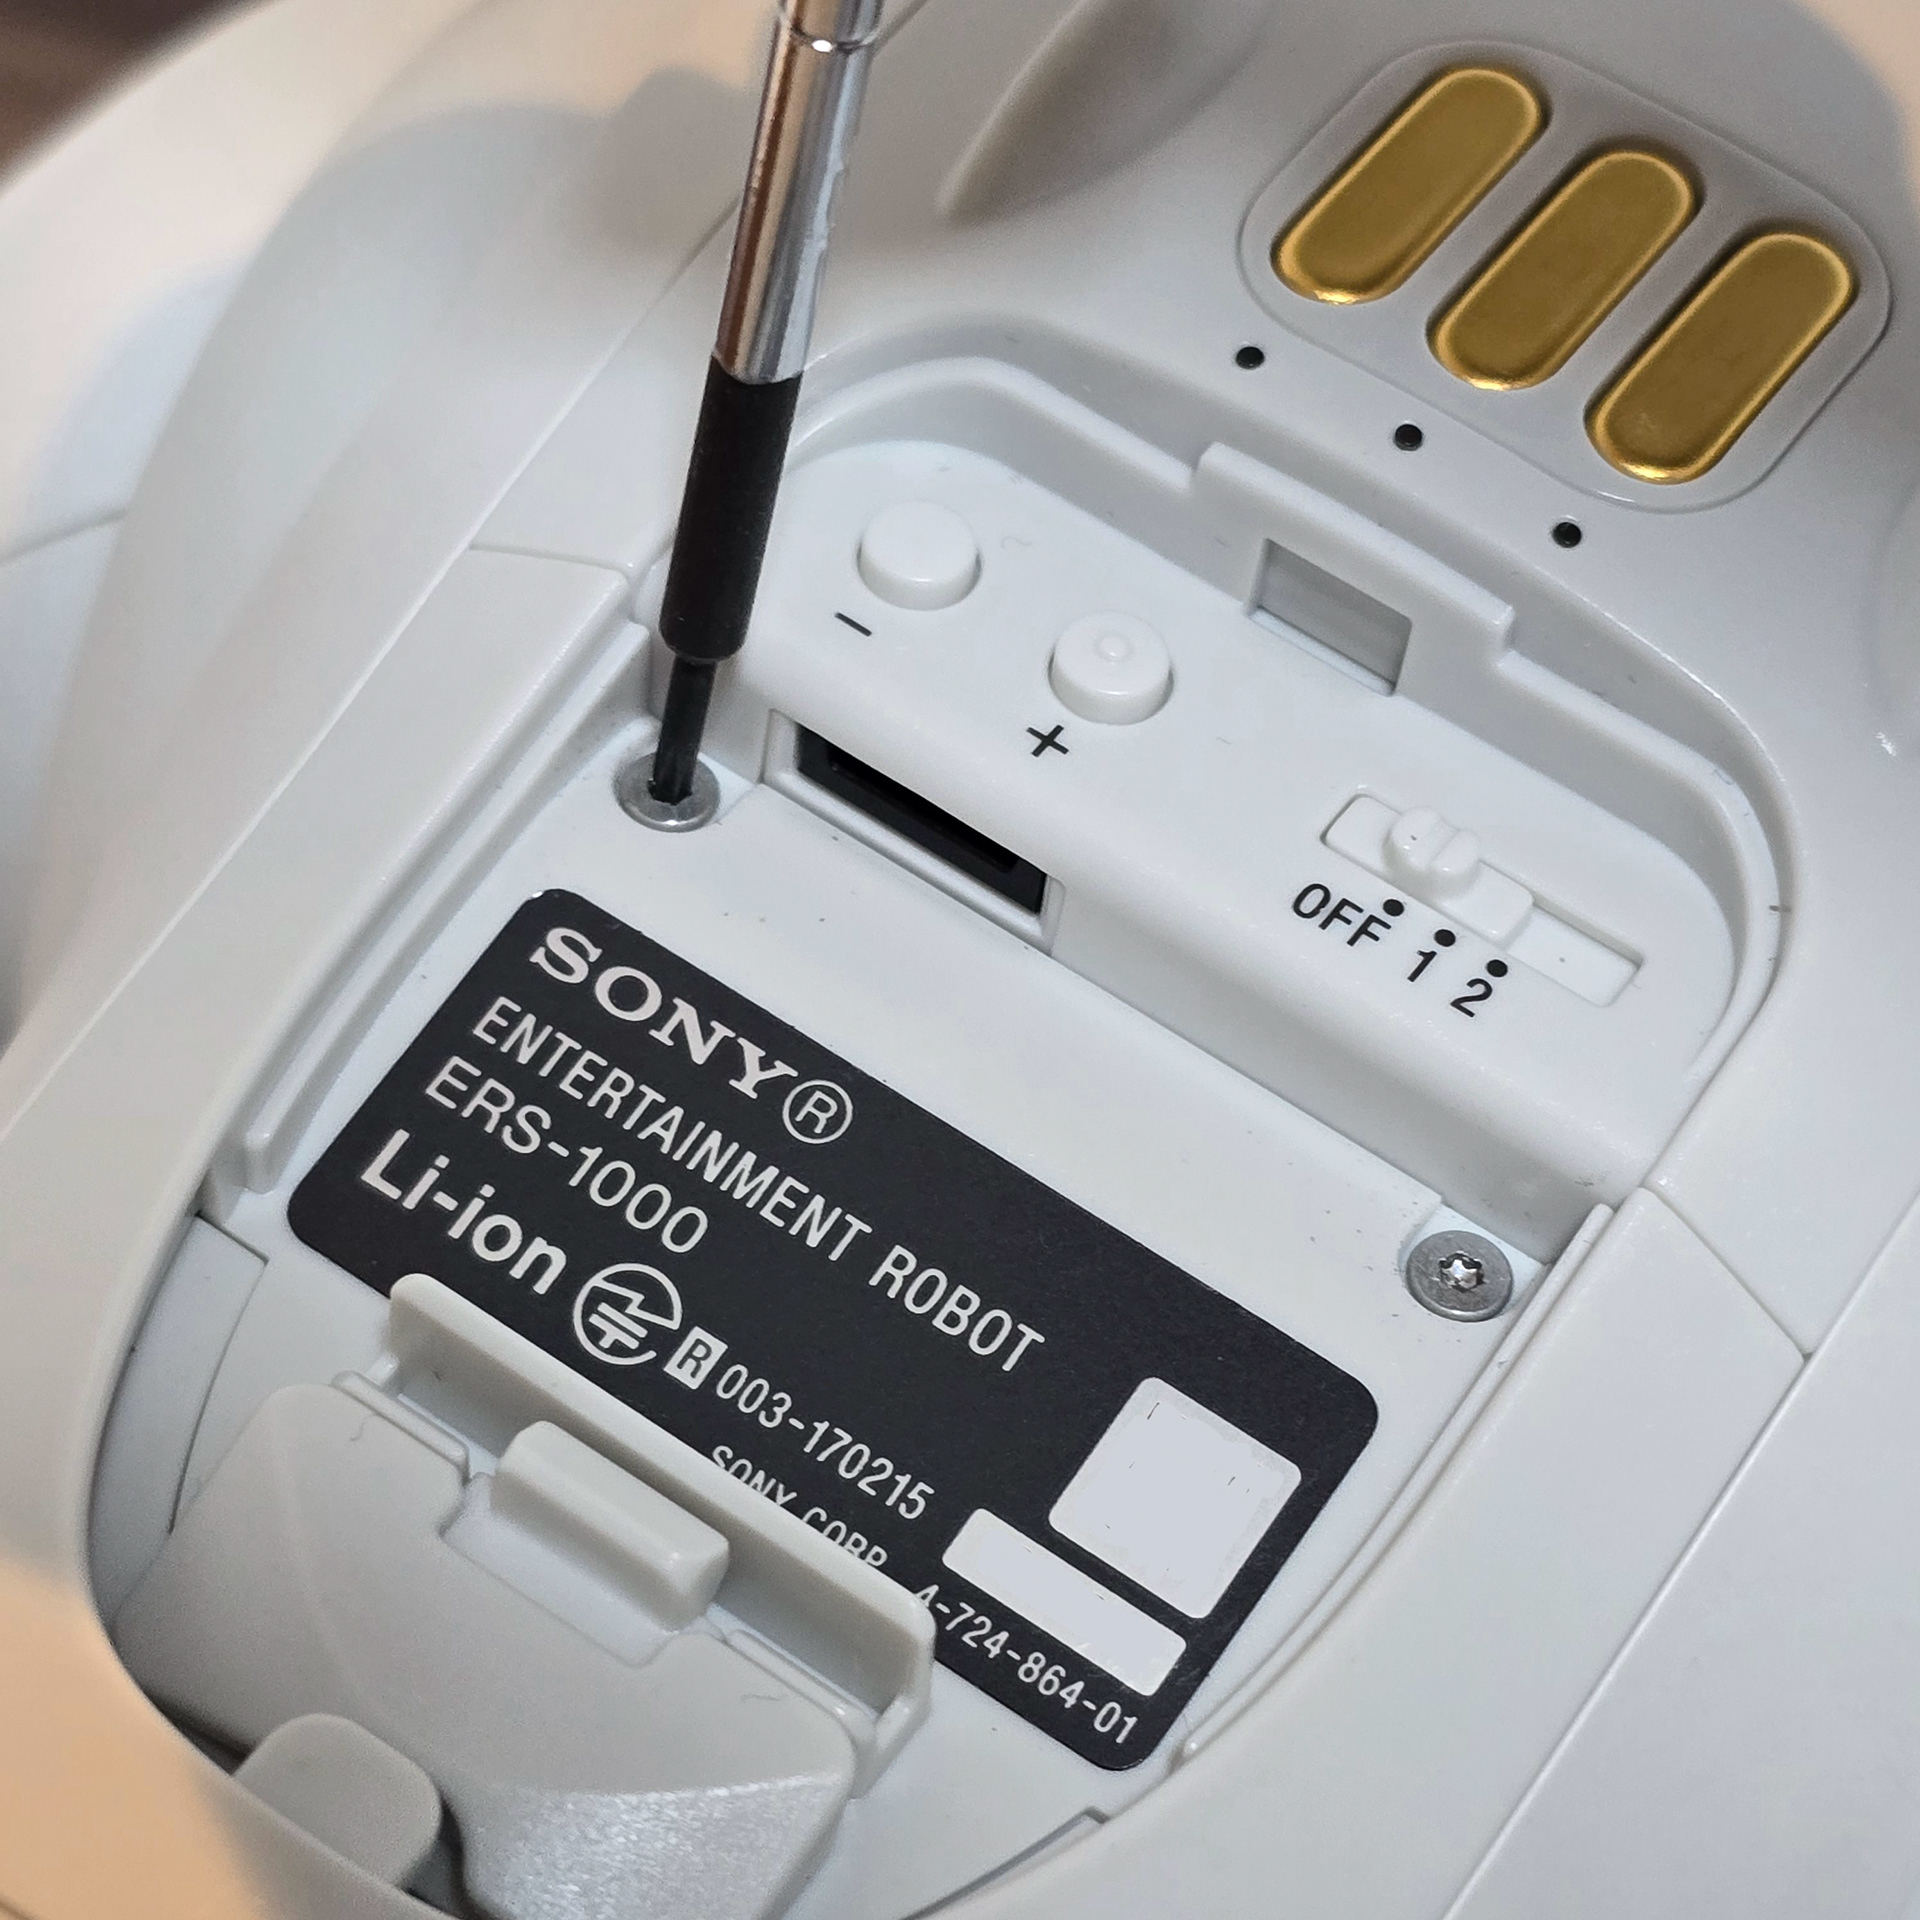
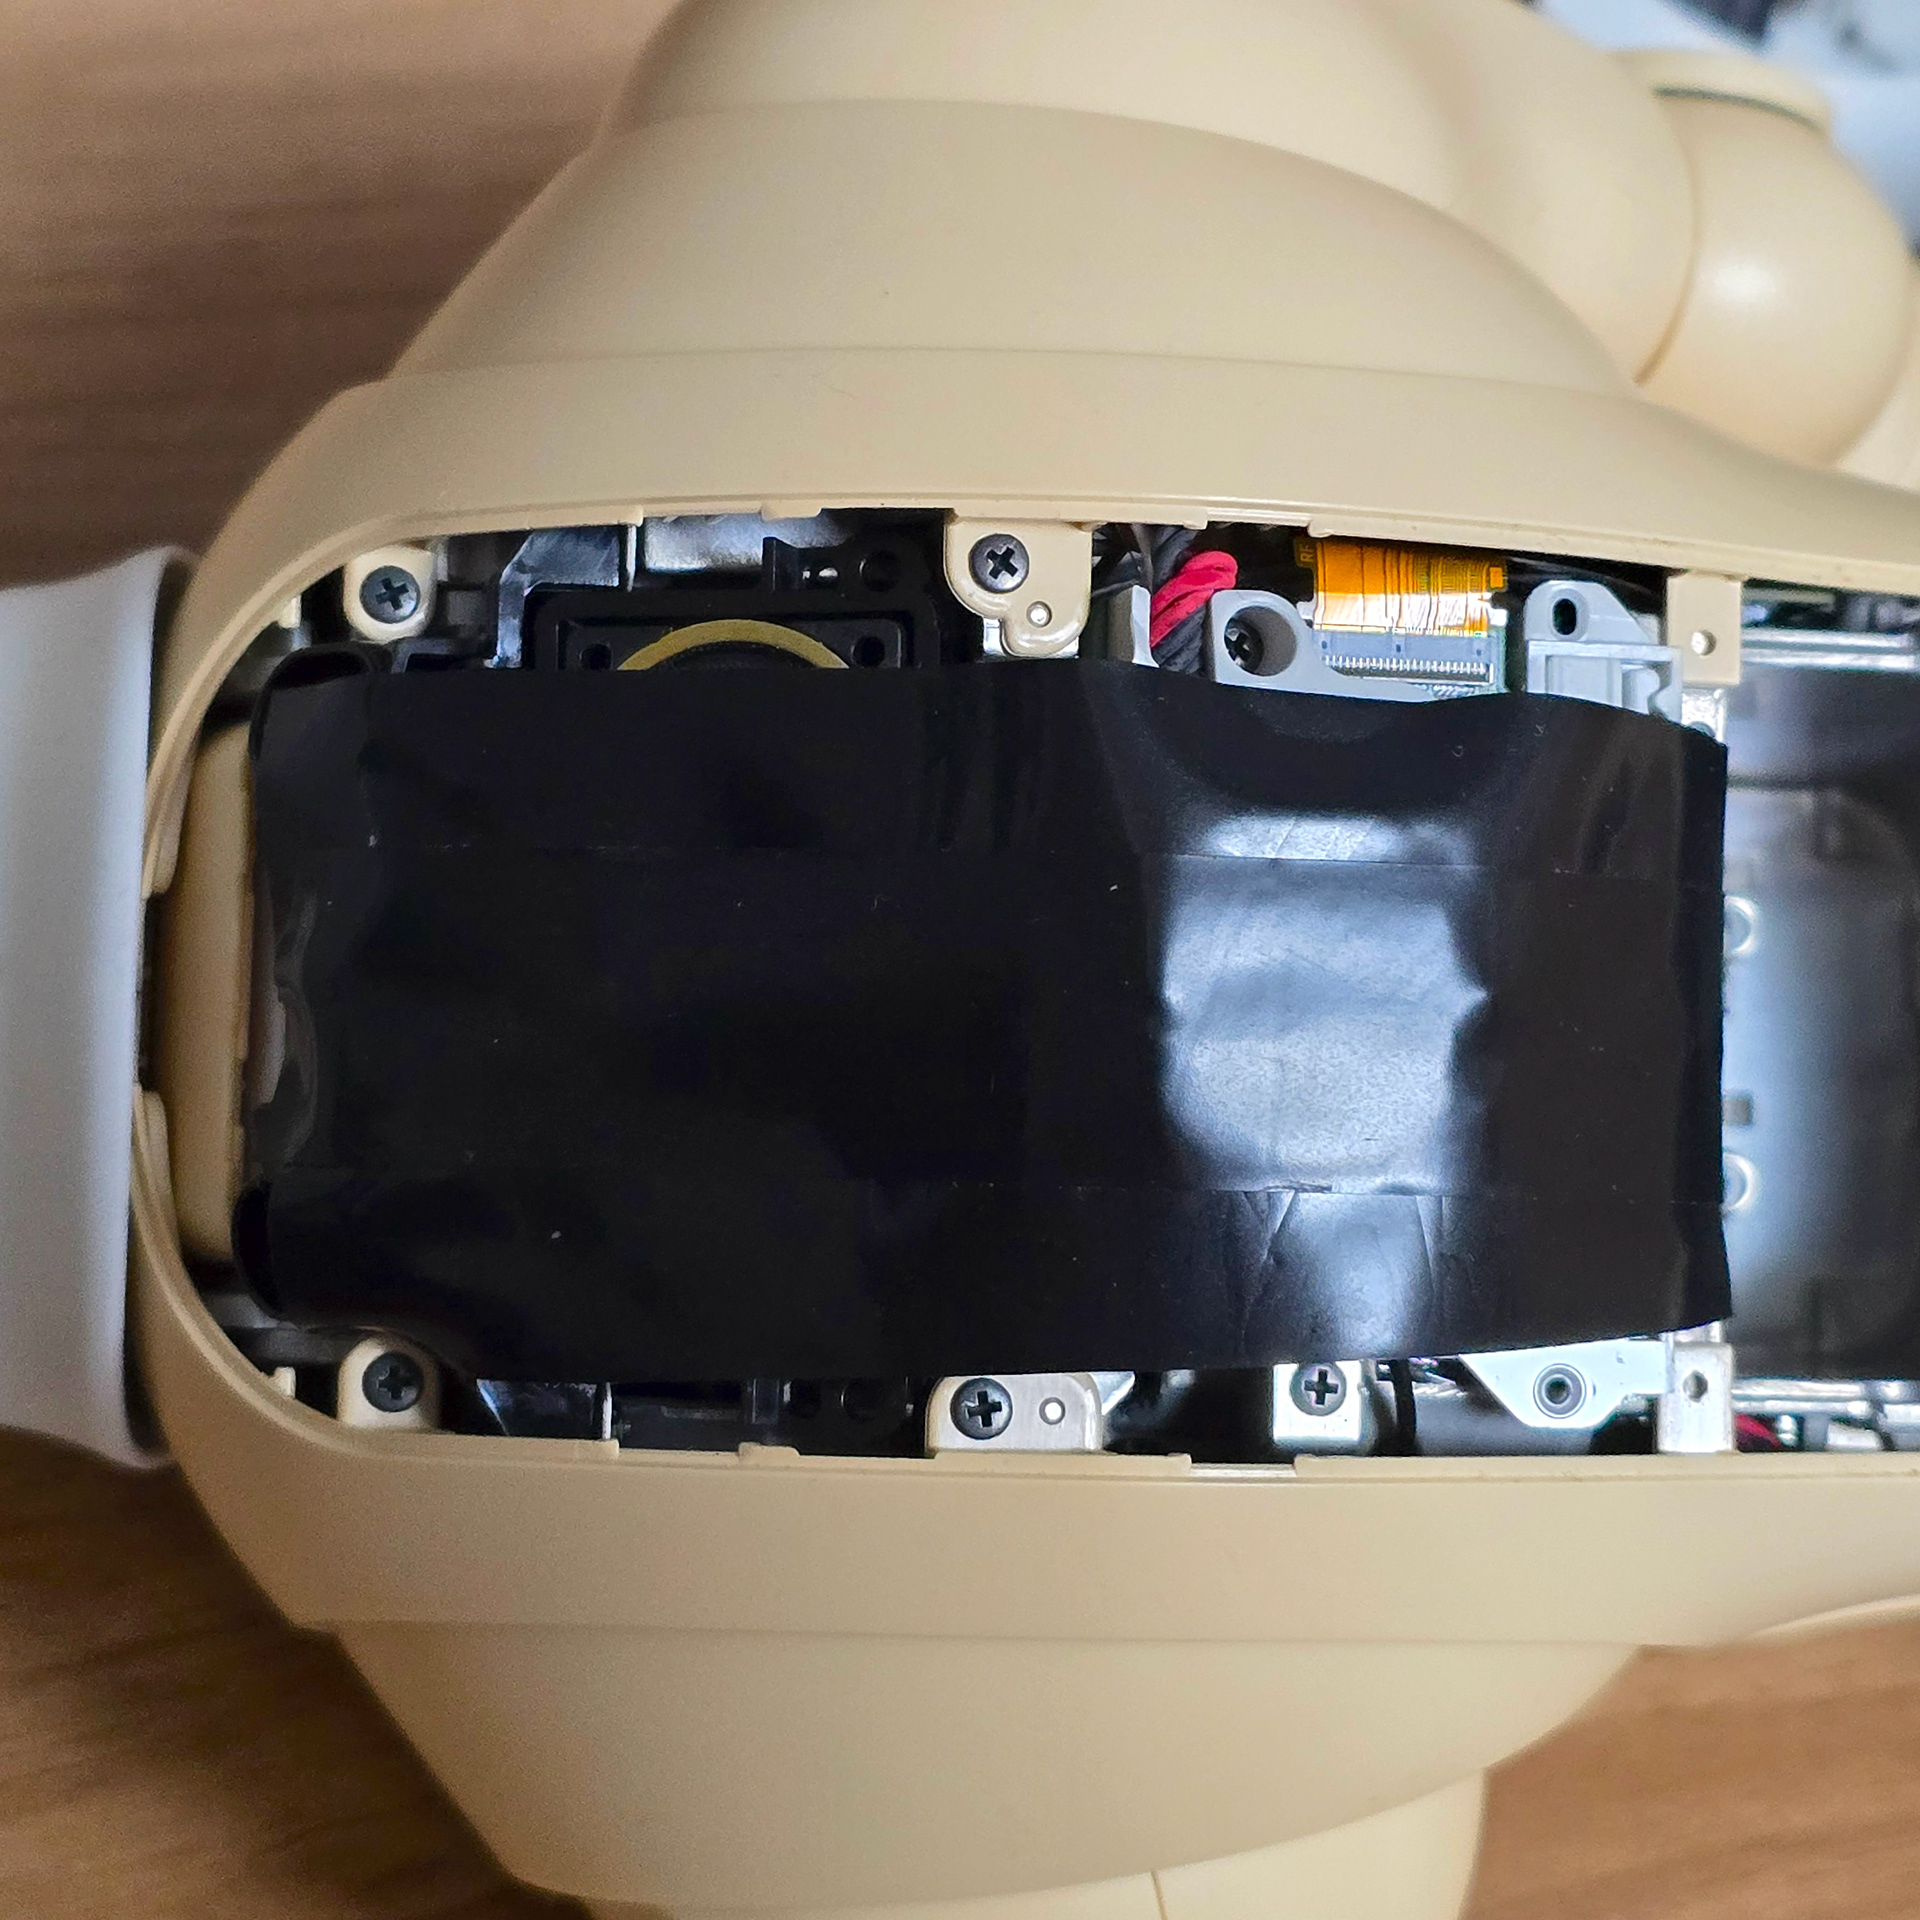
At the bottom of the battery compartment is two screws - remove both. There are also two screws next to the battery compartment - take these out as well. These 4 screws help anchor the external body plastic to the metal core.
電池ボックスの底にはネジが2本あります。両方とも外してください。電池ボックスの横にもネジが2本ありますので、これも外してください。この4本のネジは、外装のプラスチック部分を金属コアに固定する役割を果たしています。
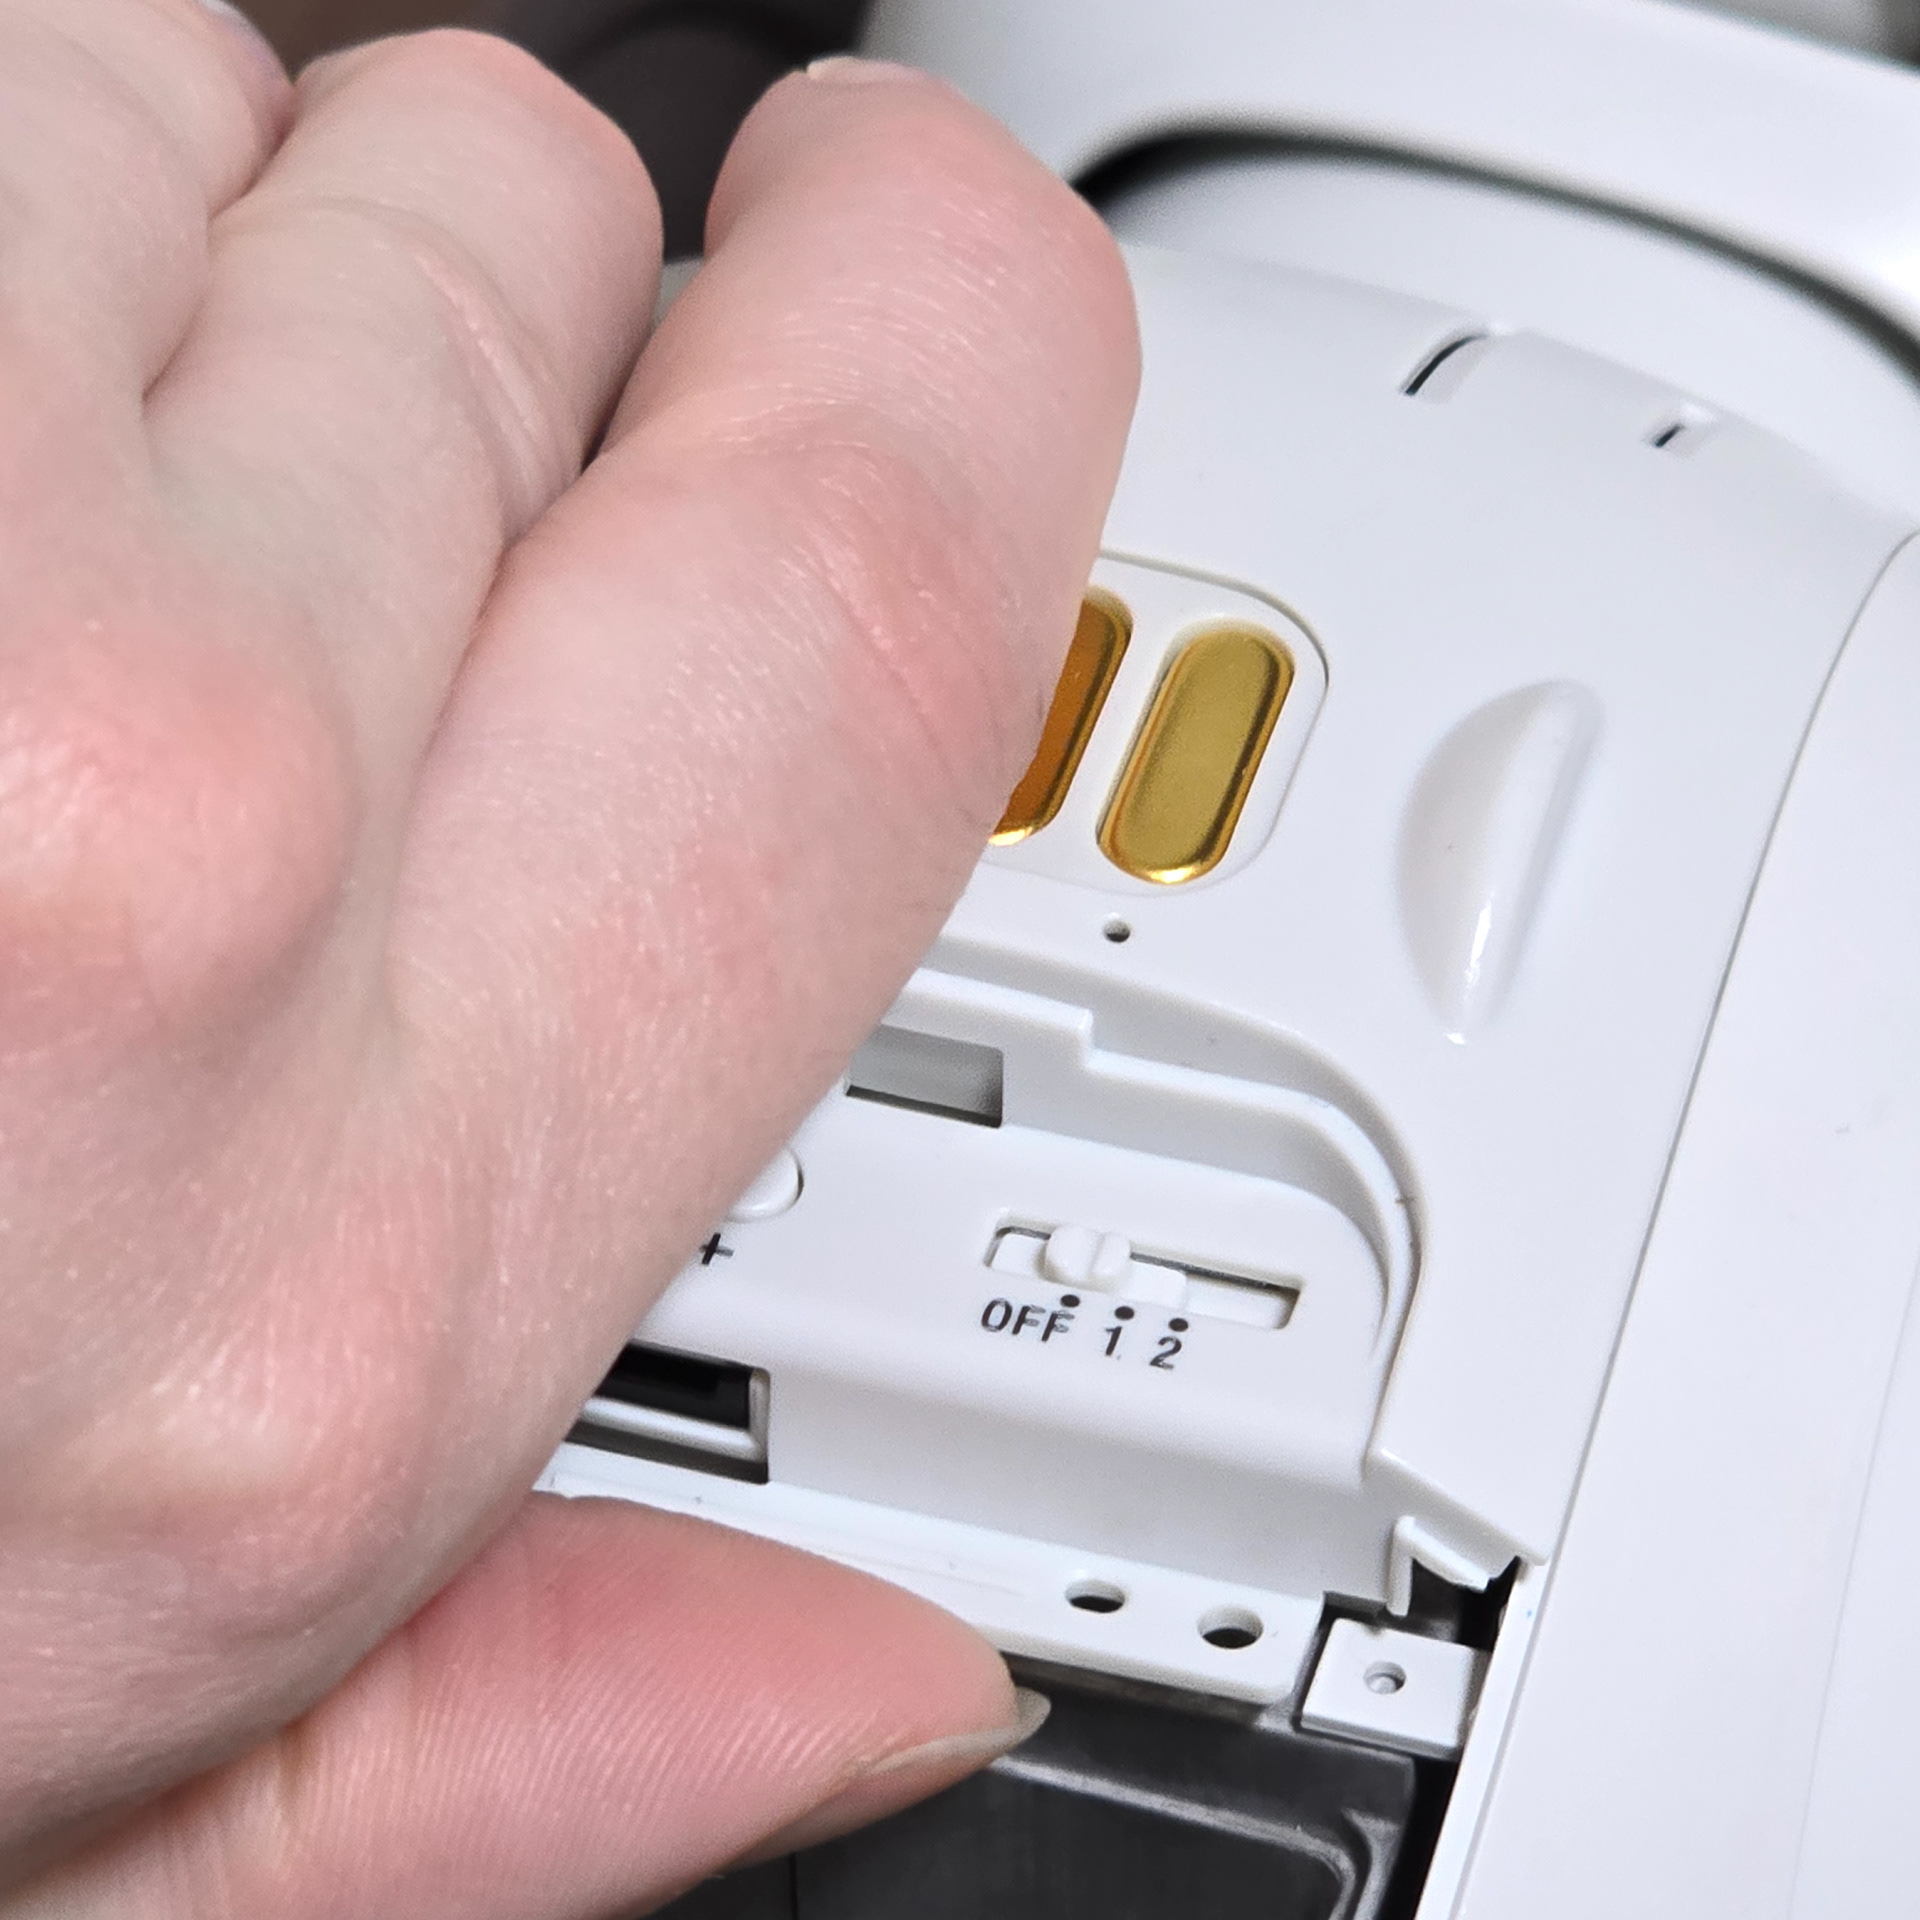

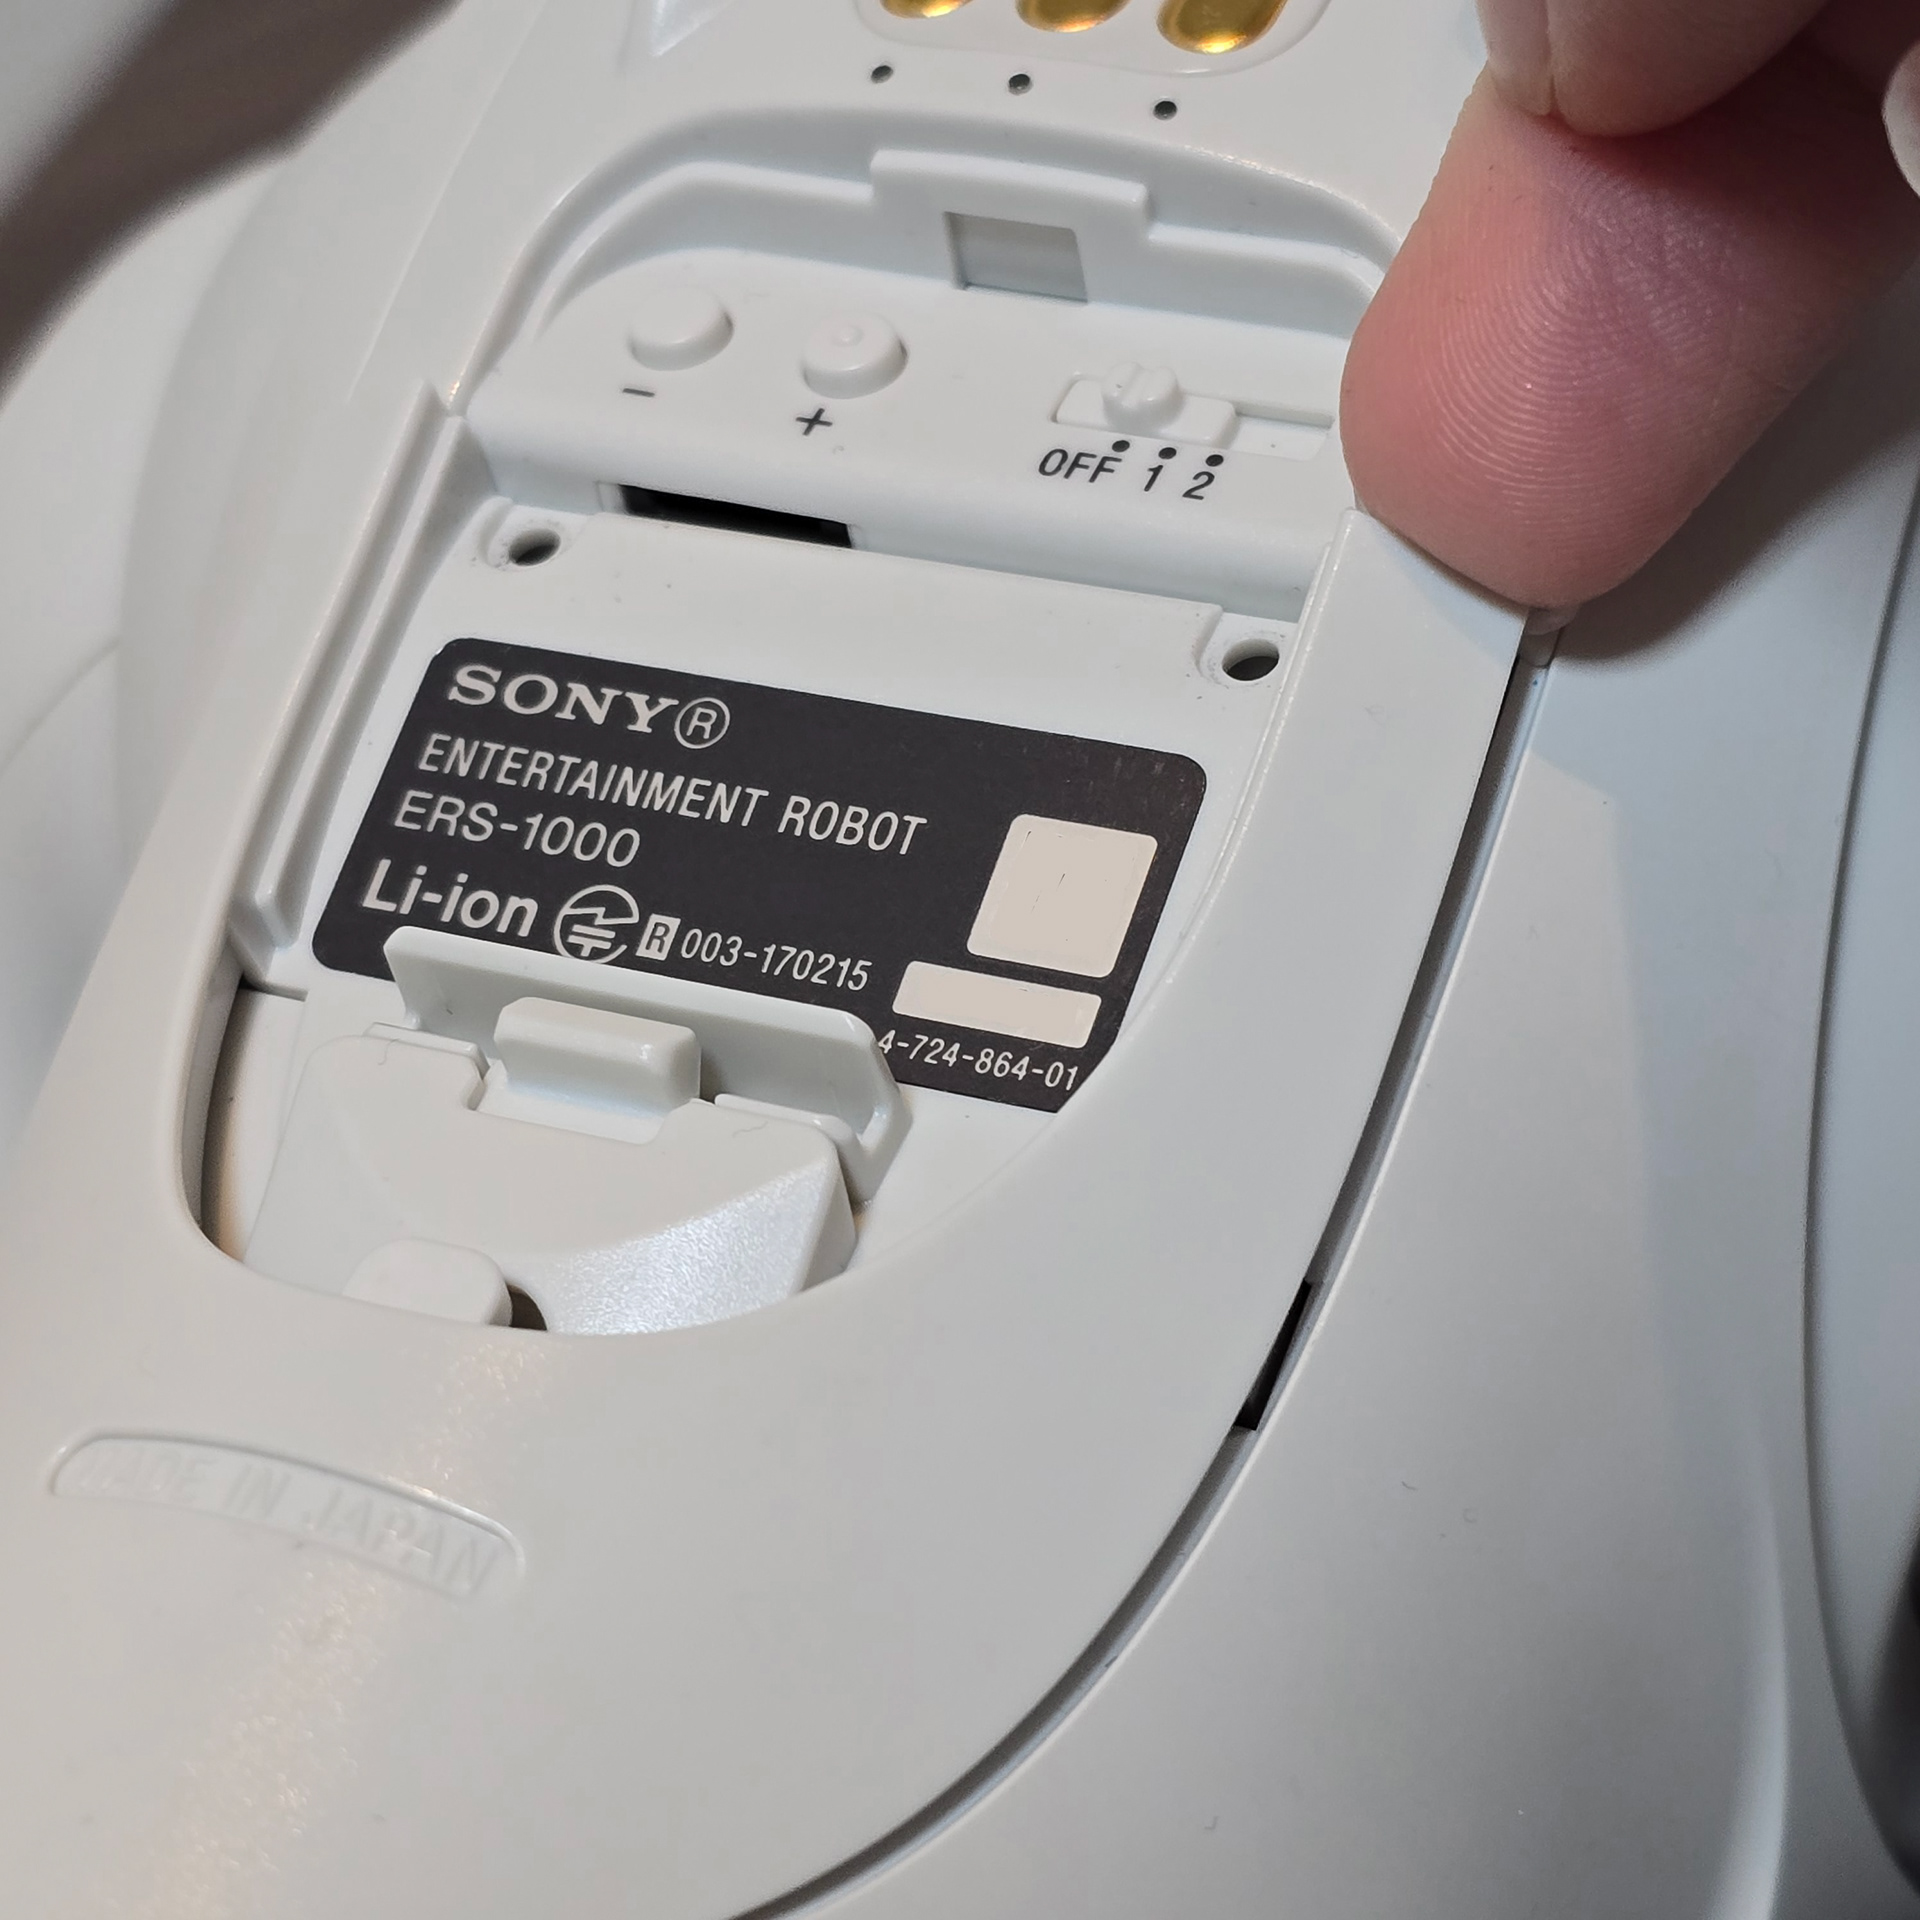
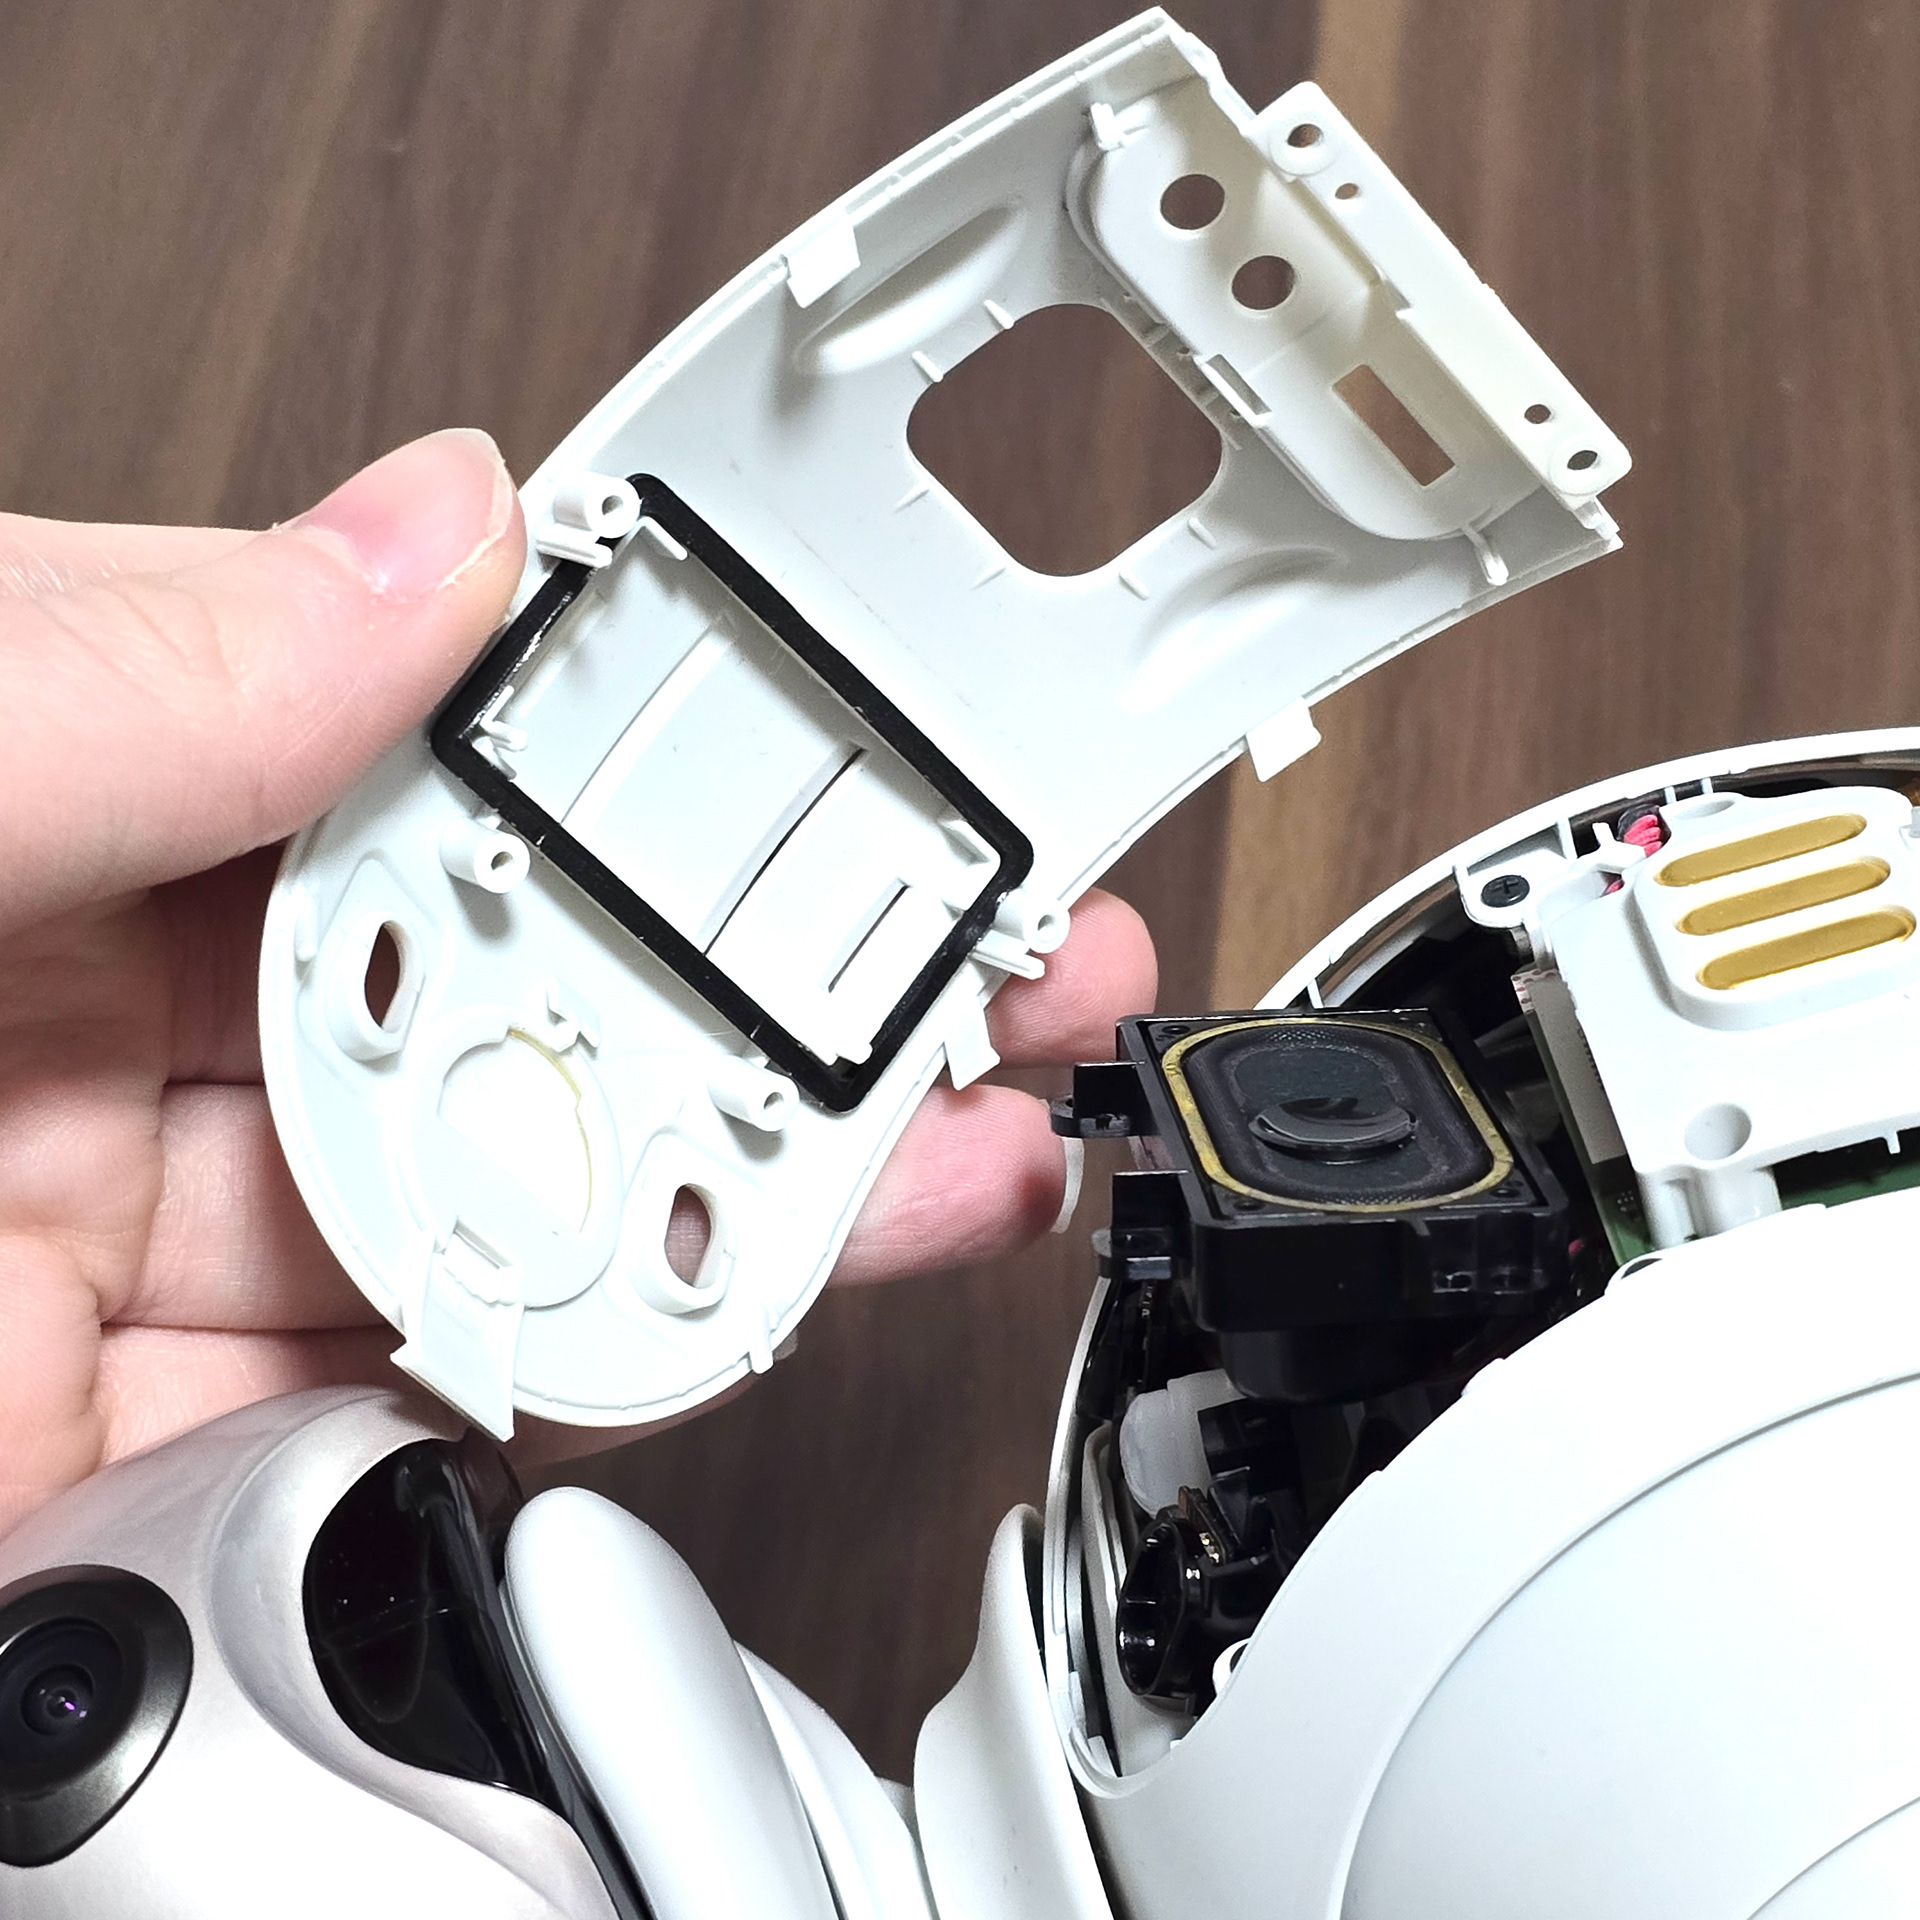
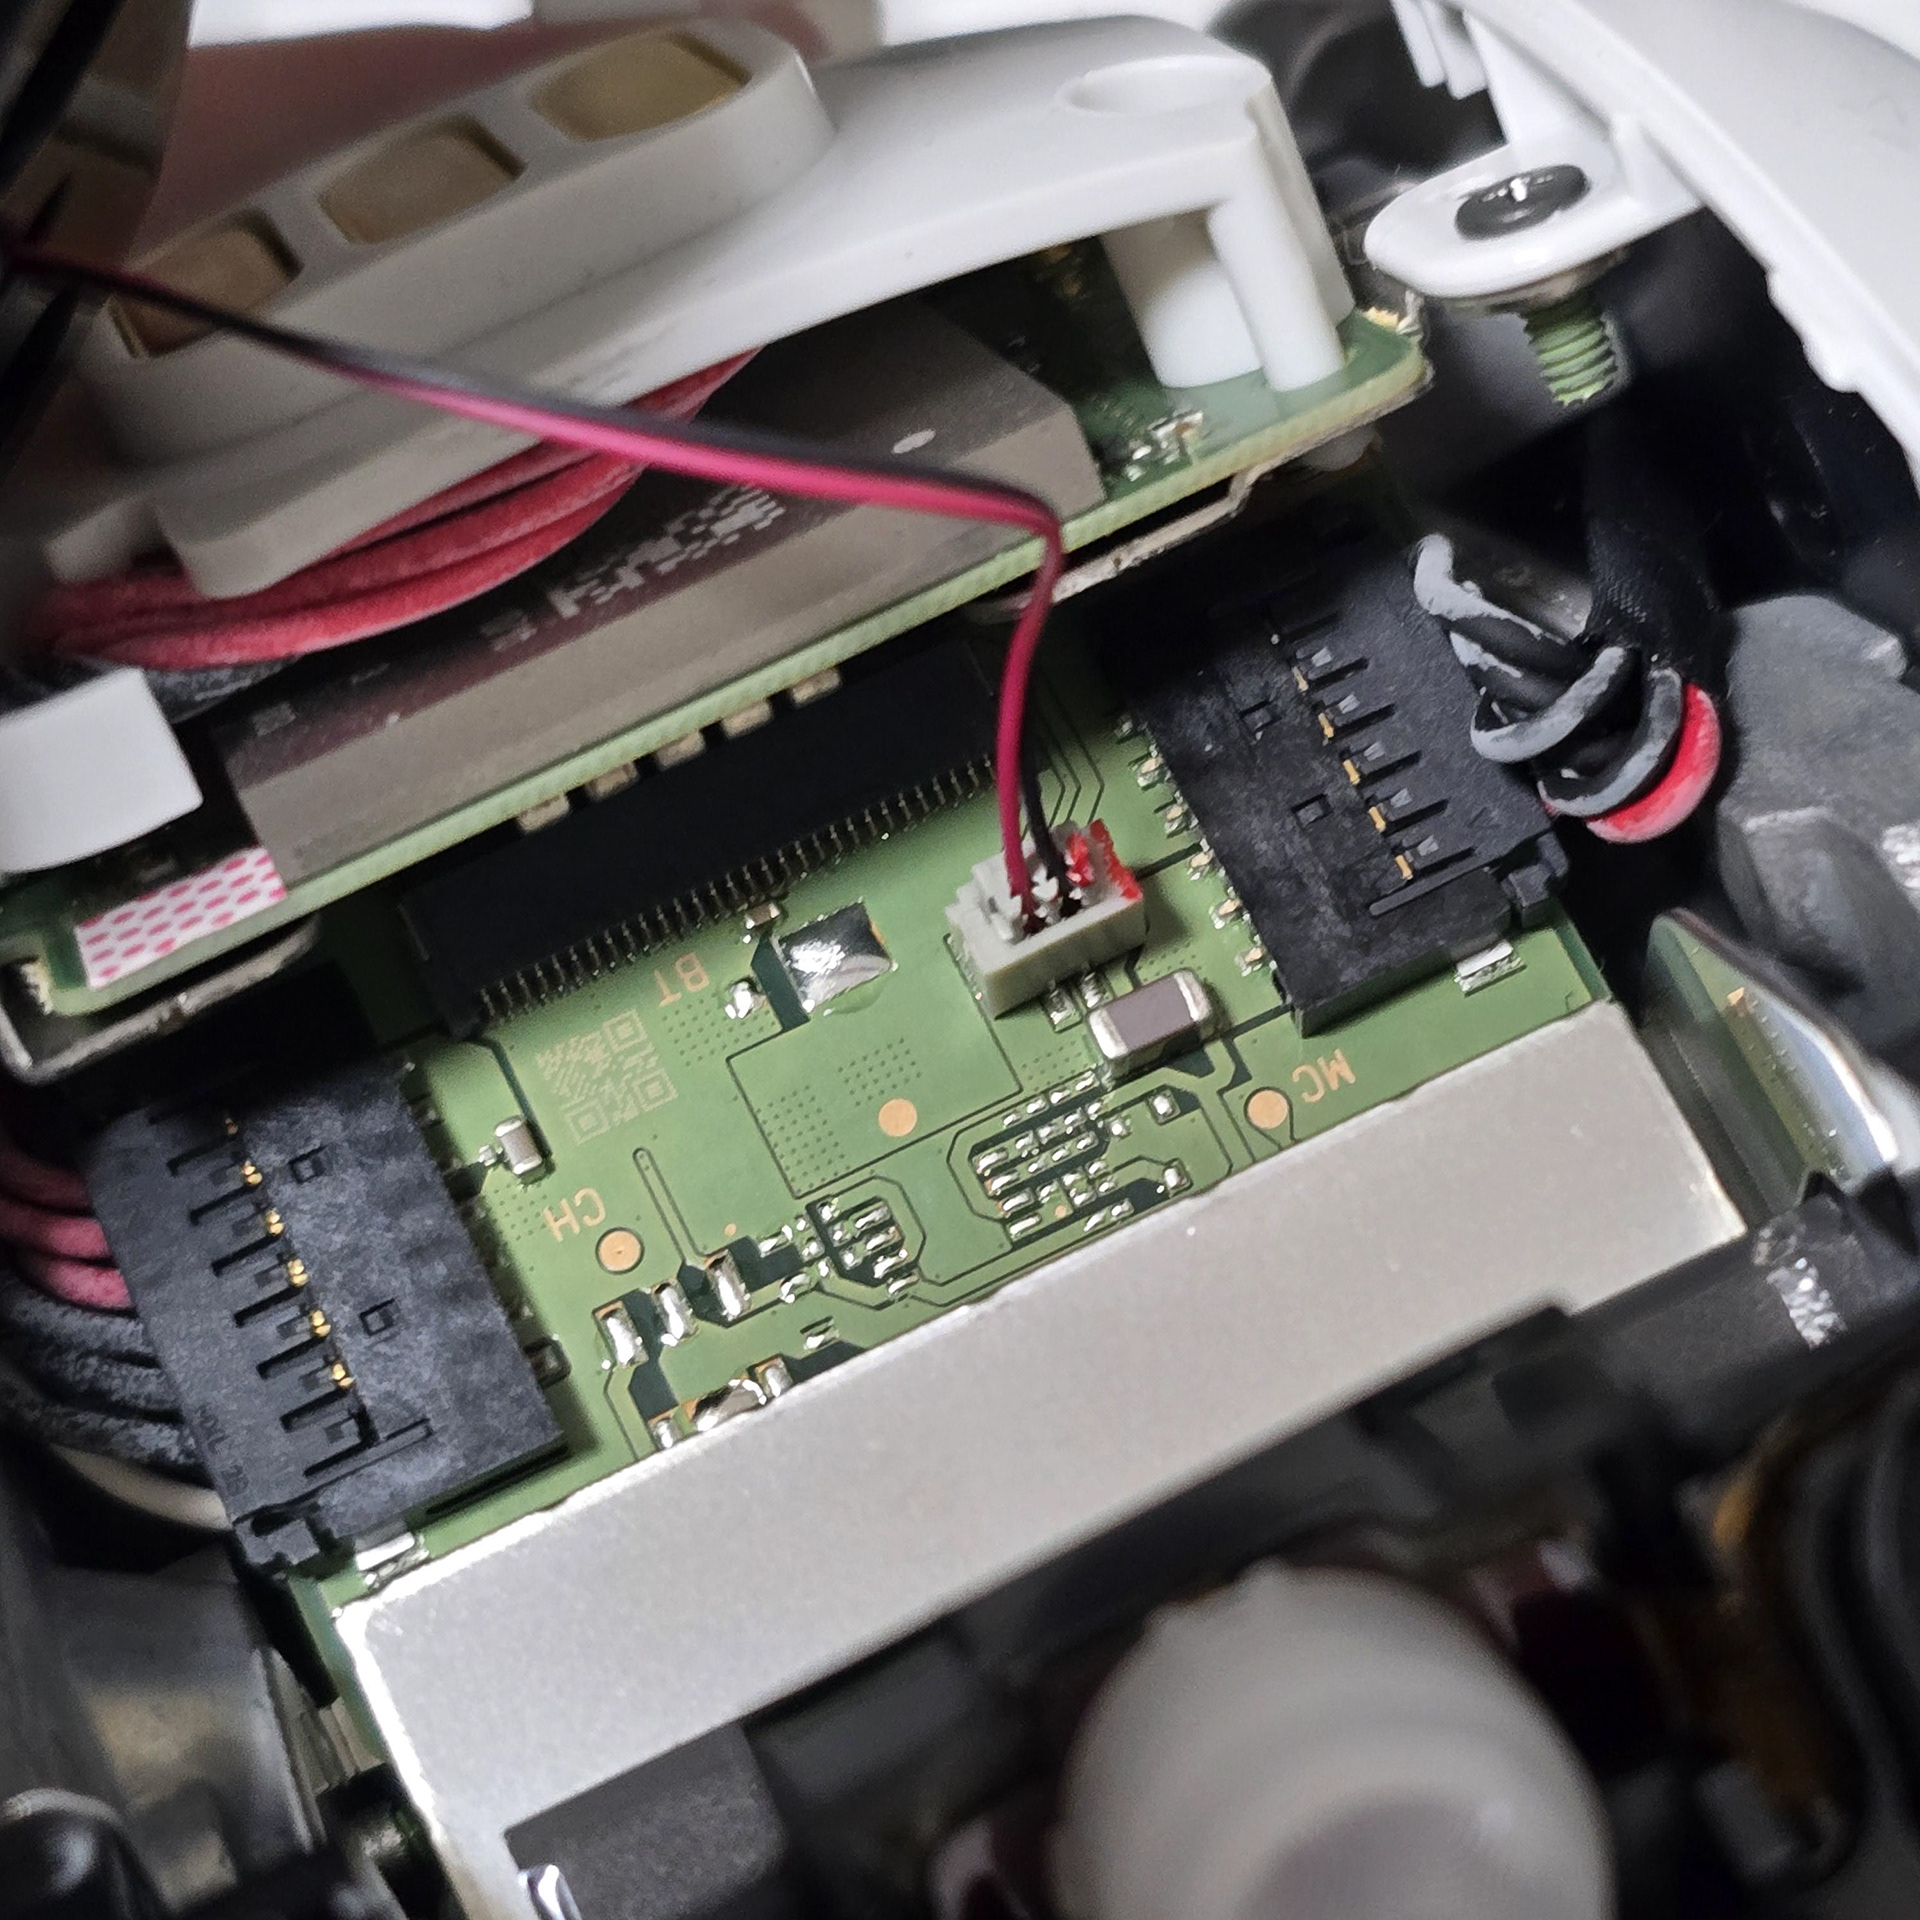
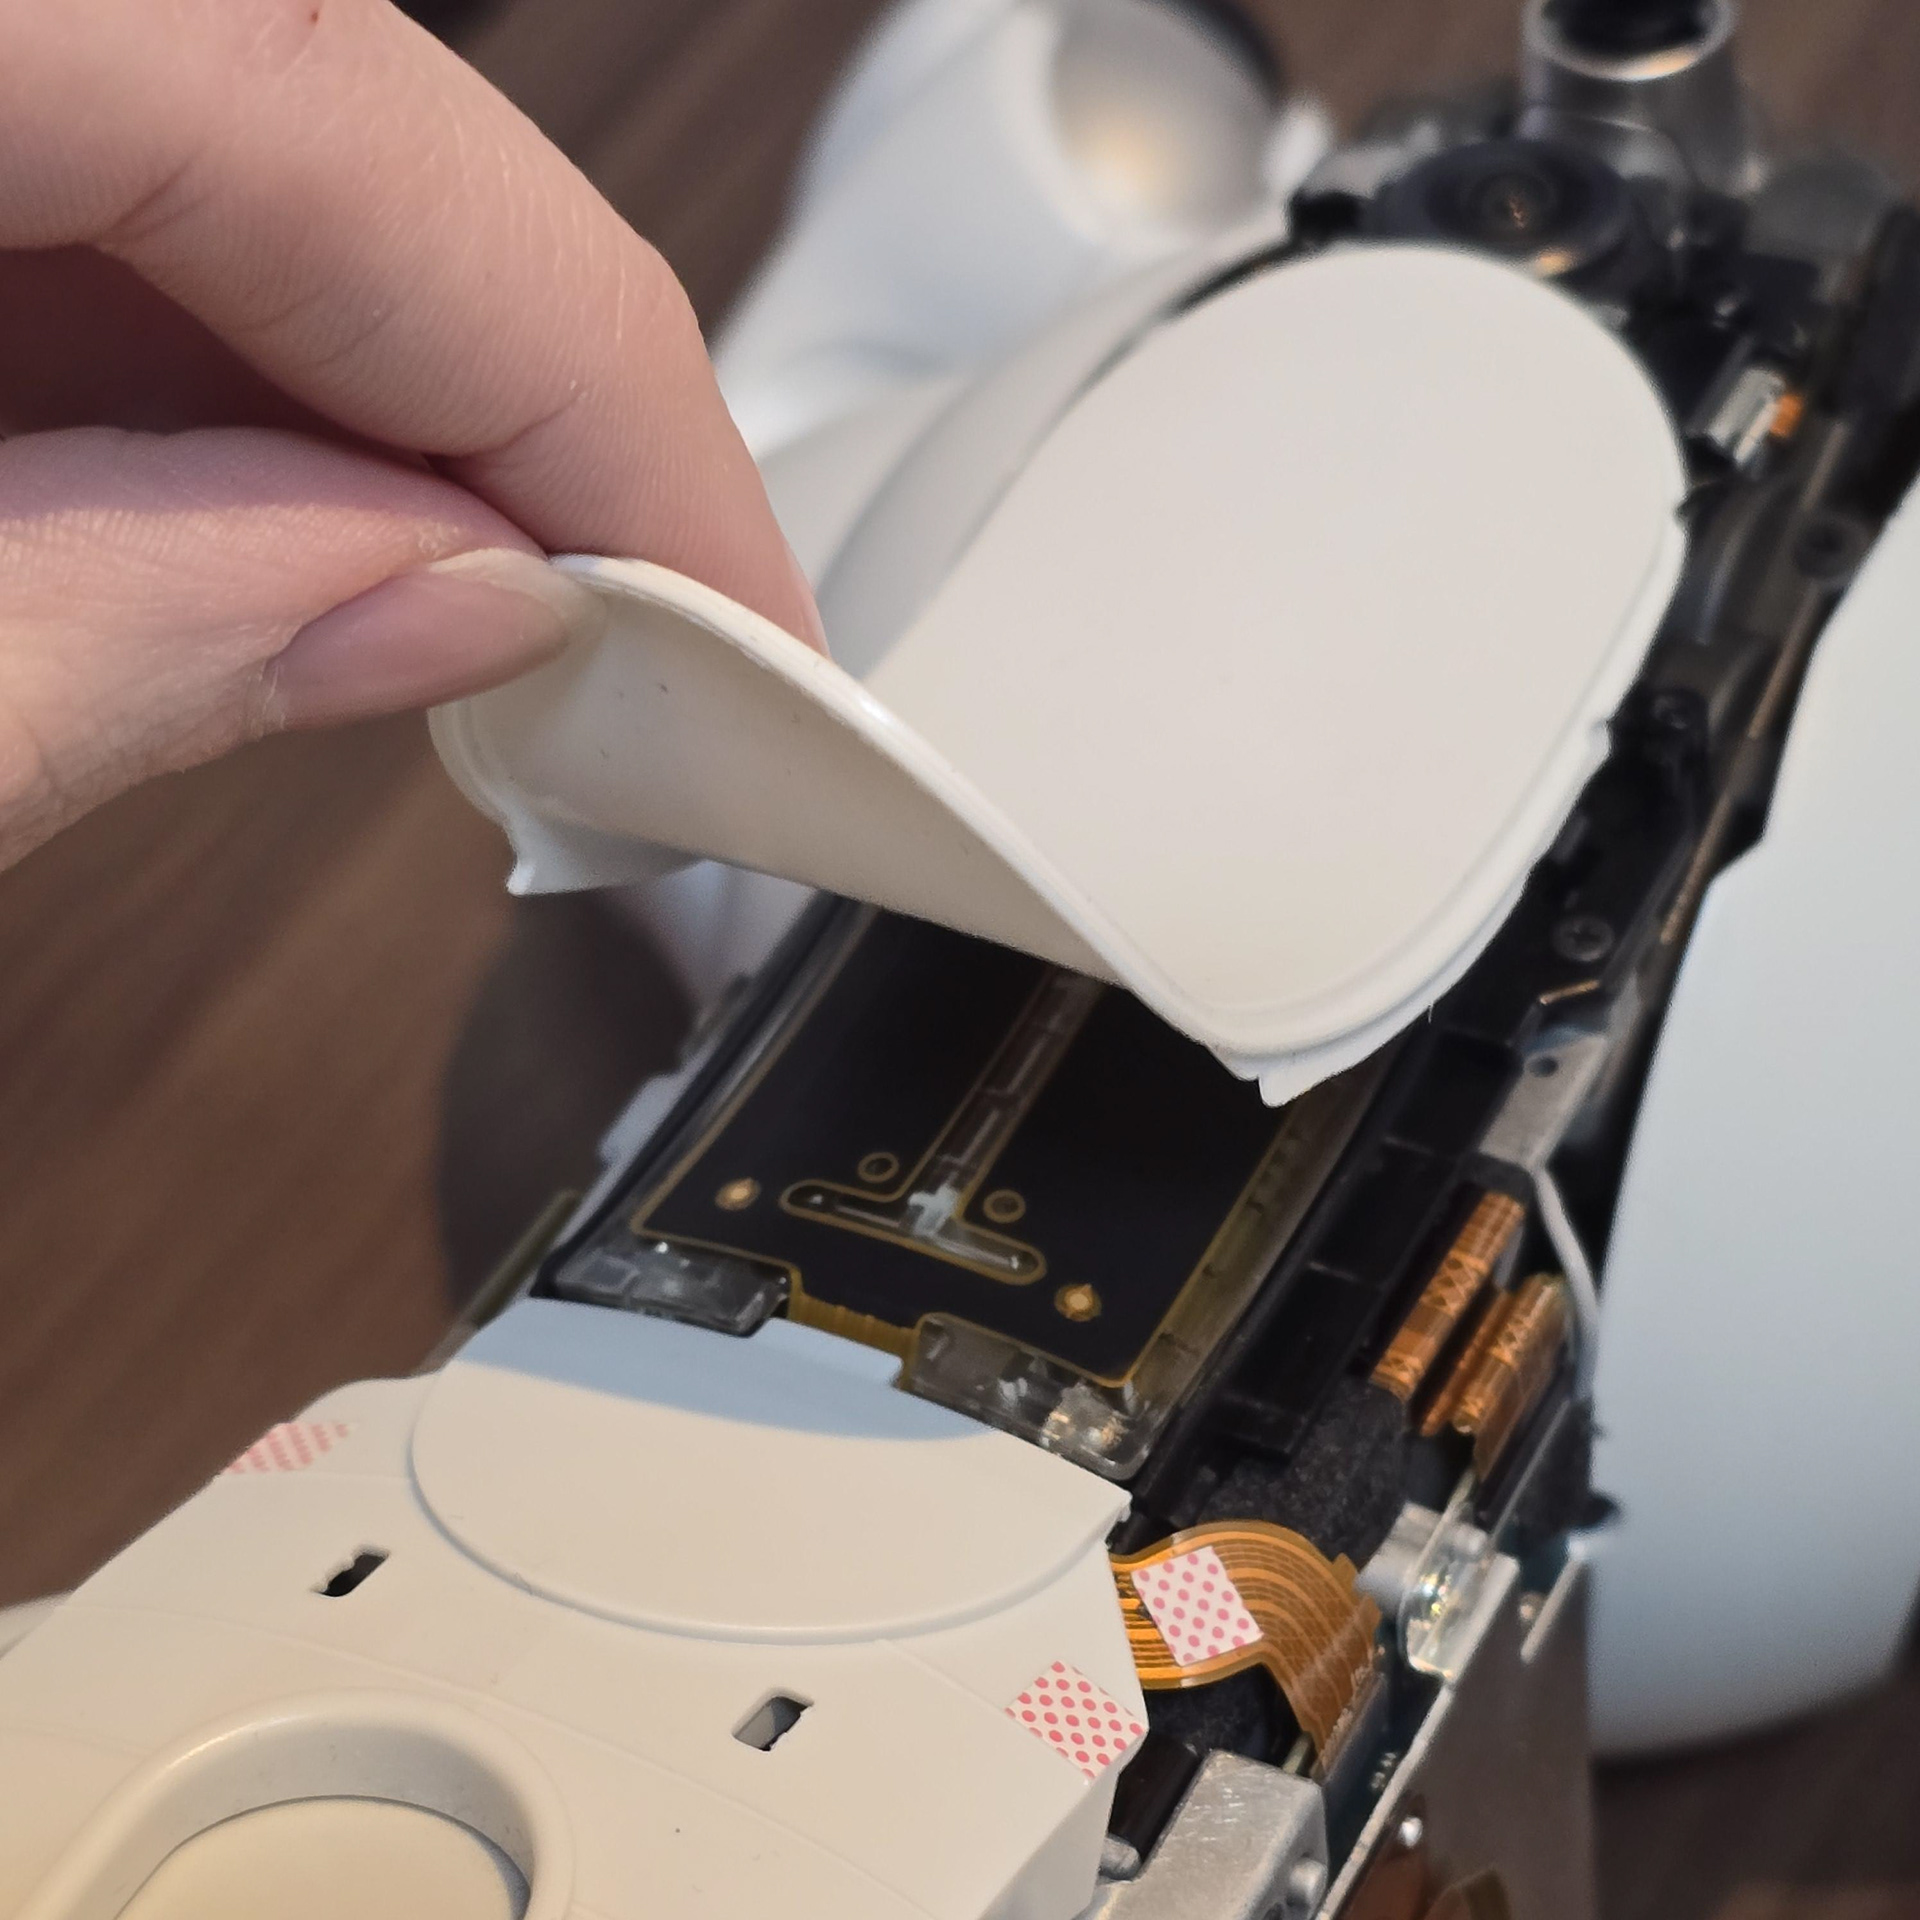
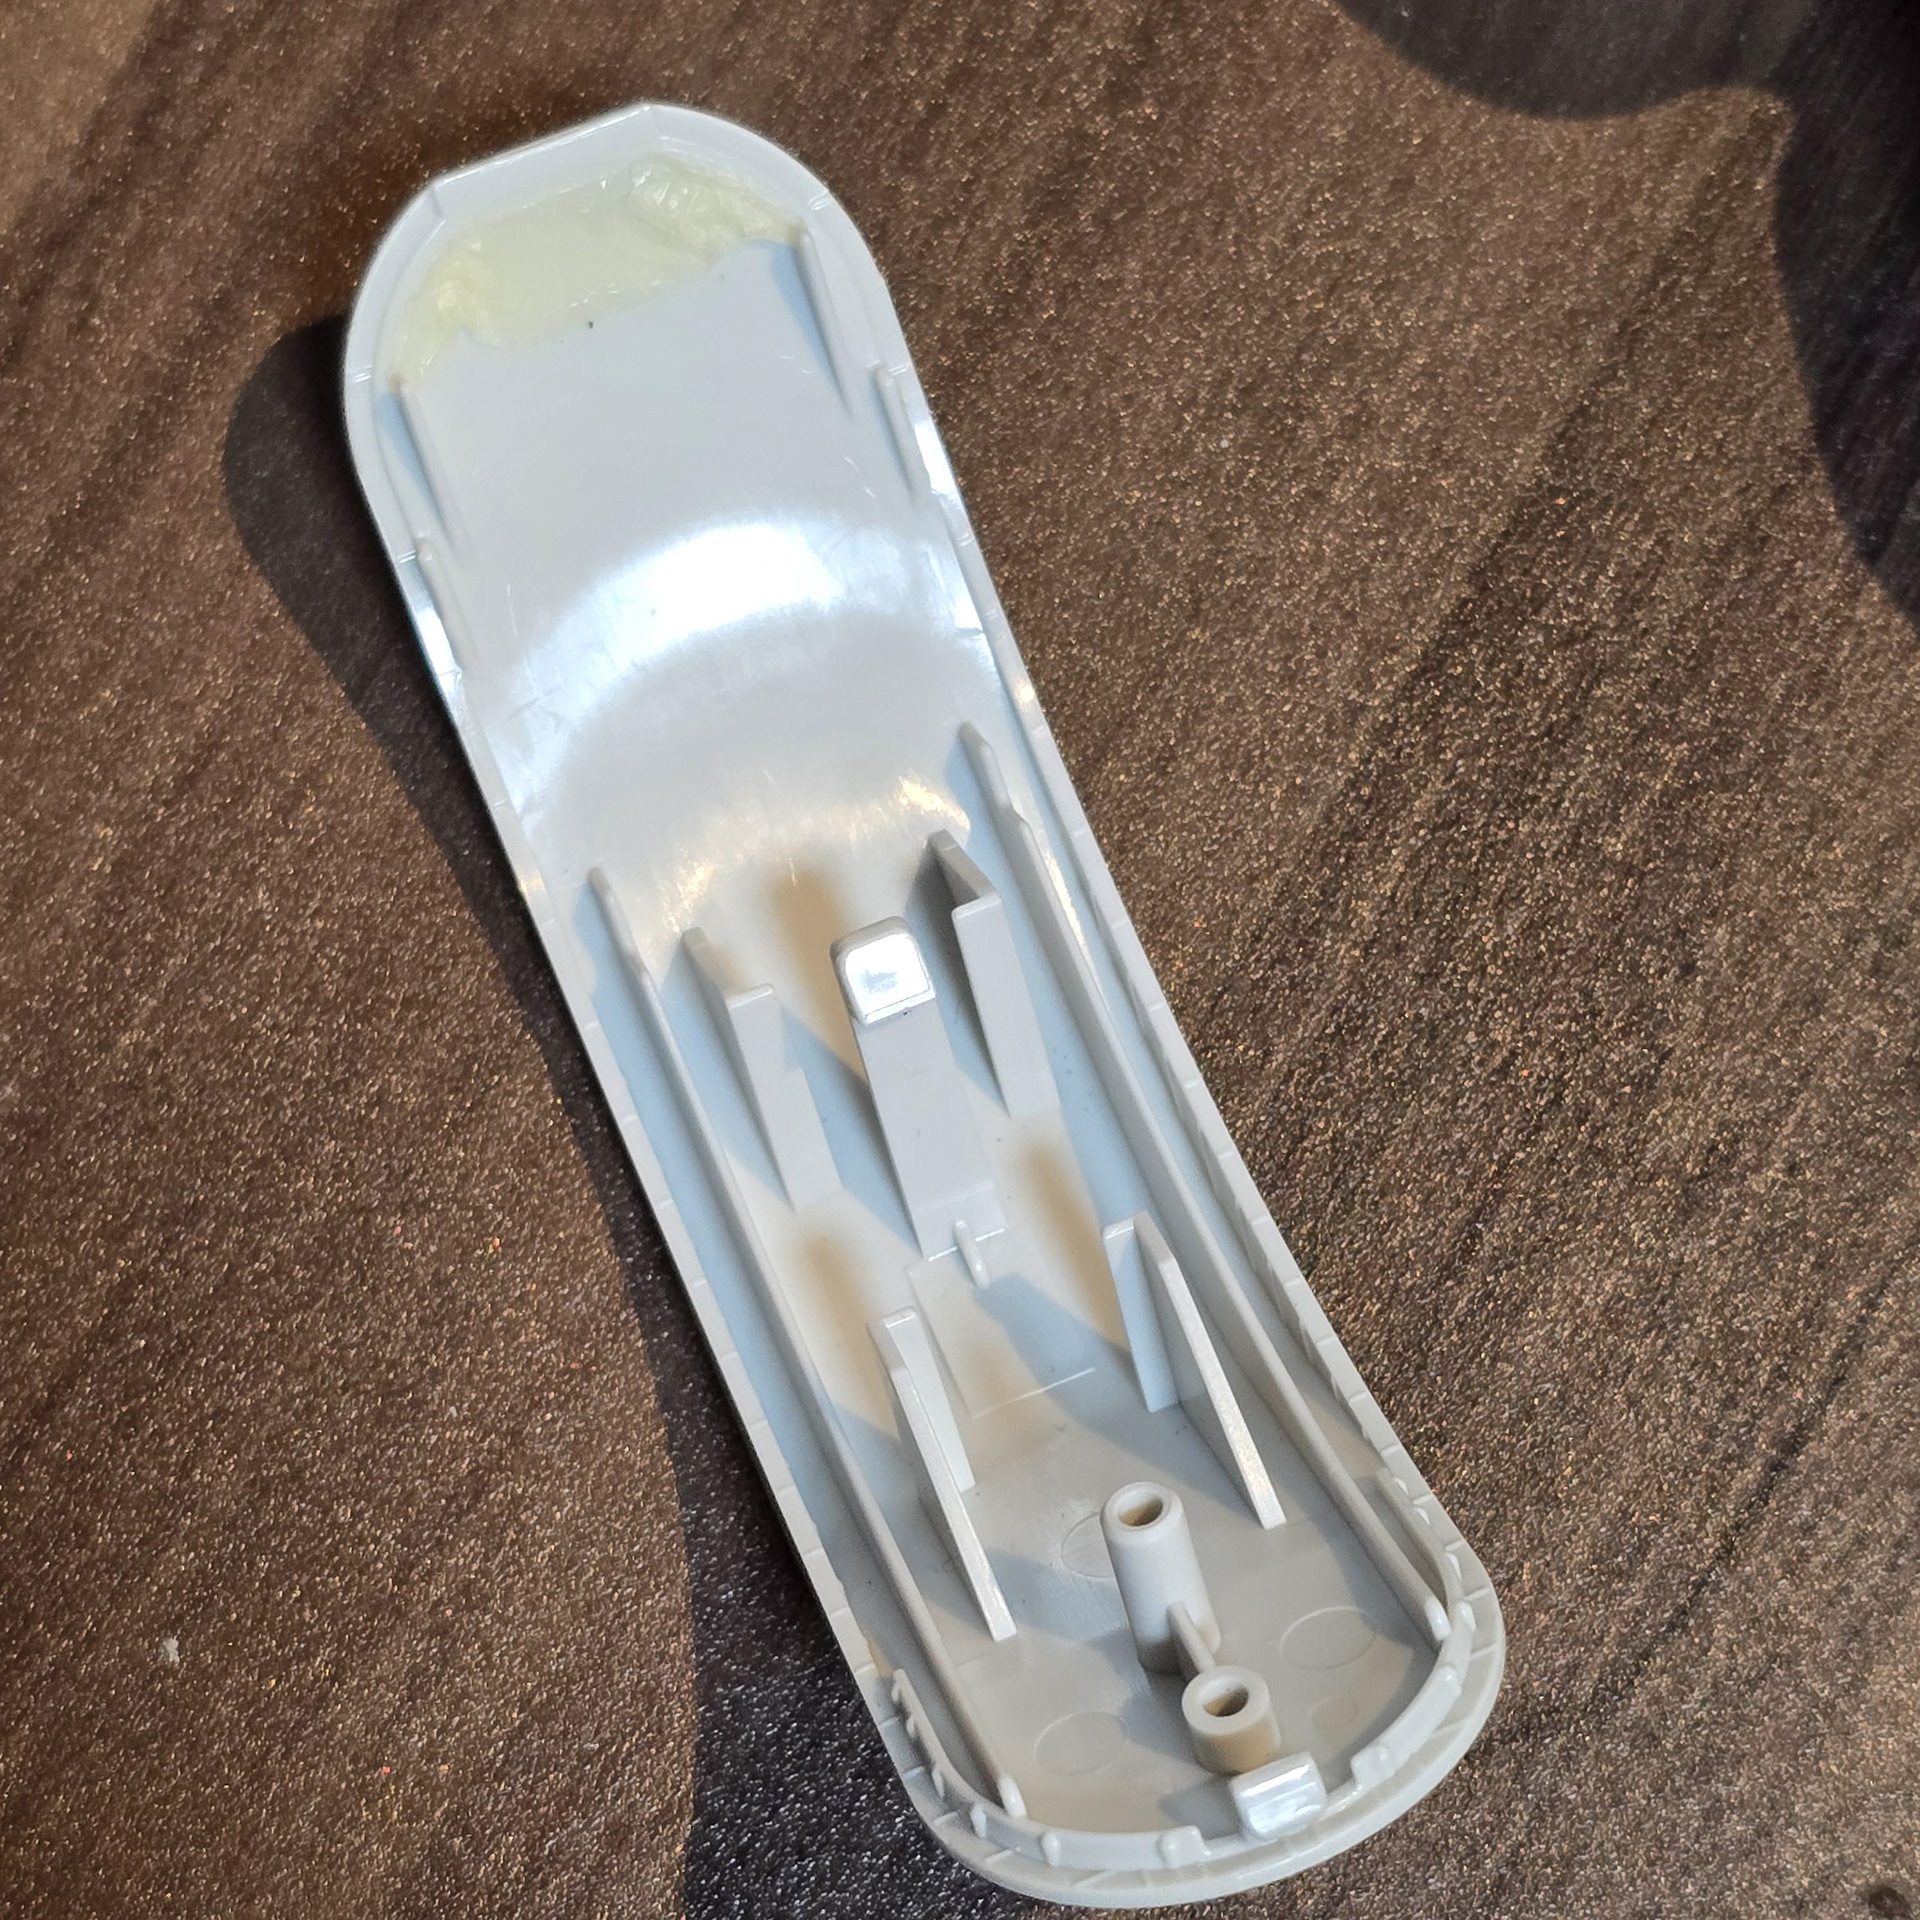
Next, pull the front chest panel up, pulling up from near where the Torx screws were located. The panel should pop up (do not try to fully remove it as it is connected by a speaker wire to the chest board. When pulling the chest panel up, the volume button and wireless slider switch plastics may come loose. Just put them in a safe place once we reassemble the robot.
次に、胸部前面パネルを、トルクスネジが付いていた場所の近くから引き上げます。パネルが飛び出すはずです(スピーカーケーブルで胸部ボードに接続されているため、完全に取り外そうとしないでください)。胸部パネルを引き上げると、音量ボタンとワイヤレススライダースイッチのプラスチックが緩む場合があります。ロボットを組み立て直したら、安全な場所に保管してください。
Two Ways to Deal With the Speaker
話し手への対処法2つ
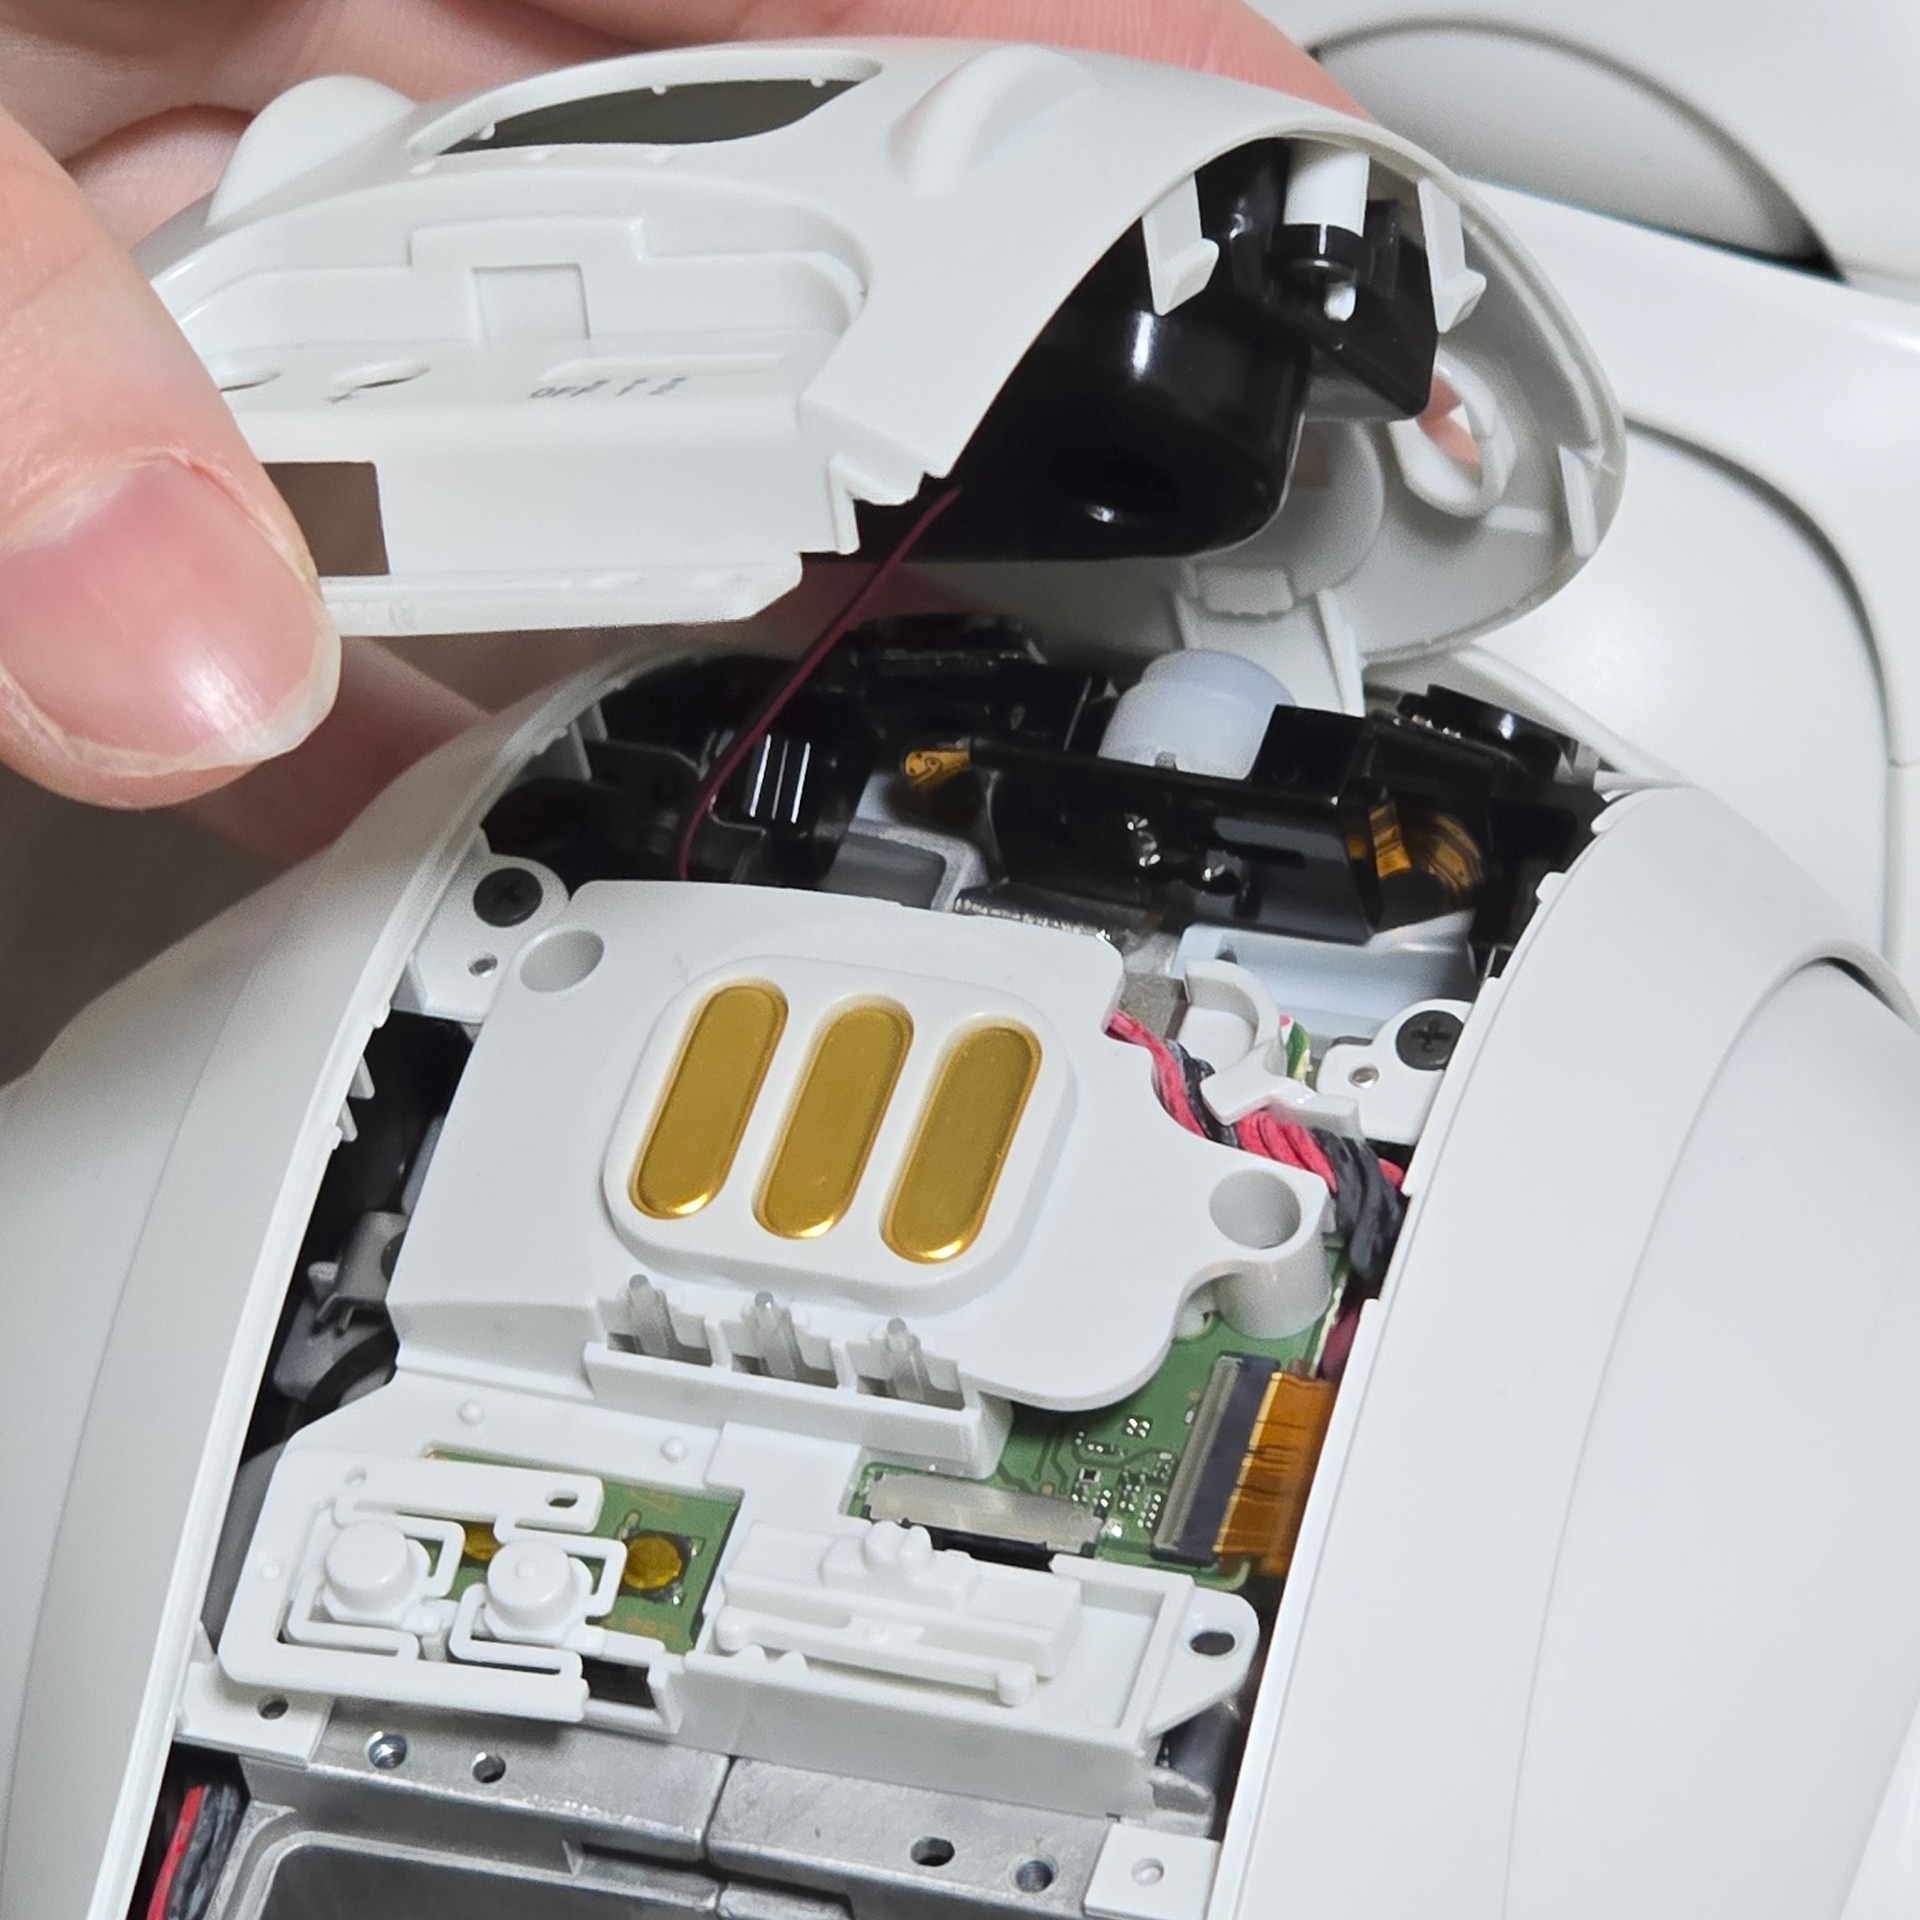
The speaker is probably the worst section of taking the ERS-1000 shells off because its wires have a nasty habit of randomly snapping when trying to unplug it. The wire plug is too snuggly fit into the socket and its hard to wiggle out. It is a bad design decision that Im surprised hasn't been addressed 7+ years on. I am currently in the process of making replacement speakers with the correct wire attachment so we no longer have to worry about this part breaking.
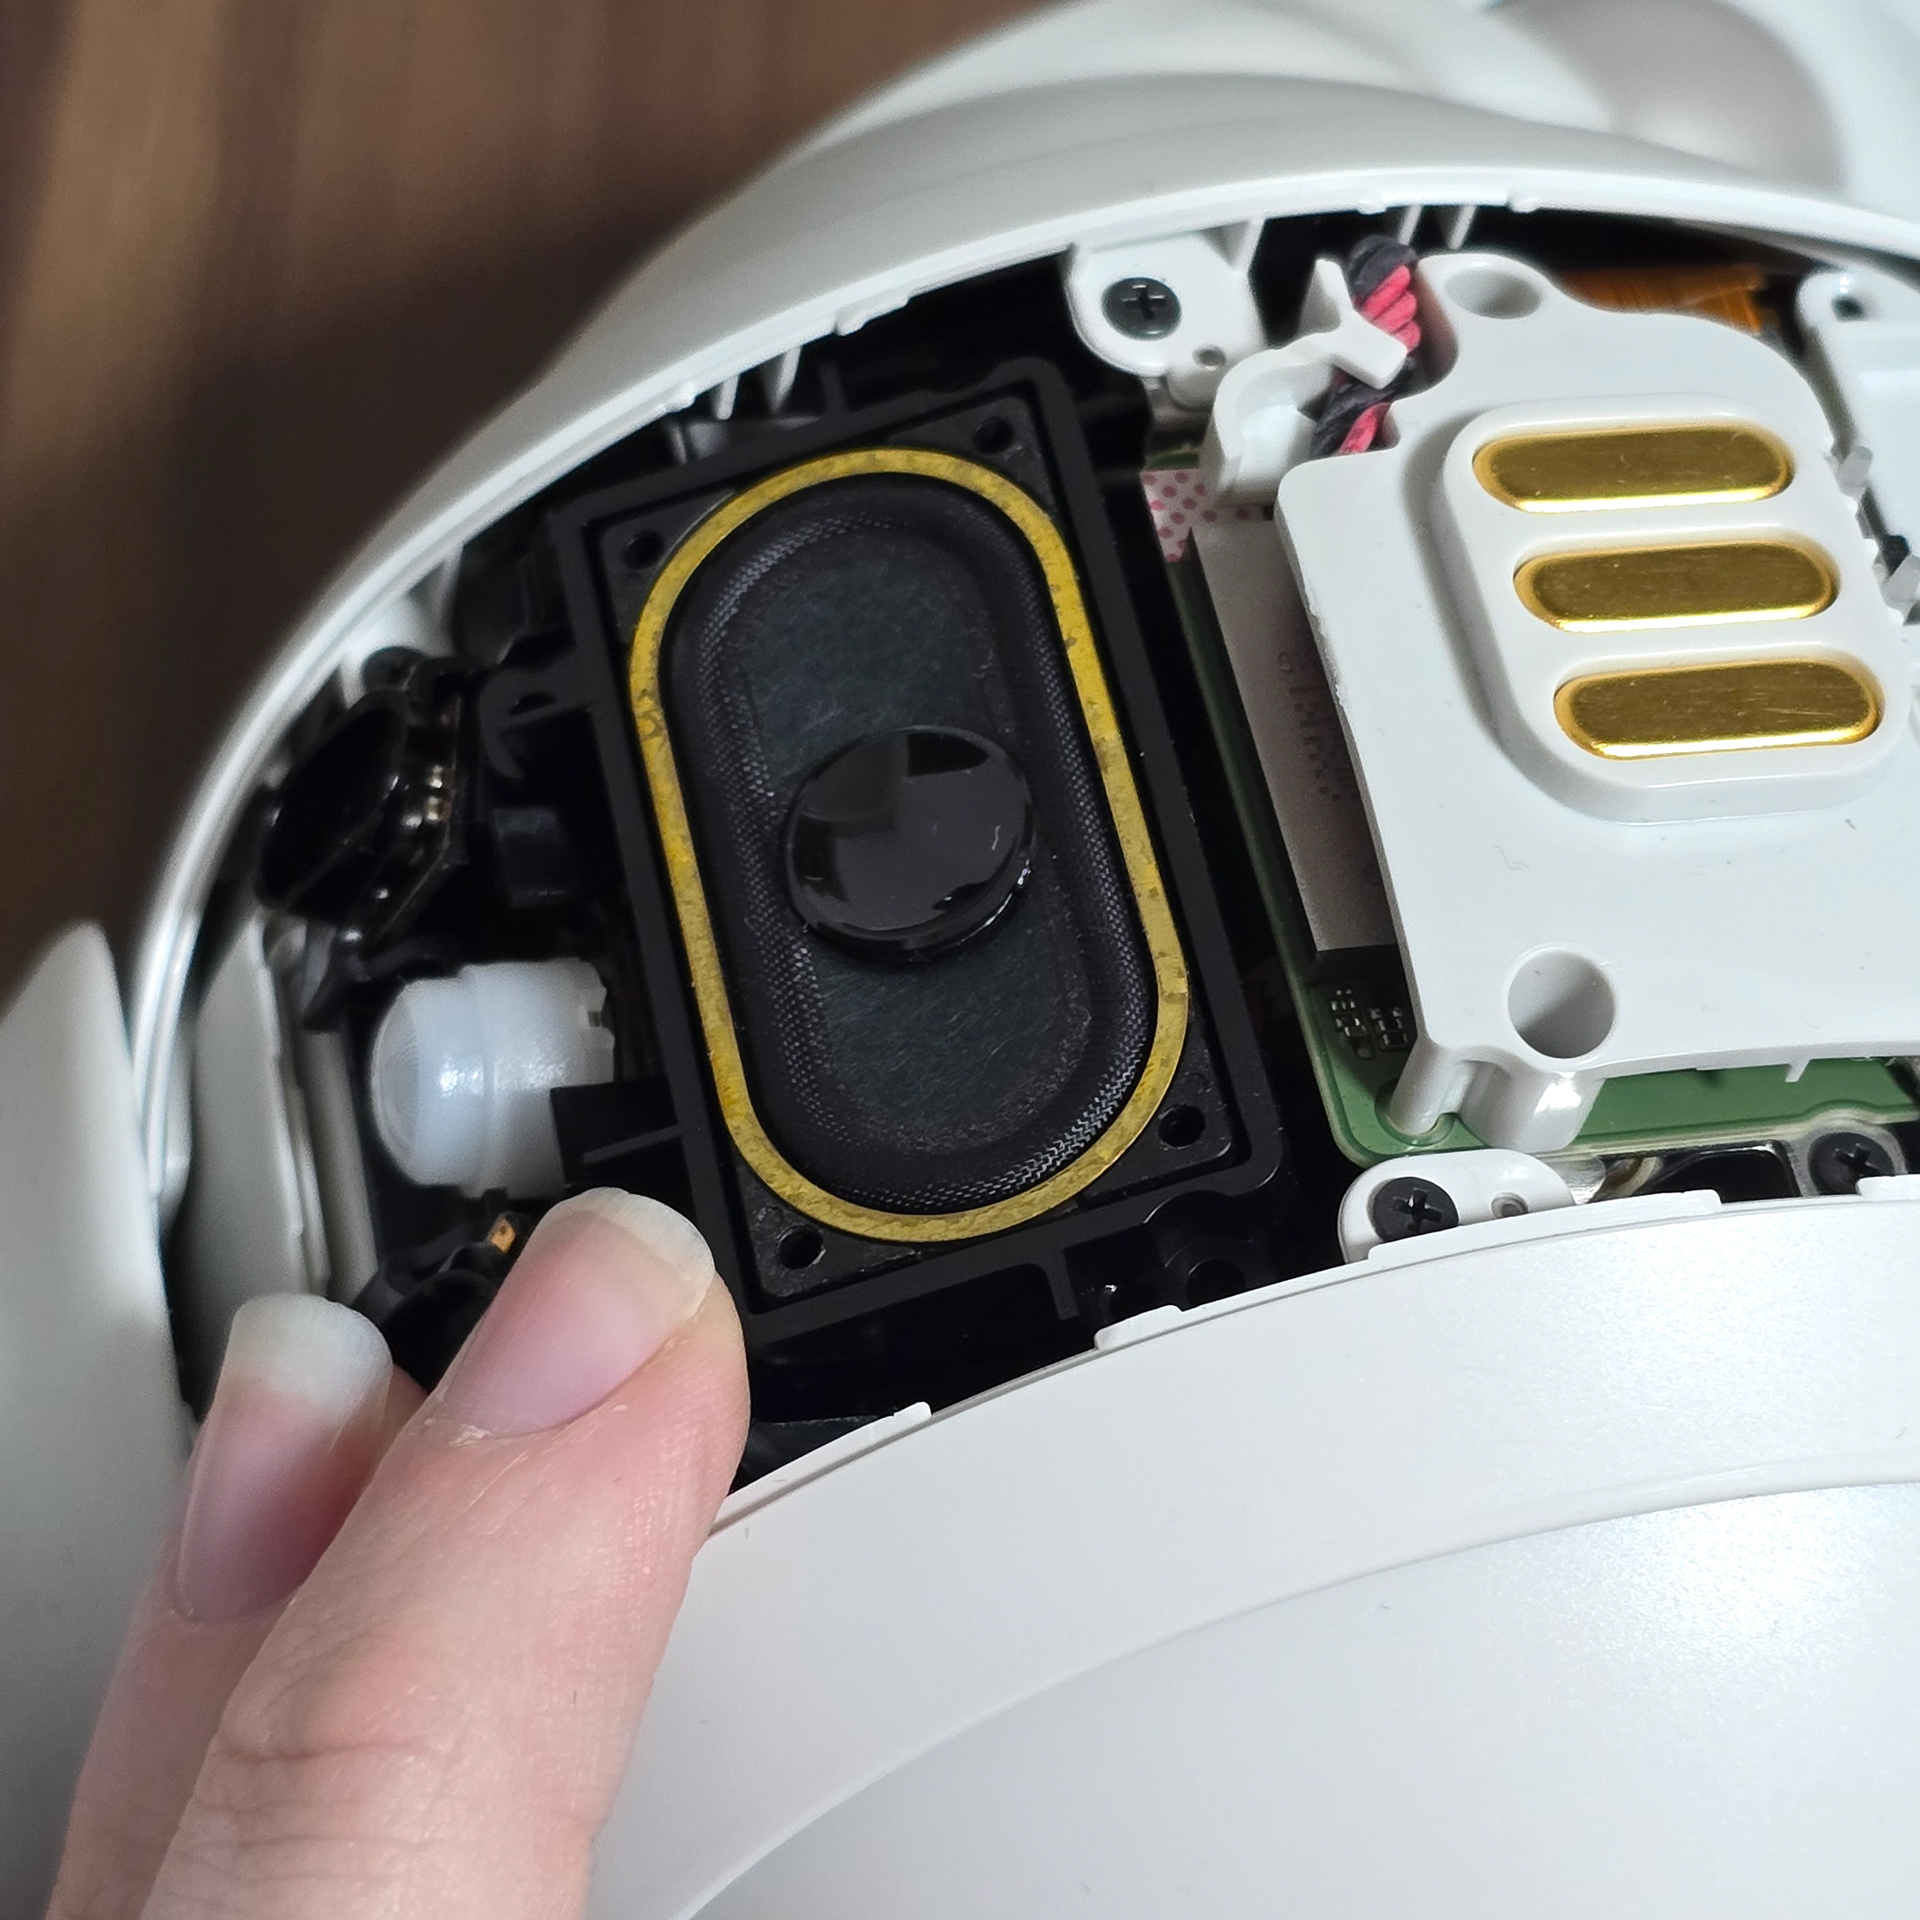
Depending on the reason why you are disassembling the aibo, the speaker doesn't need to be unplugged. It is actually safer to unscrew the speaker from the chest shell and use tape to secure the speaker into the gap on the metal body core.
ERS-1000のシェルを外す際に最も厄介な部分はスピーカーでしょう。なぜなら、プラグを抜こうとすると、コードが勝手に切れてしまう厄介な癖があるからです。コードプラグがソケットにぴったりと収まりすぎていて、揺らして抜くのが困難です。7年以上経った今でも改善されていないのは、設計上の誤りだと思います。現在、正しいコードアタッチメントを備えた交換用スピーカーを製作中なので、この部分が壊れる心配はもうありません。
aiboを分解する理由にもよりますが、スピーカーのプラグを抜く必要はありません。実際には、胸のシェルからスピーカーをネジで外し、金属ボディコアの隙間にテープで固定する方が安全です。
aiboを分解する理由にもよりますが、スピーカーのプラグを抜く必要はありません。実際には、胸のシェルからスピーカーをネジで外し、金属ボディコアの隙間にテープで固定する方が安全です。
Tape Method (Safer - Do this for most things)
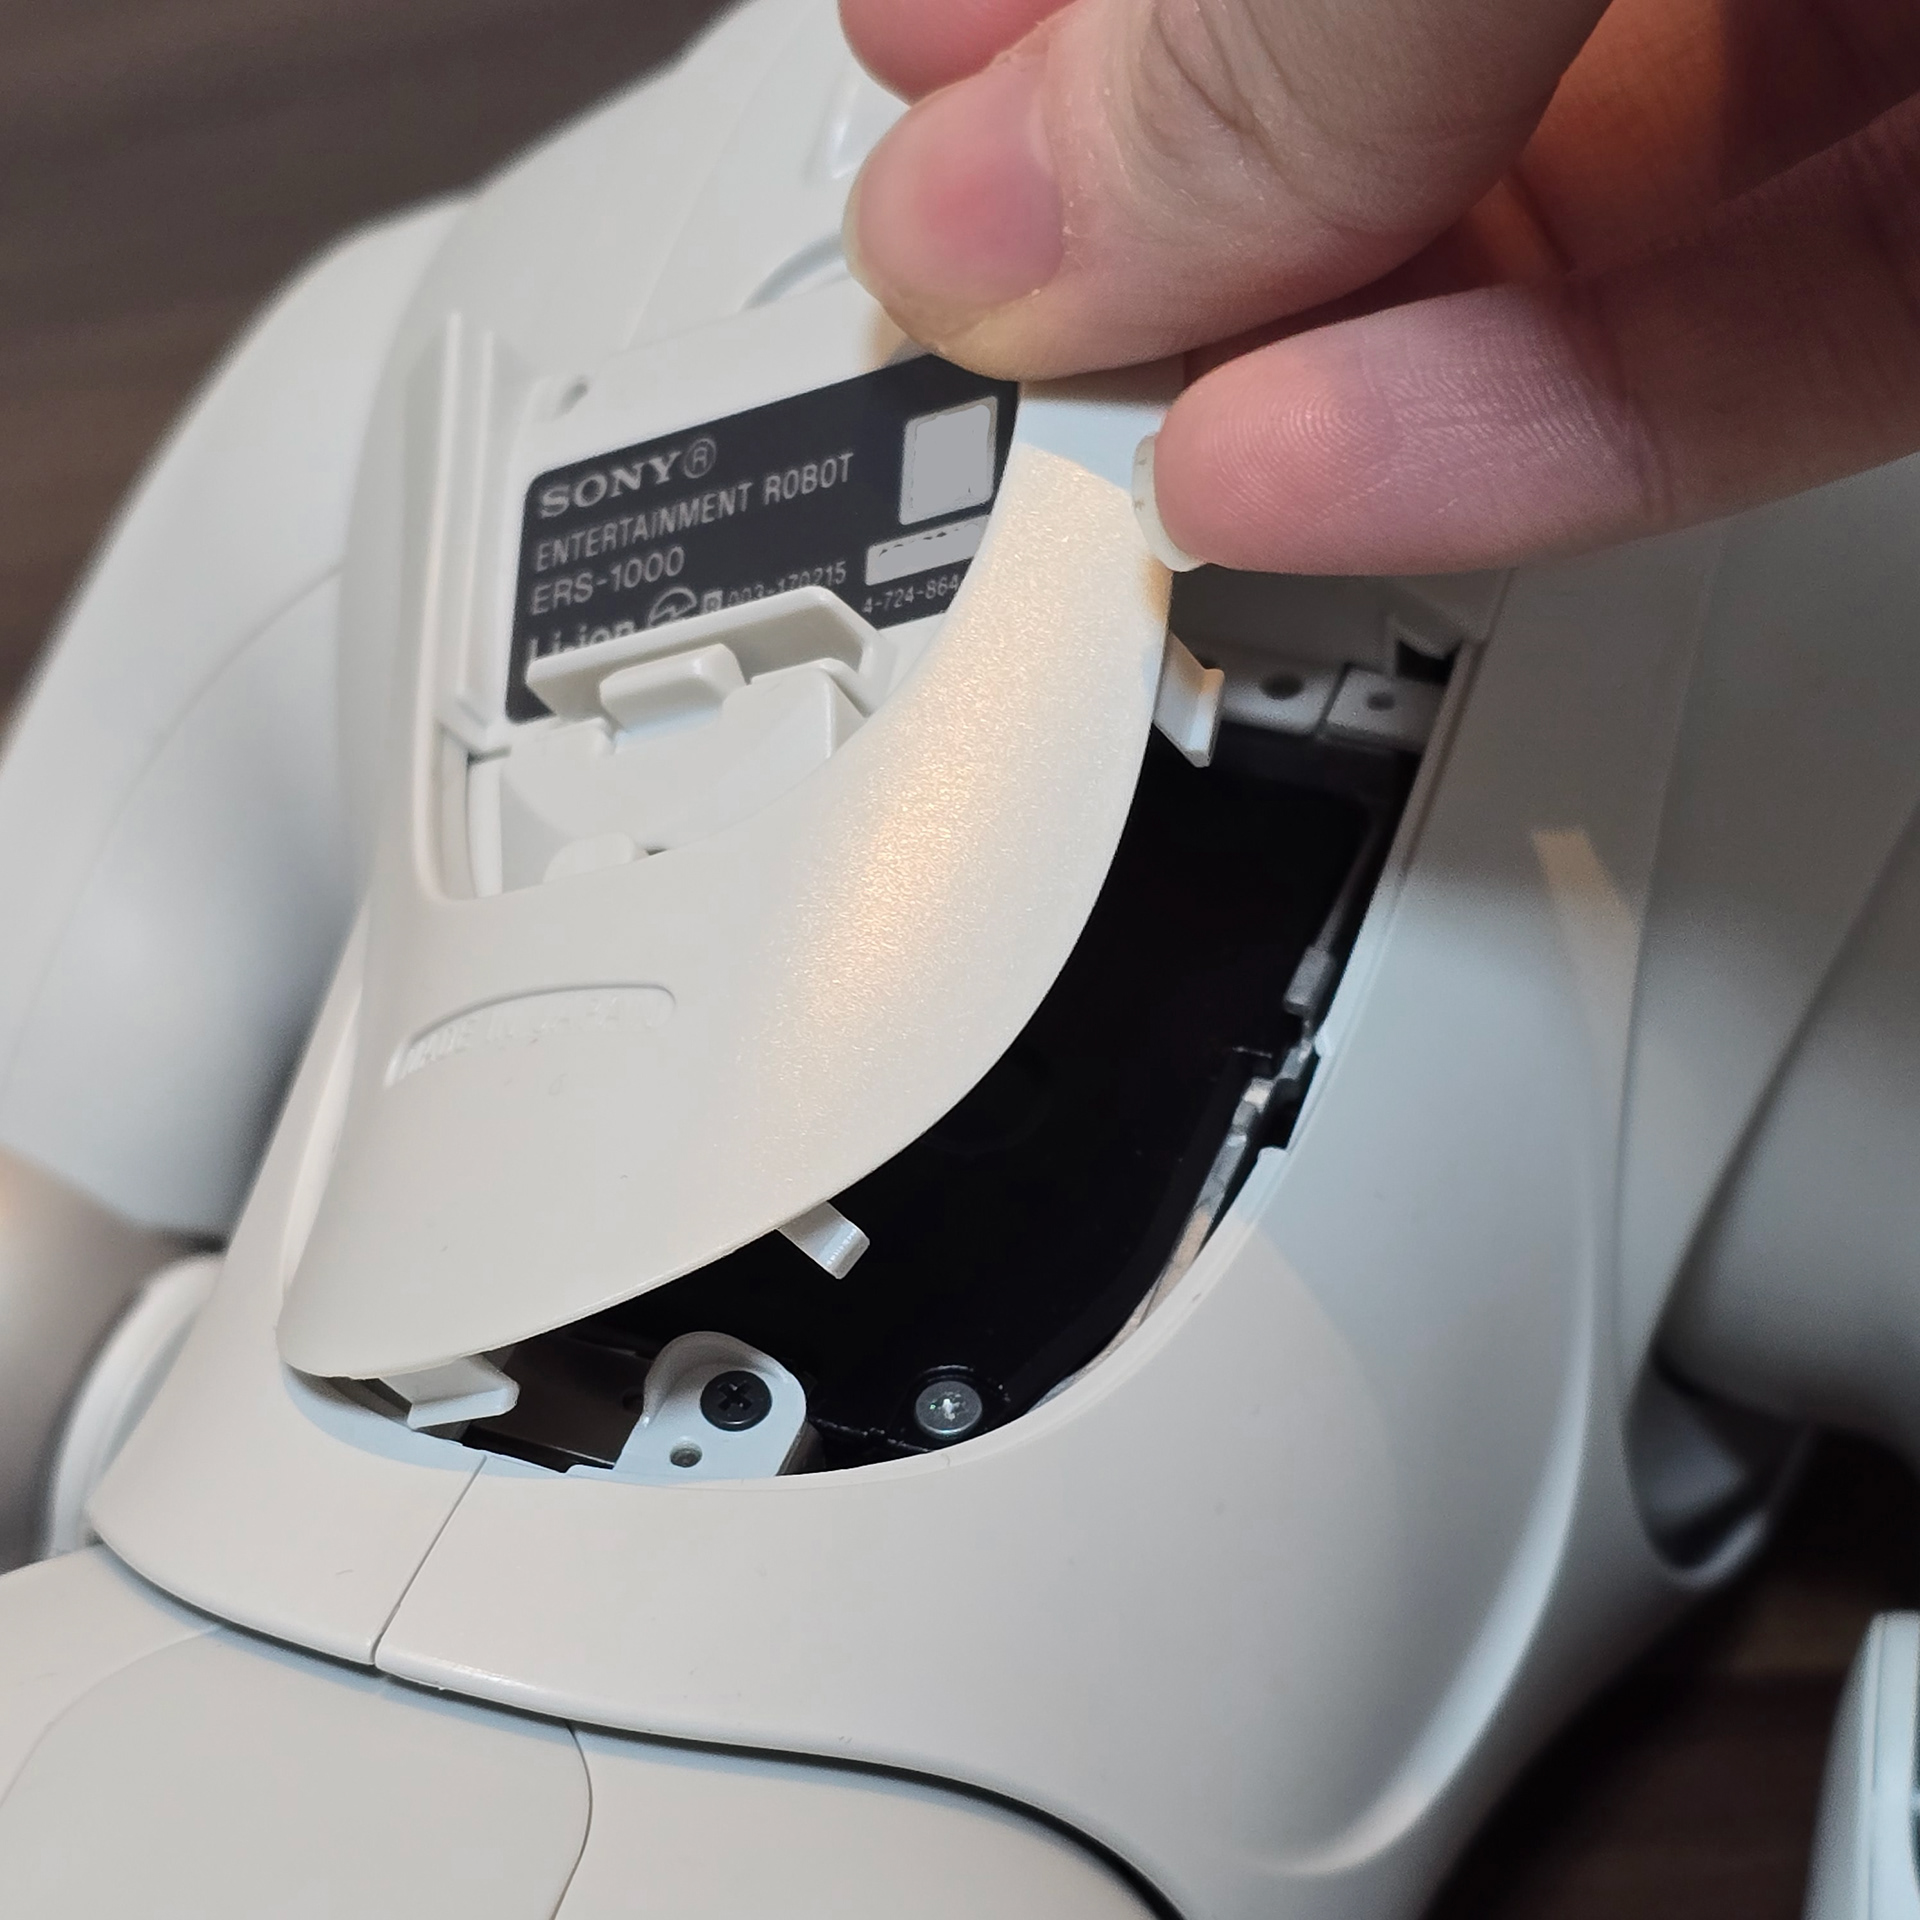
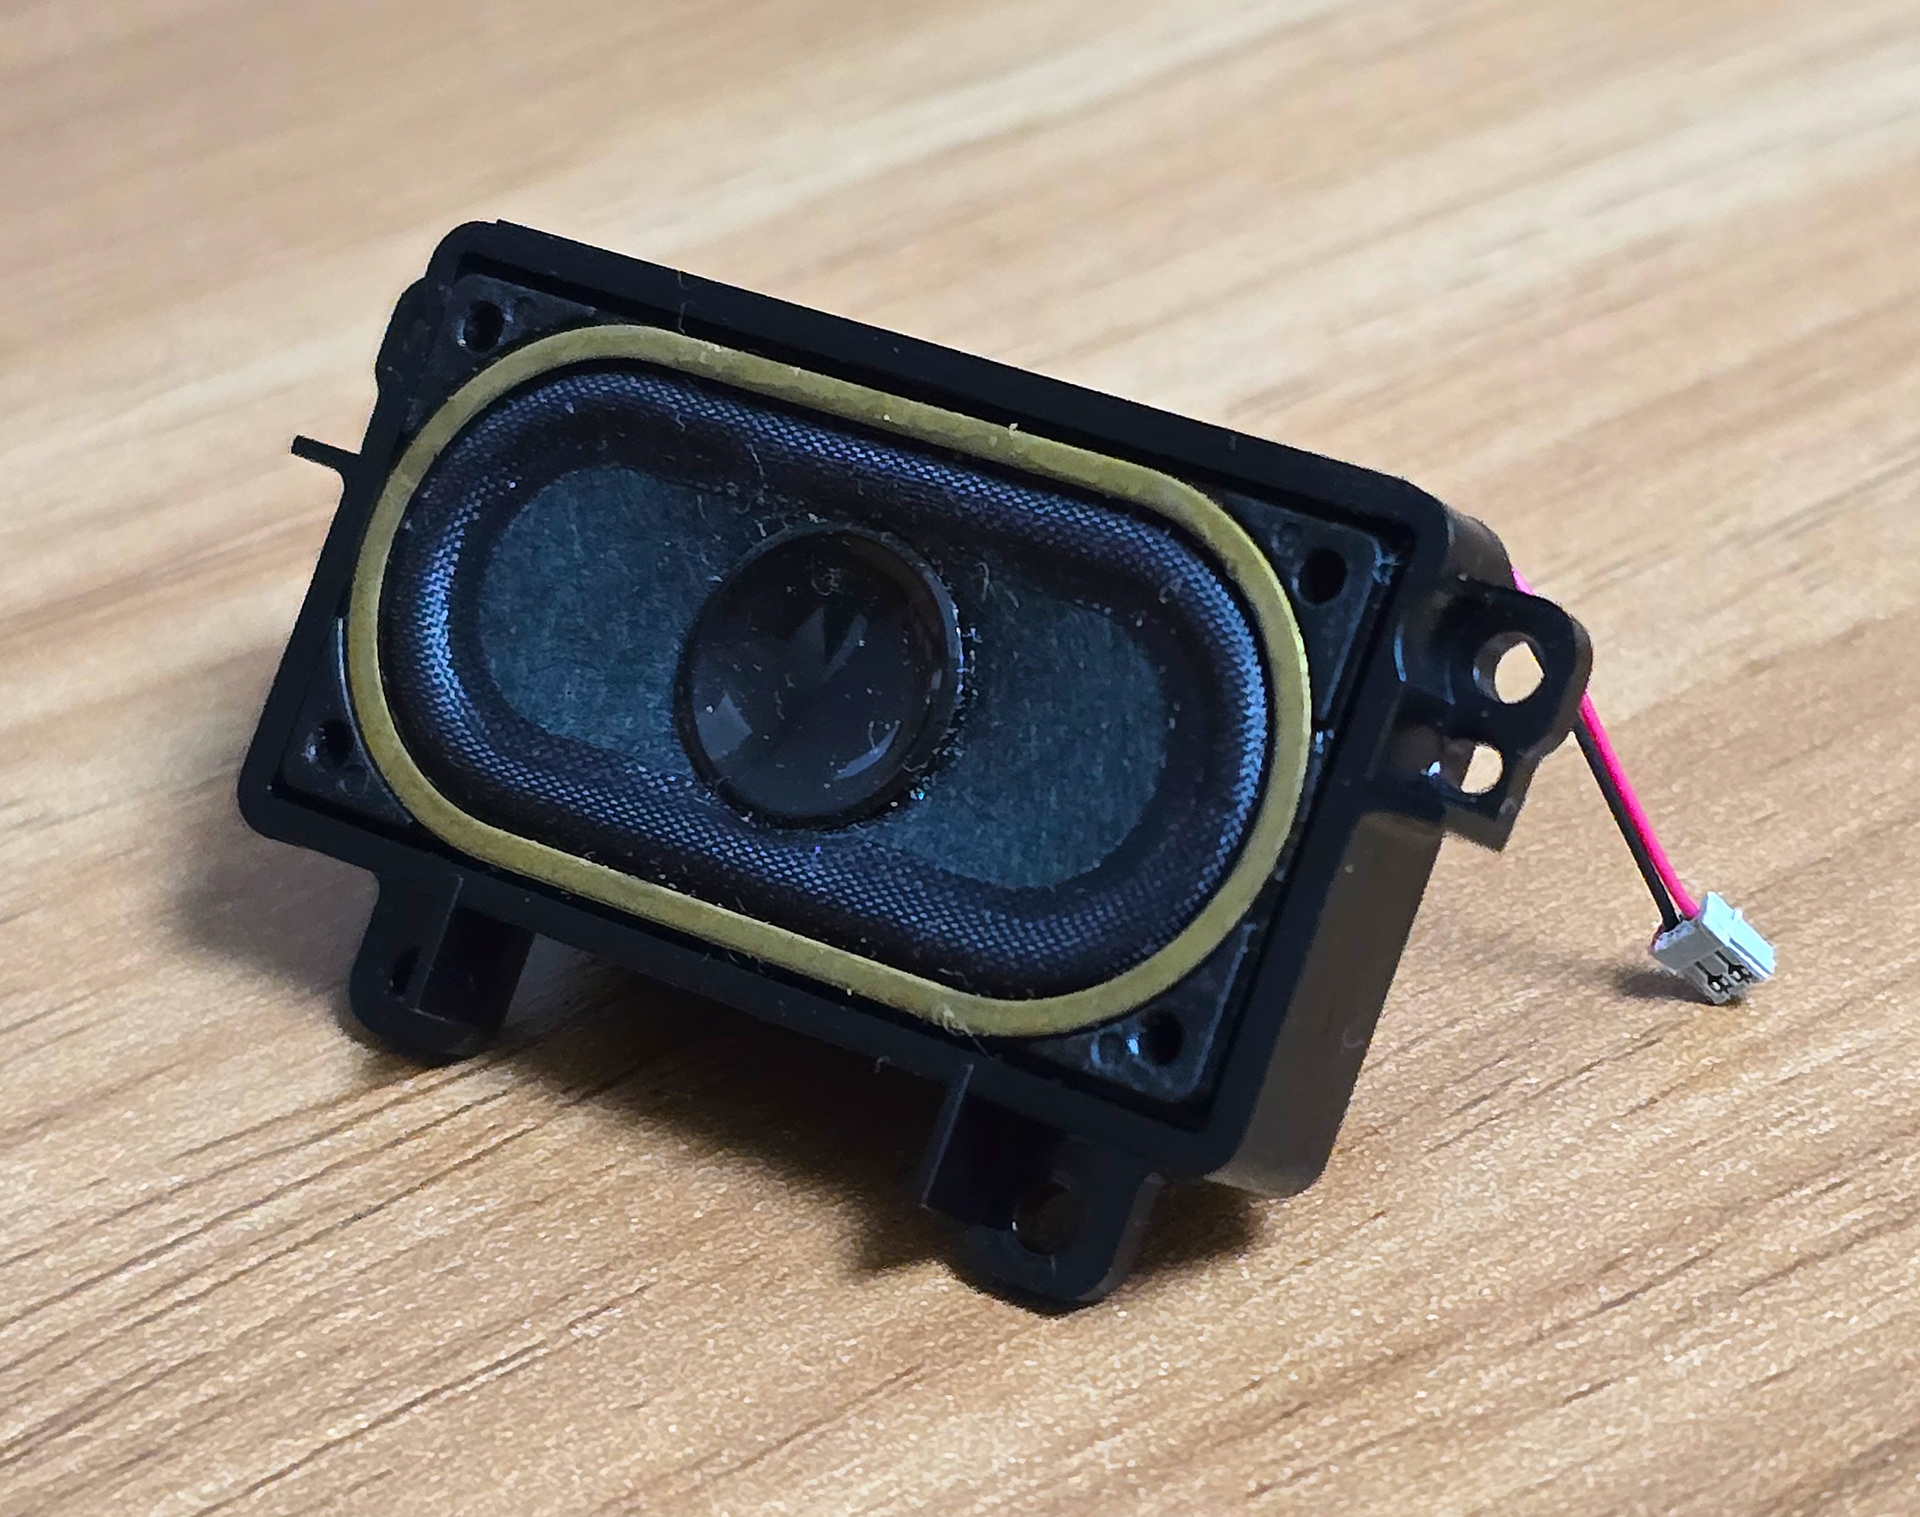
There are 4 screws attaching the speaker to the front chest plate. Carefully unscrew each one, making sure not to drop the screws into the body. Once all 4 are removed, the speaker should separate from the chest panel.
スピーカーはフロントチェストプレートに4本のネジで固定されています。ネジを本体内に落とさないように注意しながら、1本ずつ慎重に外してください。4本すべてを外すと、スピーカーがチェストパネルから外れます。
Once that is done, push the speaker into the chest hole it sits in and then tape it down using electrical tape. Do not worry about taping over the charging pins or anything else as it leaves no sticky residue. Make sure not to tape over the screws along the sides of the chest cavity as we will need to access them for body shell removal.
それが終わったら、スピーカーをチェストホールに差し込み、絶縁テープで固定します。充電ピンやその他の部分をテープで覆っても粘着跡が残らないので、ご安心ください。チェストホールの側面にあるネジは、ボディシェルを取り外す際にアクセスする必要があるため、テープで覆わないようにしてください。
Normal Method (Riskier - Use this only if you have to)
To unplug the speaker, grasp it near the end where its connector plugs into the chest board plug and slowly wiggle it out slowly. As I previously mentioned, don't do this method unless you have to.
スピーカーを抜くには、チェストボードのプラグに差し込まれているコネクタの先端付近を掴み、ゆっくりと揺らしながら引き抜きます。前述の通り、どうしても必要な場合を除いて、この方法は避けてください。

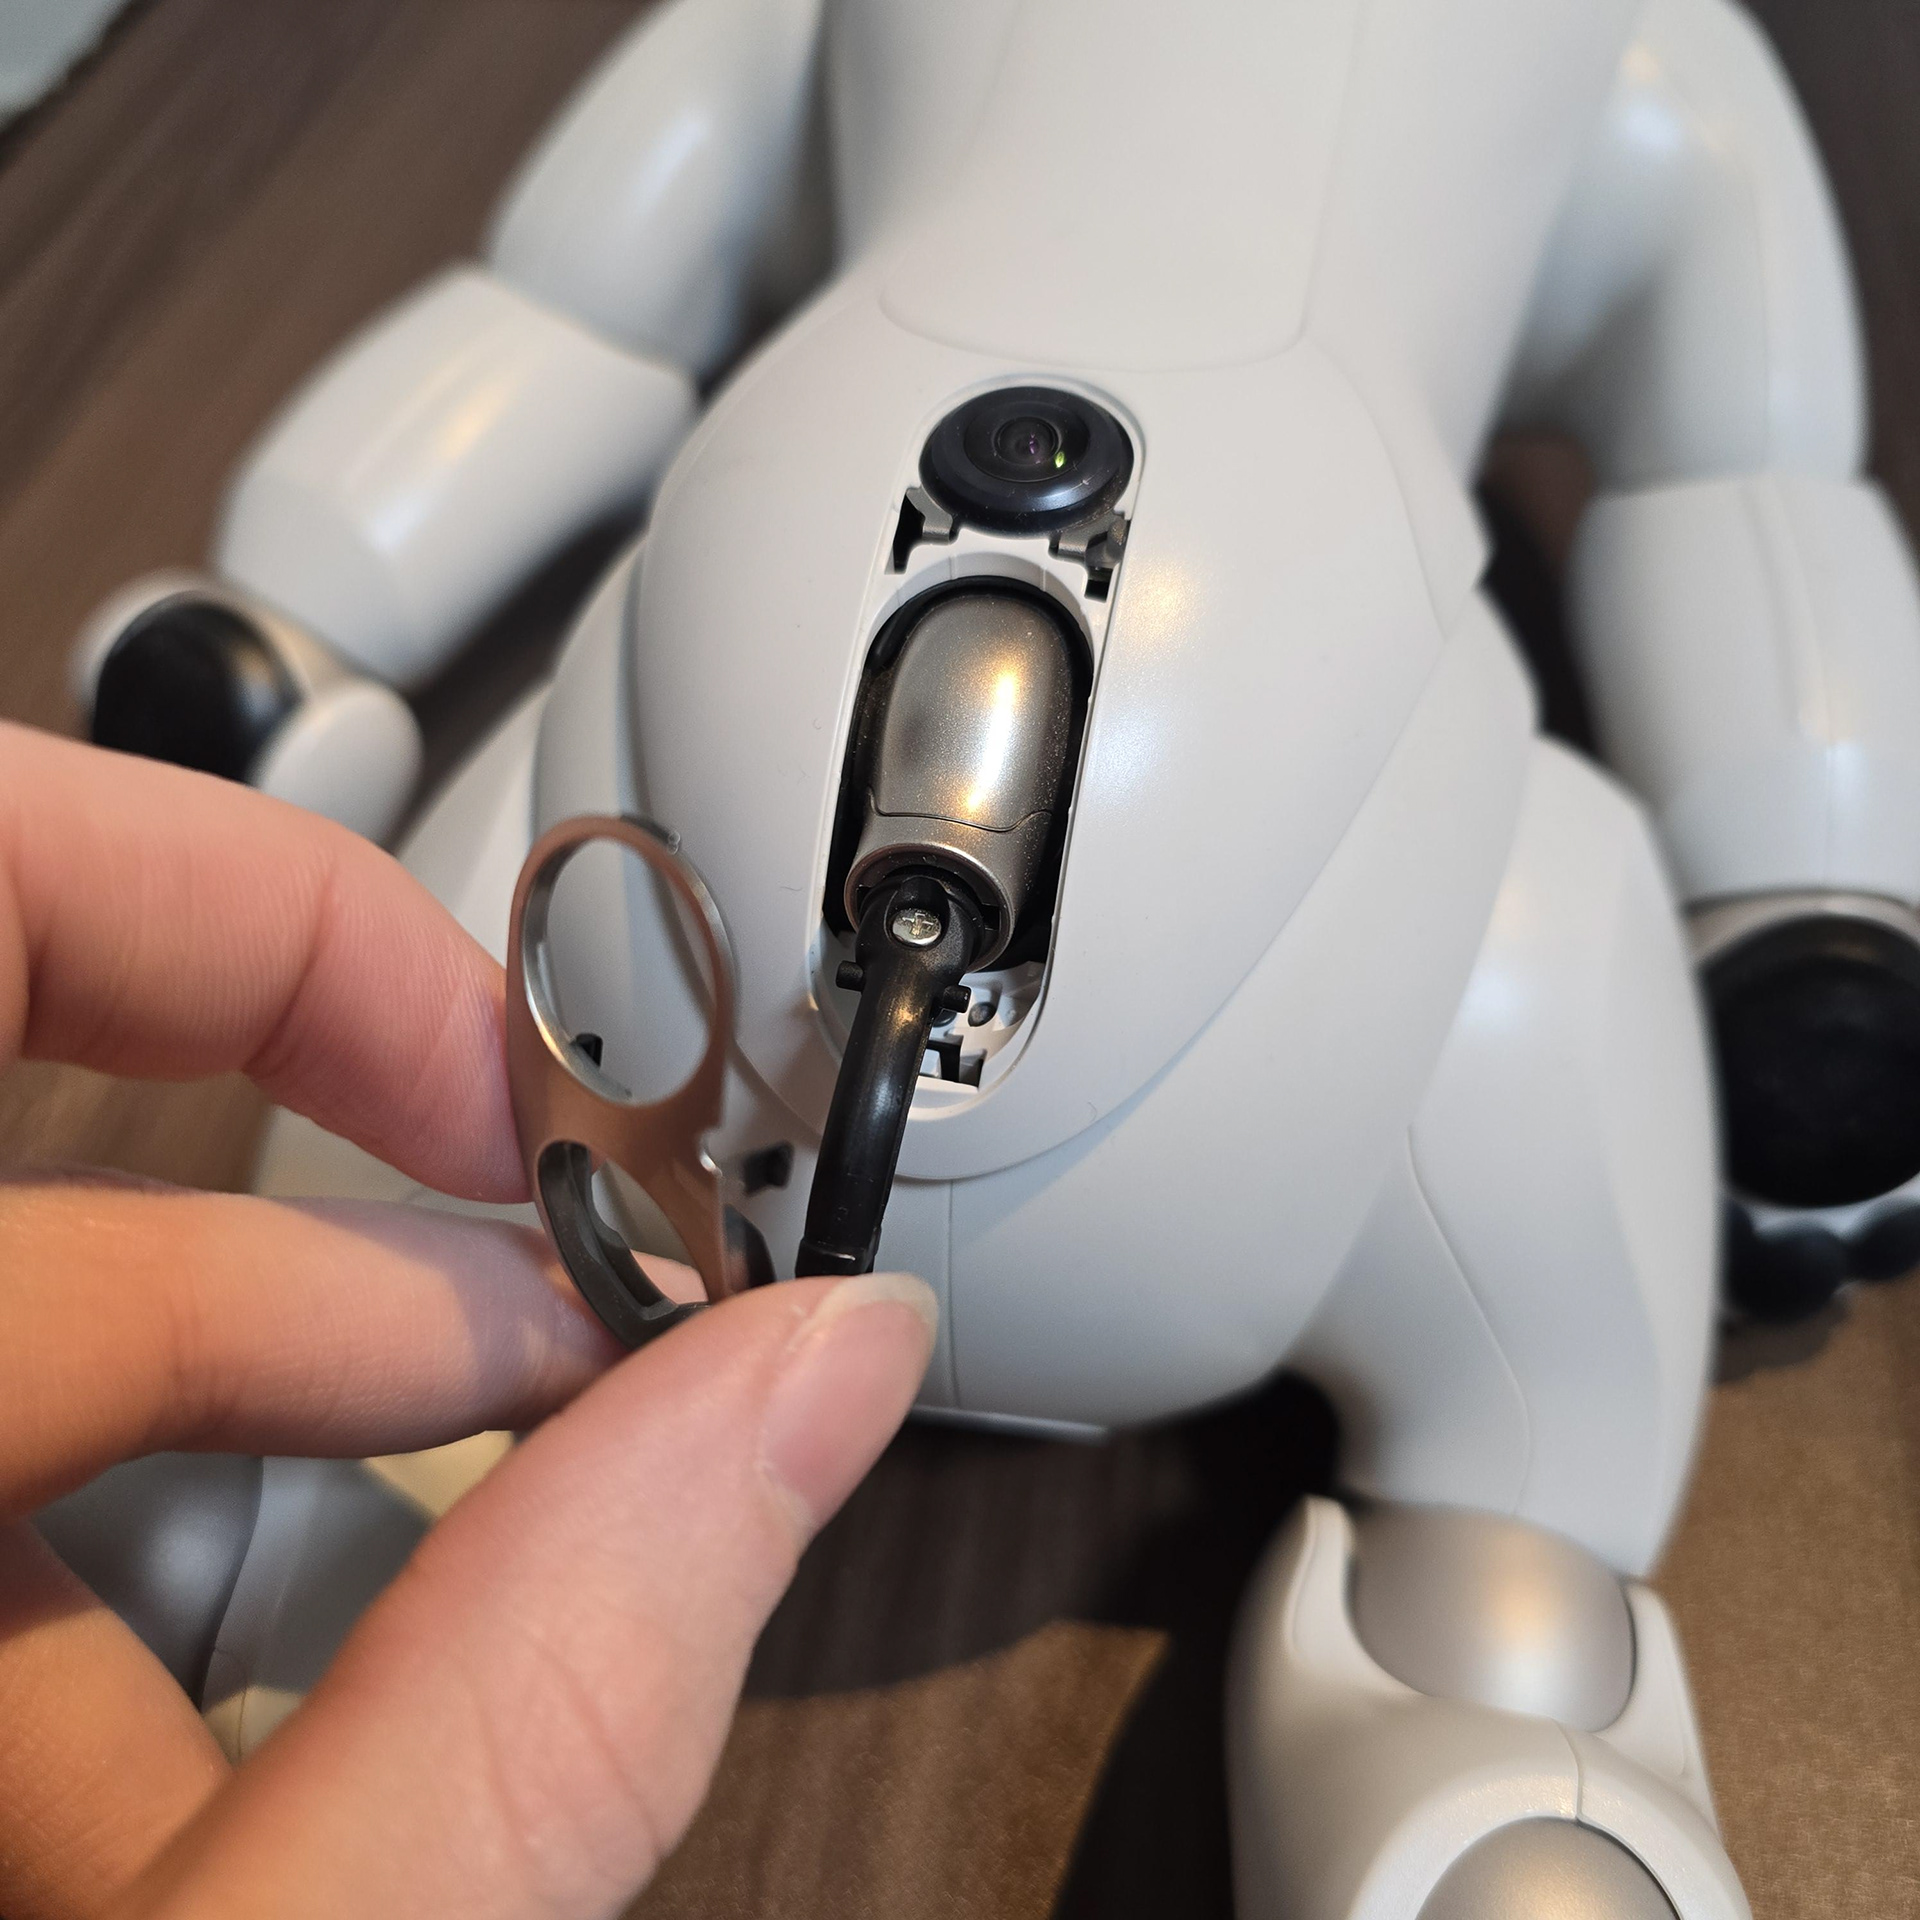
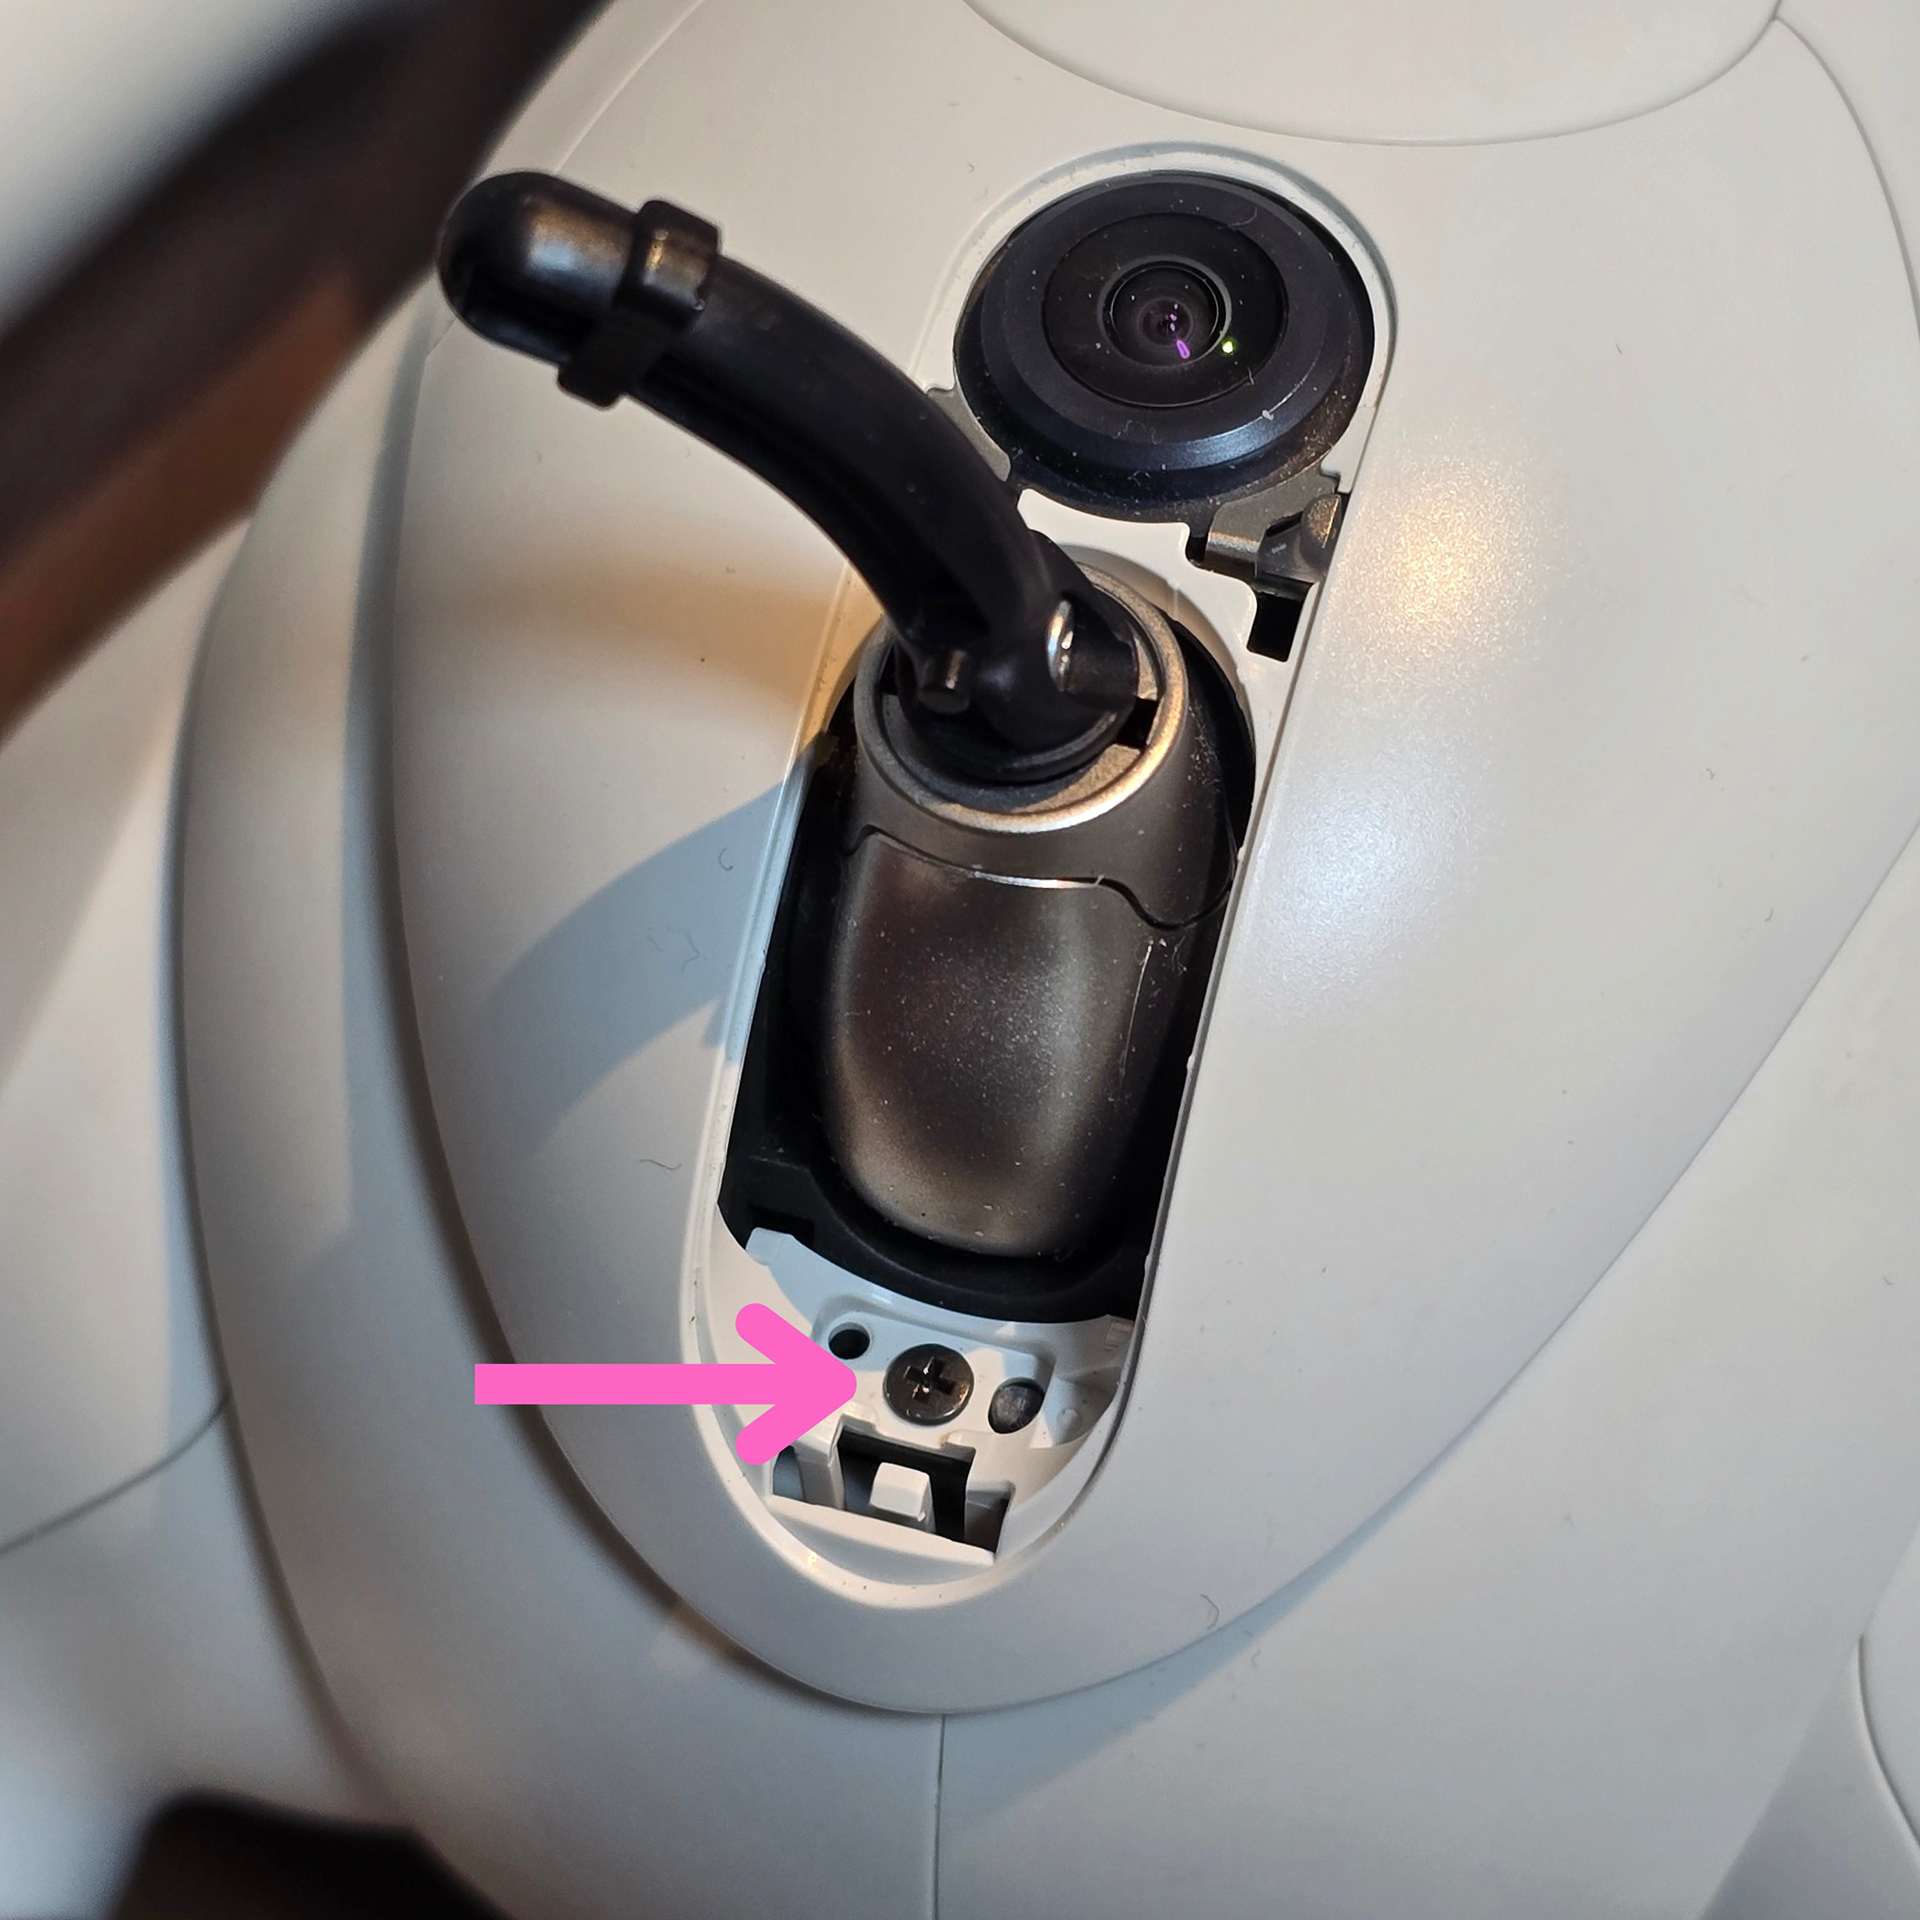
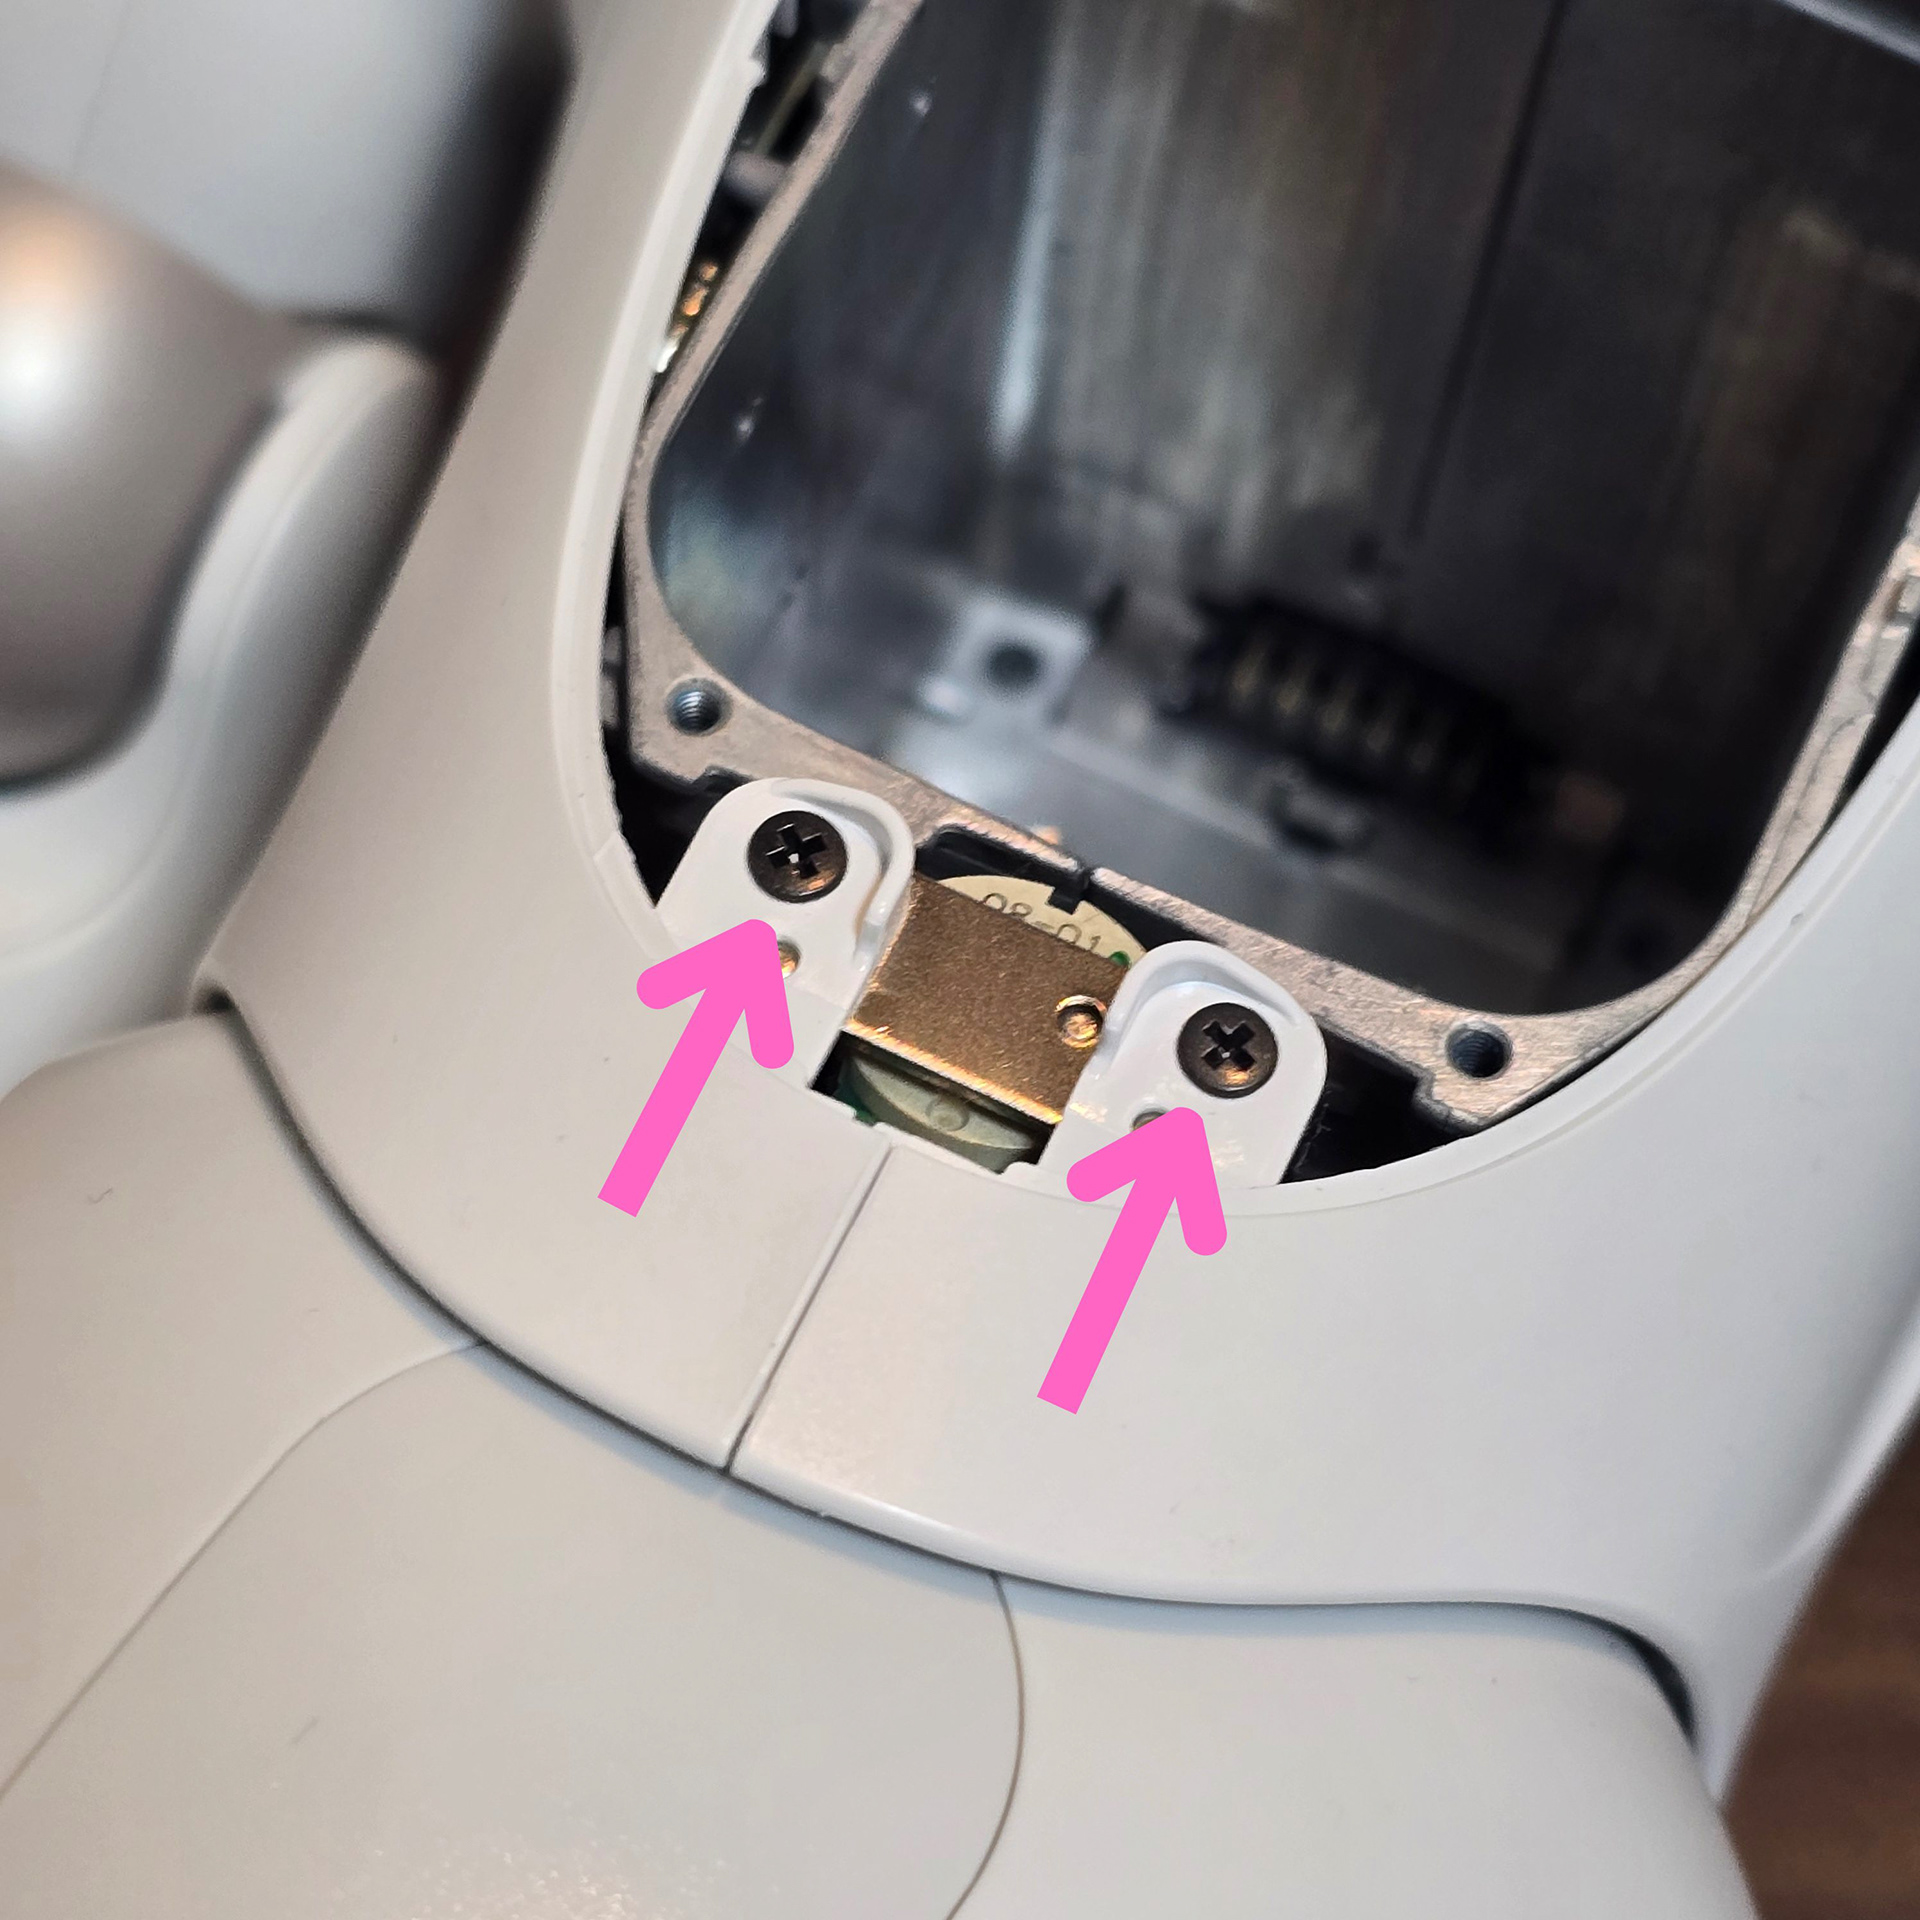
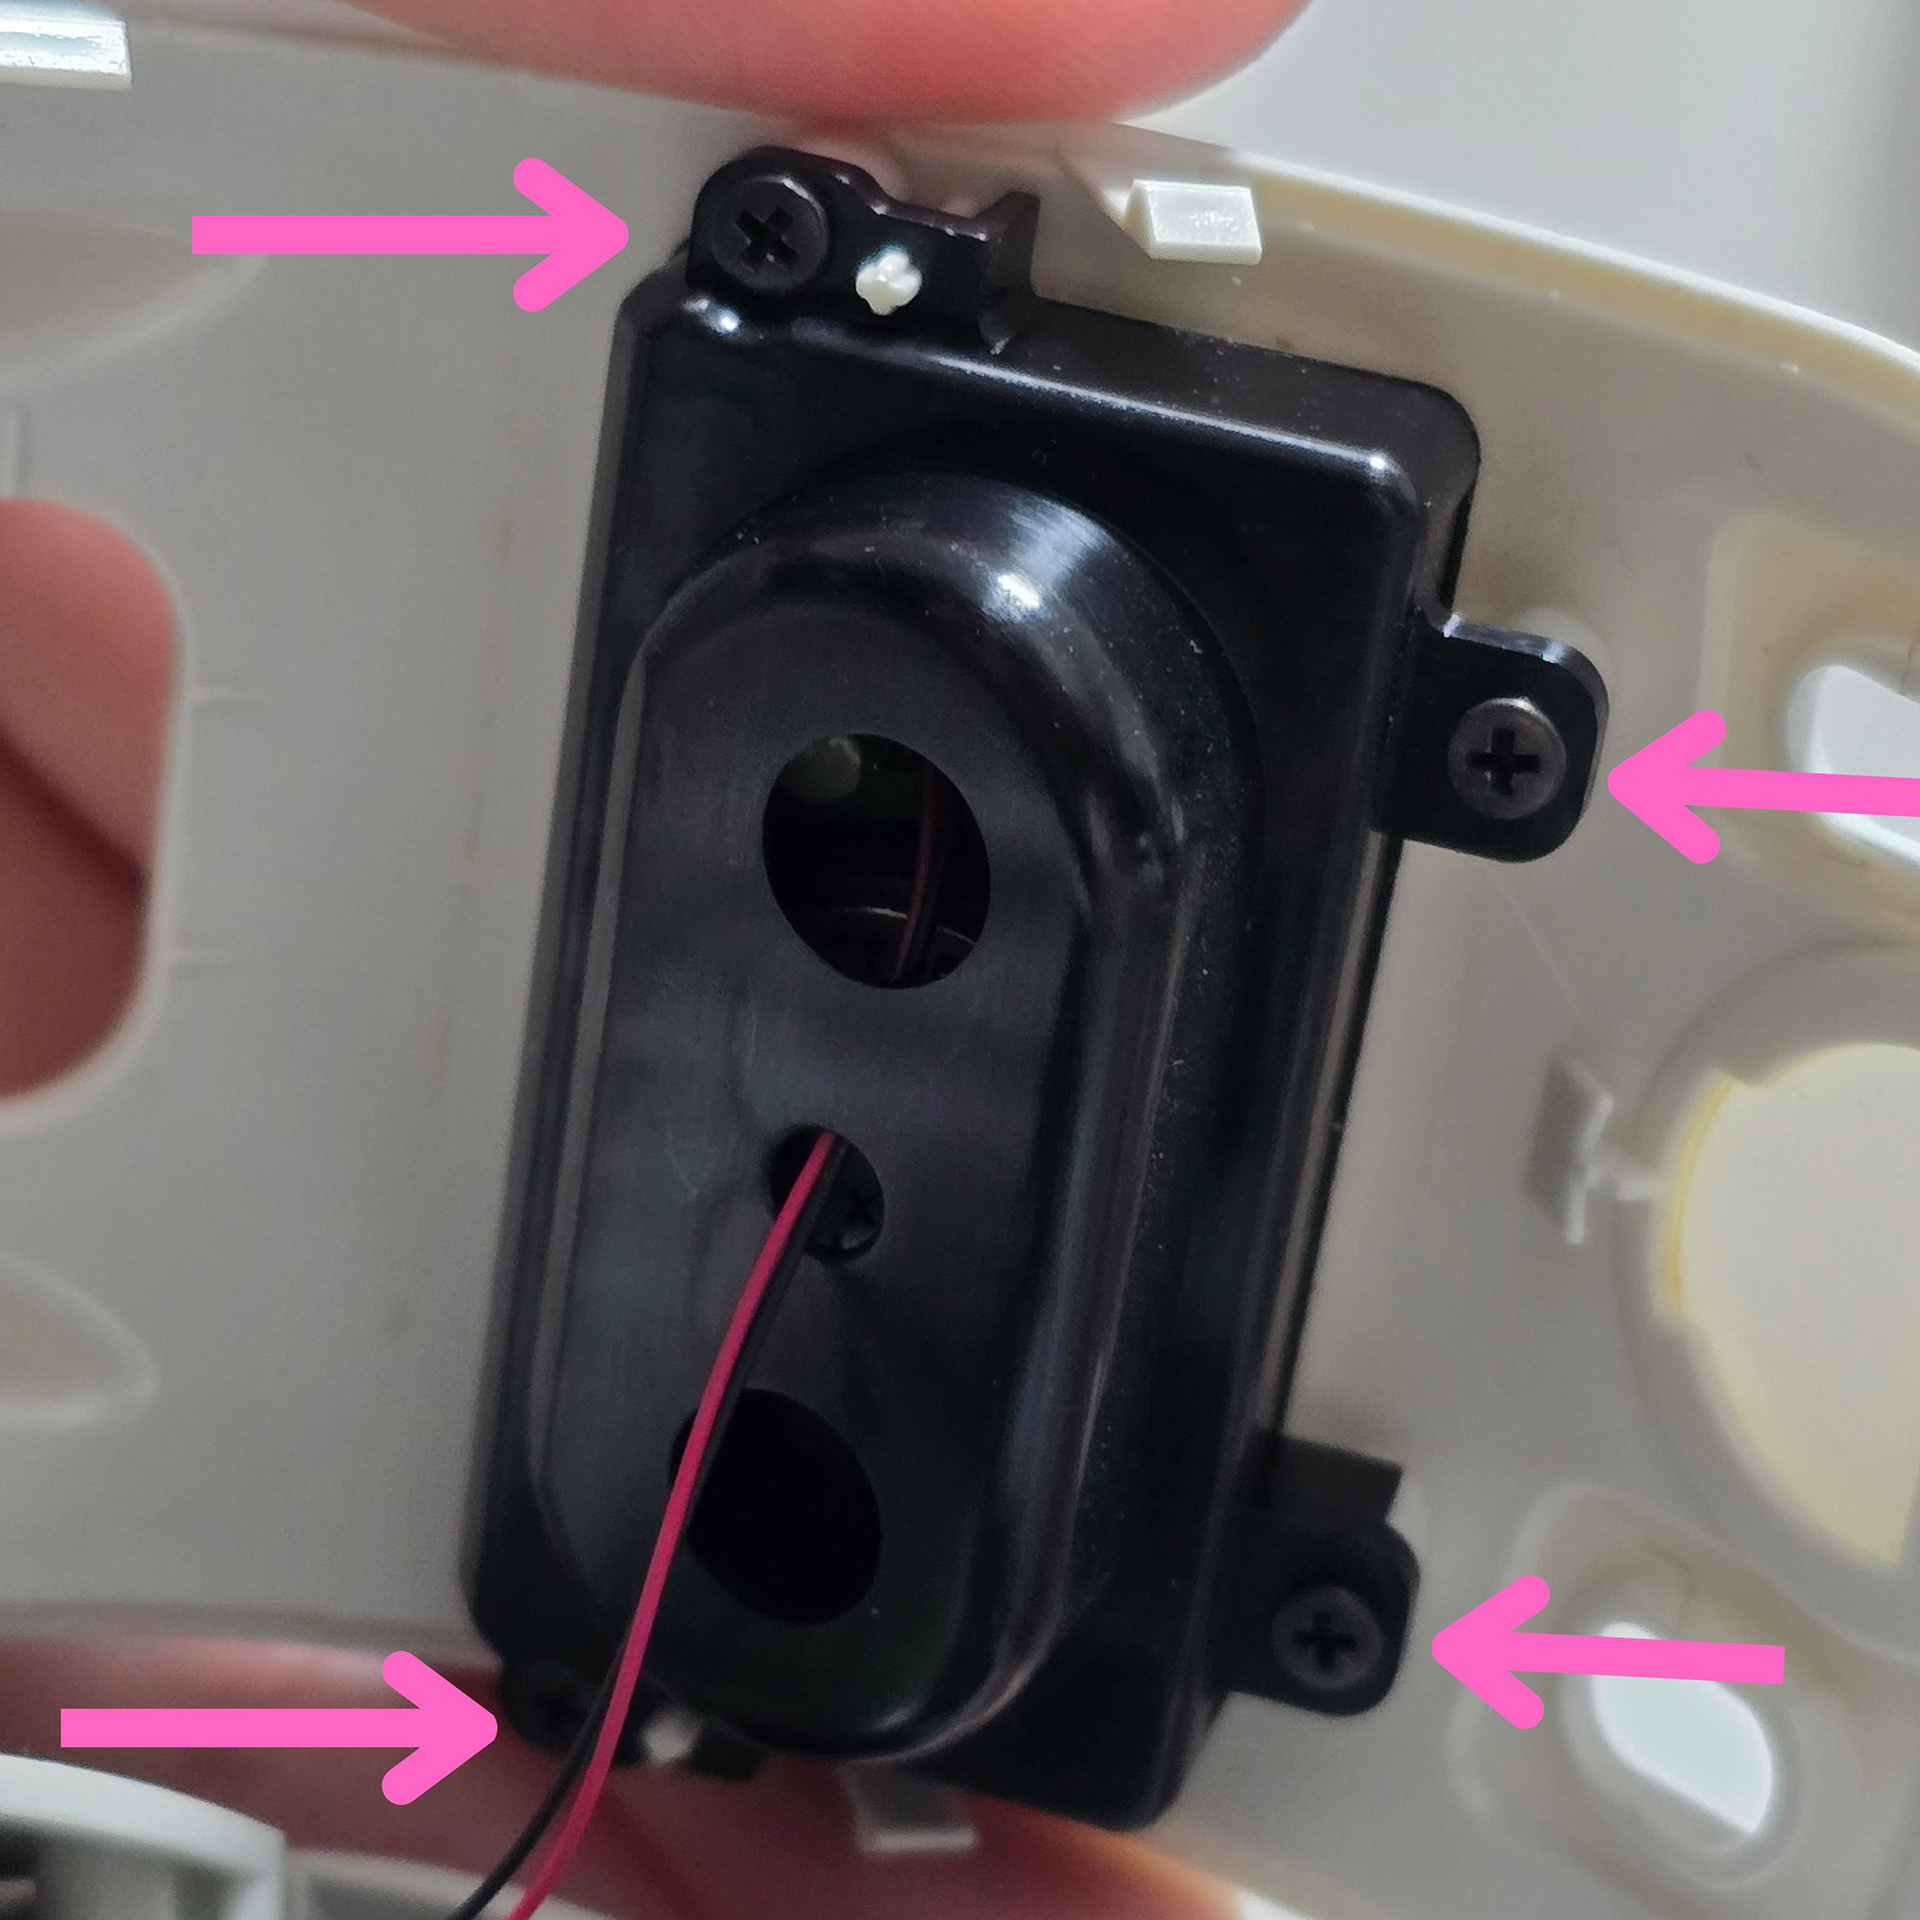
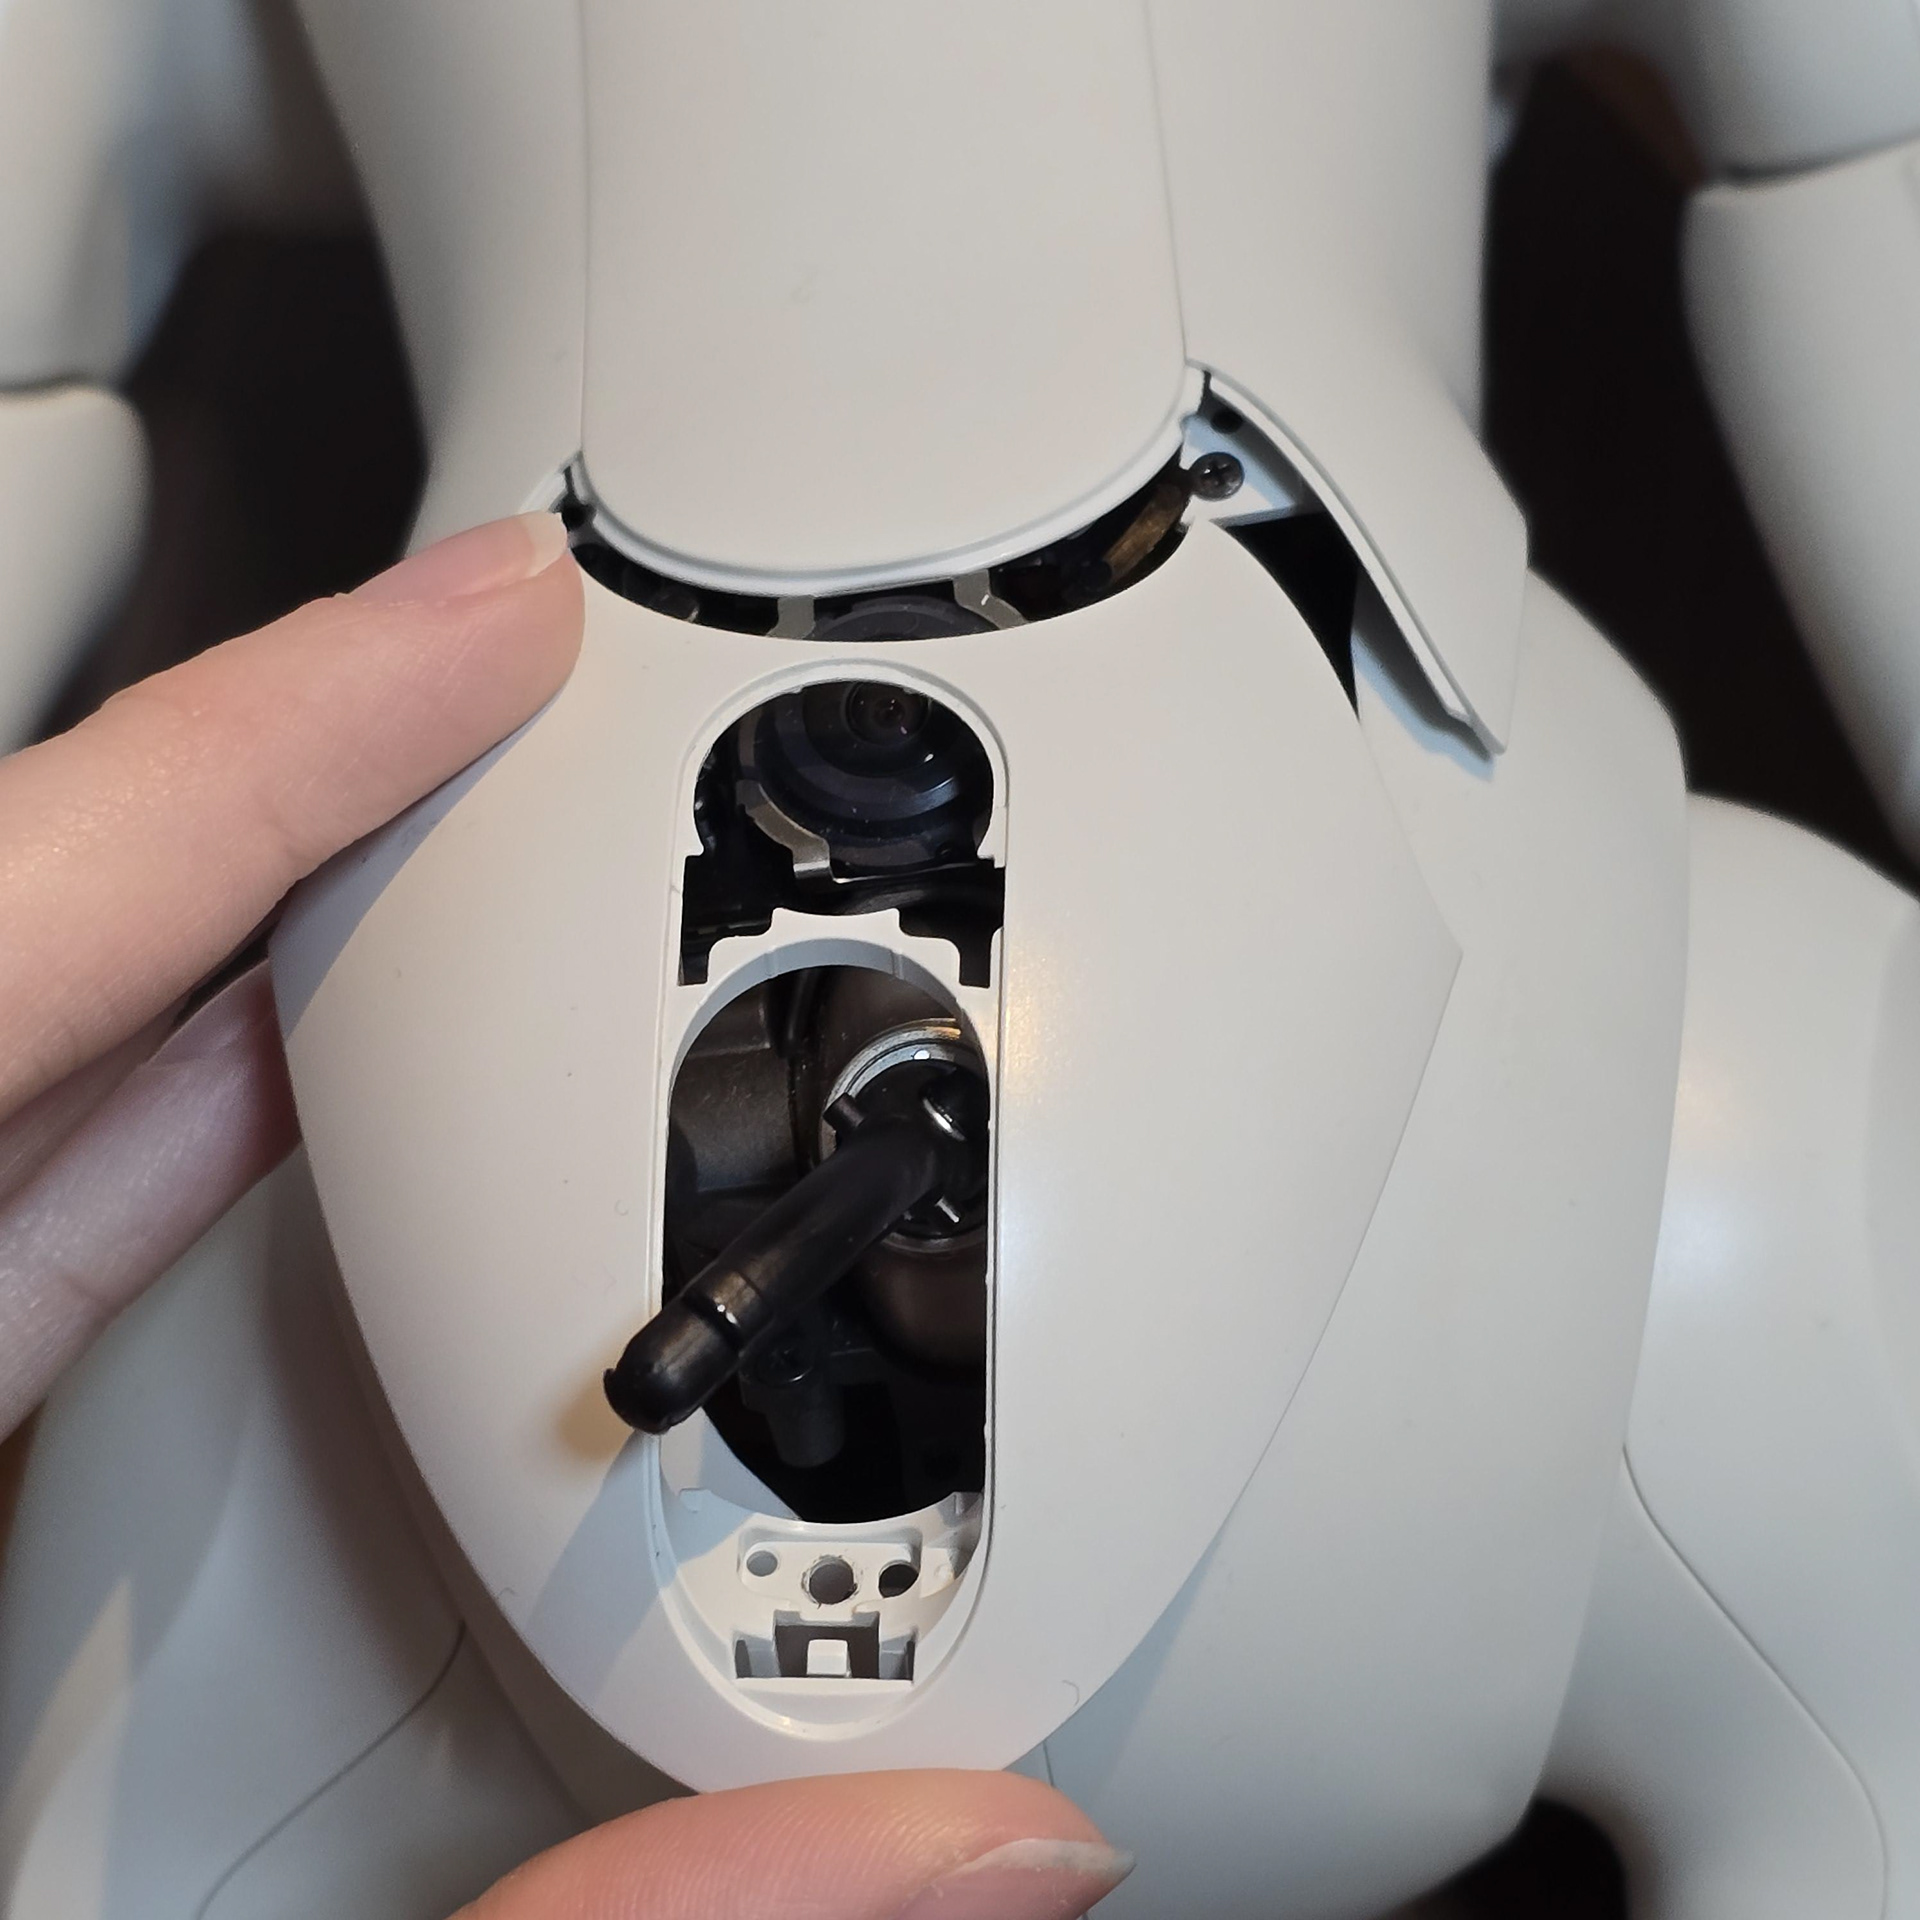
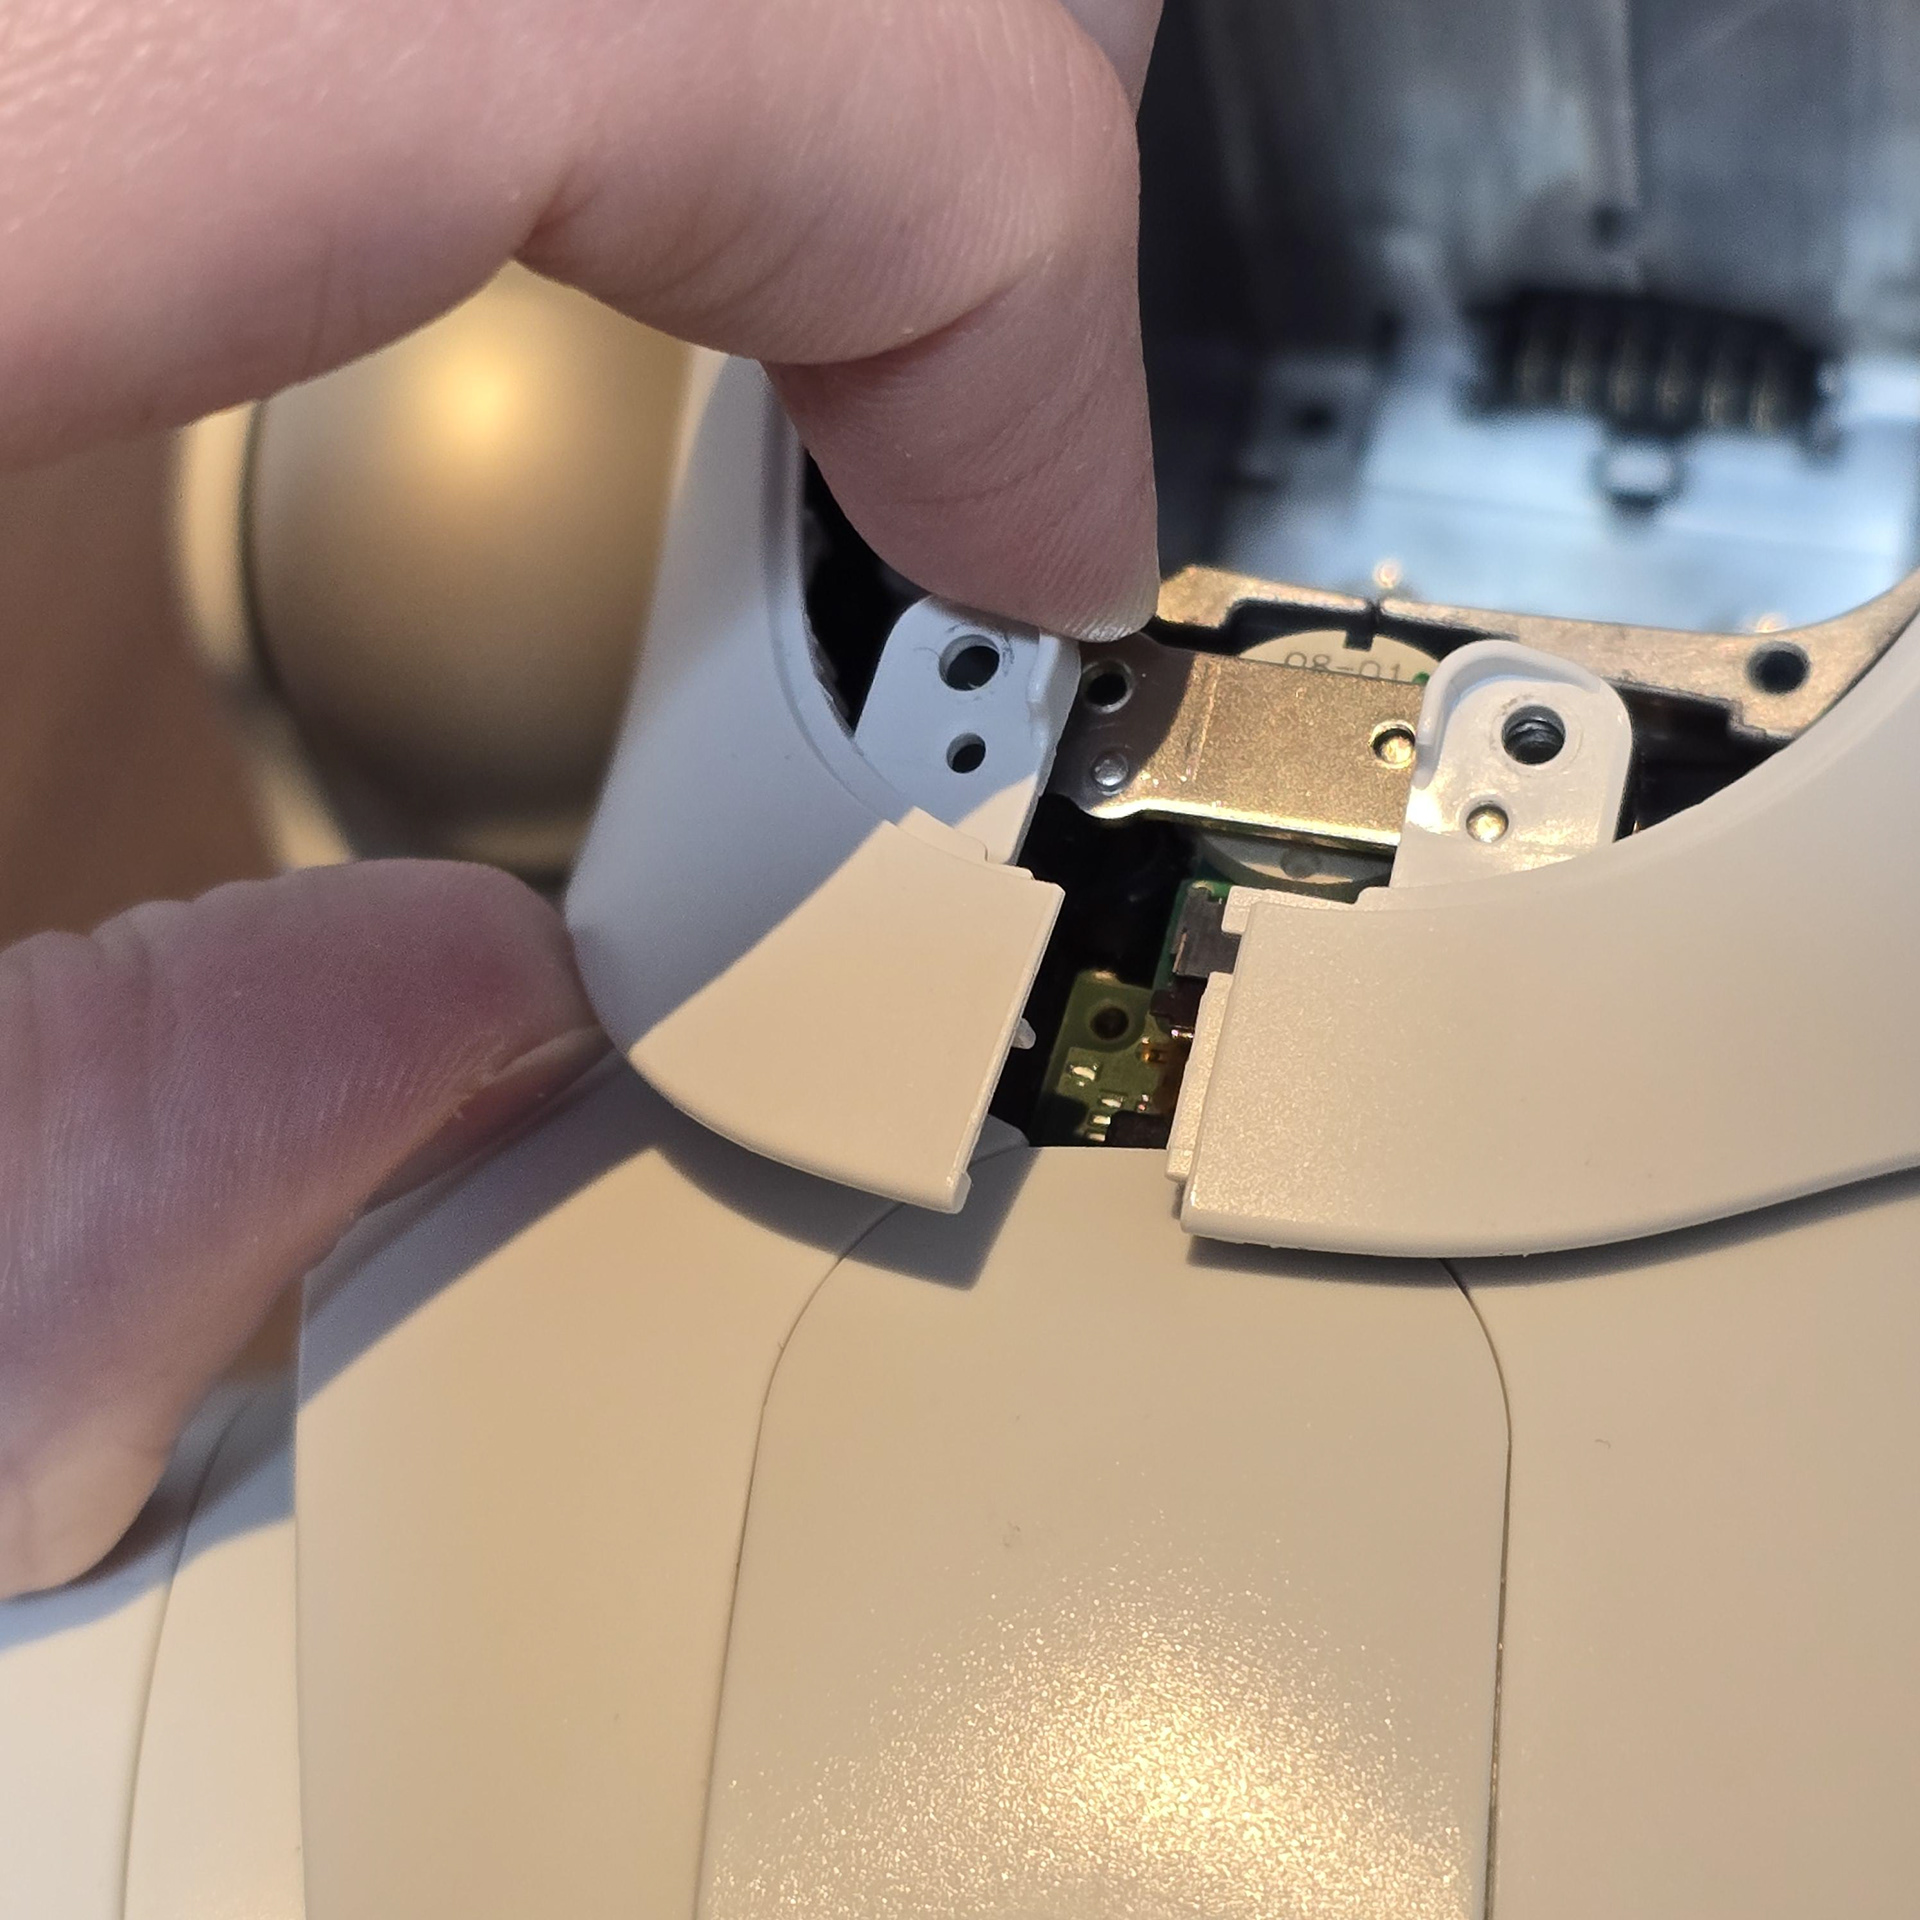
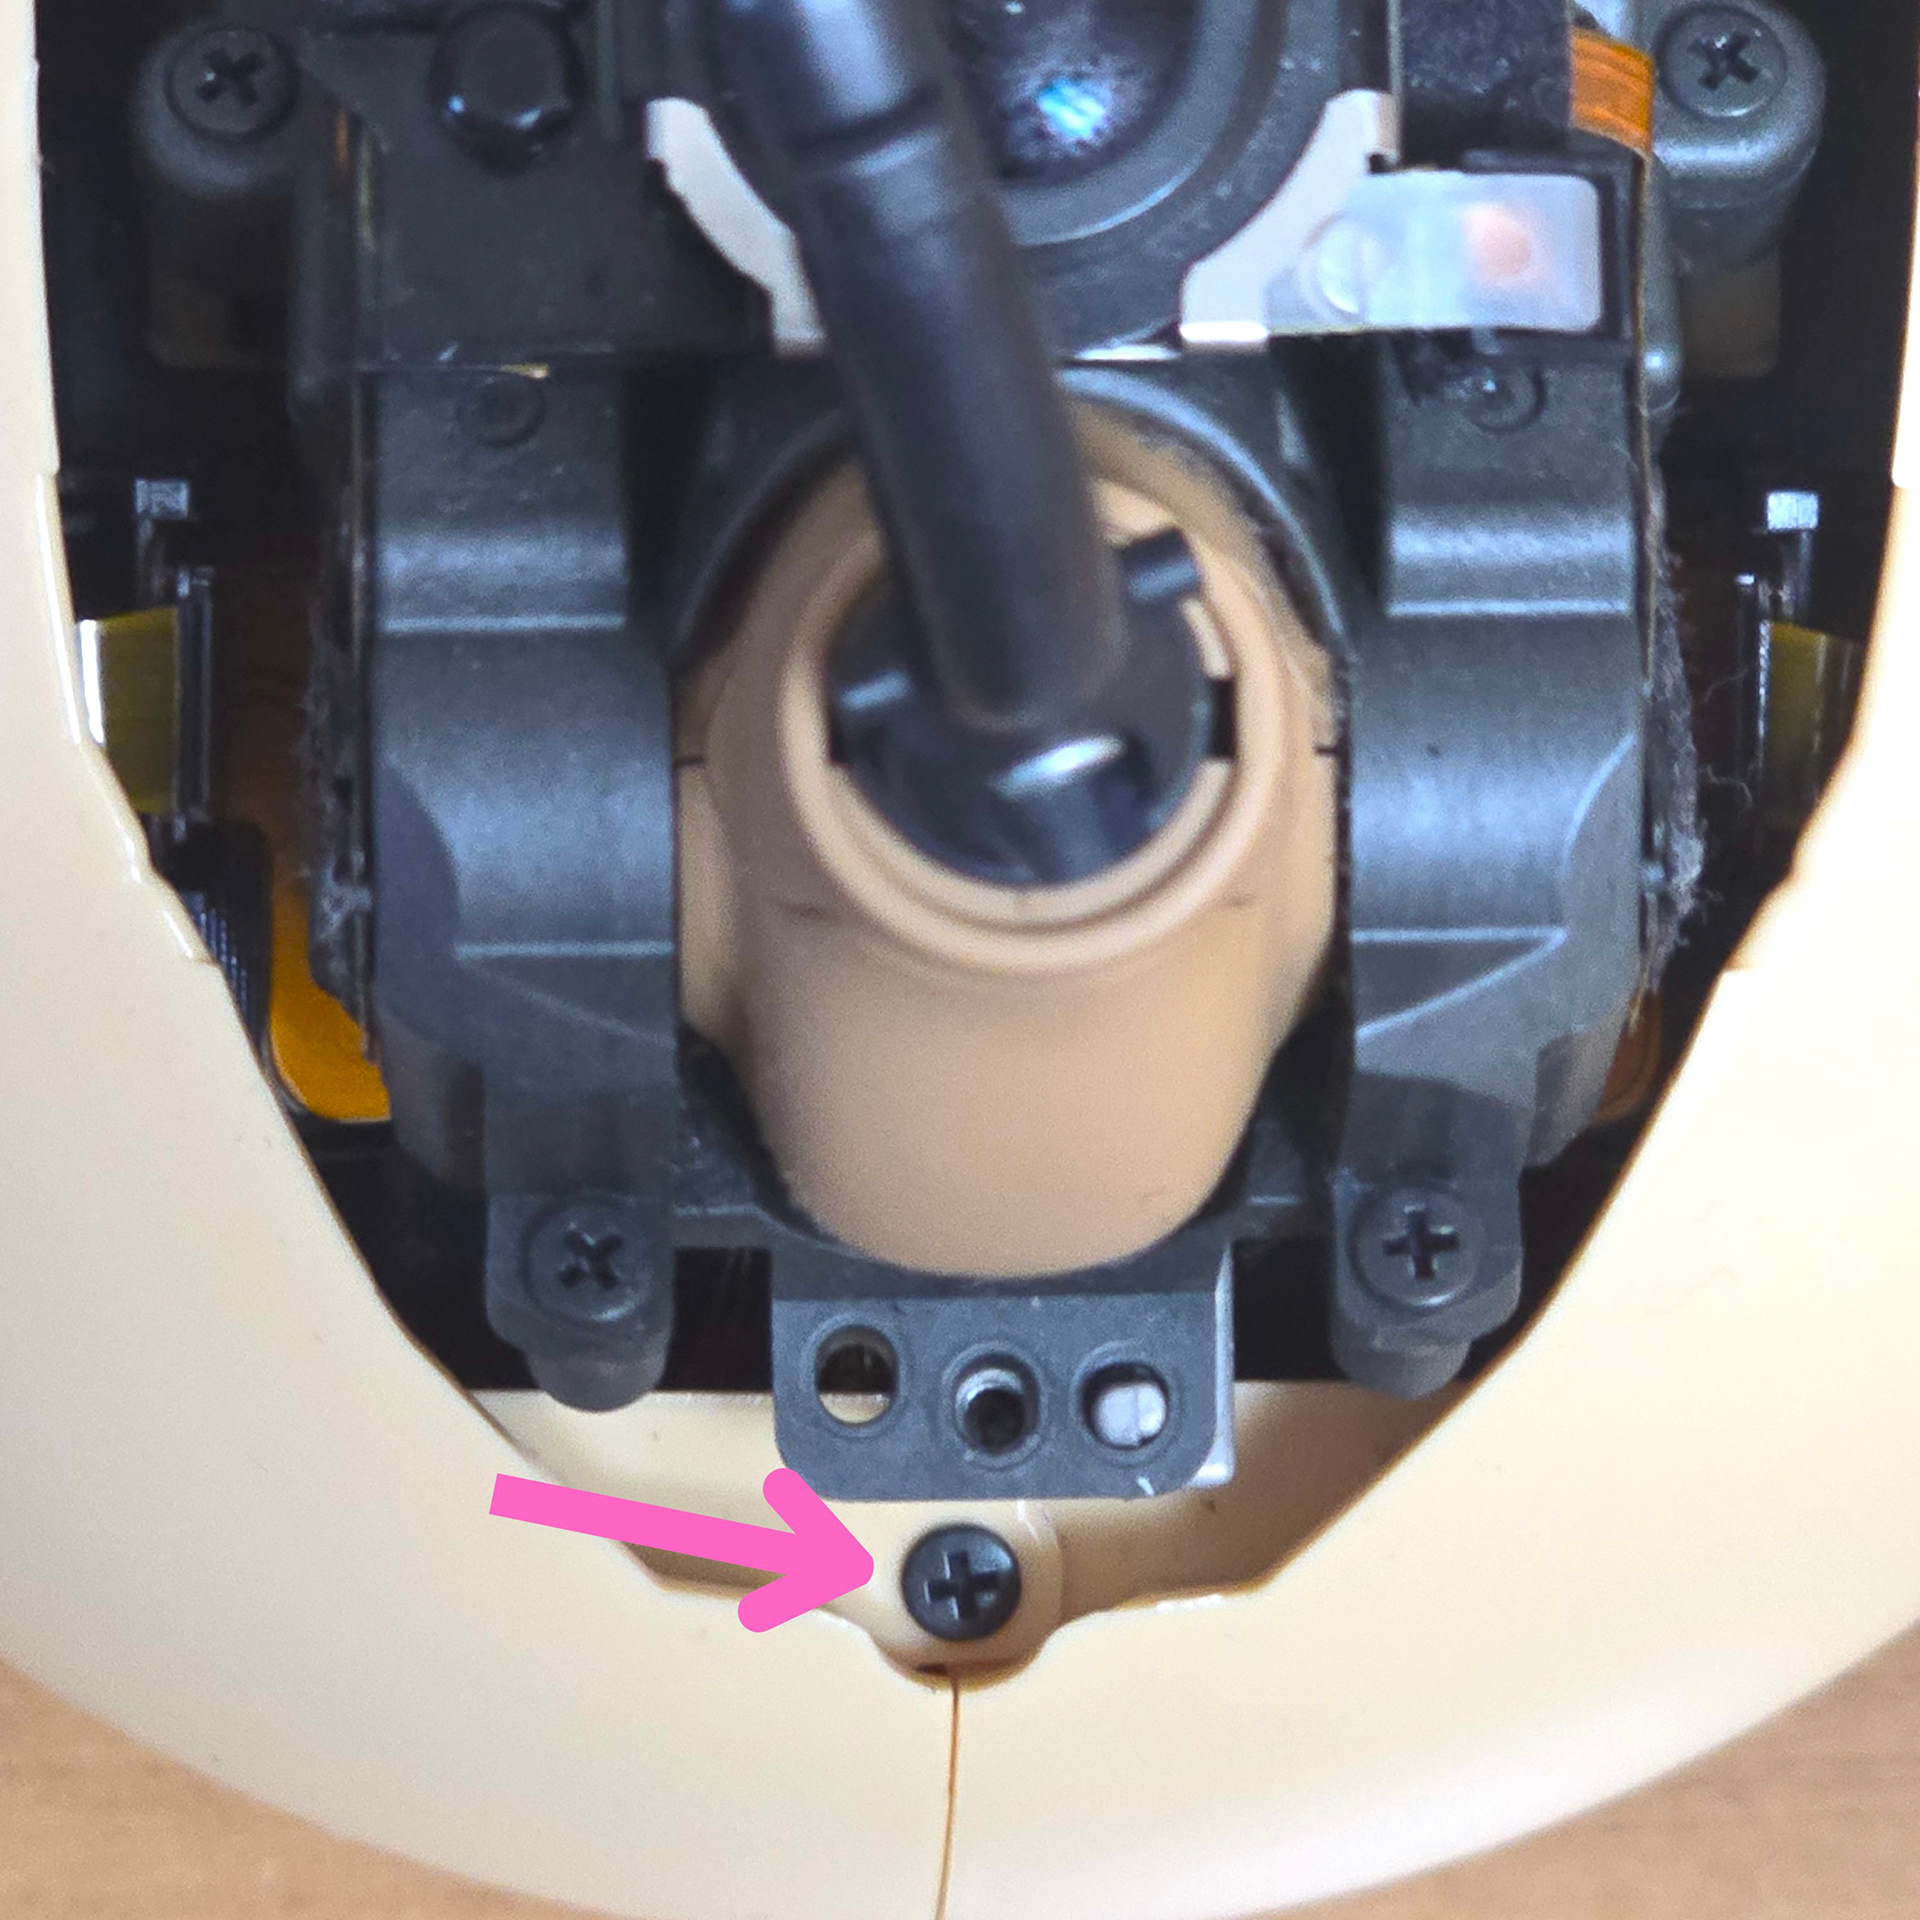
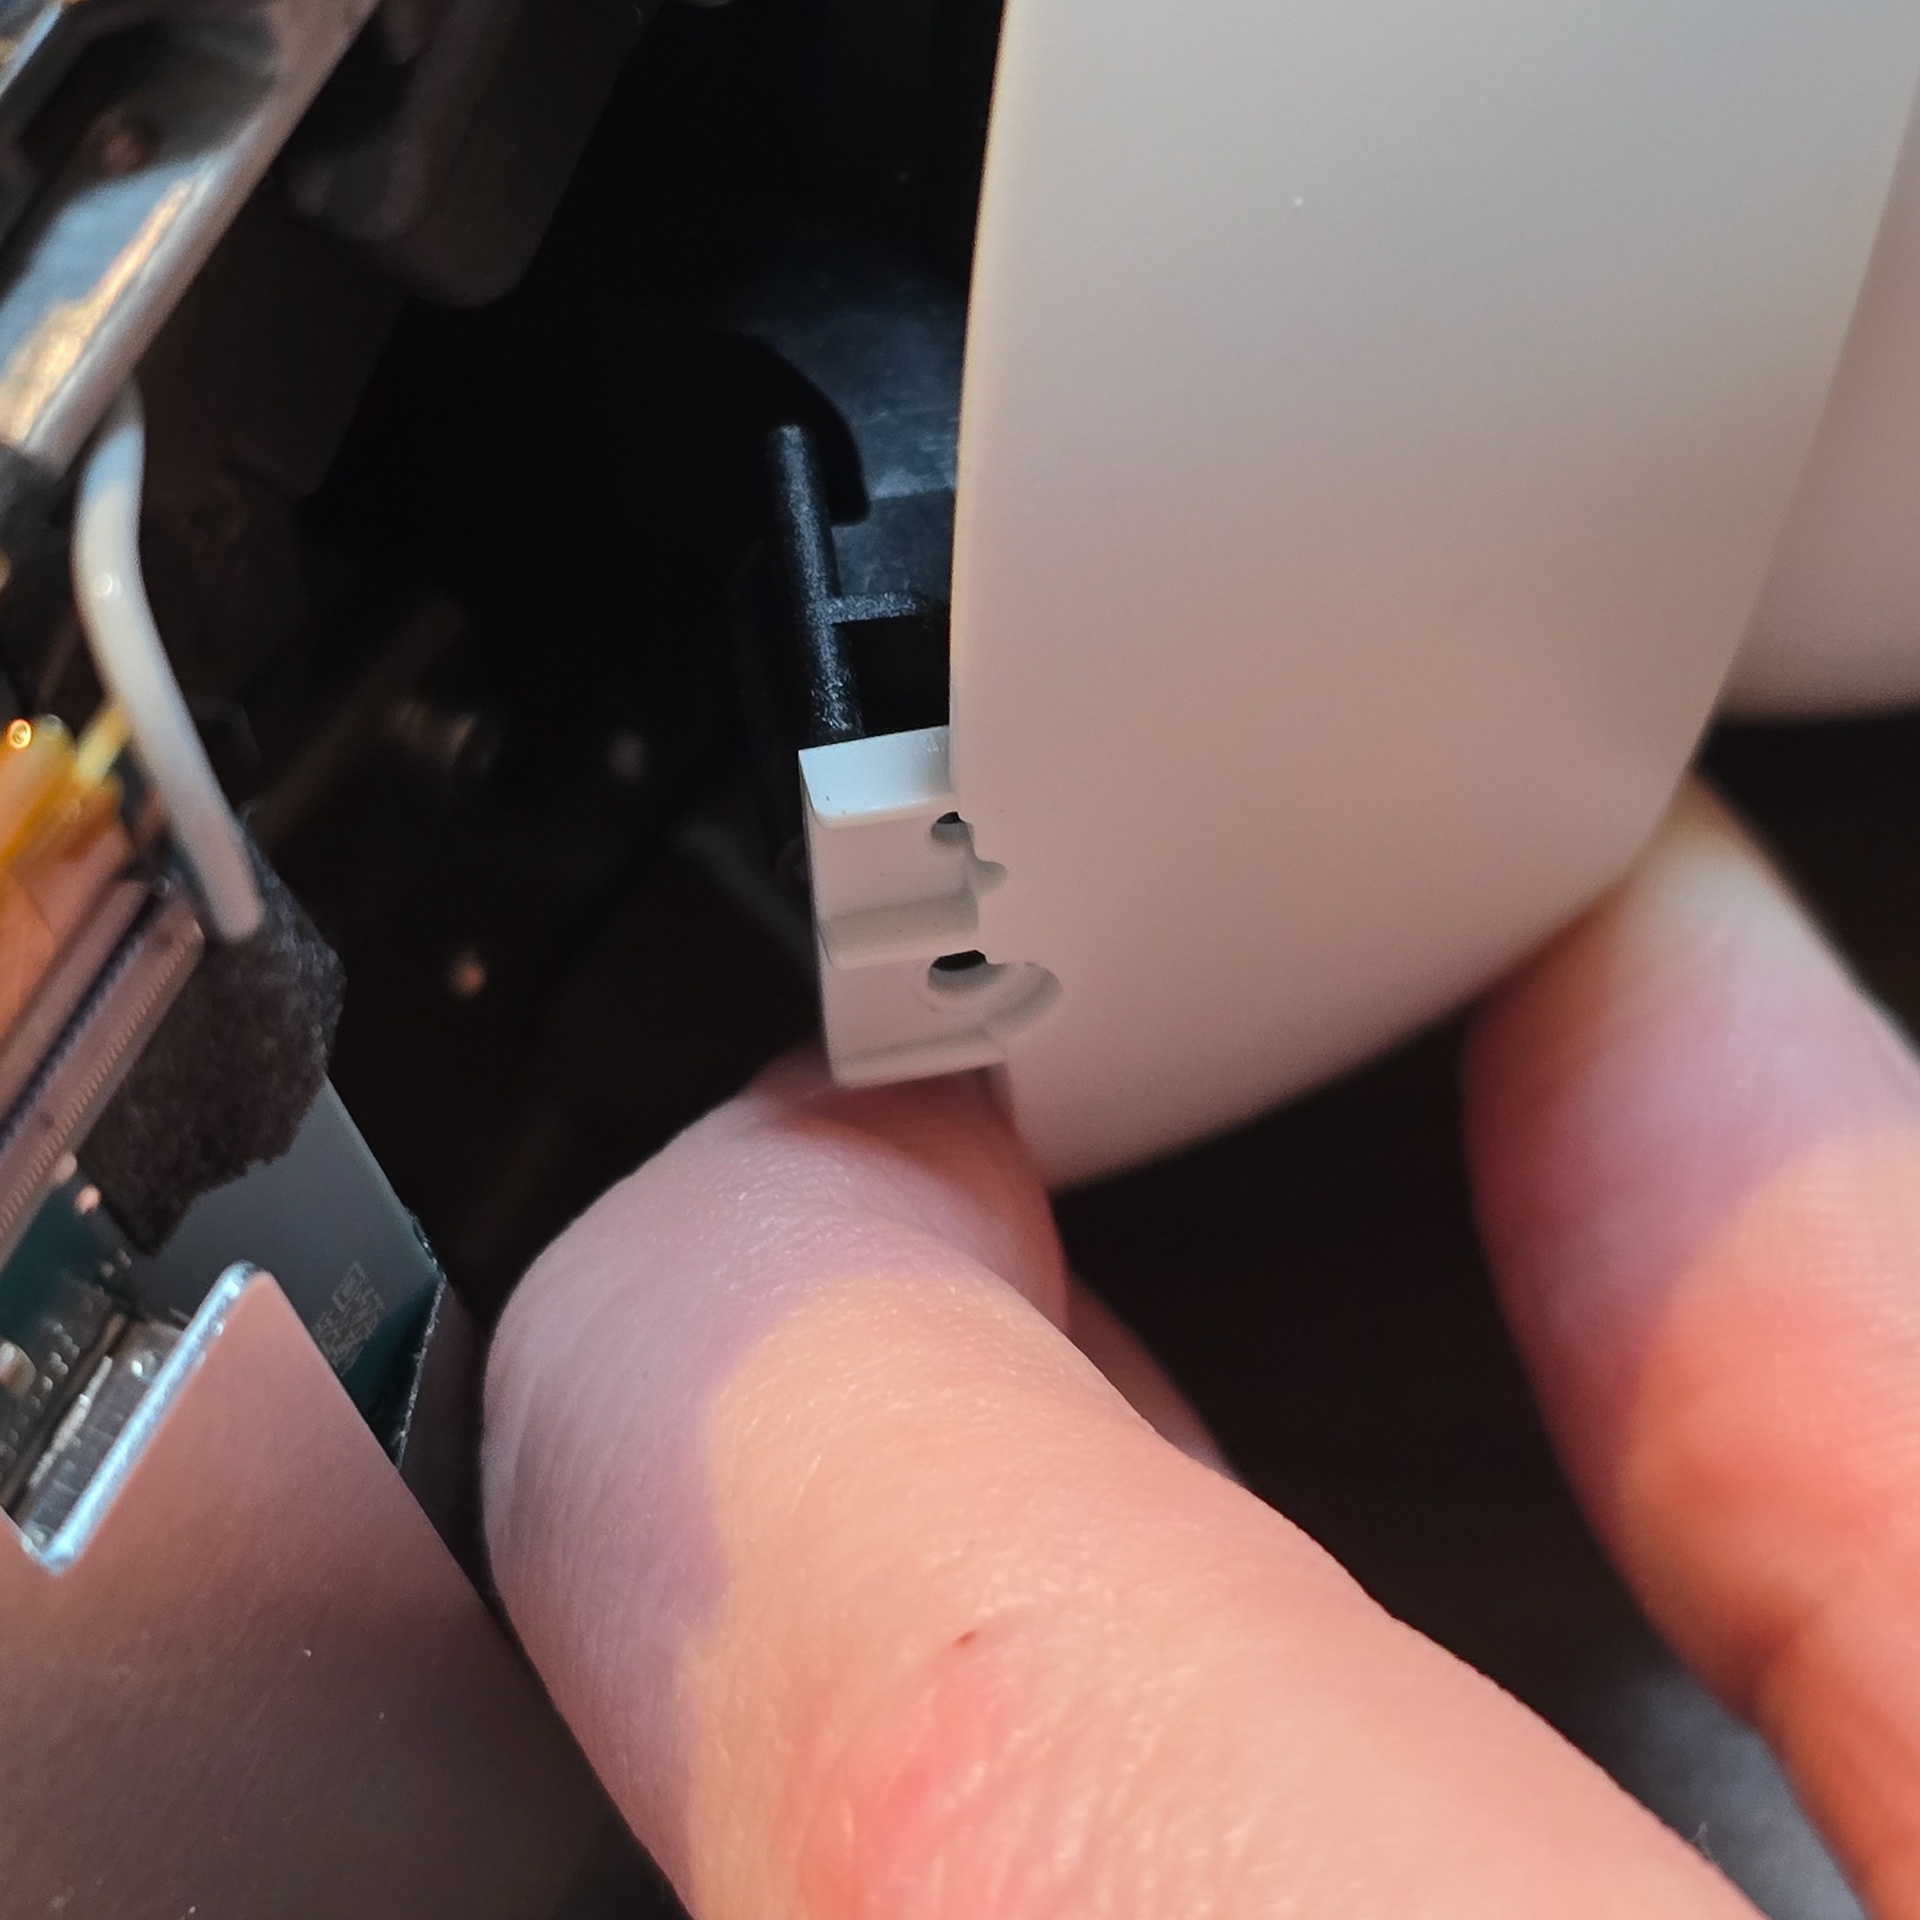
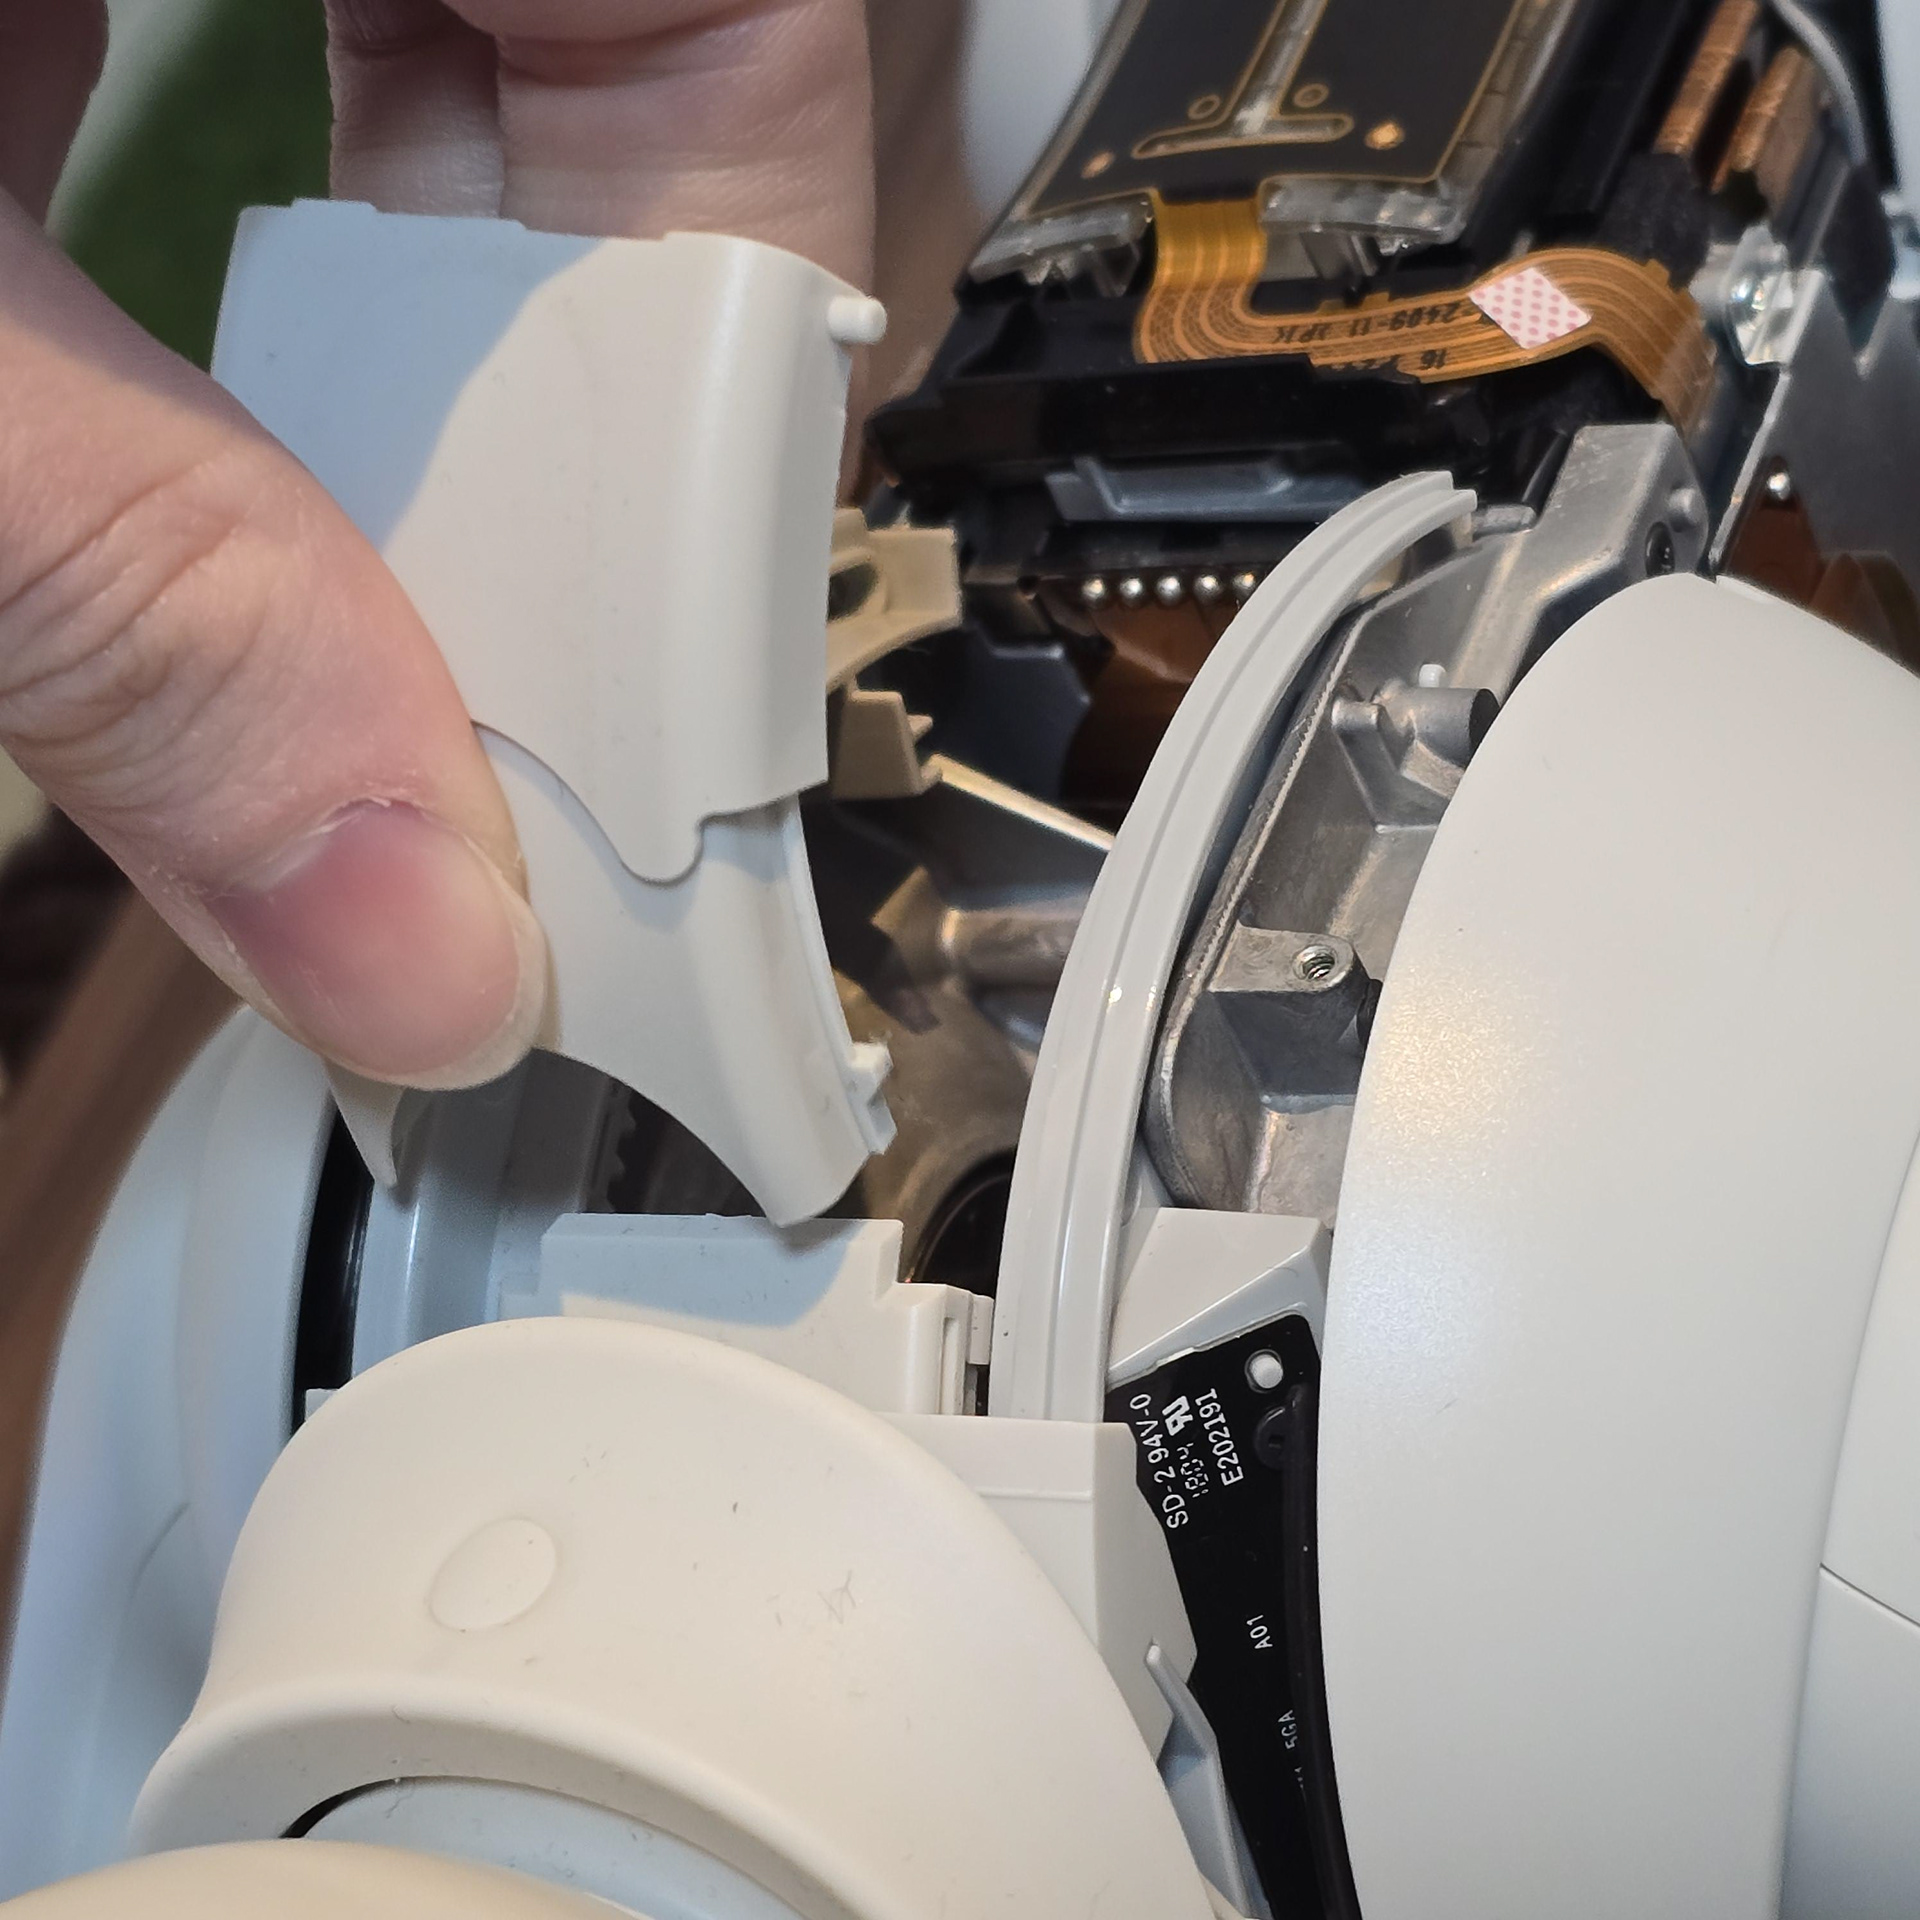
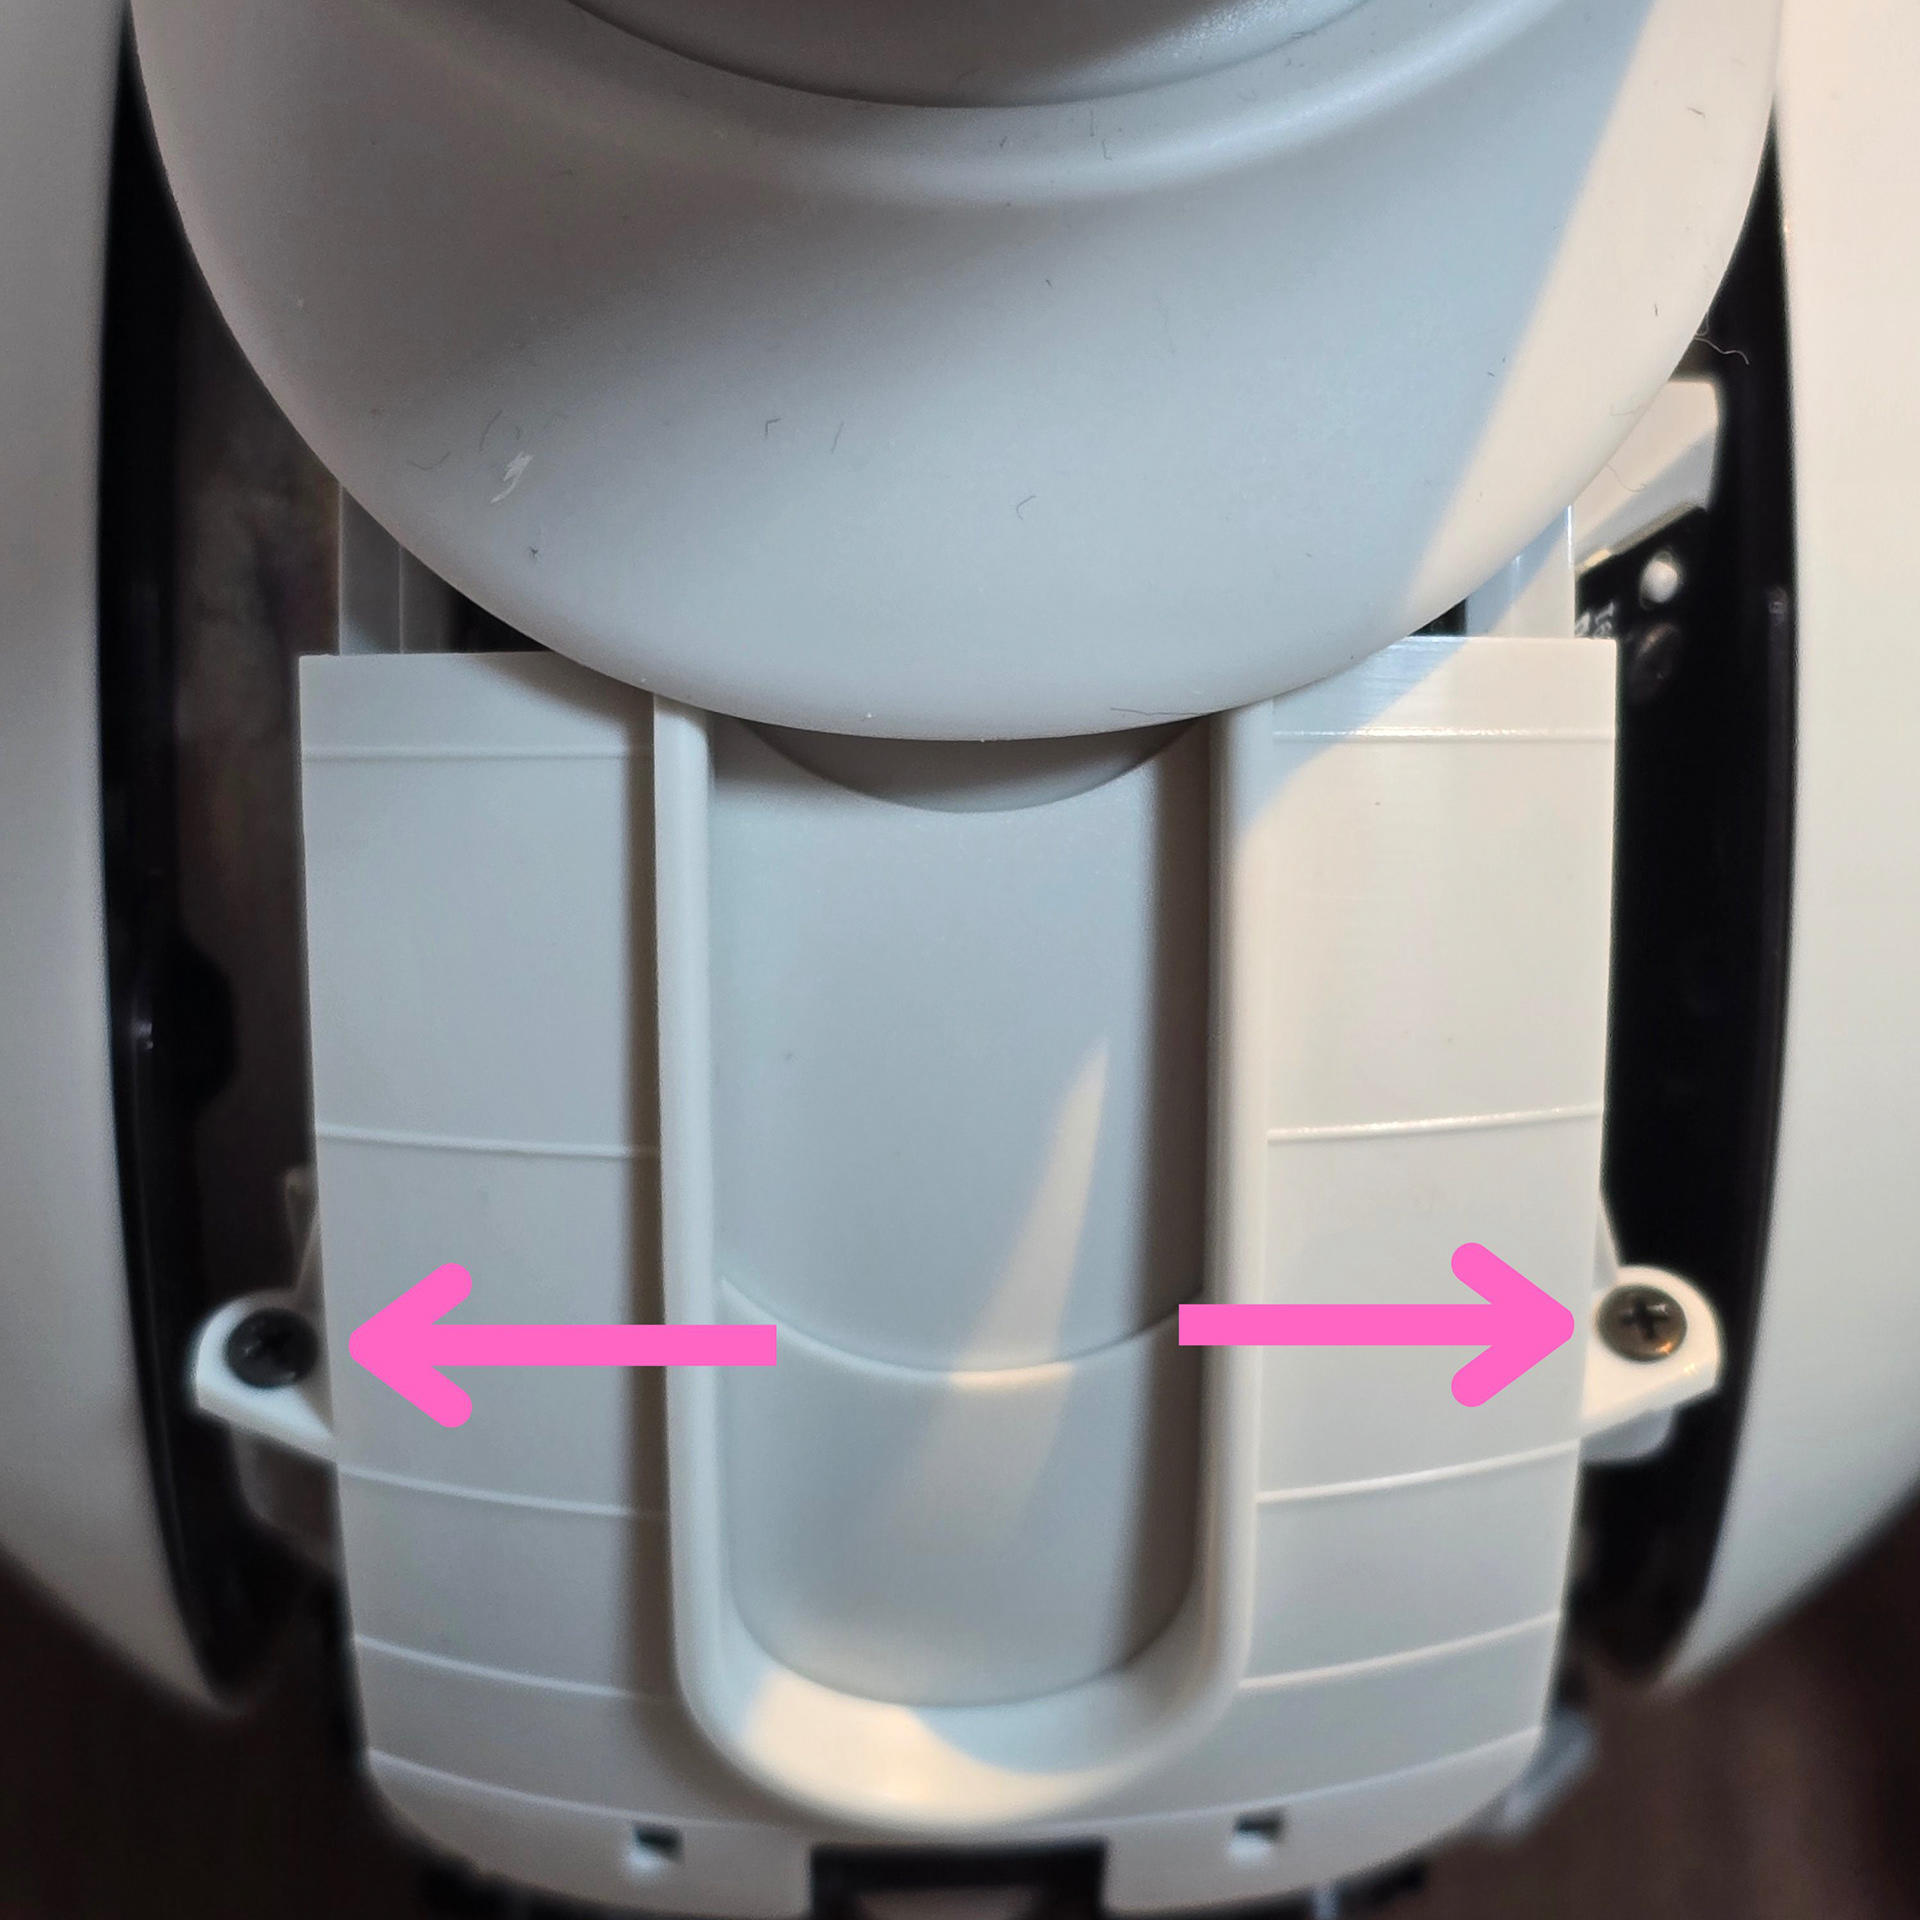
Next we will deal with the screws on the back. First remove the tail and tail ornament. To remove the tail ornament, jam your nail into the top corner next to the SLAM camera and pull it free. You will see a single screw under the tail - remove it.
次に、背面のネジを外します。まず、尾部と尾部の飾りを取り外します。尾部の飾りを外すには、SLAMカメラの横にある上部の角に爪を引っ掛けて引き抜きます。尾部の下にネジが1本あるので、それを外します。
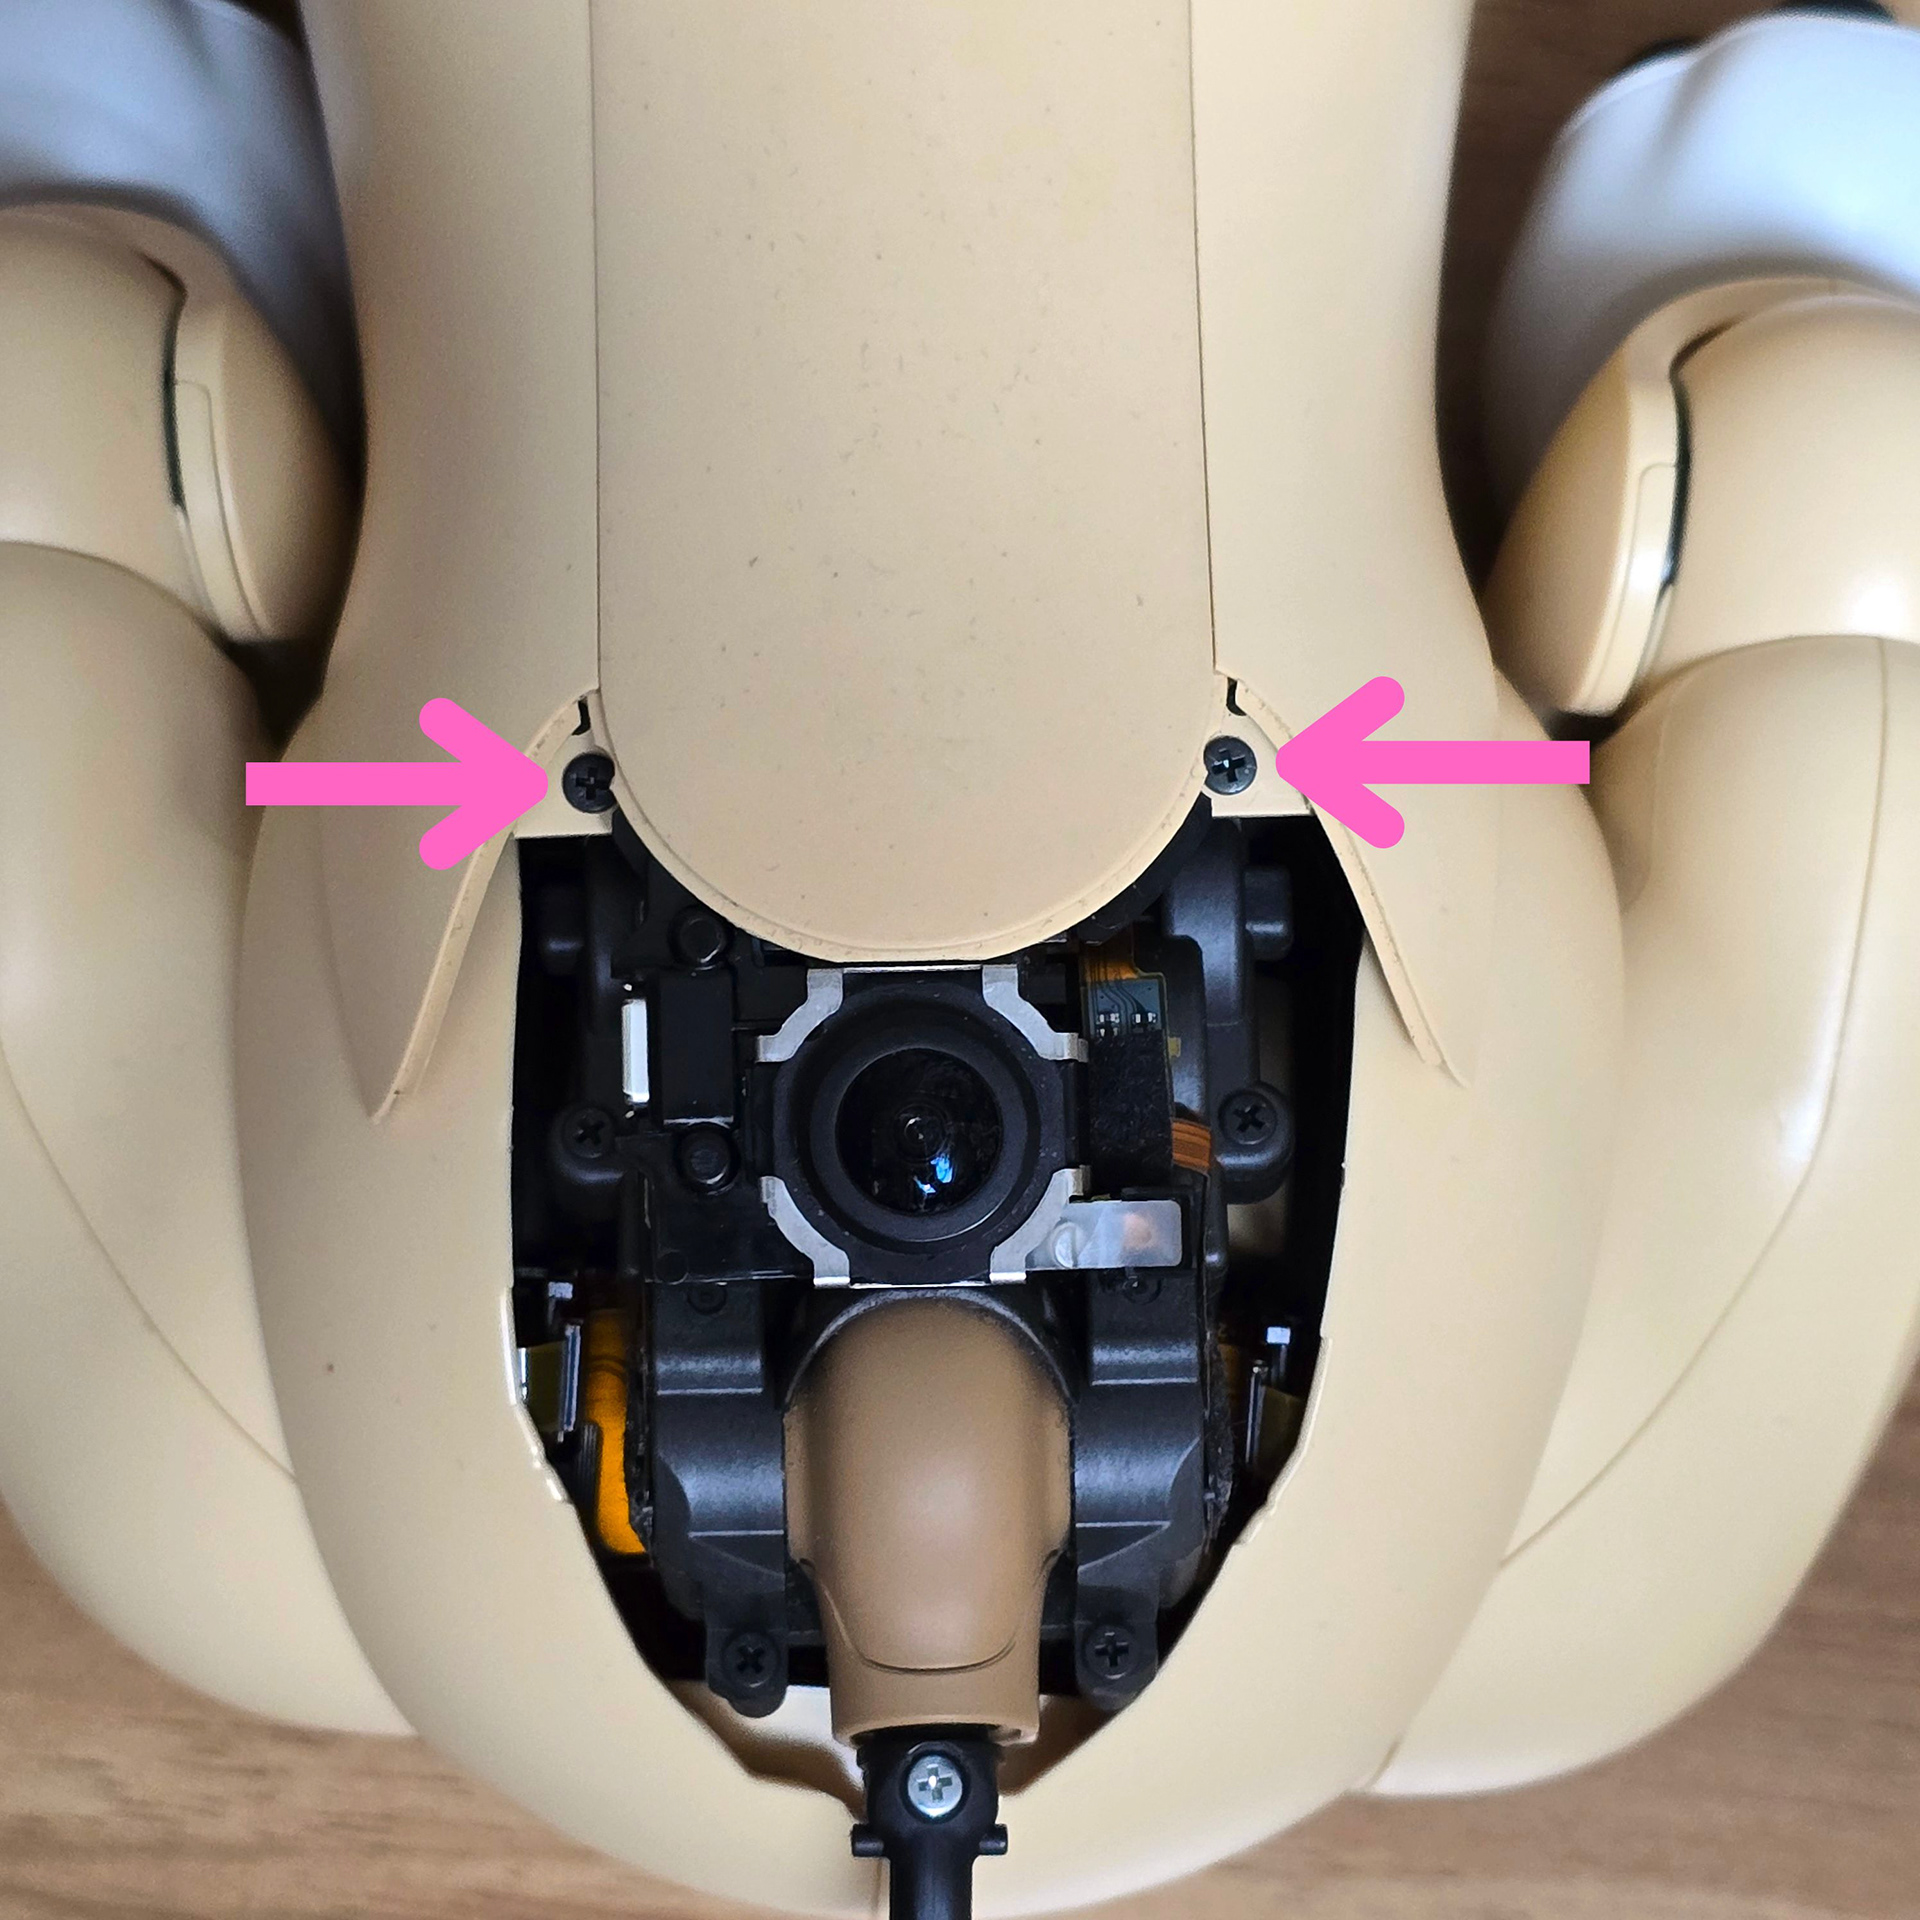
Then pull the cover off. This will reveal two screws, one either side near the back of the back sensor. Take both of these out.
次にカバーを取り外します。すると、背面センサーの裏側付近の両側に2本のネジが現れます。このネジを両方とも外します。
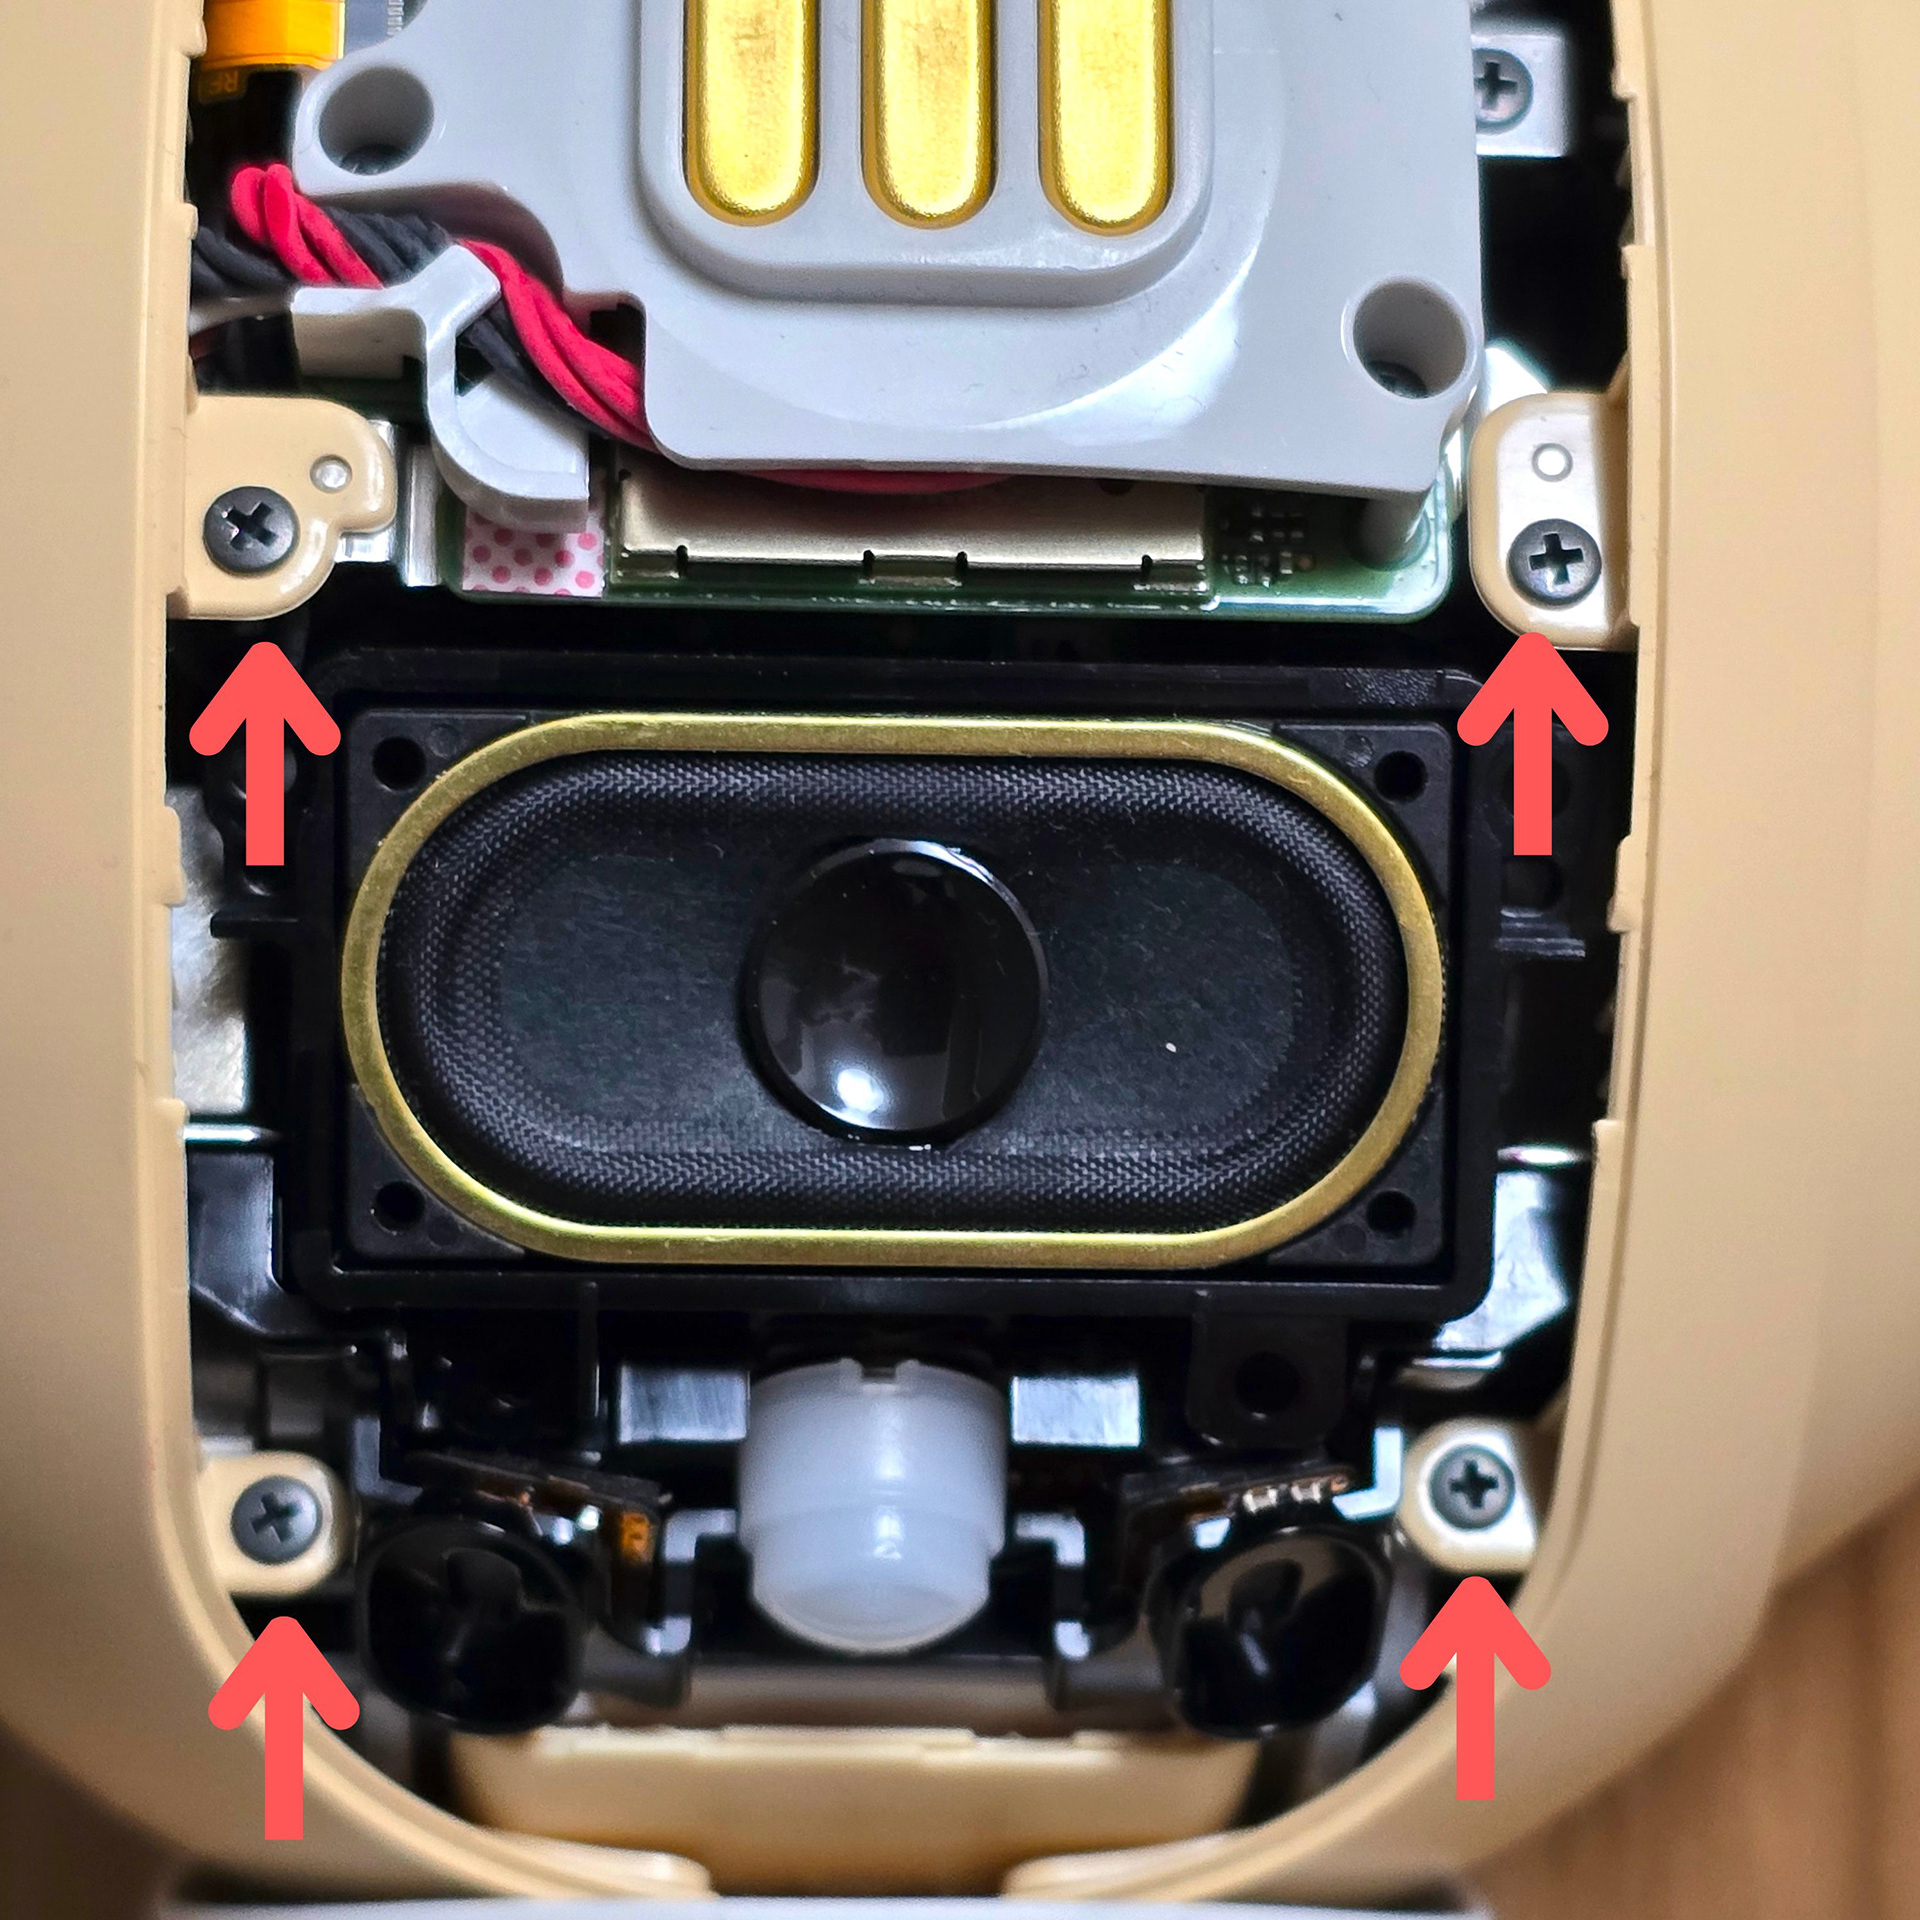
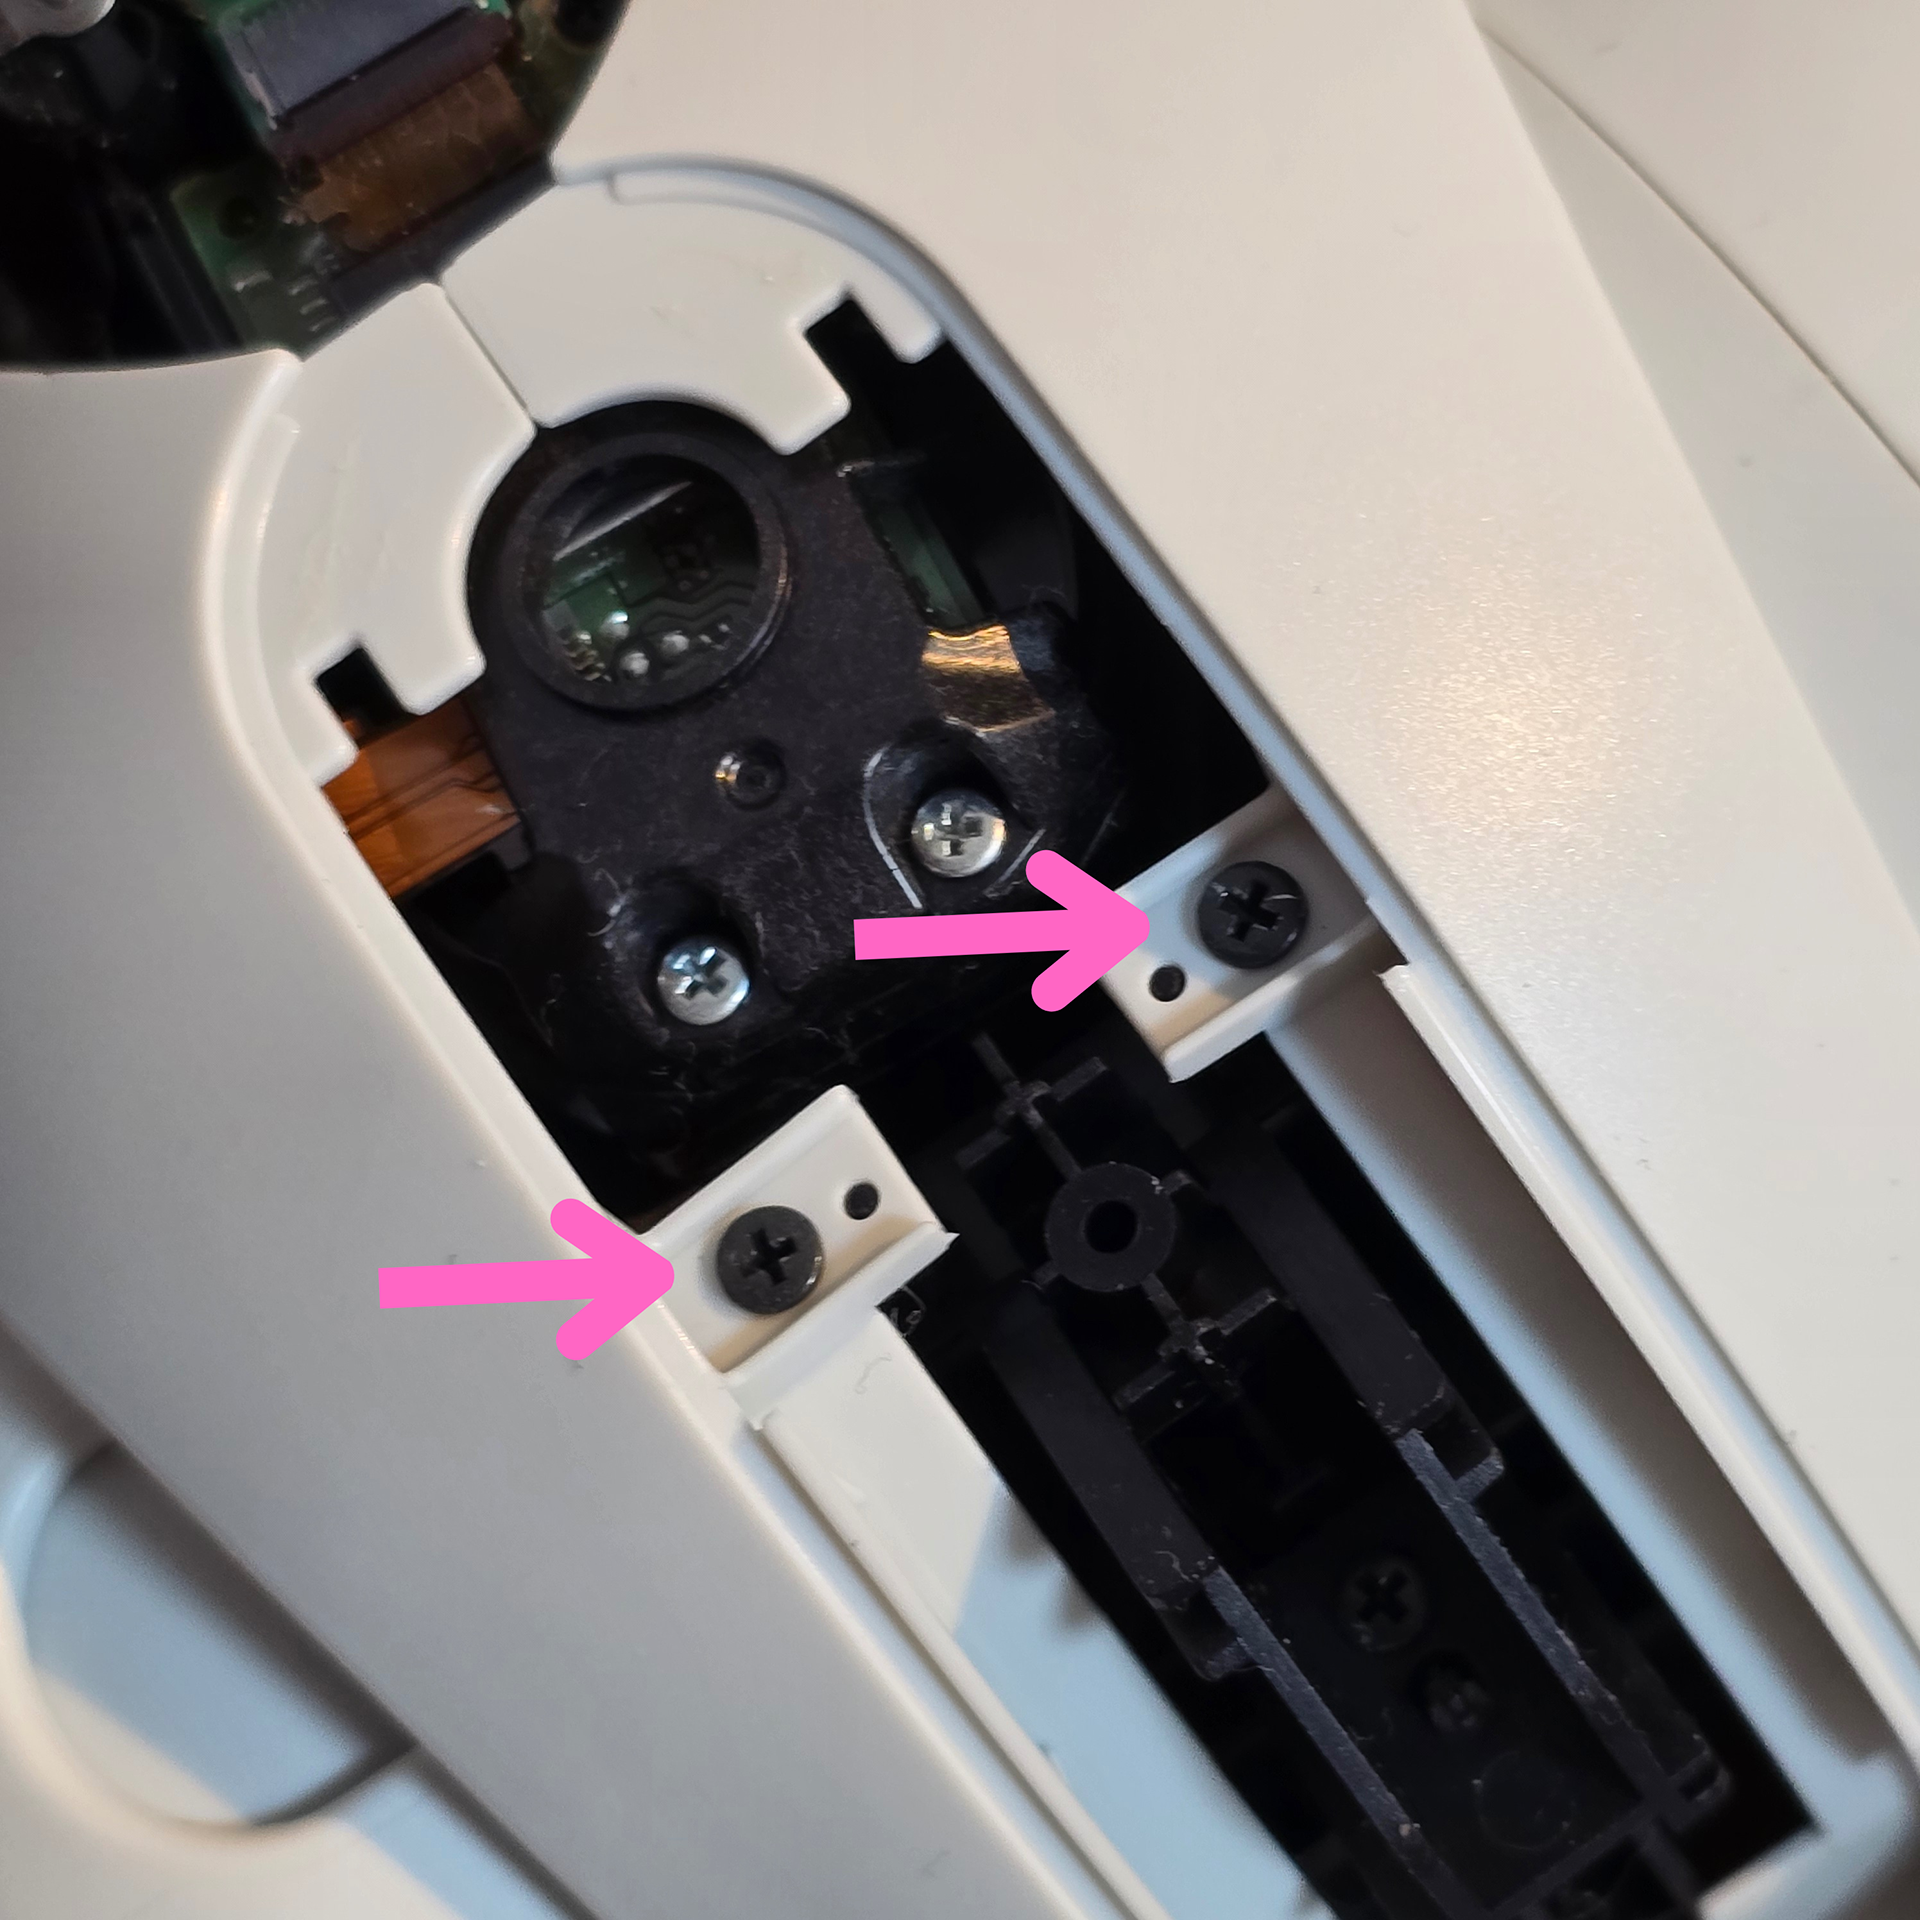
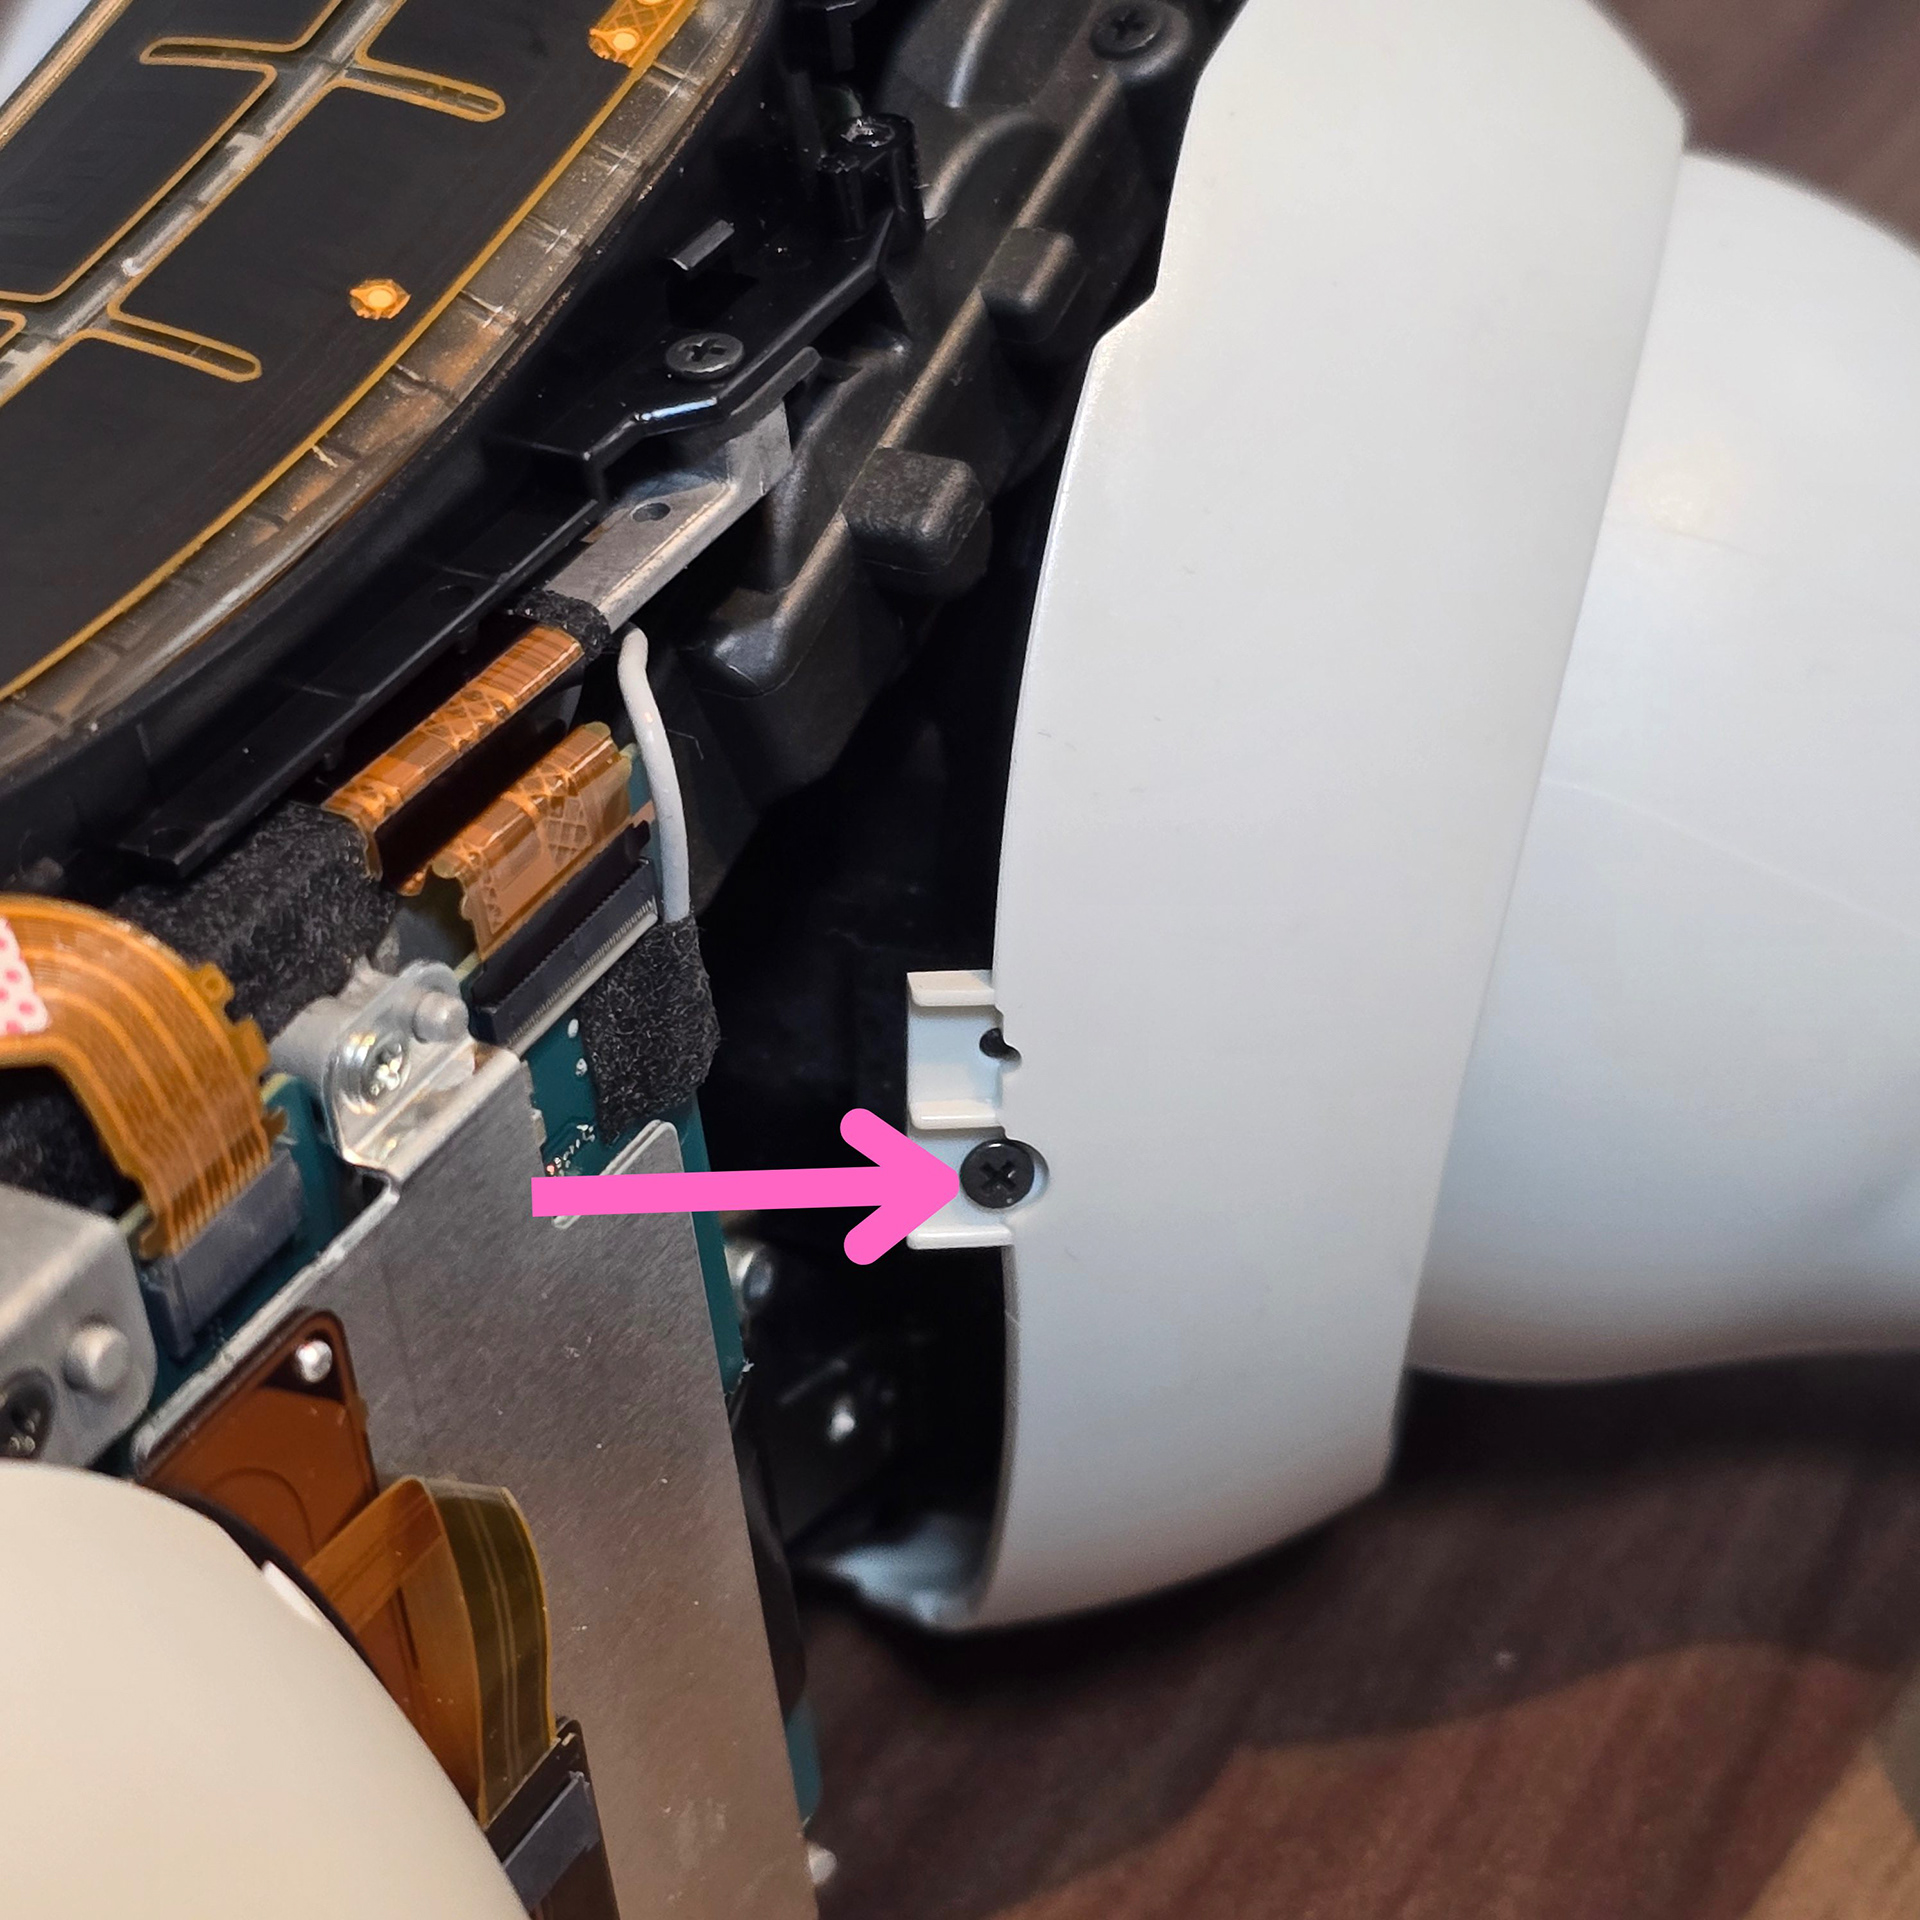
Returning to the chest area of the aibo - there are 4 screws that hold down the plastic body shells to the aibo's metal internal frame. Take all 4 screws out, making sure not to drop any into the body.
aiboの胸の部分に戻ると、プラスチック製のボディシェルをaiboの金属製の内部フレームに固定しているネジが4本あります。4本のネジをすべて外しますが、本体の中にネジを落とさないように注意してください。
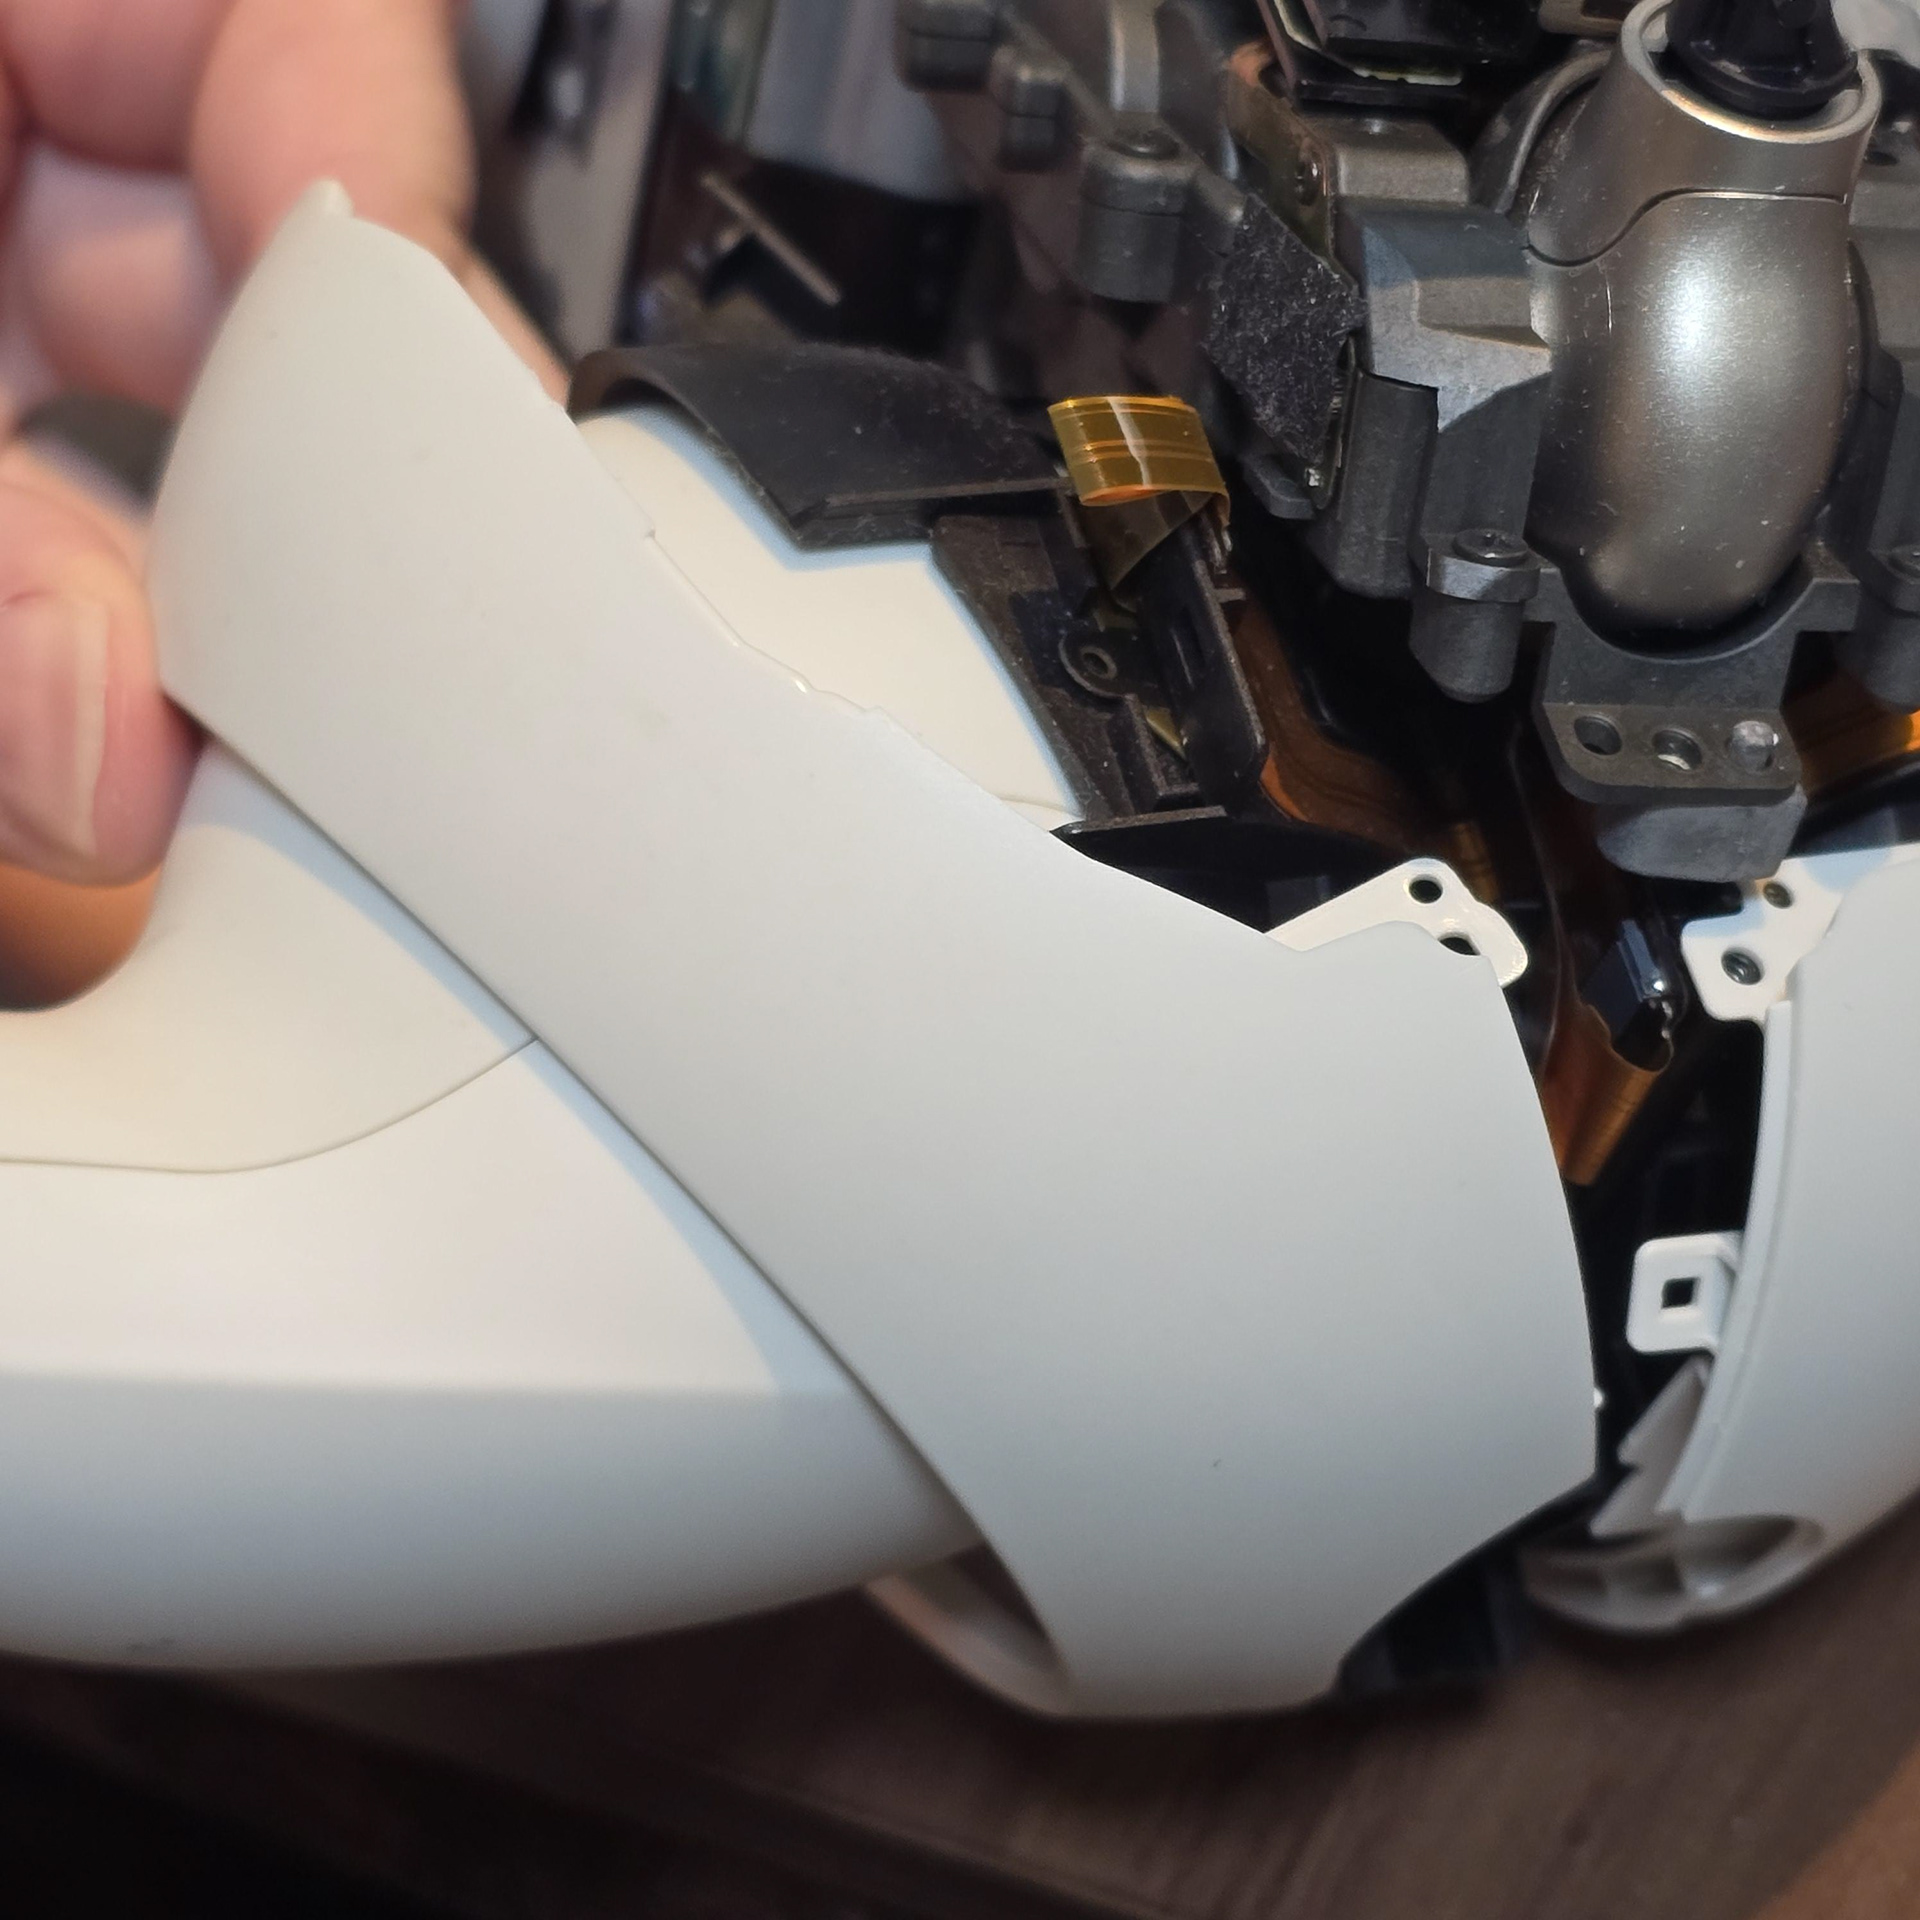
With all of the screws removed, we can now start prying the plastic body panels off the aibo. There are two main body panels (one each side) that are held in place by strong clips and screws. With the screws removed, we just need to deal with the plastic tabs. First start by popping the back and the underside plastic tabs (furthest from the aibos chest).
I recommend freeing the RIGHT side panel first, as some of the clips from both sides overlap each other and doing it this way will make it easier.
すべてのネジを外したら、aiboのプラスチック製のボディパネルをこじ開けることができます。ボディパネルは2枚(両側に1枚ずつ)あり、強力なクリップとネジで固定されています。ネジを外したら、あとはプラスチックのタブを外すだけです。まずは、aiboの胸から一番遠い、背面と底面のプラスチックタブを外します。
両側のクリップの一部が重なり合っているため、右側面パネルから外すと作業が楽になるので、最初に右側面パネルから外すことをお勧めします。
両側のクリップの一部が重なり合っているため、右側面パネルから外すと作業が楽になるので、最初に右側面パネルから外すことをお勧めします。
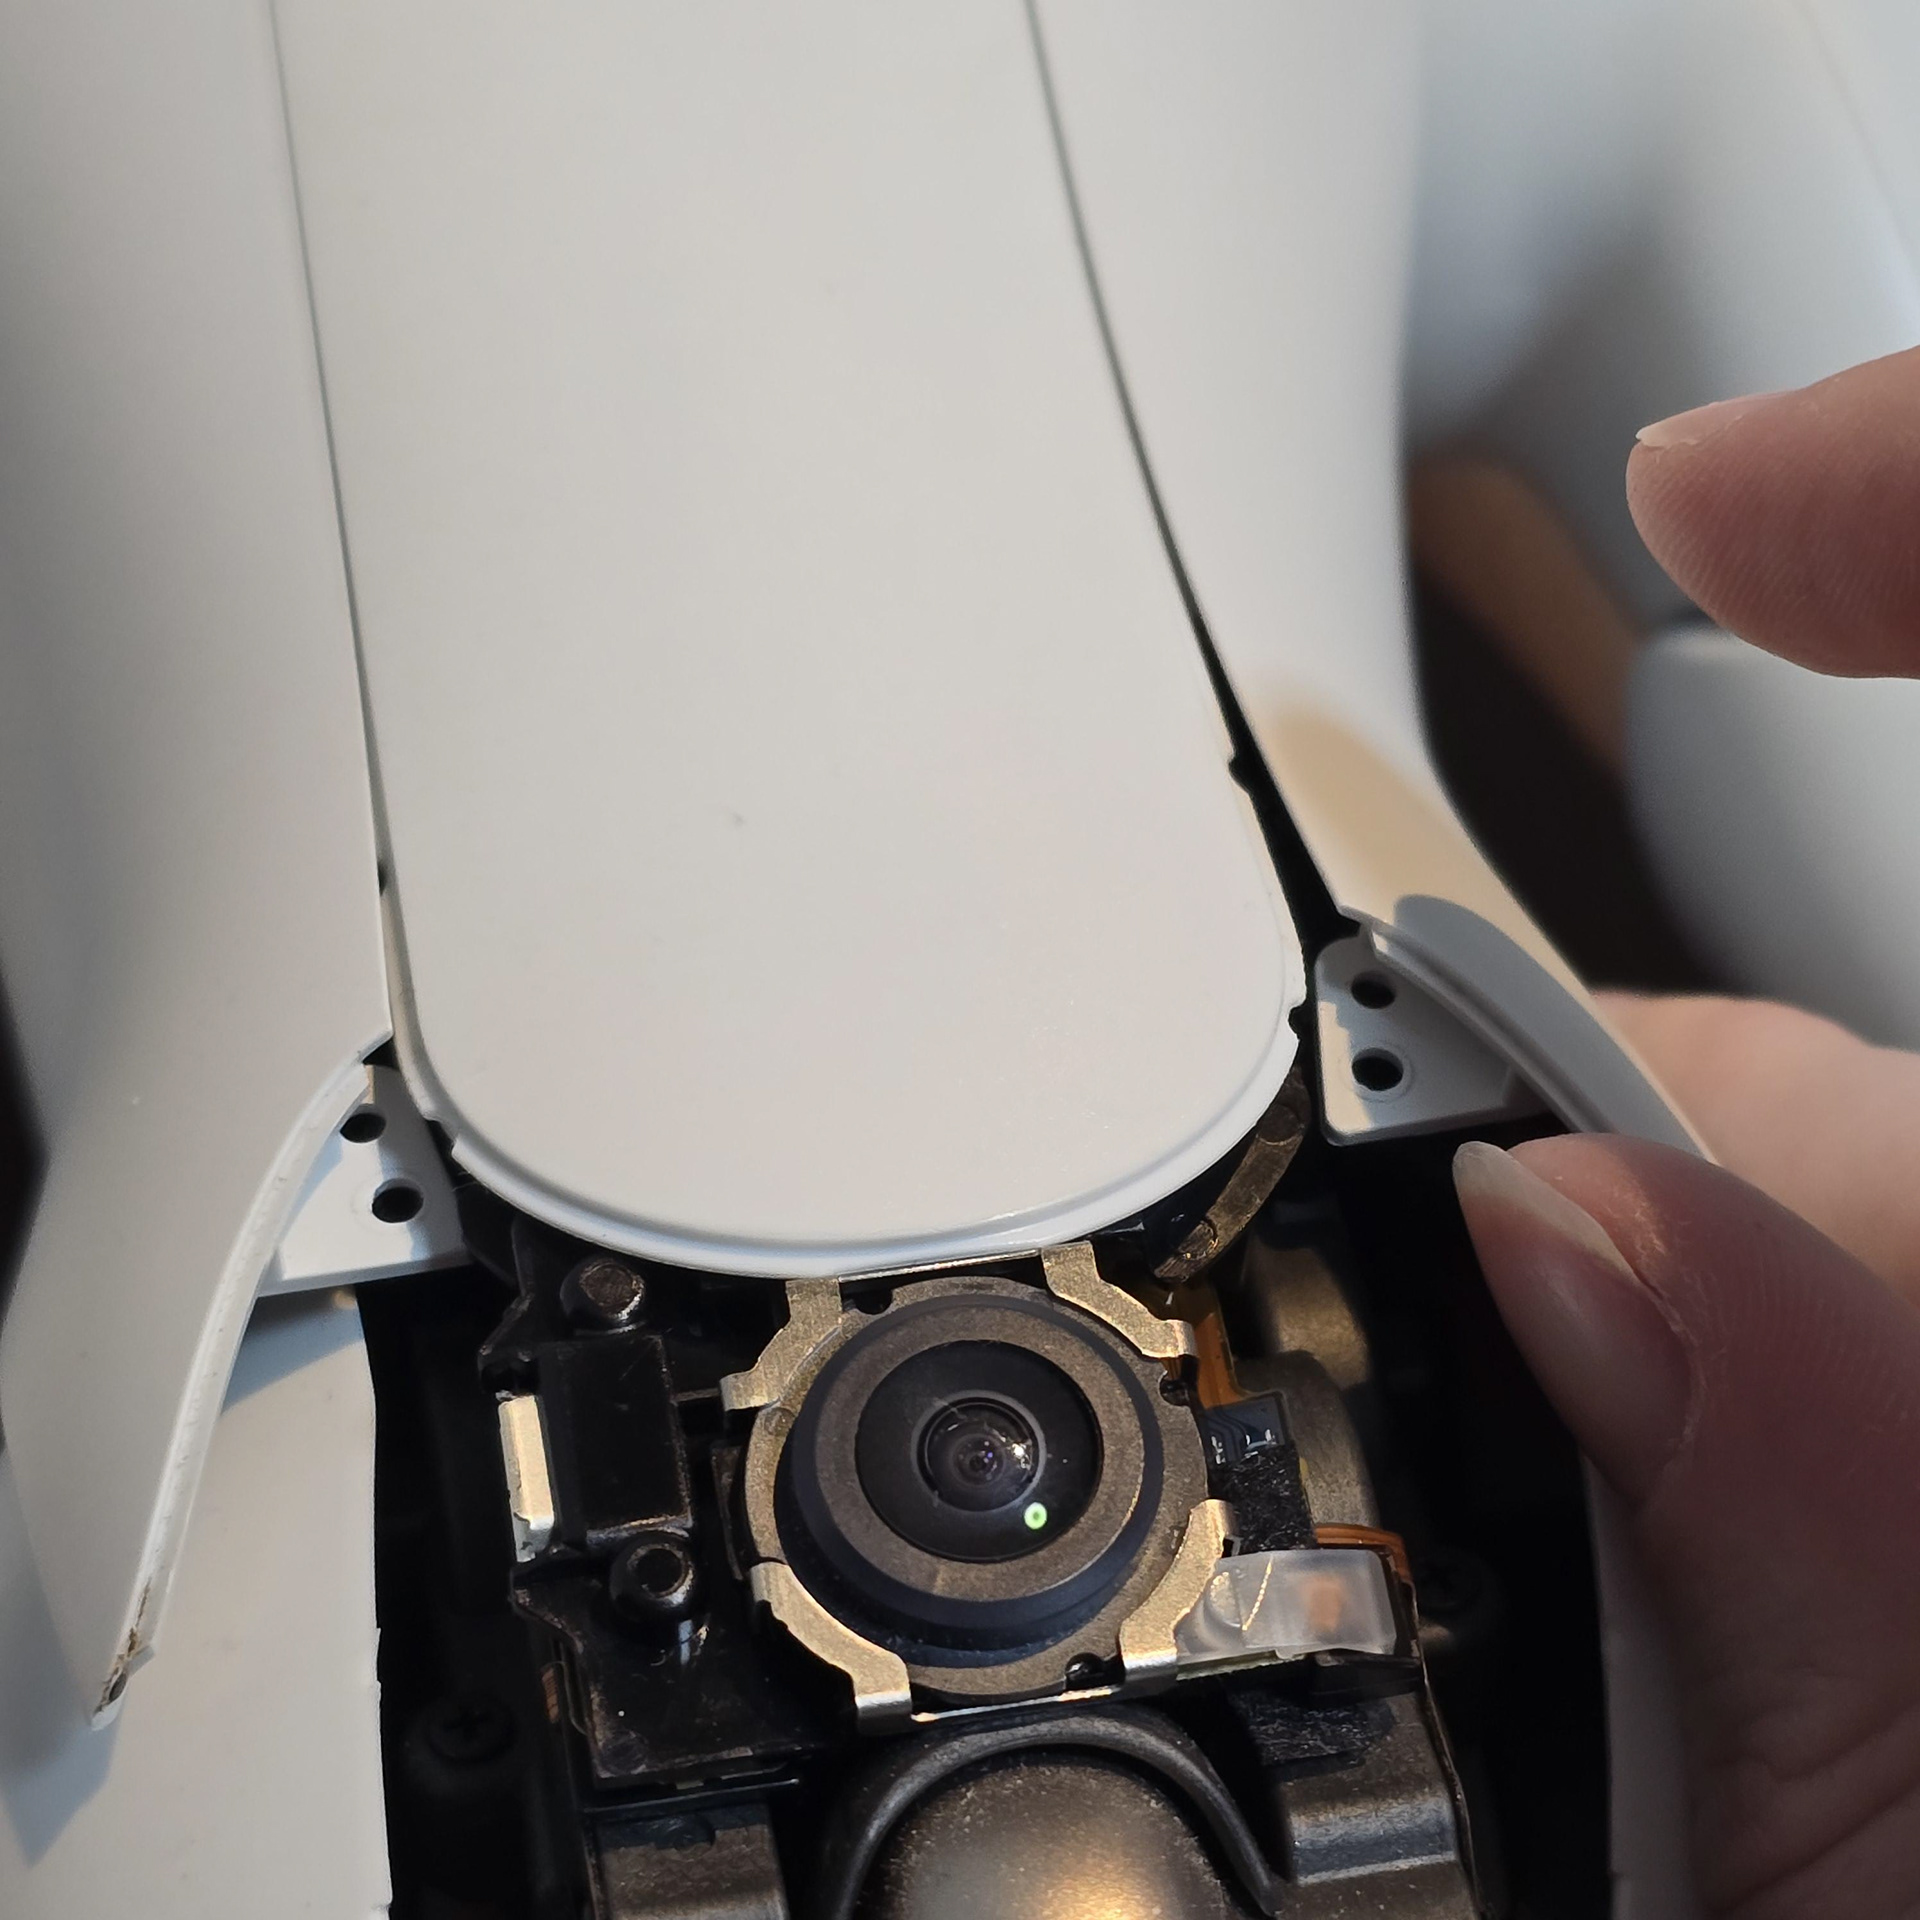
Then move to the very front of the aibos chest, under the neck dust cover area. There are super strong tabs here - unless you free these you will not be able to remove the body shells. Pry them forward until you hear a pop. Again, make sure you are freeing the right side first as these tabs overlap.
次に、アイボの胸部の最前部、首のダストカバーの下の部分に移動します。ここには非常に強力なタブがあり、これを外さないとボディシェルを取り外すことができません。カチッという音がするまで前方にこじ開けます。繰り返しますが、タブは重なっているので、必ず右側から外してください。

The above tabs are plastic that slot into metal tabs, so they are stiff and a pain to release as they always want to click back into place. To deal with them, I use a tiny flathead screwdriver to pry the plastic tab up and free, before pulling the whole side panel to the side, freeing the entire plastic side panel.
上記のタブはプラスチック製で、金属タブに差し込むタイプなので固く、カチッと音がして元に戻ろうとするため、外すのが大変です。対処法としては、小さなマイナスドライバーを使ってプラスチックタブをこじ開け、その後、サイドパネル全体を横に引いて、プラスチックサイドパネル全体を外します。
With that done, the side panel will be free for you to pull off. Once both sides are removed, peel the back sensor cover off (it will fall off anyway as it is actually clamped down by the two side panels.
これでサイドパネルが外れます。両側を取り外したら、背面センサーカバーを剥がします(実際には両側のサイドパネルで固定されているため、いずれ外れてしまいます)。
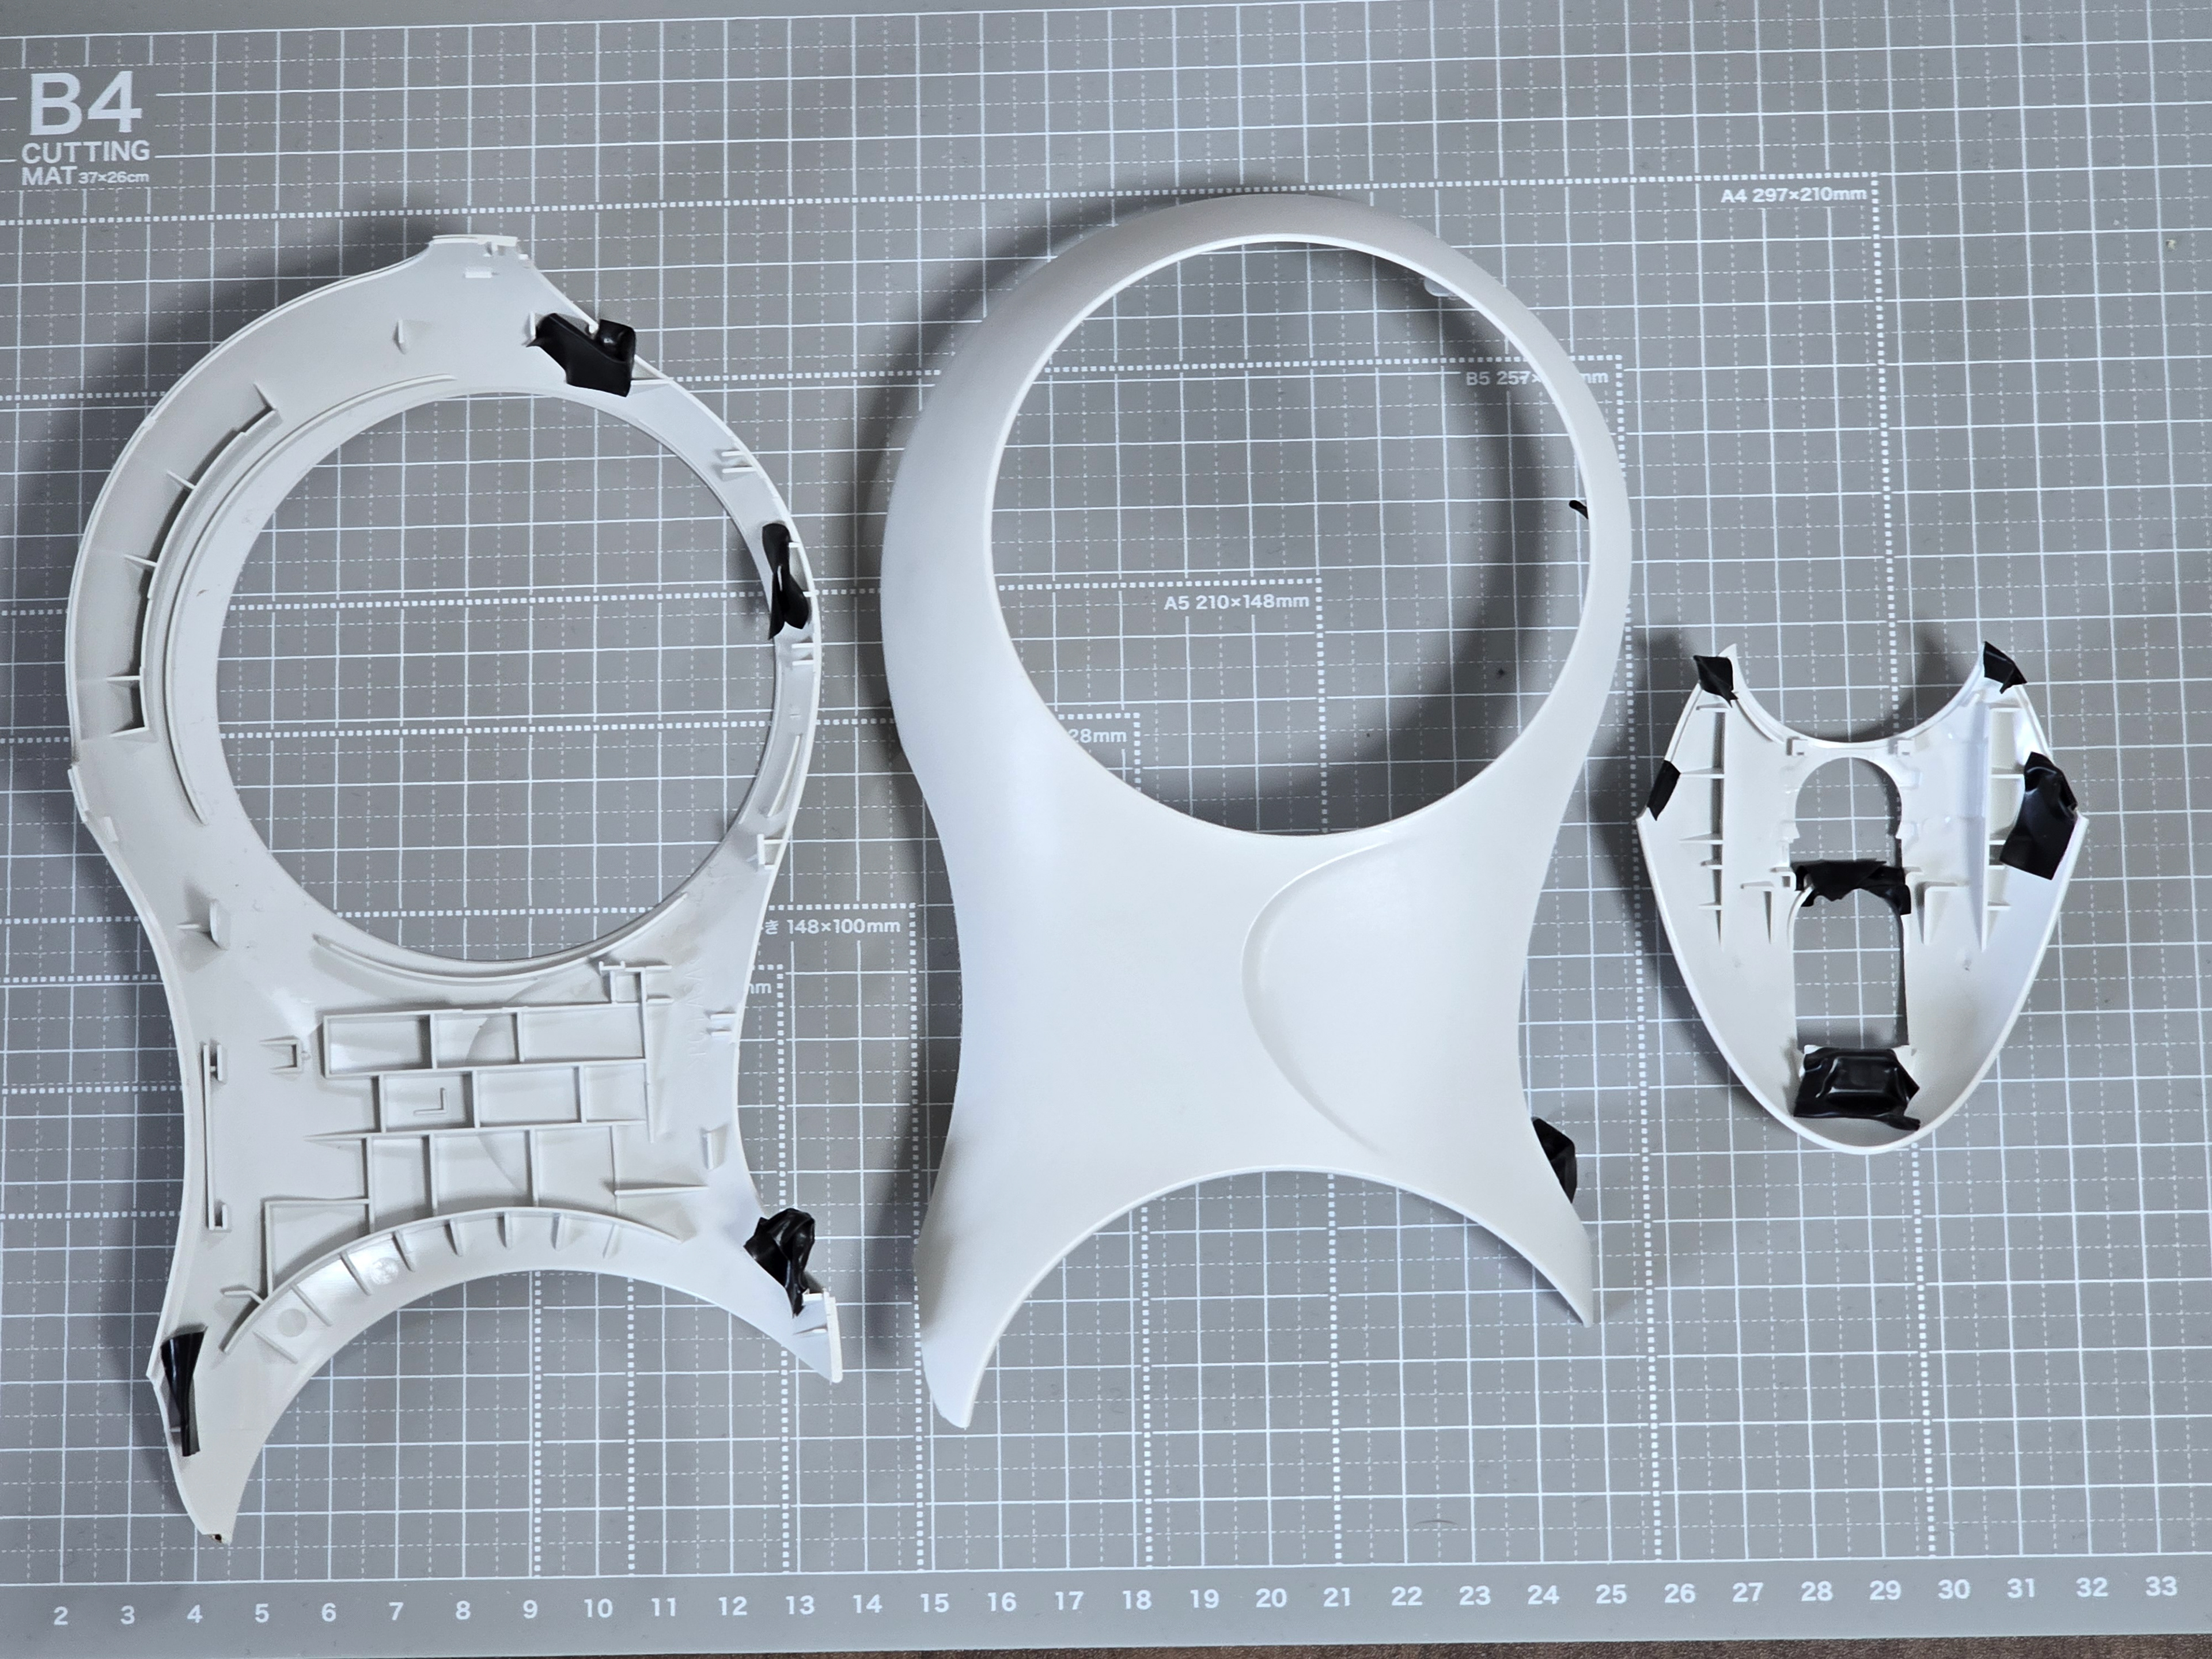
Above: Both side panels and rear panel
上:両側面パネルと背面パネル
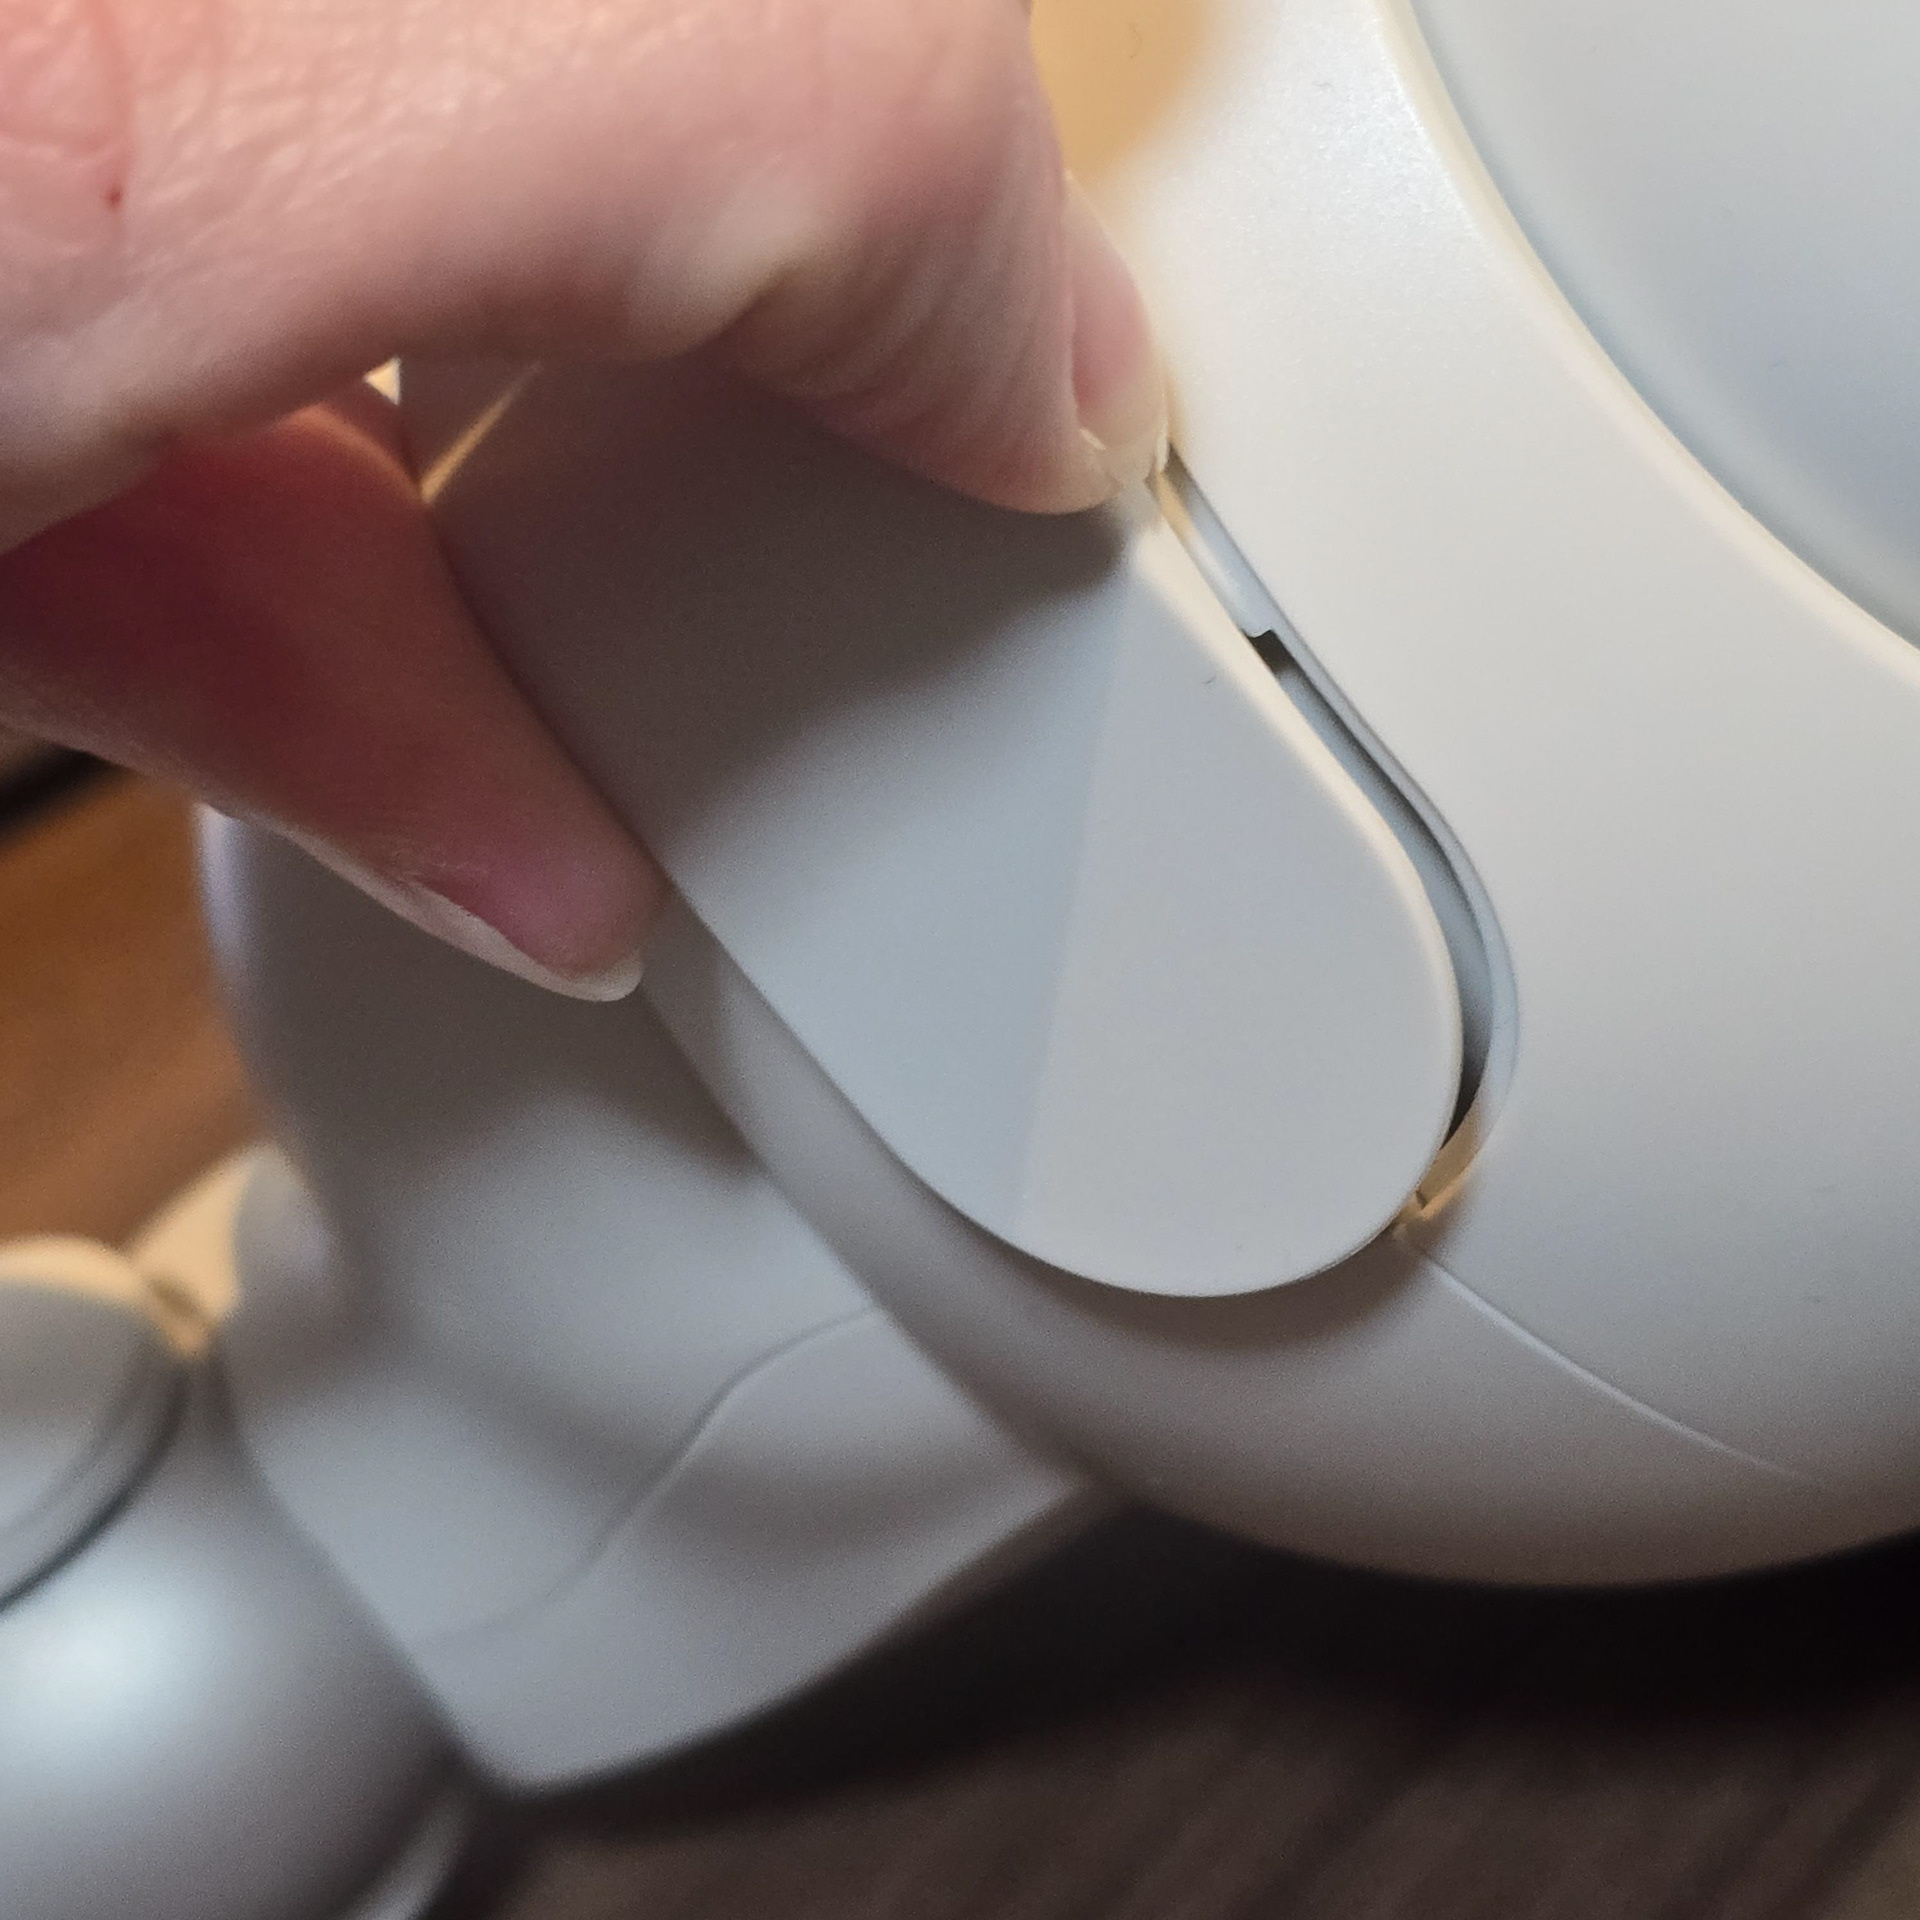
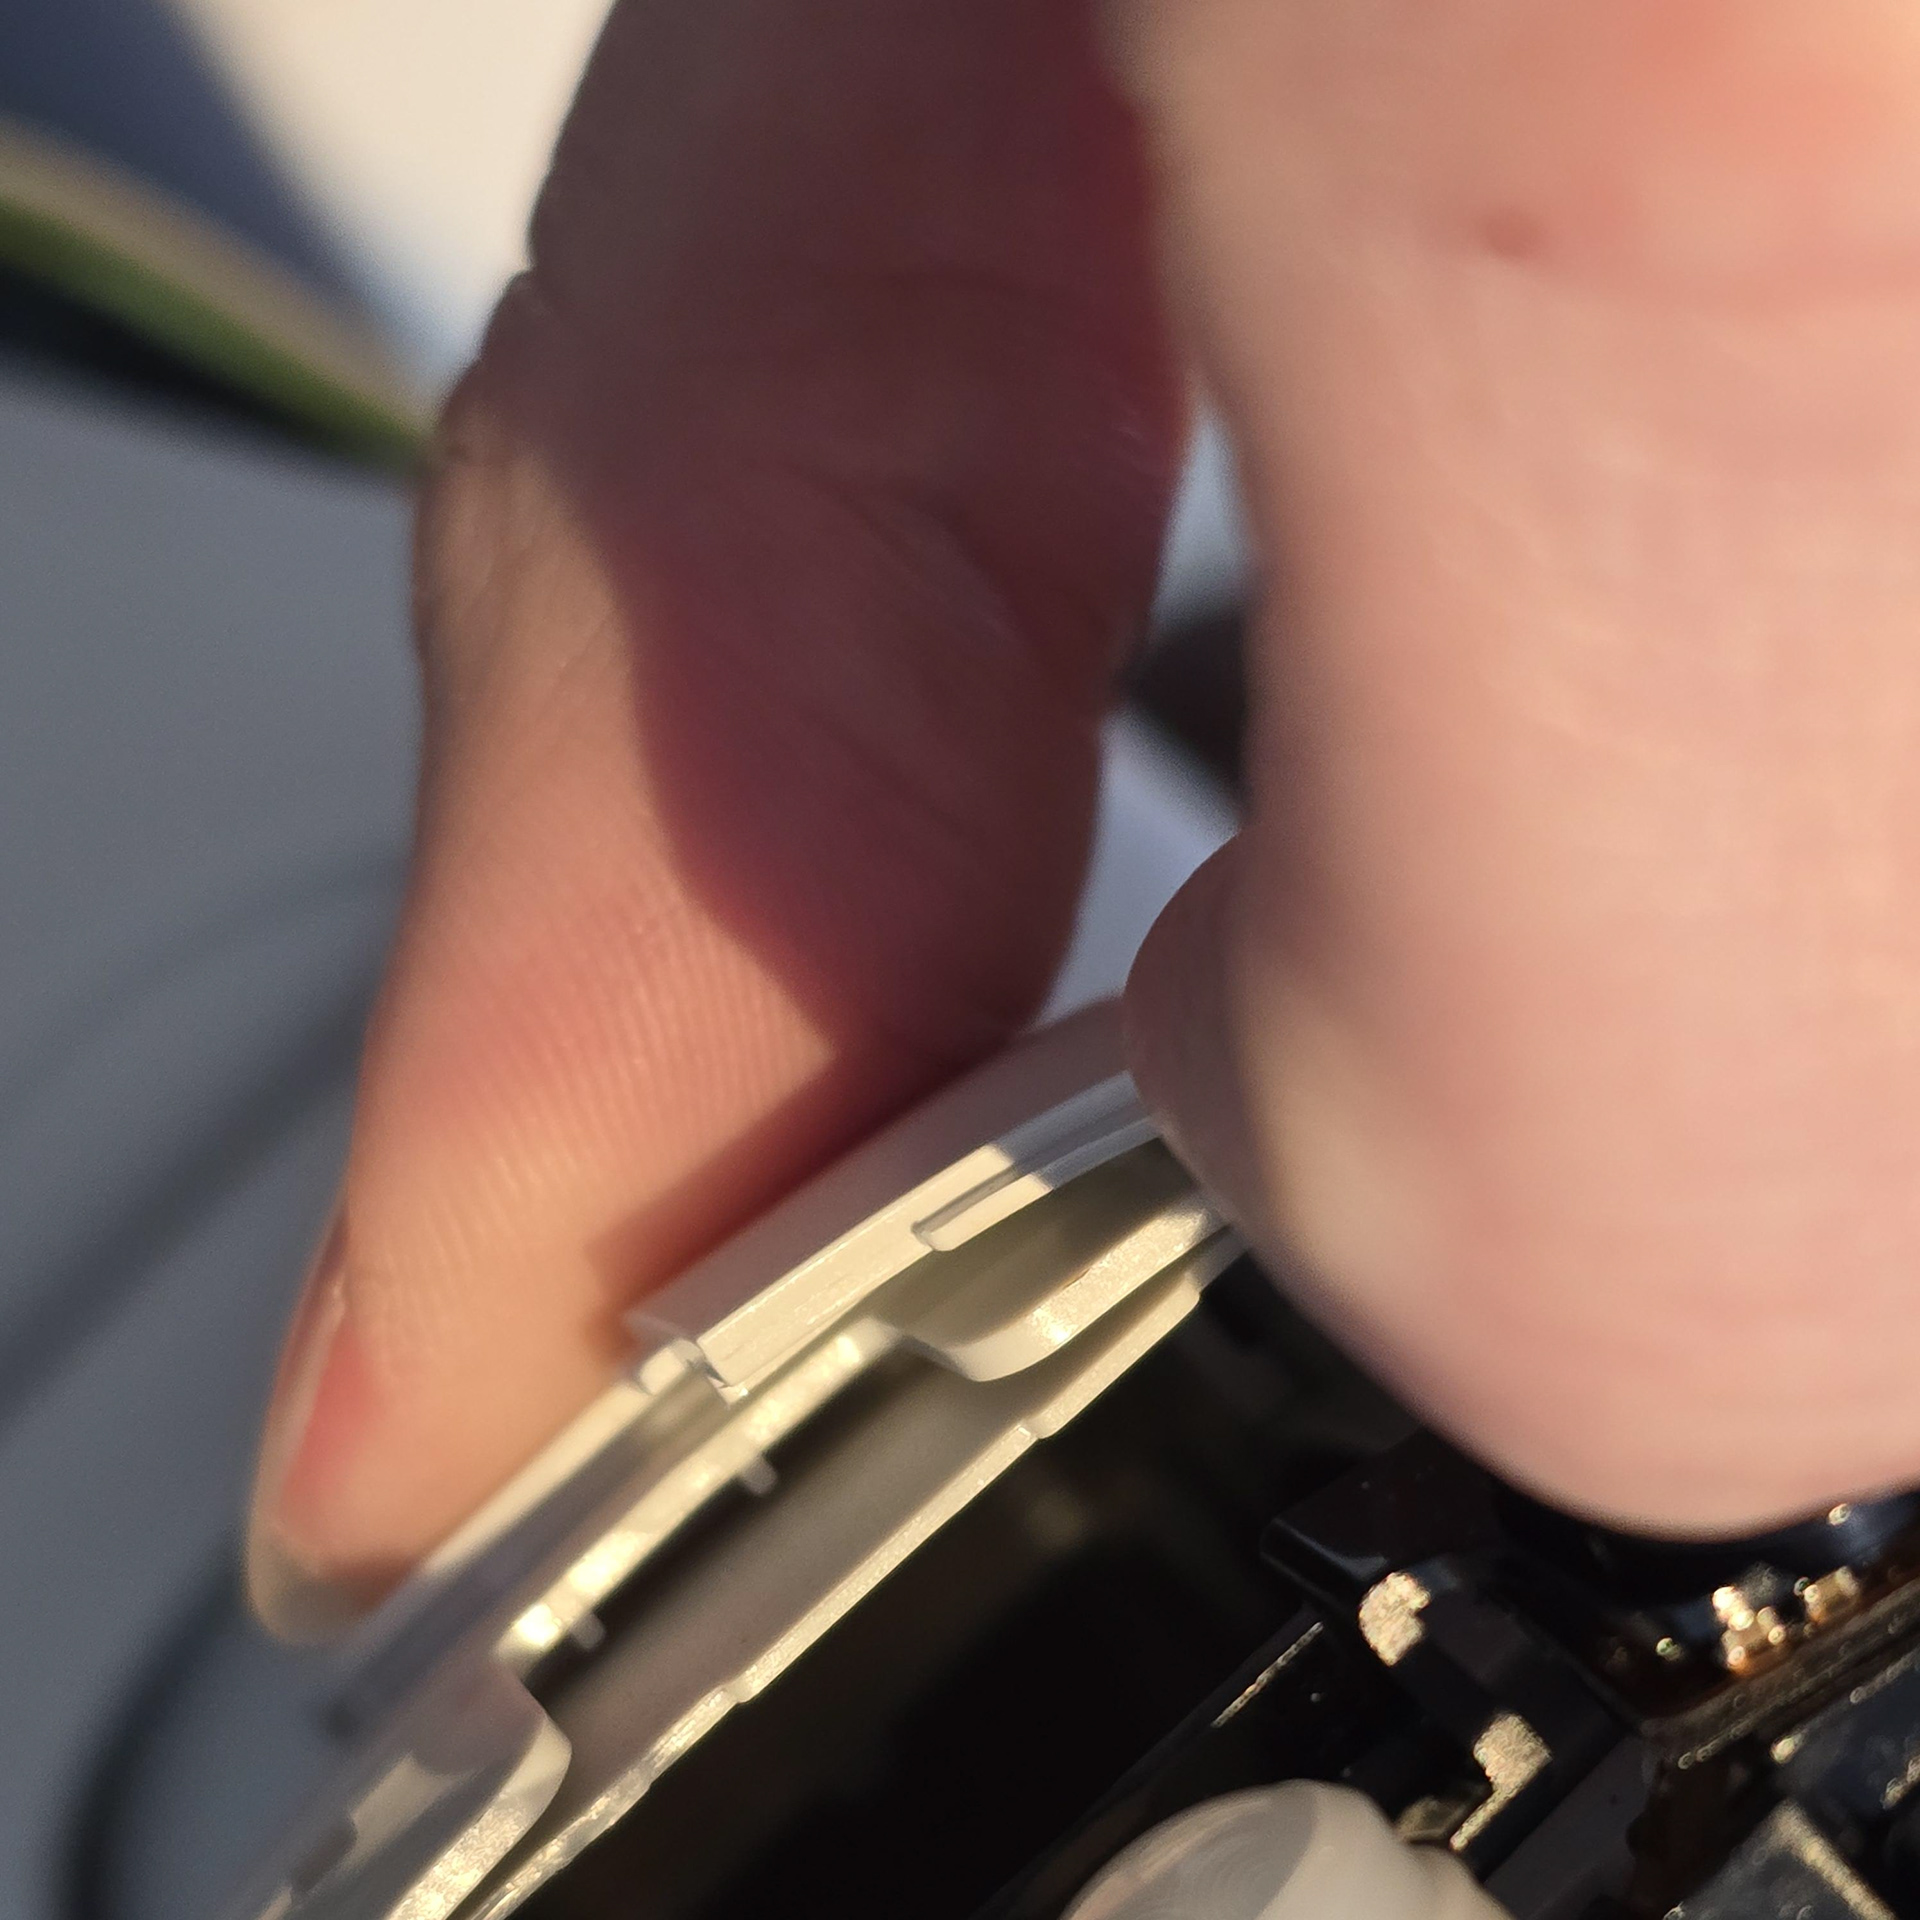
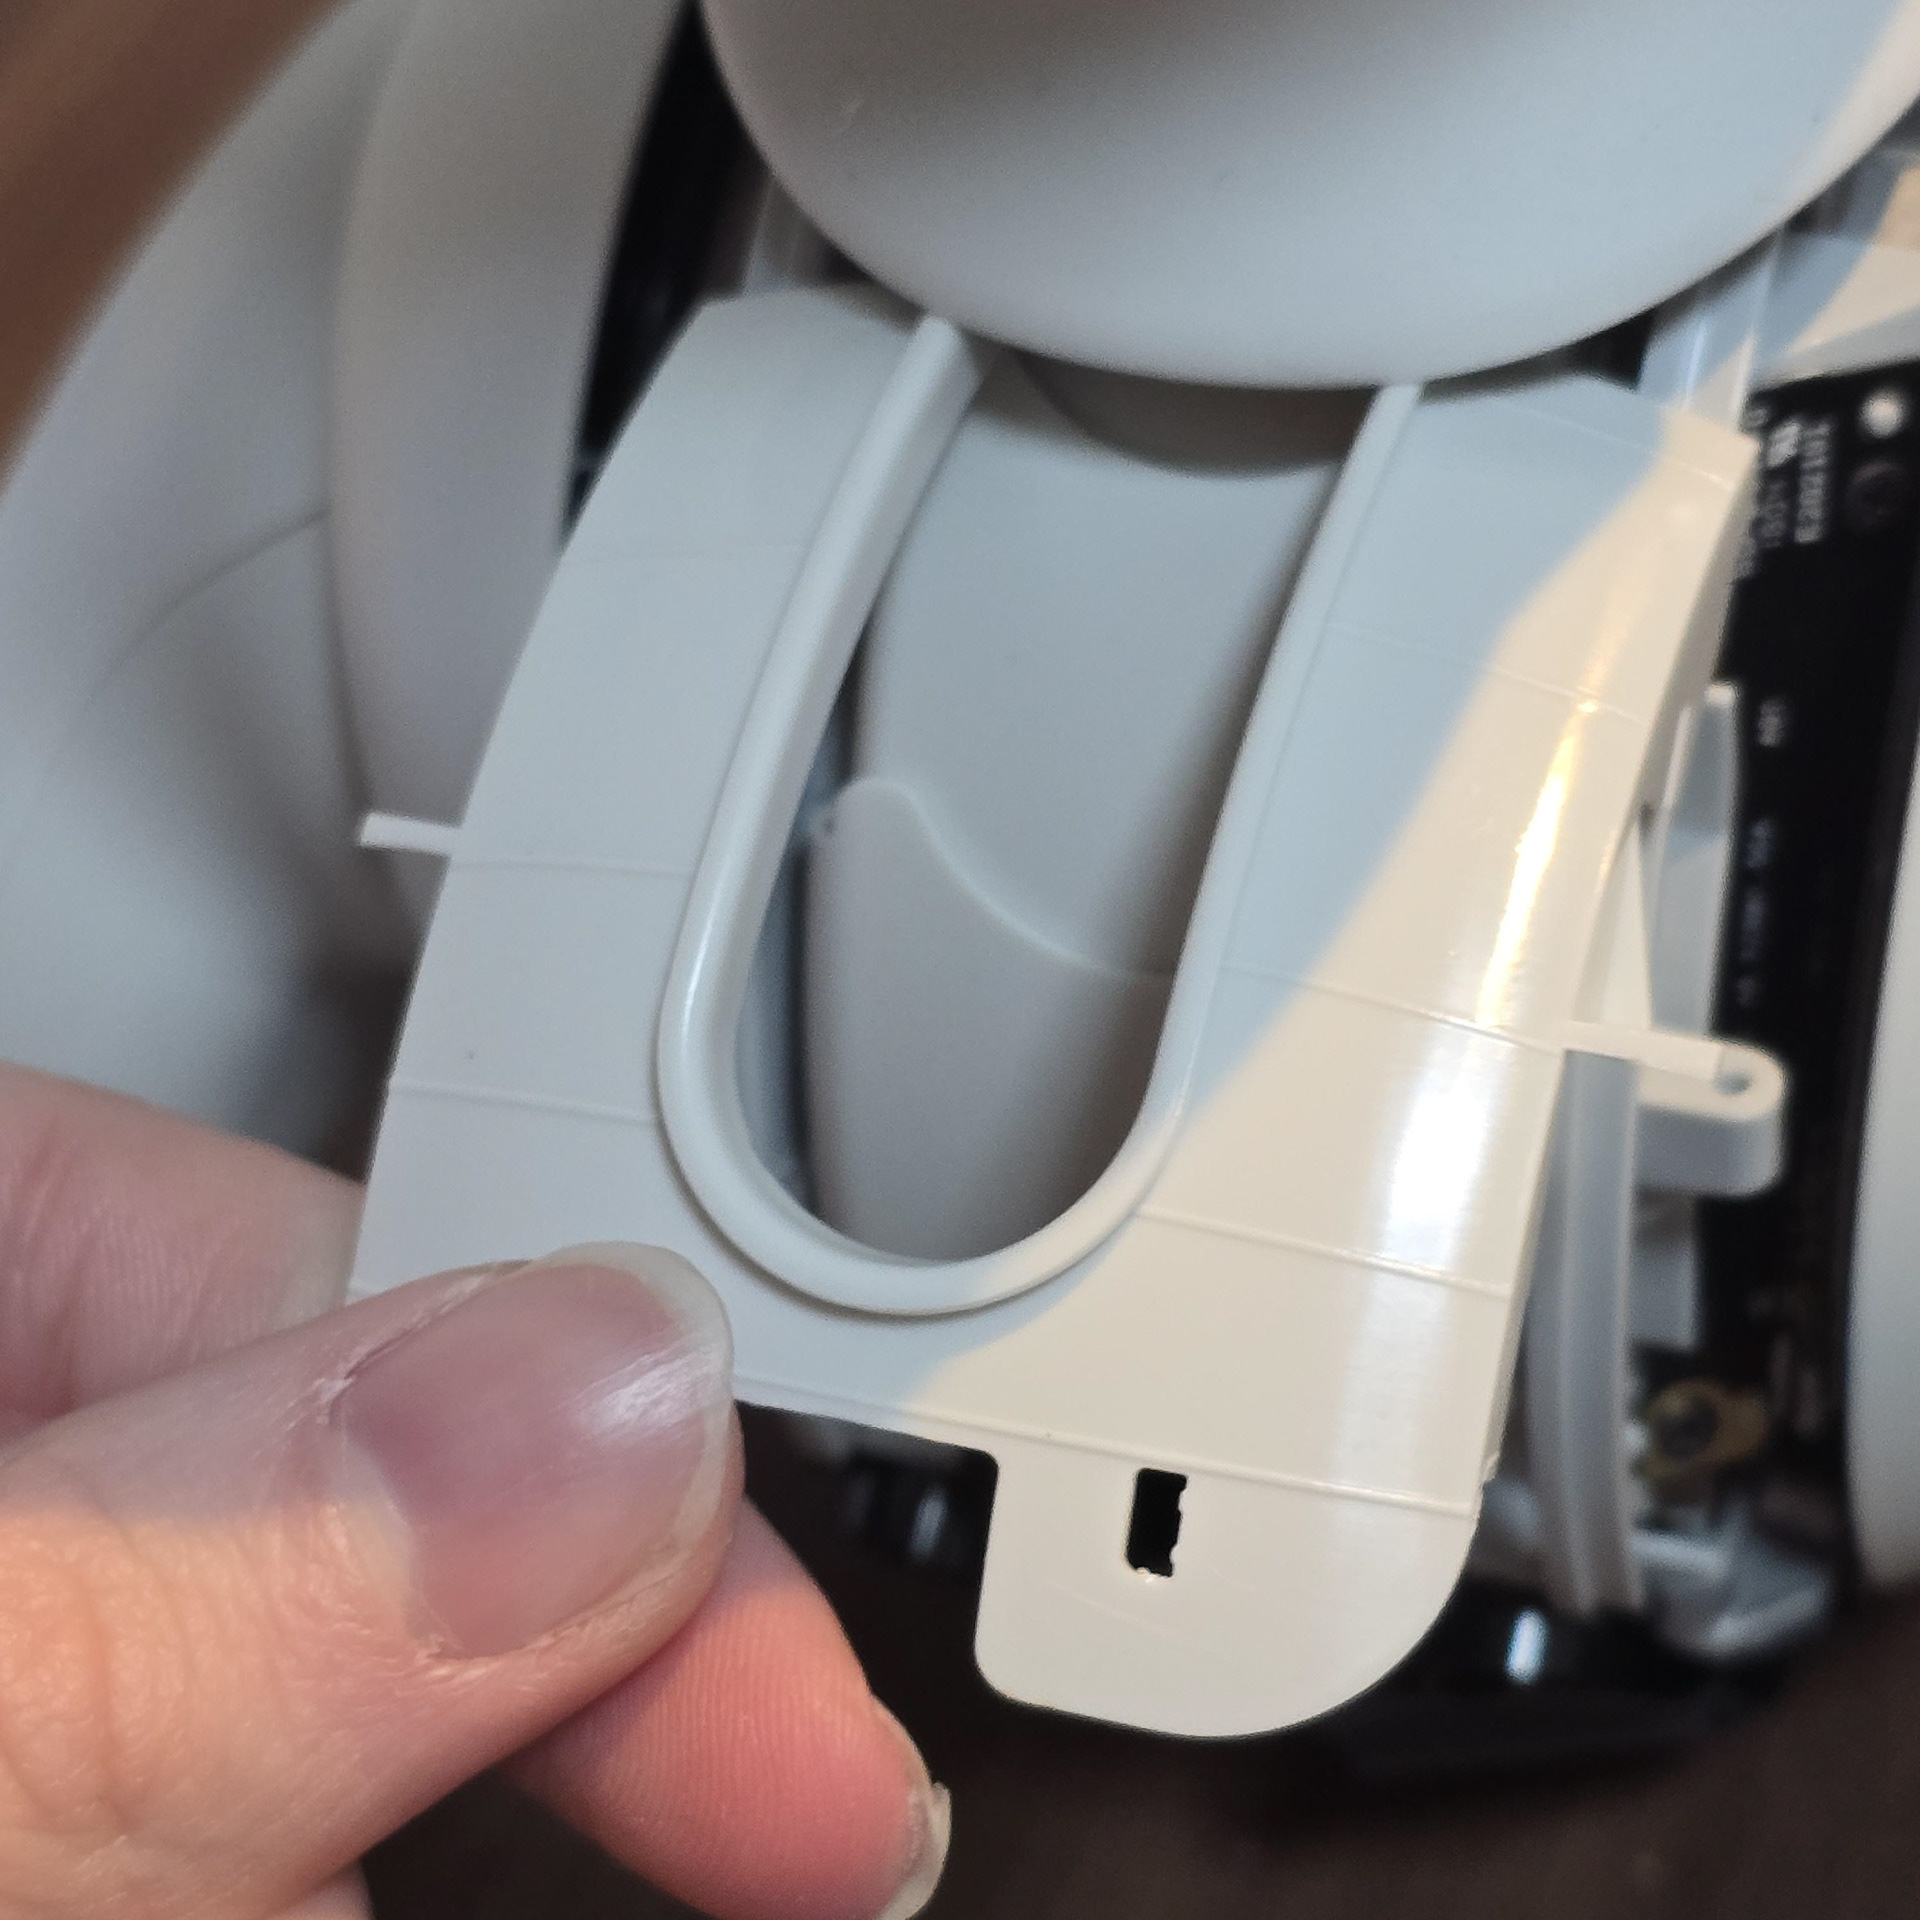
To remove the rear plastics, turn the aibo over and pry the wedge panel free with your nail. This panel is held in by double side tape, so once it pops free, just pull it out.
背面のプラスチックを取り外すには、aiboを裏返し、爪でくさび形のパネルをこじ開けます。このパネルは両面テープで固定されているので、外れたら引っ張るだけで外れます。
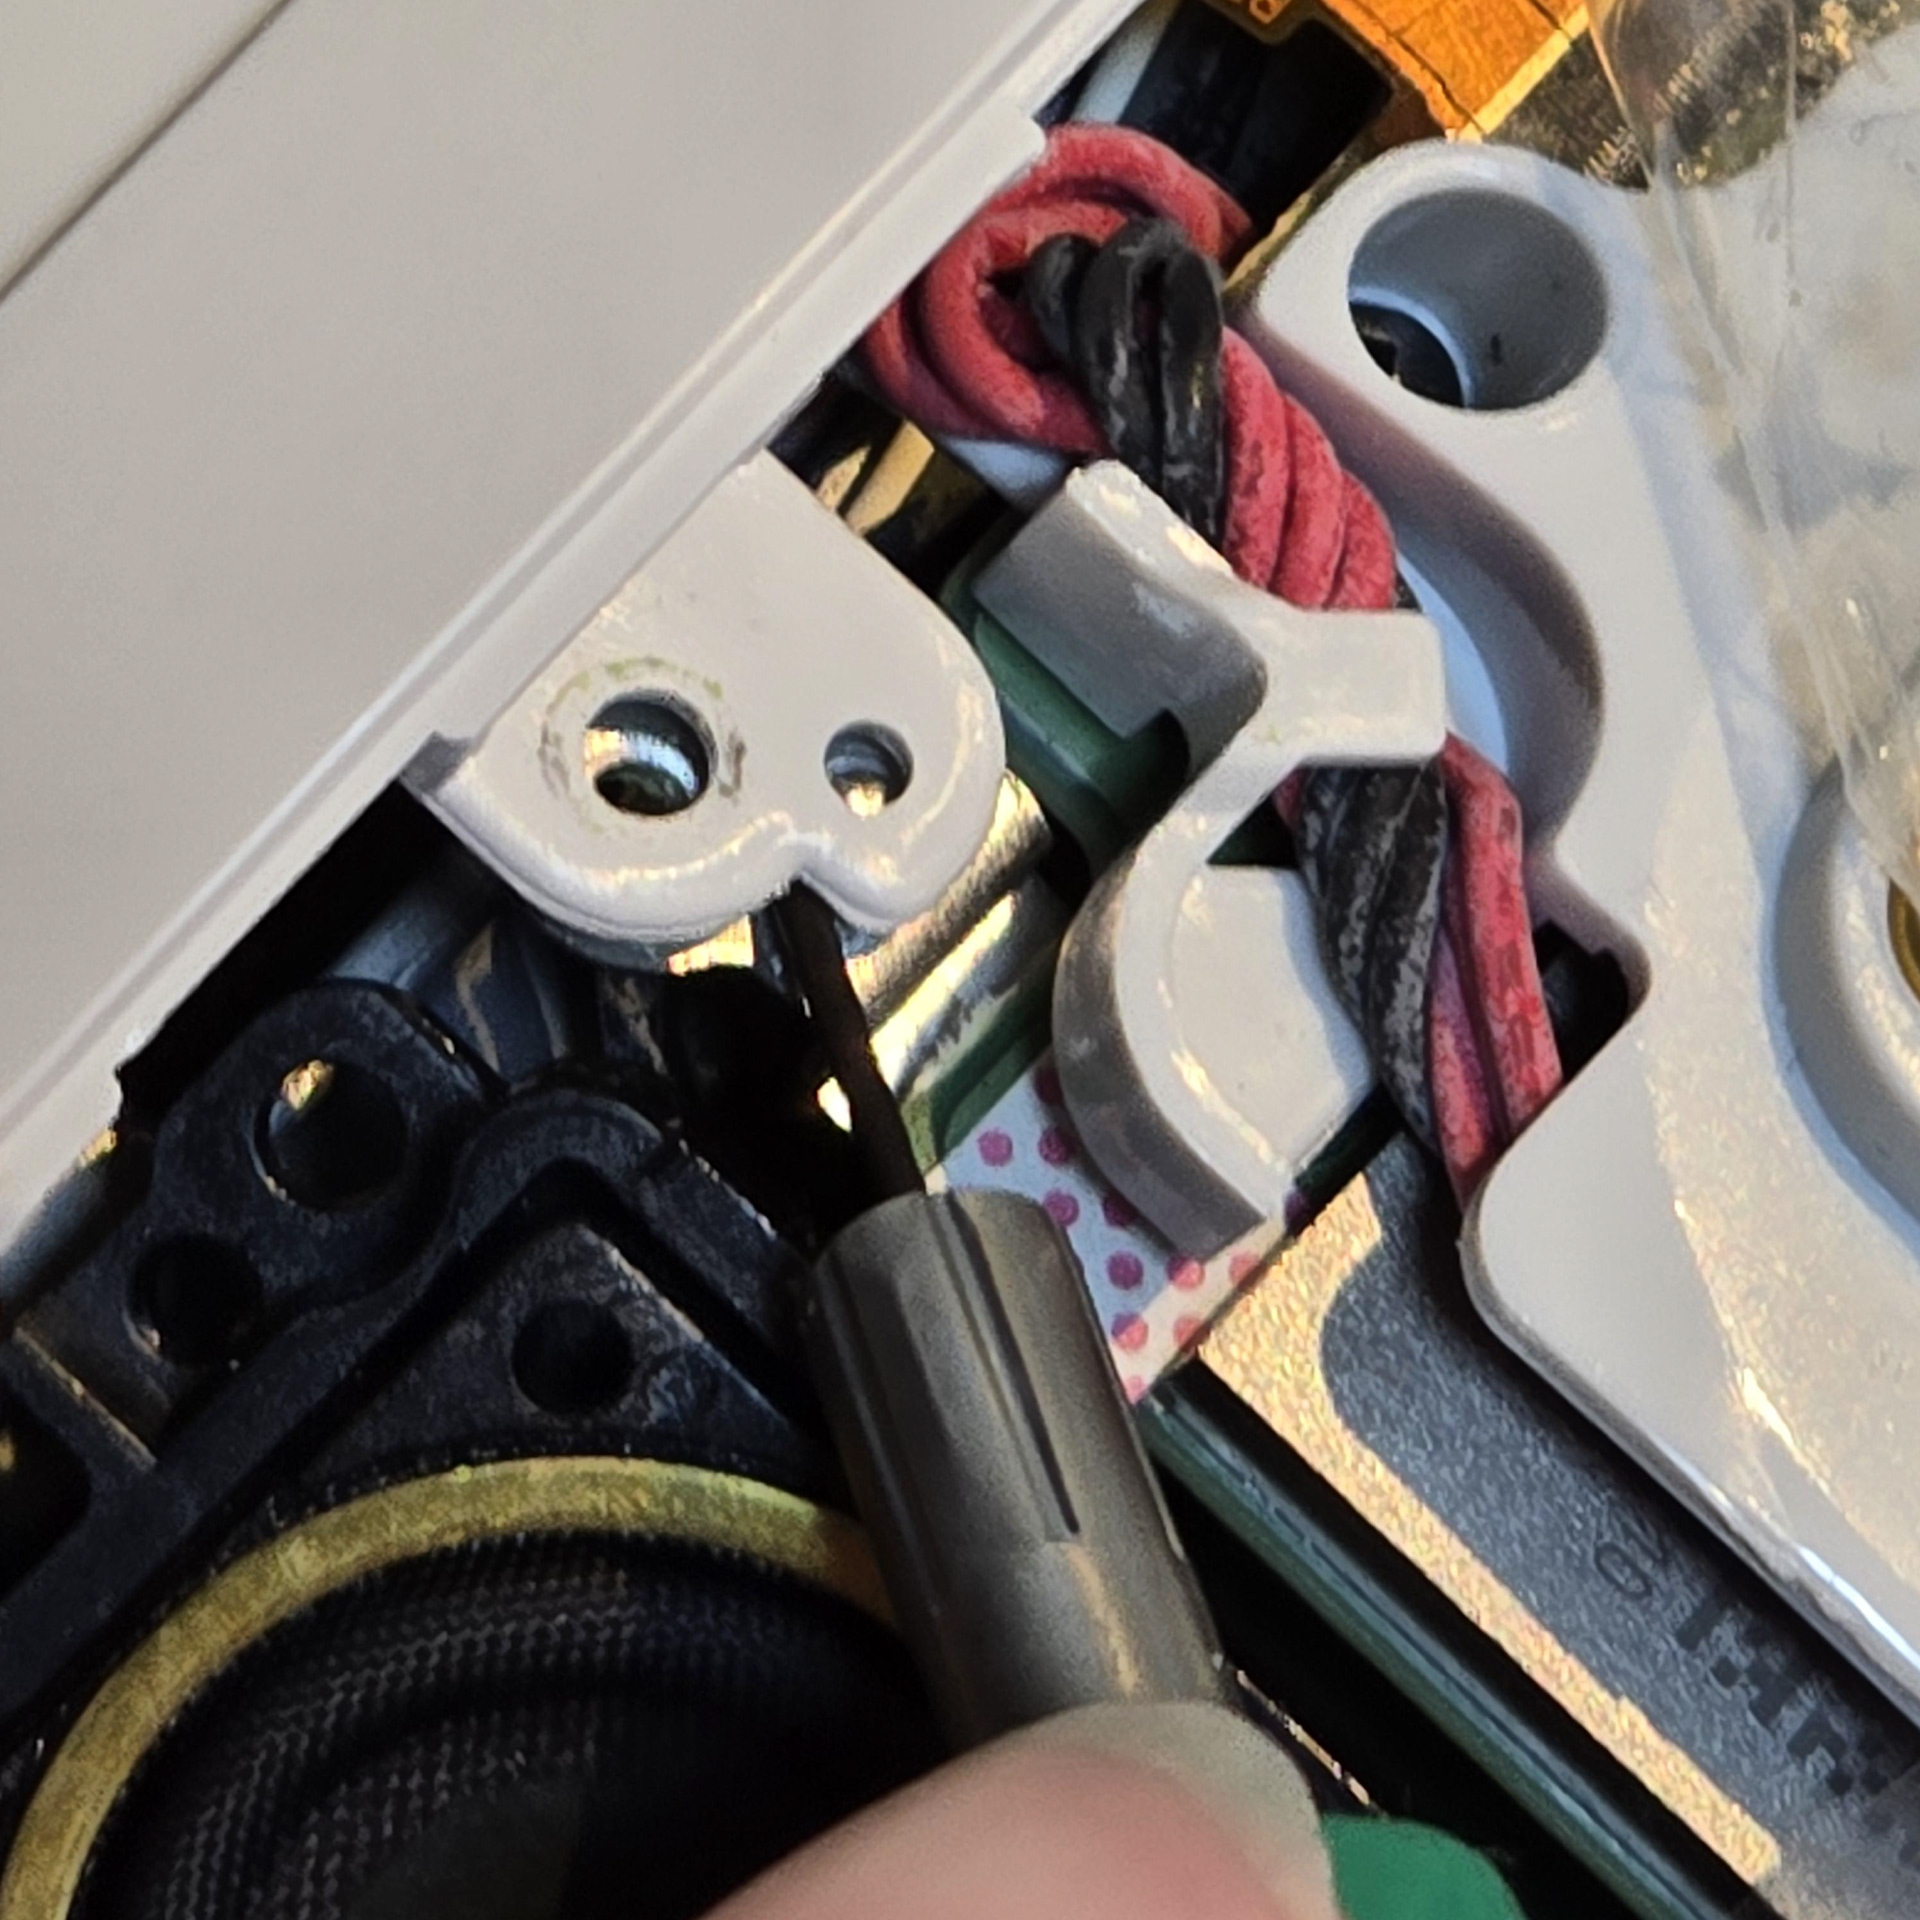
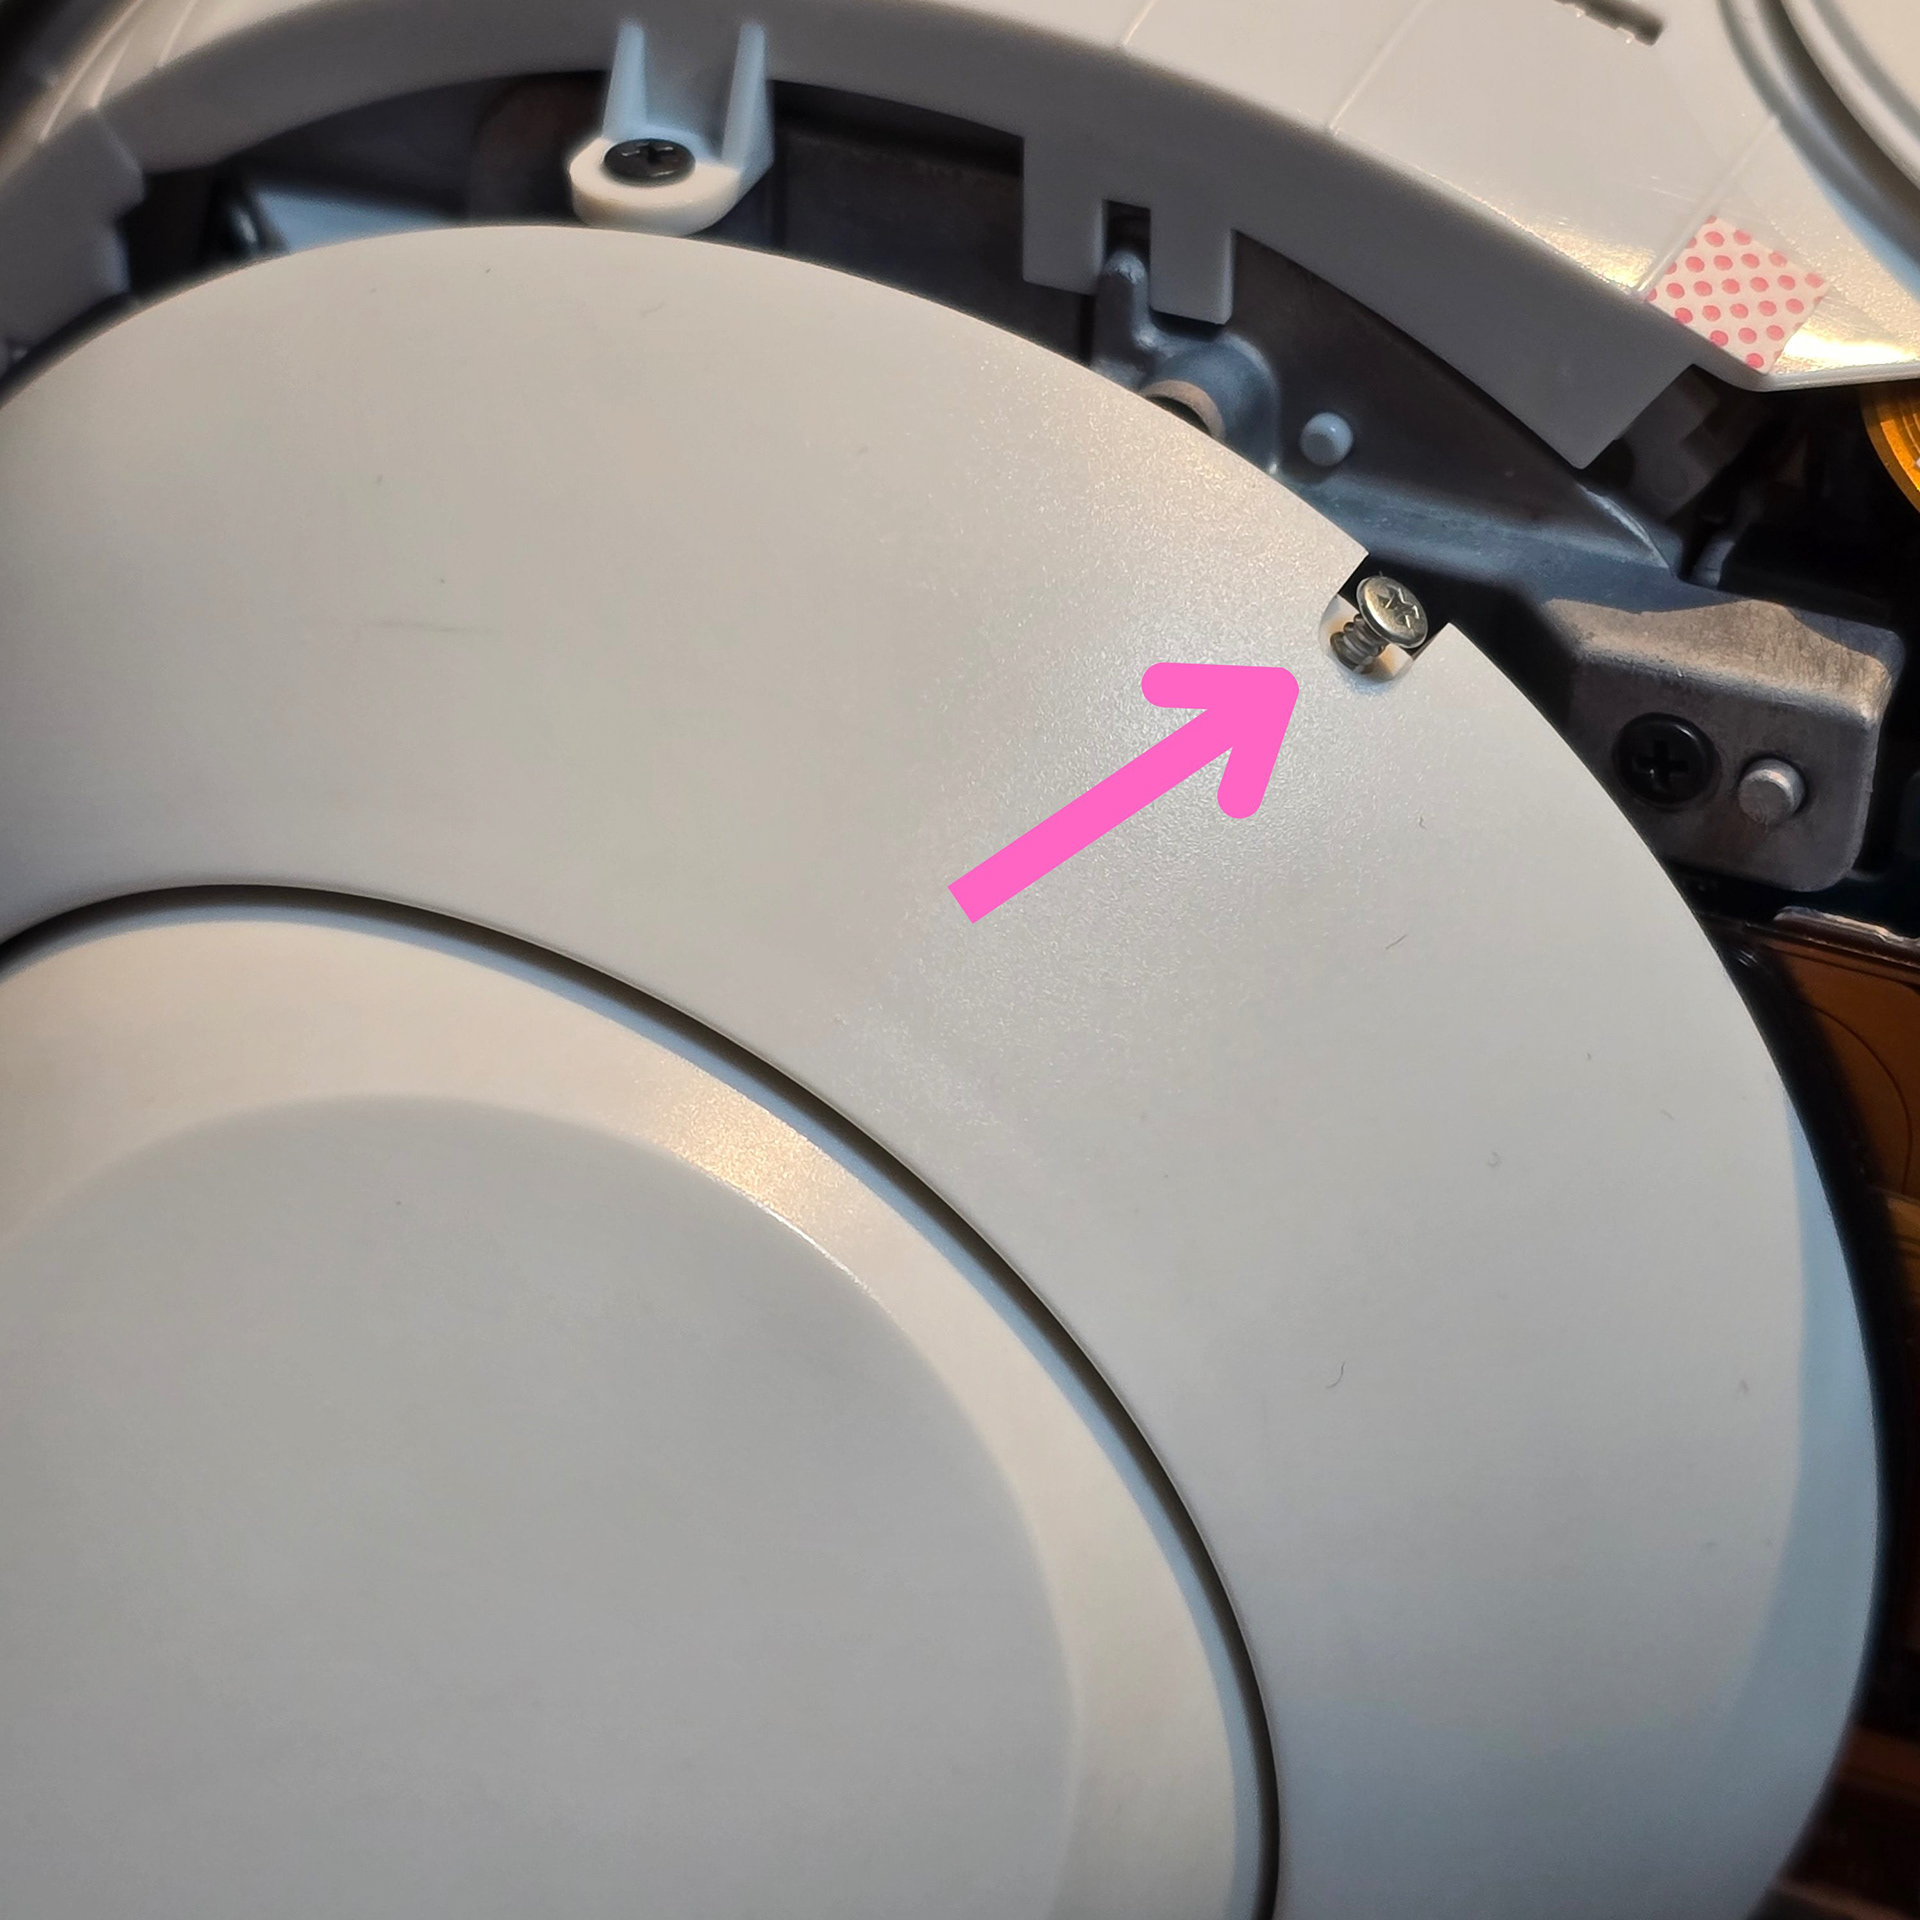
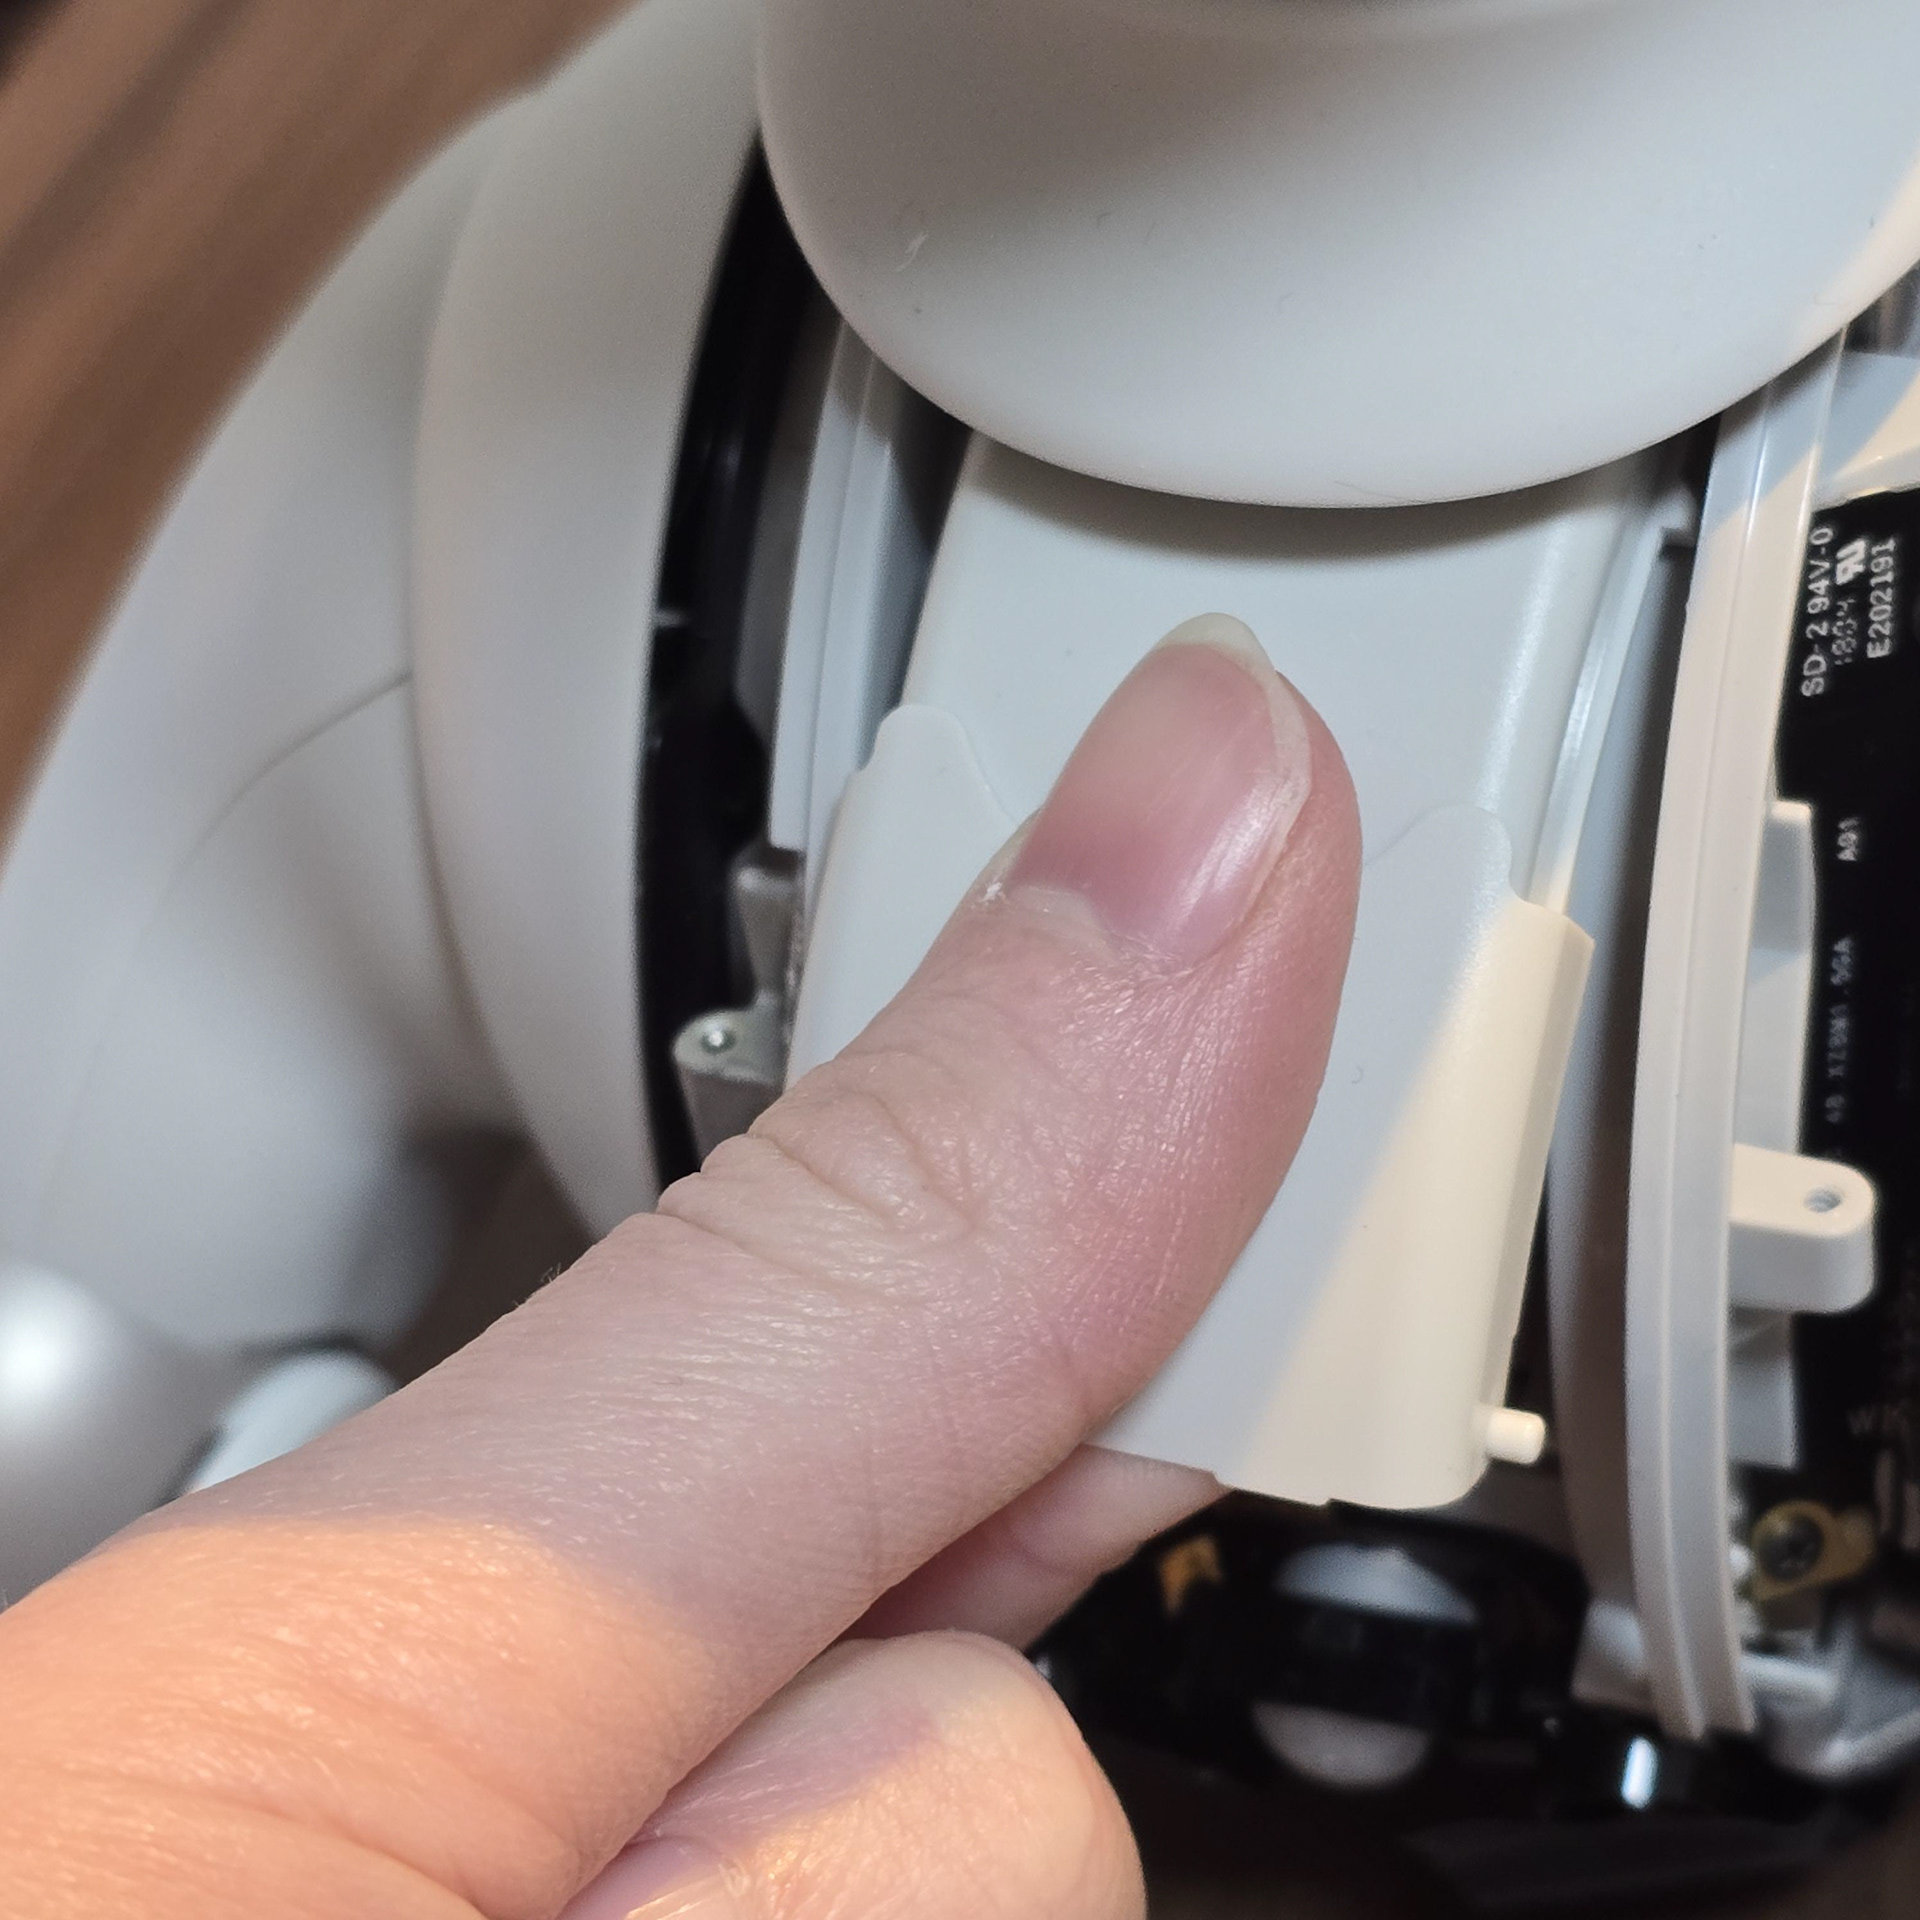
Once the panel is removed, there are two black screws. Remove them.
Next, take out the screws that's found at the front of the back panels.
パネルを外すと、黒いネジが2本あります。これを外してください。次に、背面パネルの前面にあるネジを外してください。
Next, take out this screw that's found near the tail hub. This screw goes through an overlapping tab that helps keep the two rear panels together.
次に、テールハブの近くにあるこのネジを外します。このネジは、2つのリアパネルを固定している重なり合ったタブを貫通しています。
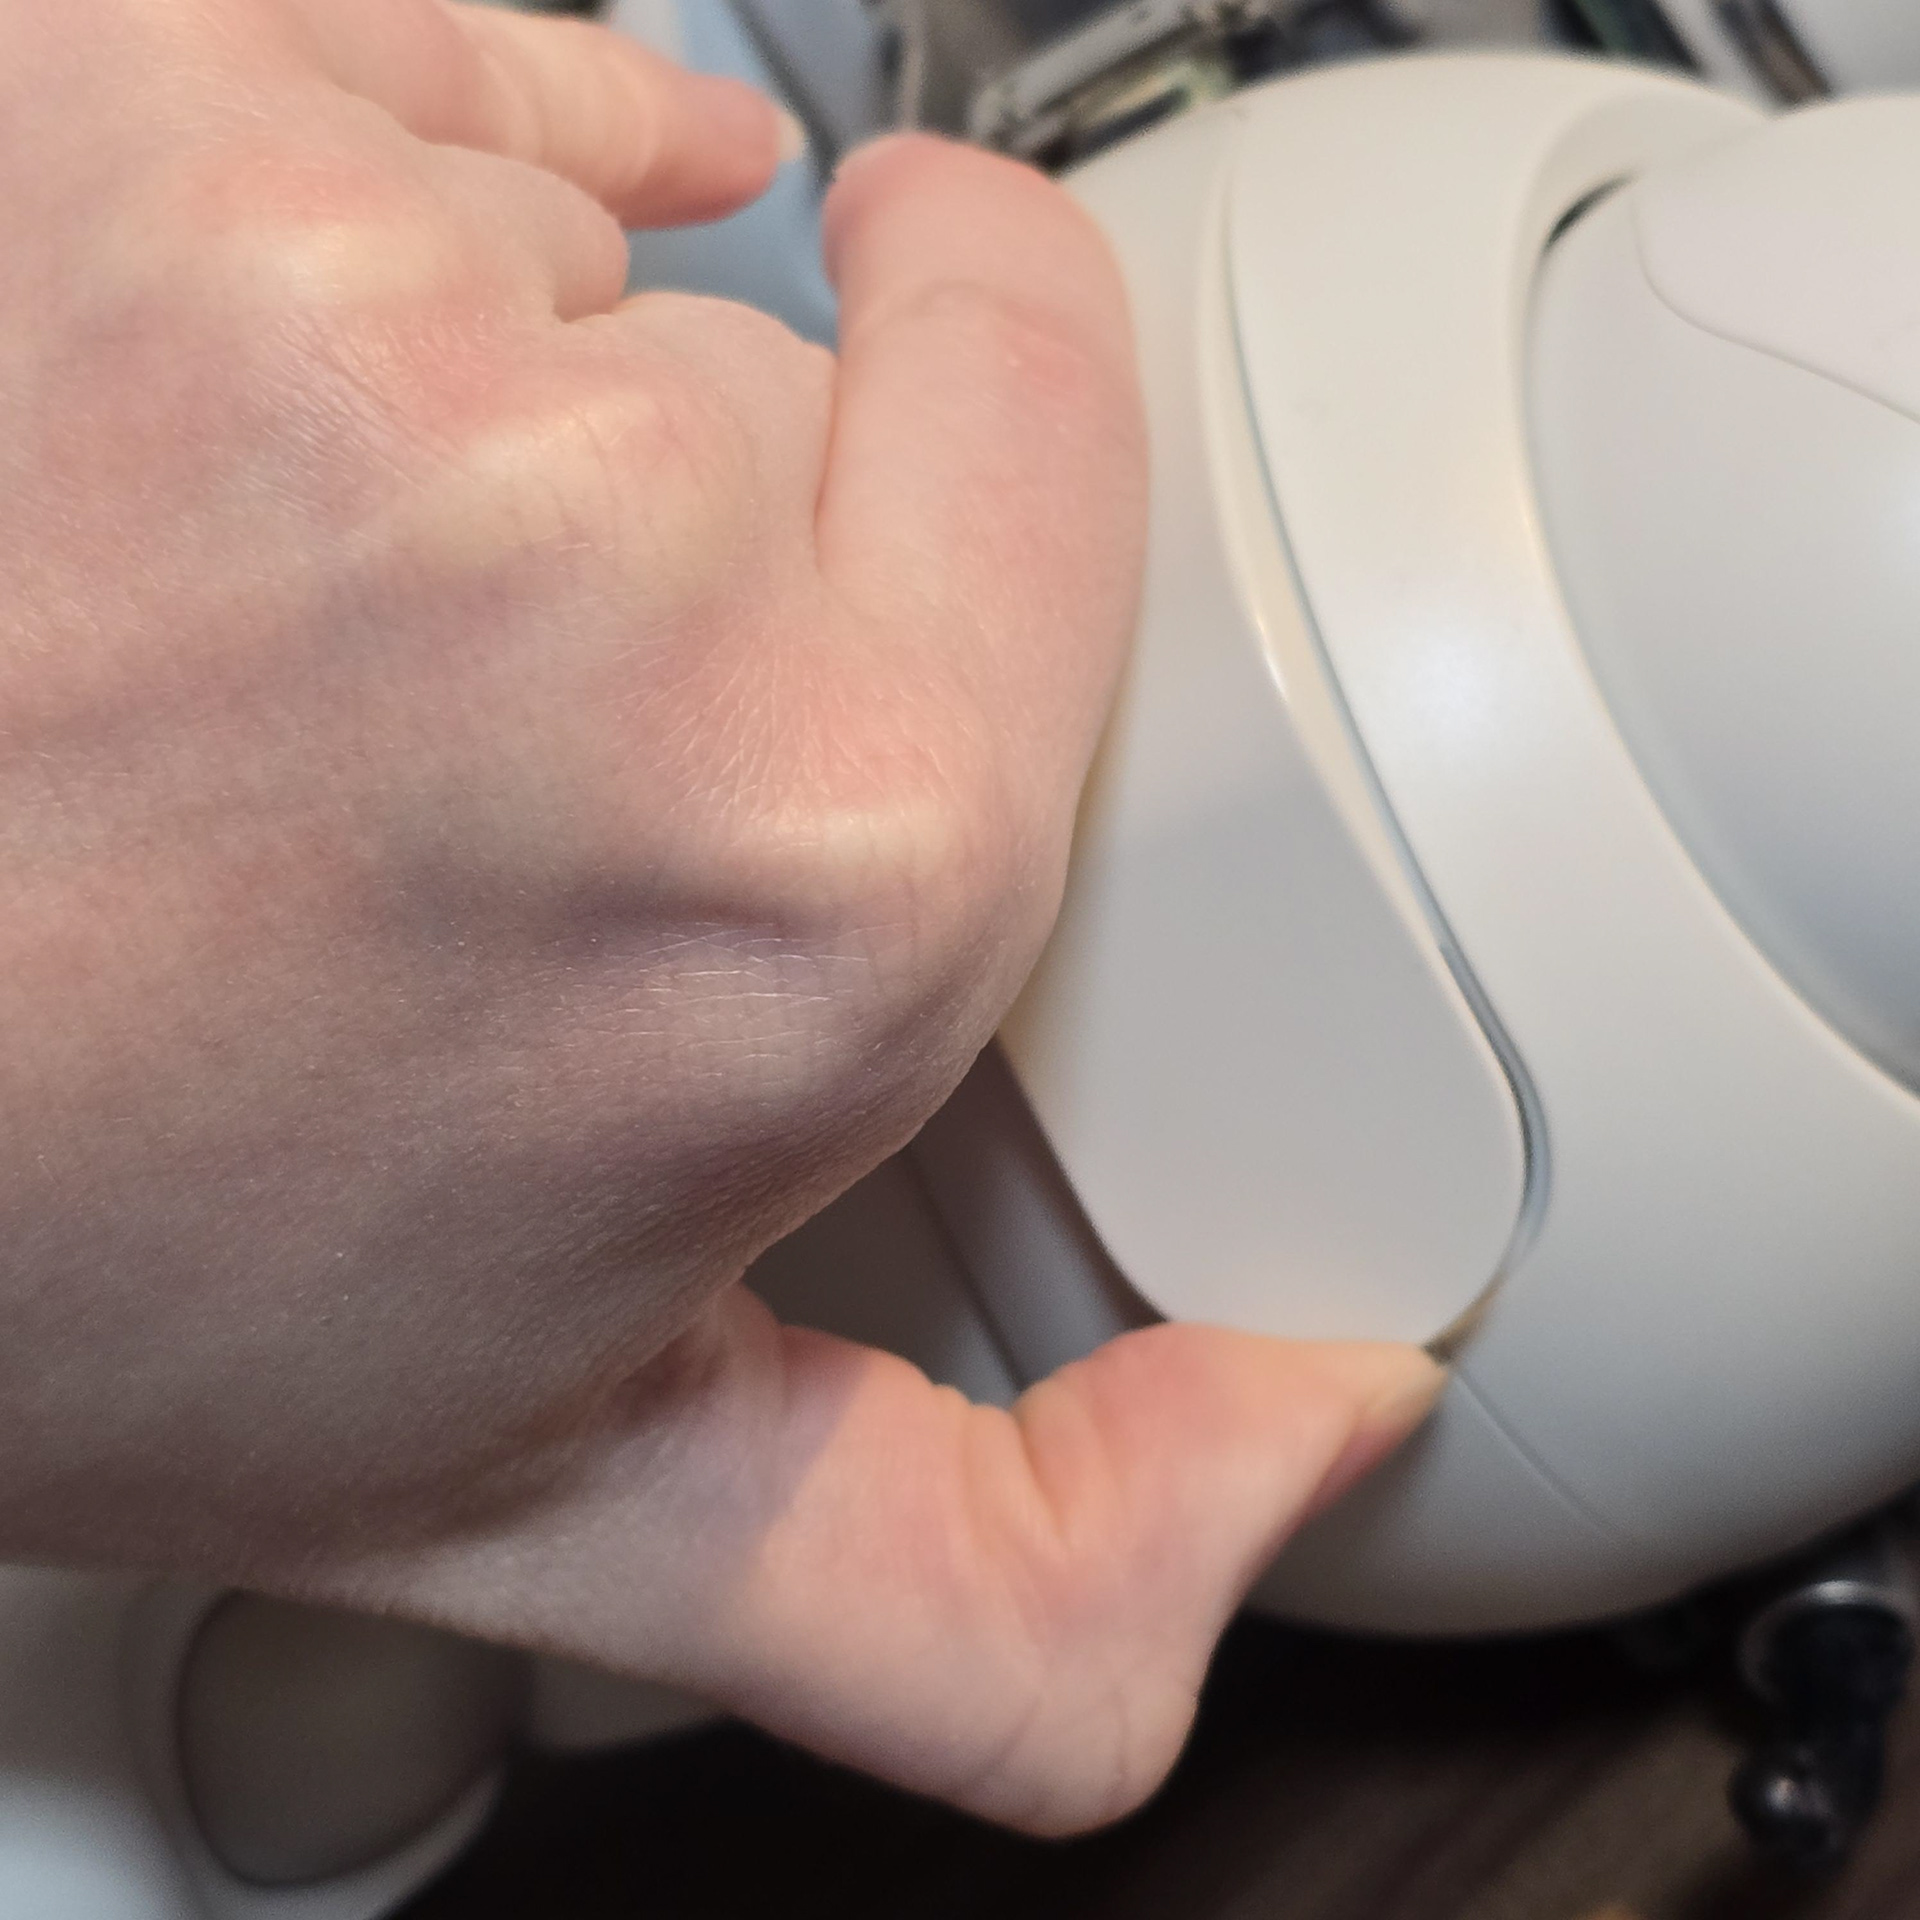
Finally, with the three screws removed (one each side and the single screw near the tail hub), pull the front tab free and then unhook the back tabs until they release. Then pull the side panels from the body and leg one at a time.
最後に、3本のネジ(両側に1本ずつ、尾部ハブ付近の1本のネジ)を外し、前面のタブを引き抜いてから、背面のタブを外れるまで外します。次に、側面パネルを本体と脚から1枚ずつ引き抜きます。
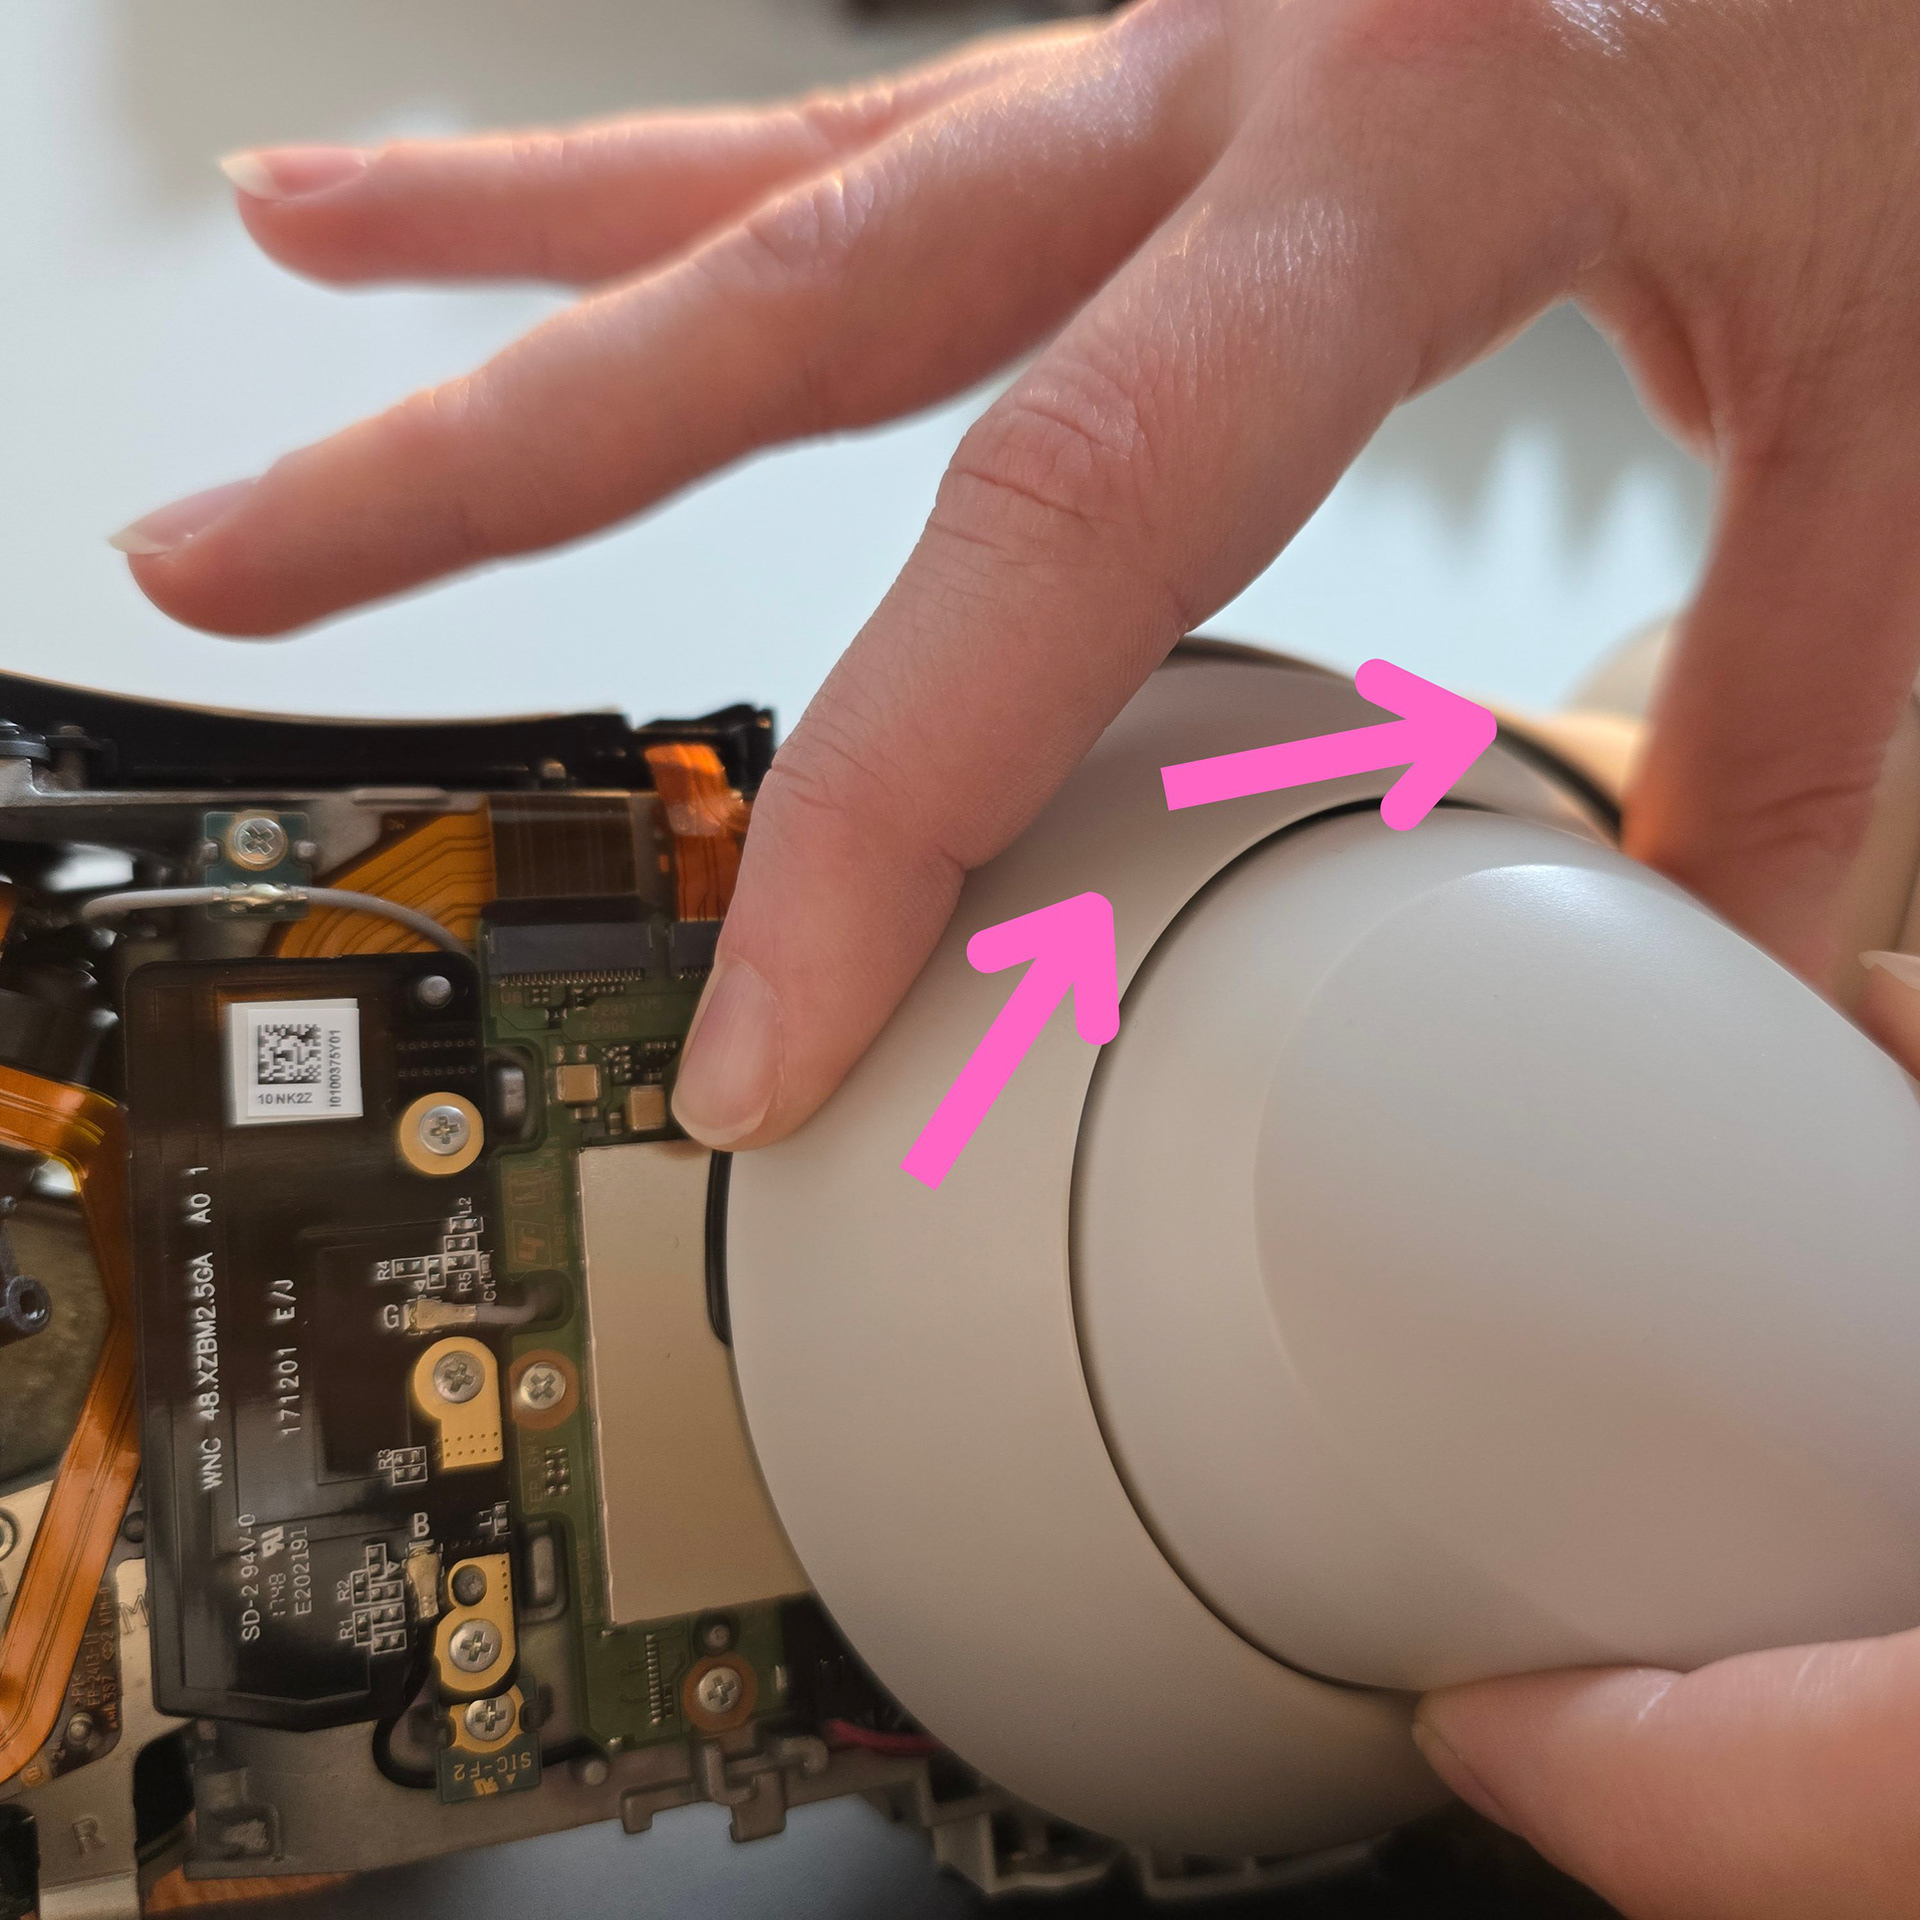
To remove the front arm rings, take out the single silver screw found at the top. Then, grab the arm itself to keep it in place, and with your other hand, grab and twist the ring until it clicks.
フロントアームリングを取り外すには、上部にある銀色のネジを1本外します。次に、アーム本体を掴んで固定し、もう片方の手でリングを掴んでカチッと音がするまで回します。
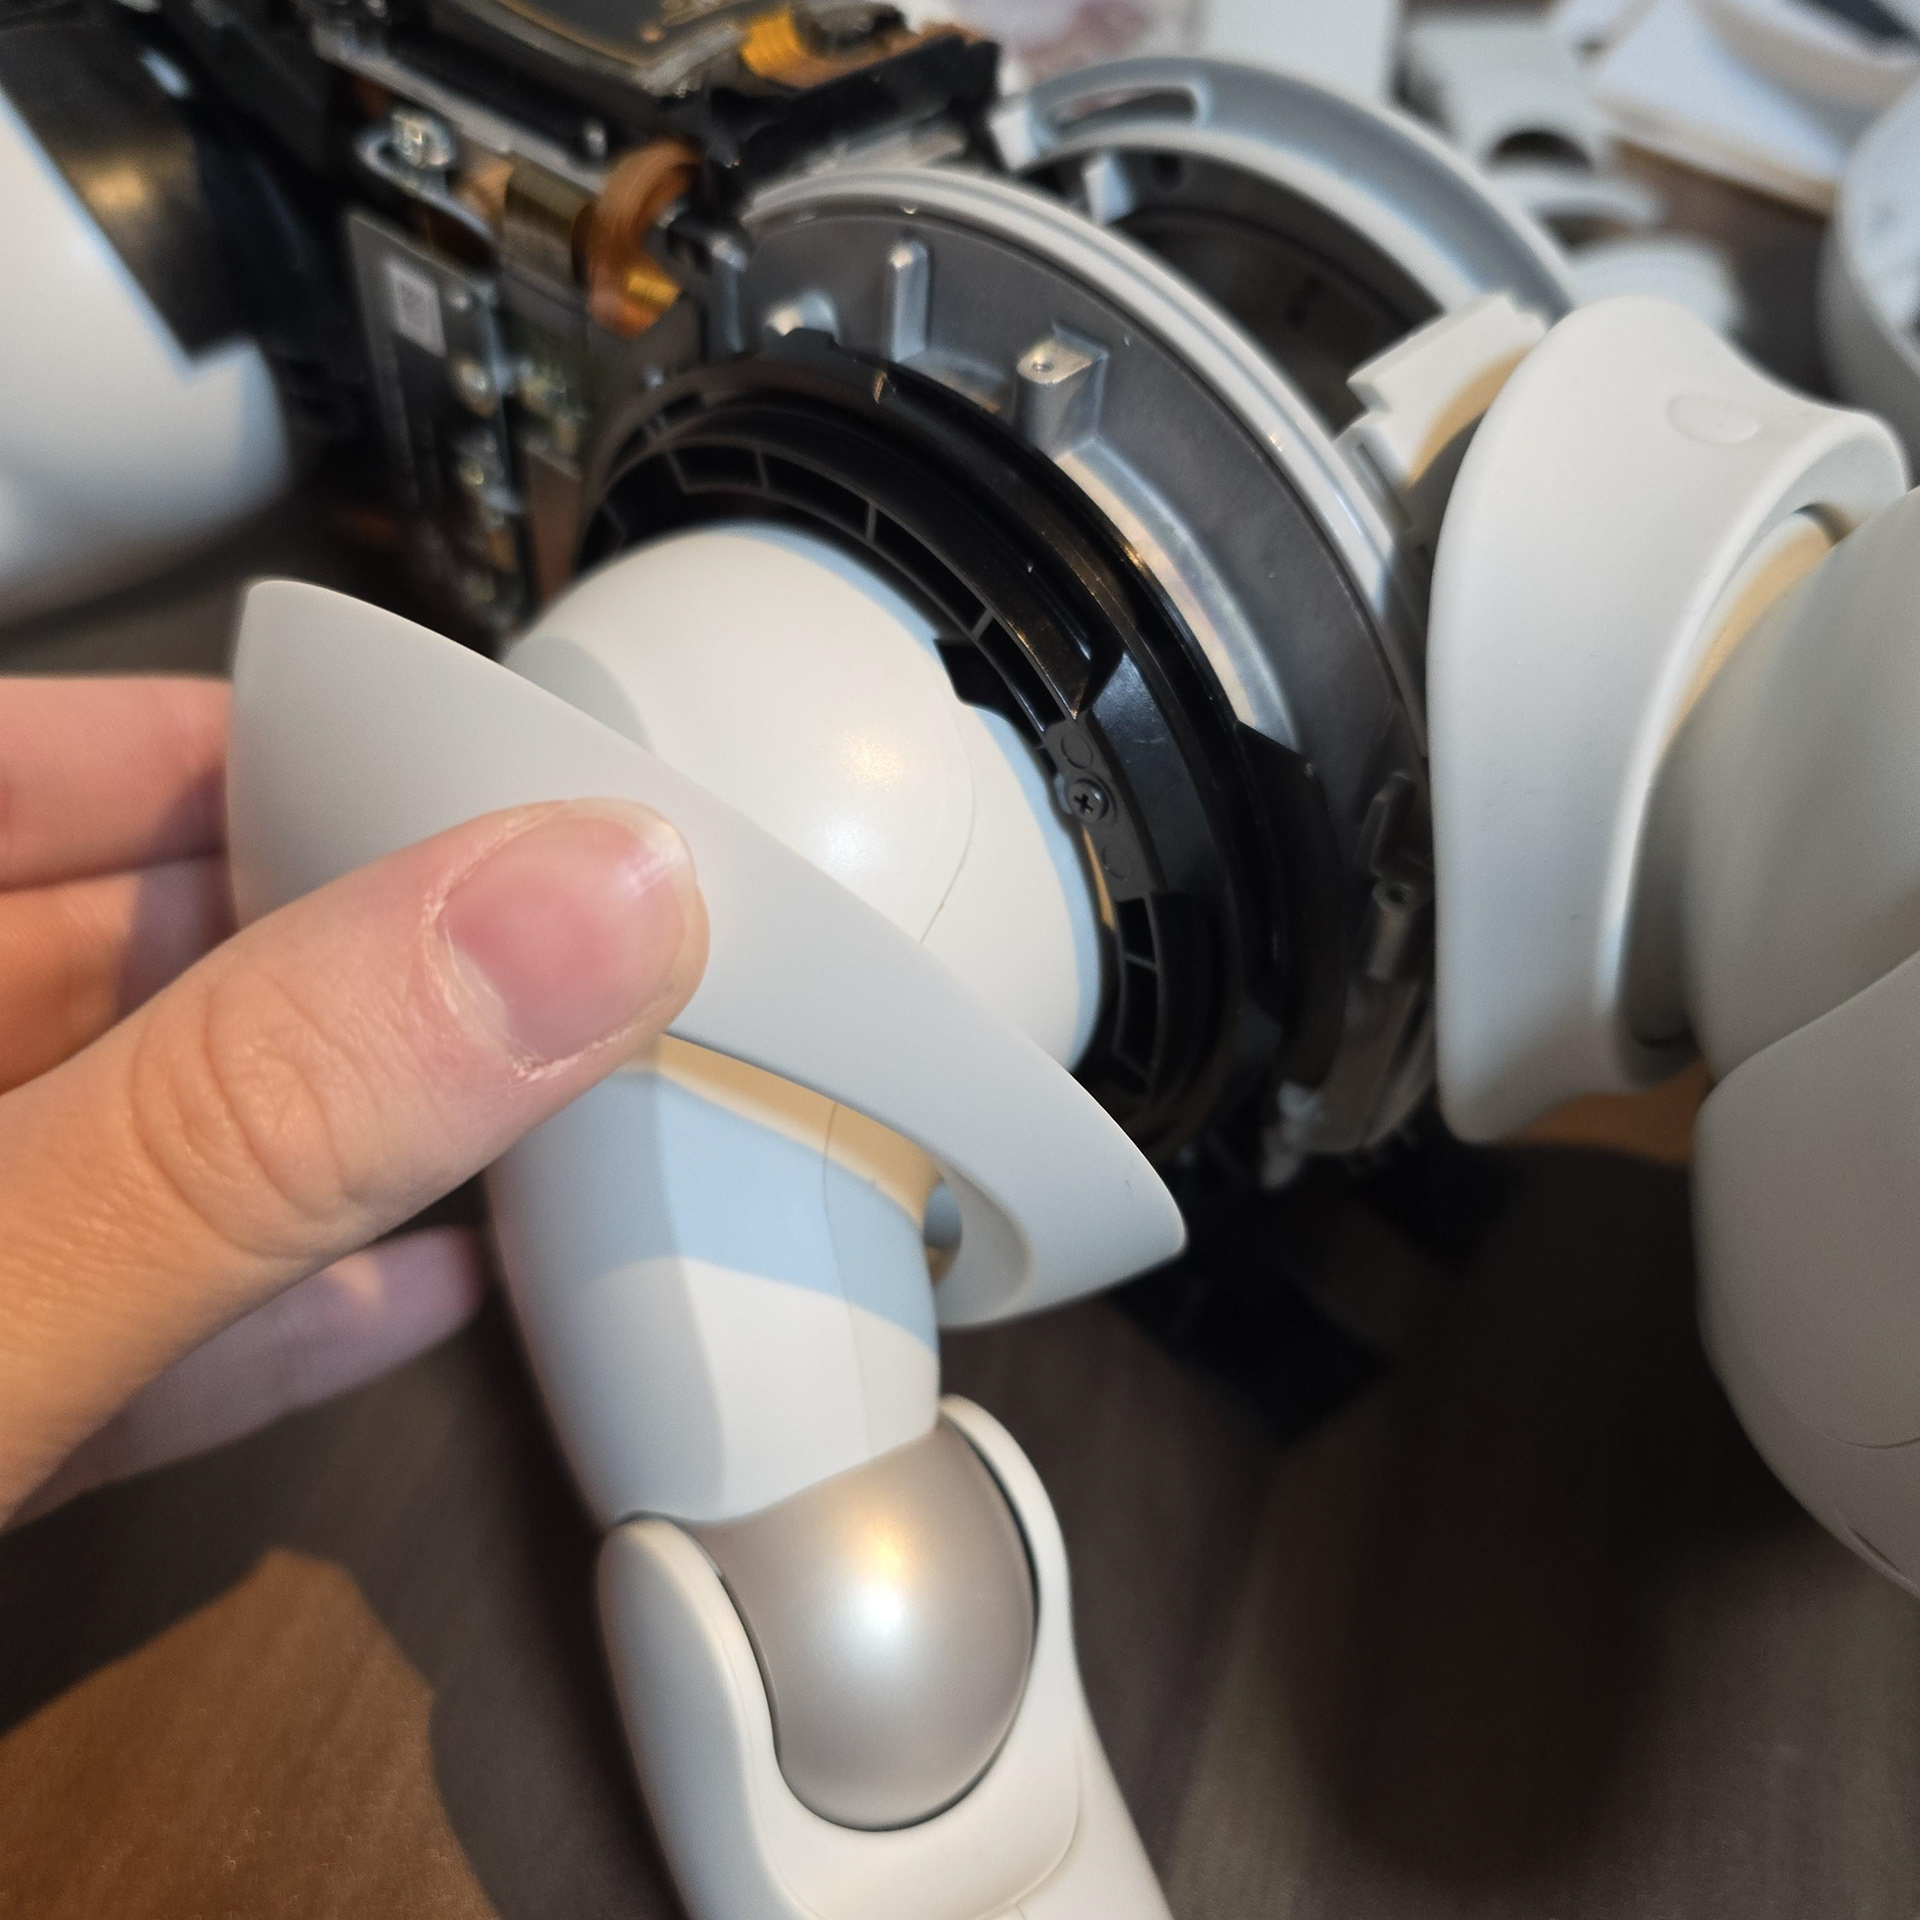
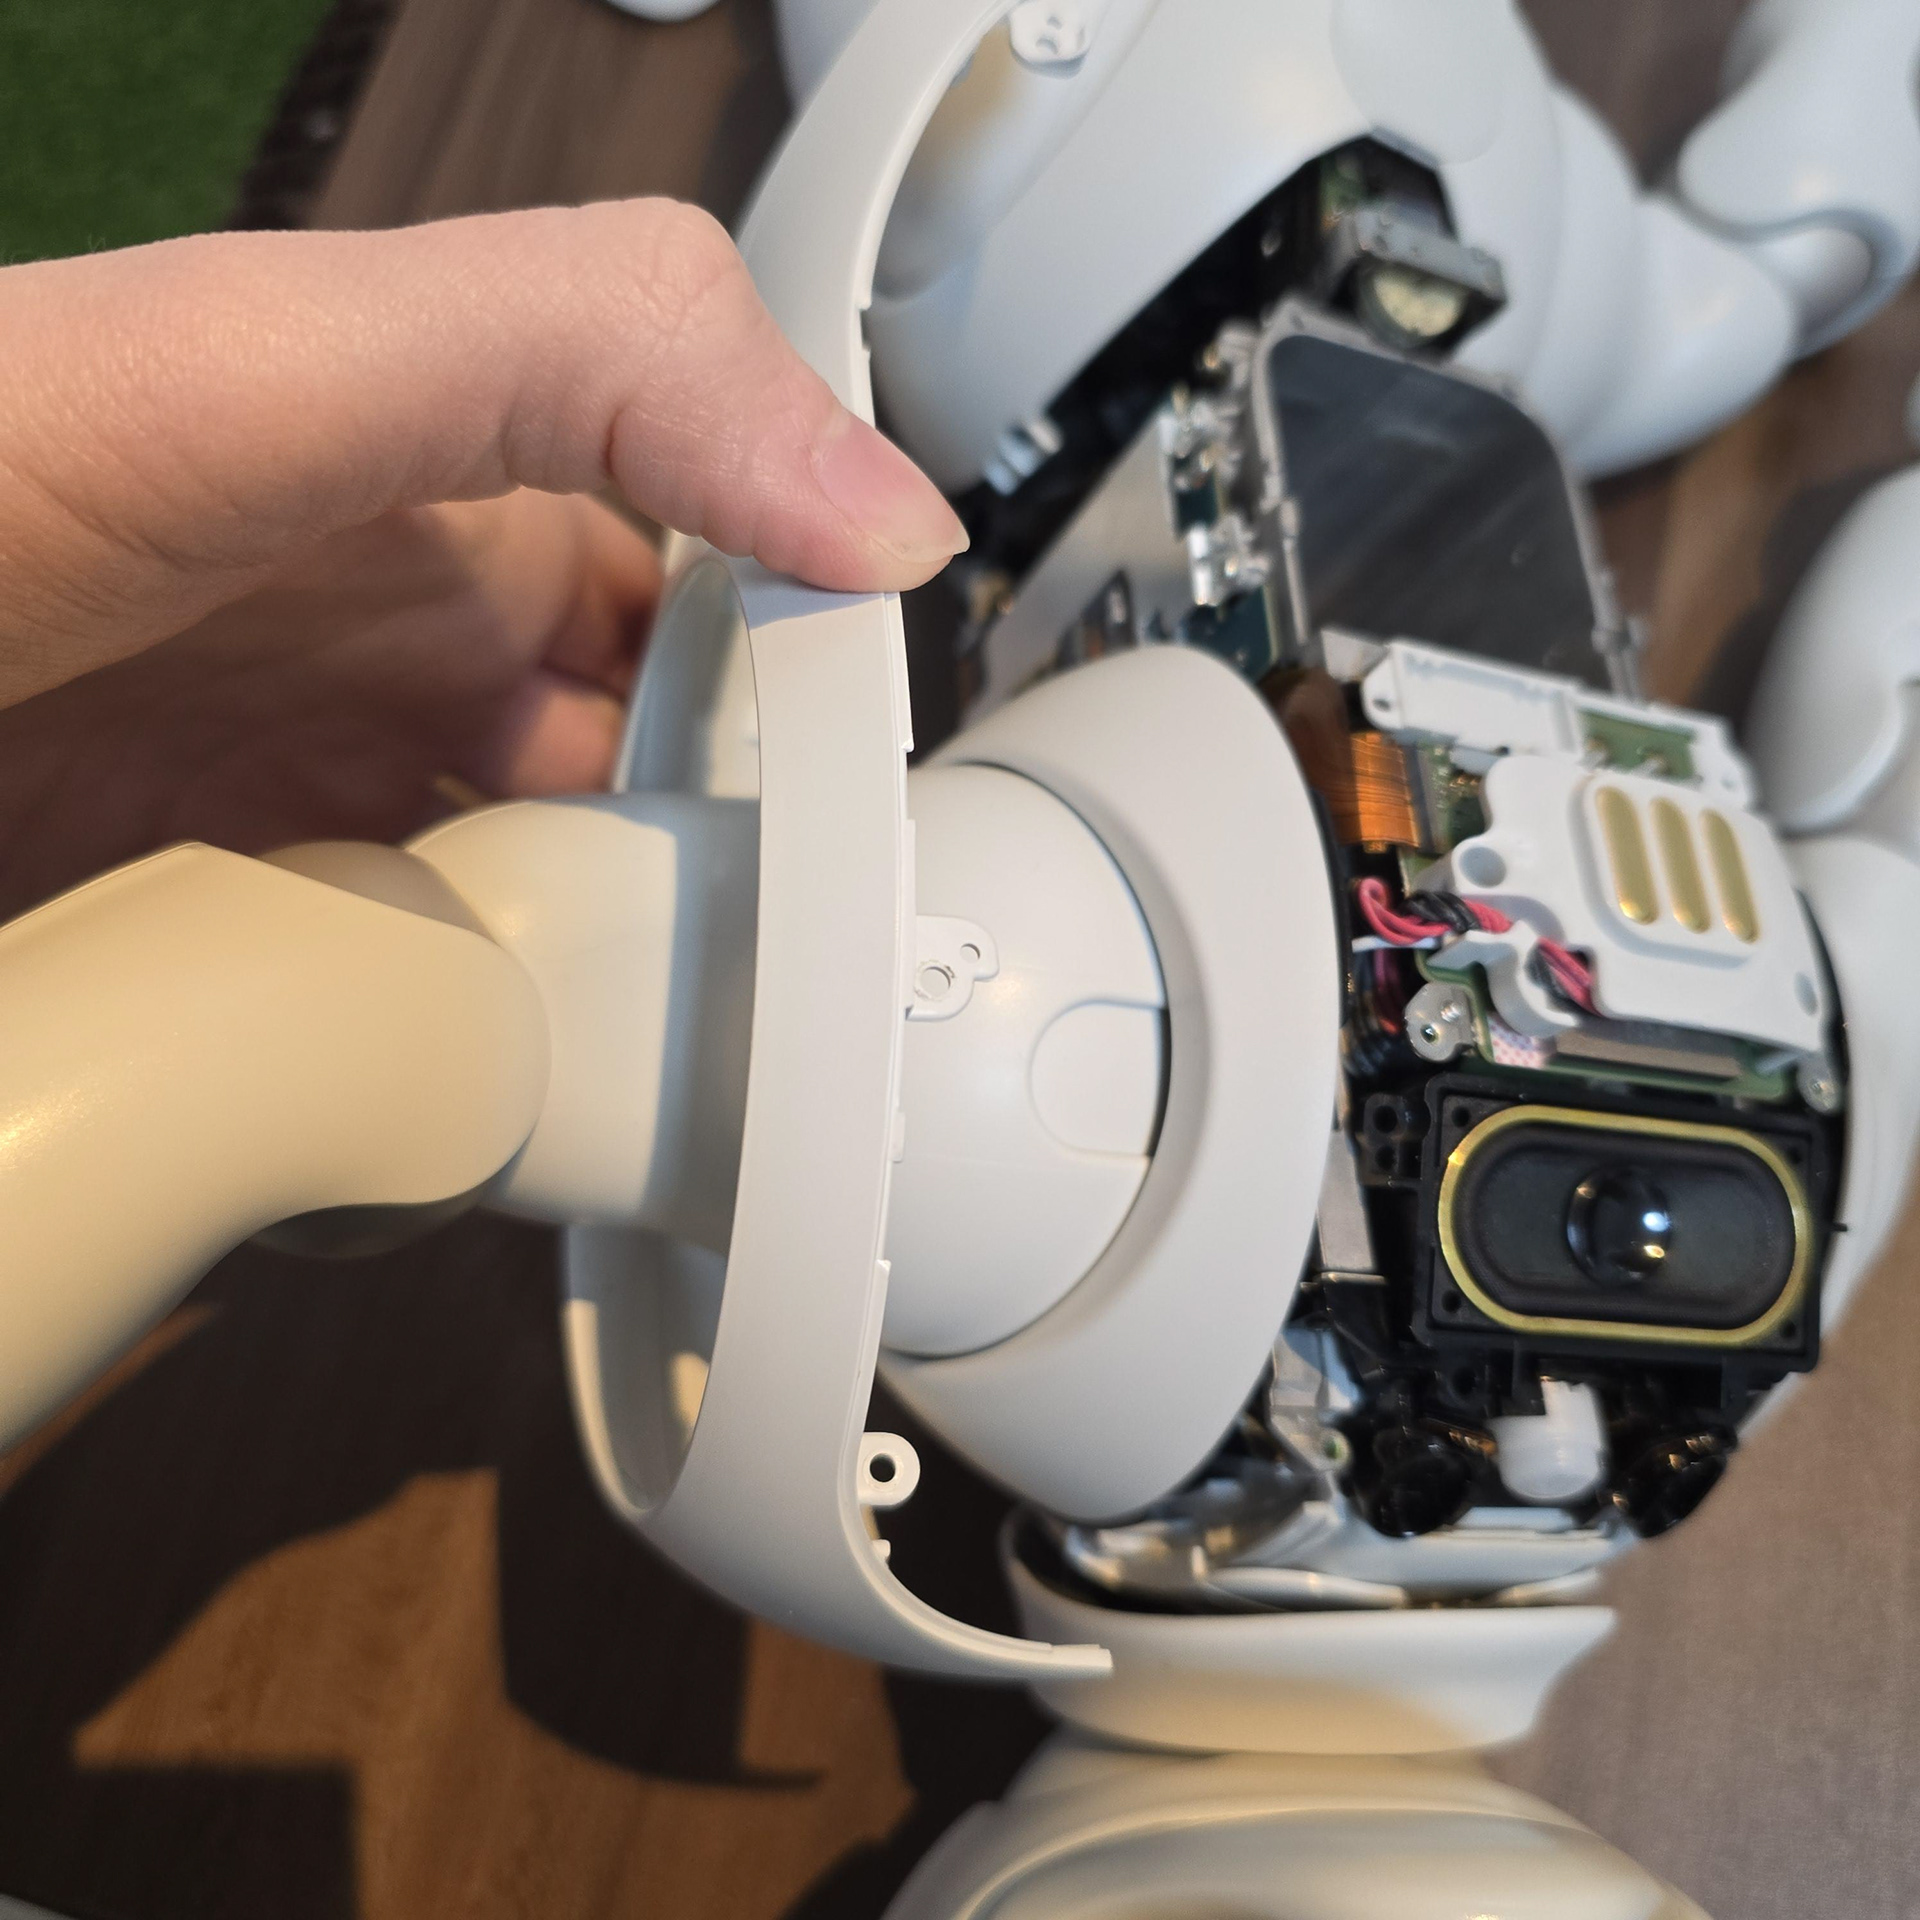
Once twisted, the front arm rings will 'click' free and can be pulled away from the body. Next let's remove the neck dust covers starting with the back. Remove these two screws.
ひねると、フロントアームリングが「カチッ」と音を立てて外れ、ボディから引き抜くことができます。次に、ネックダストカバーを背面から取り外しましょう。この2本のネジを外します。
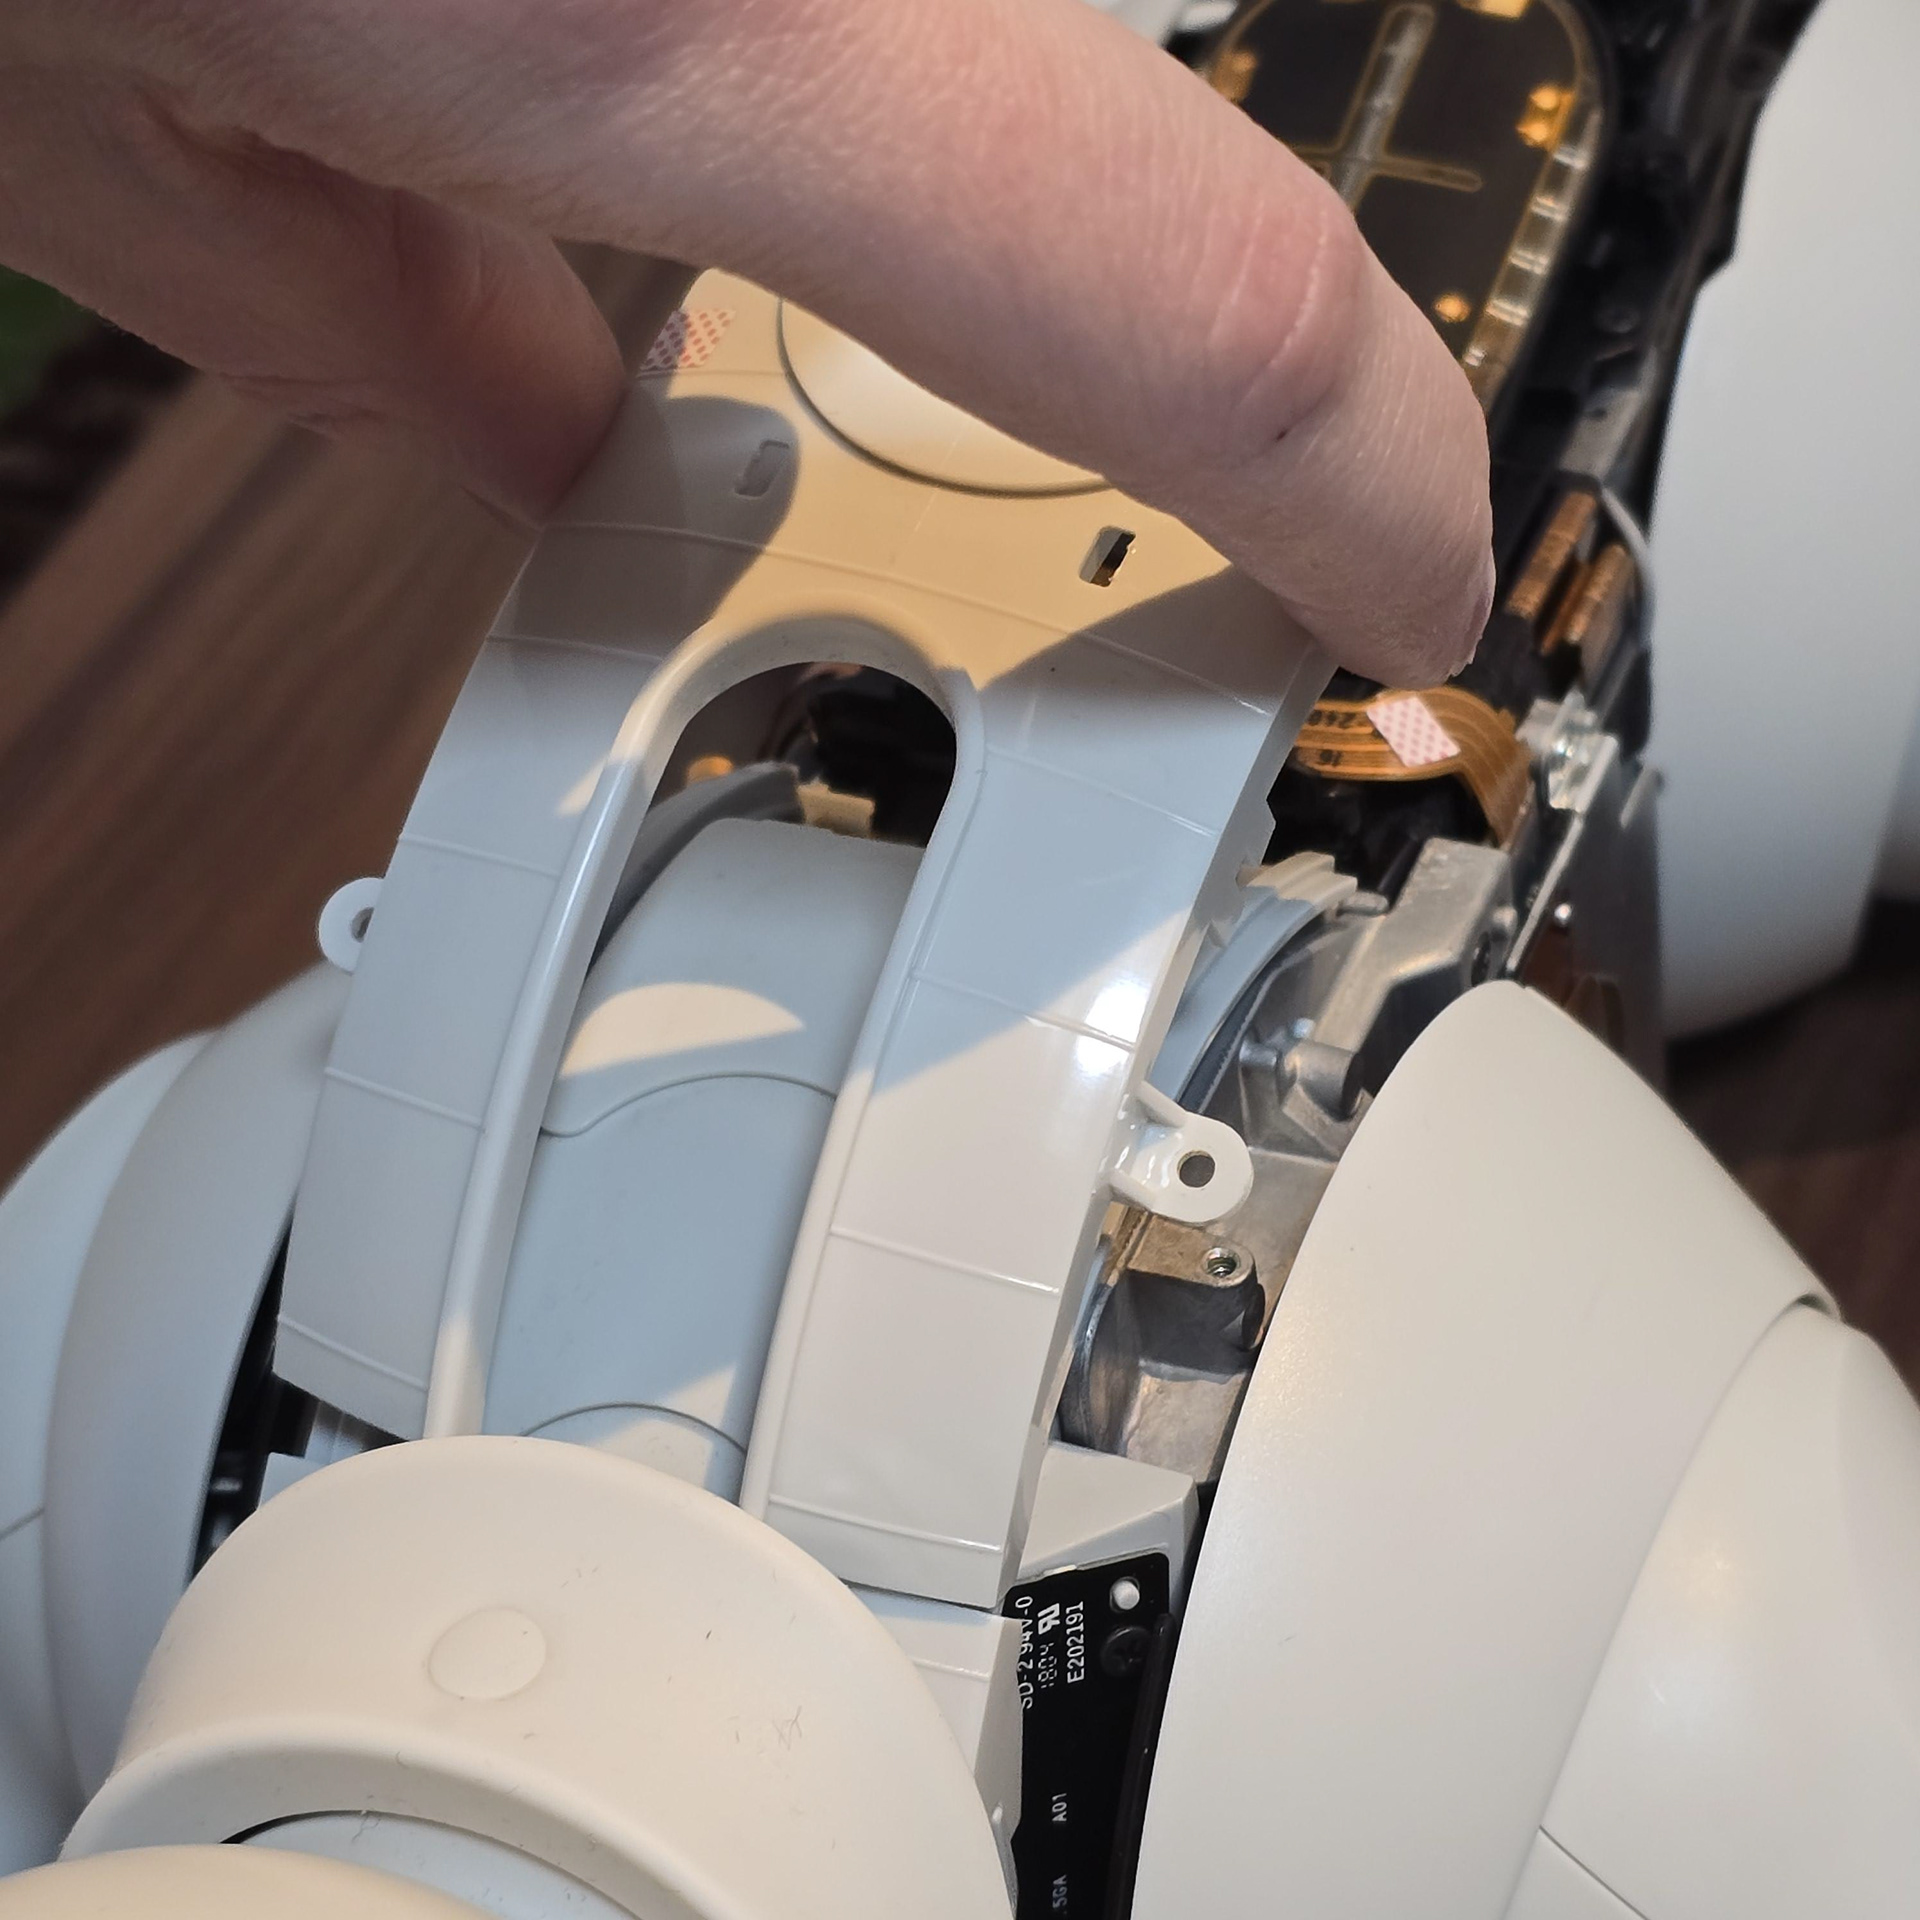
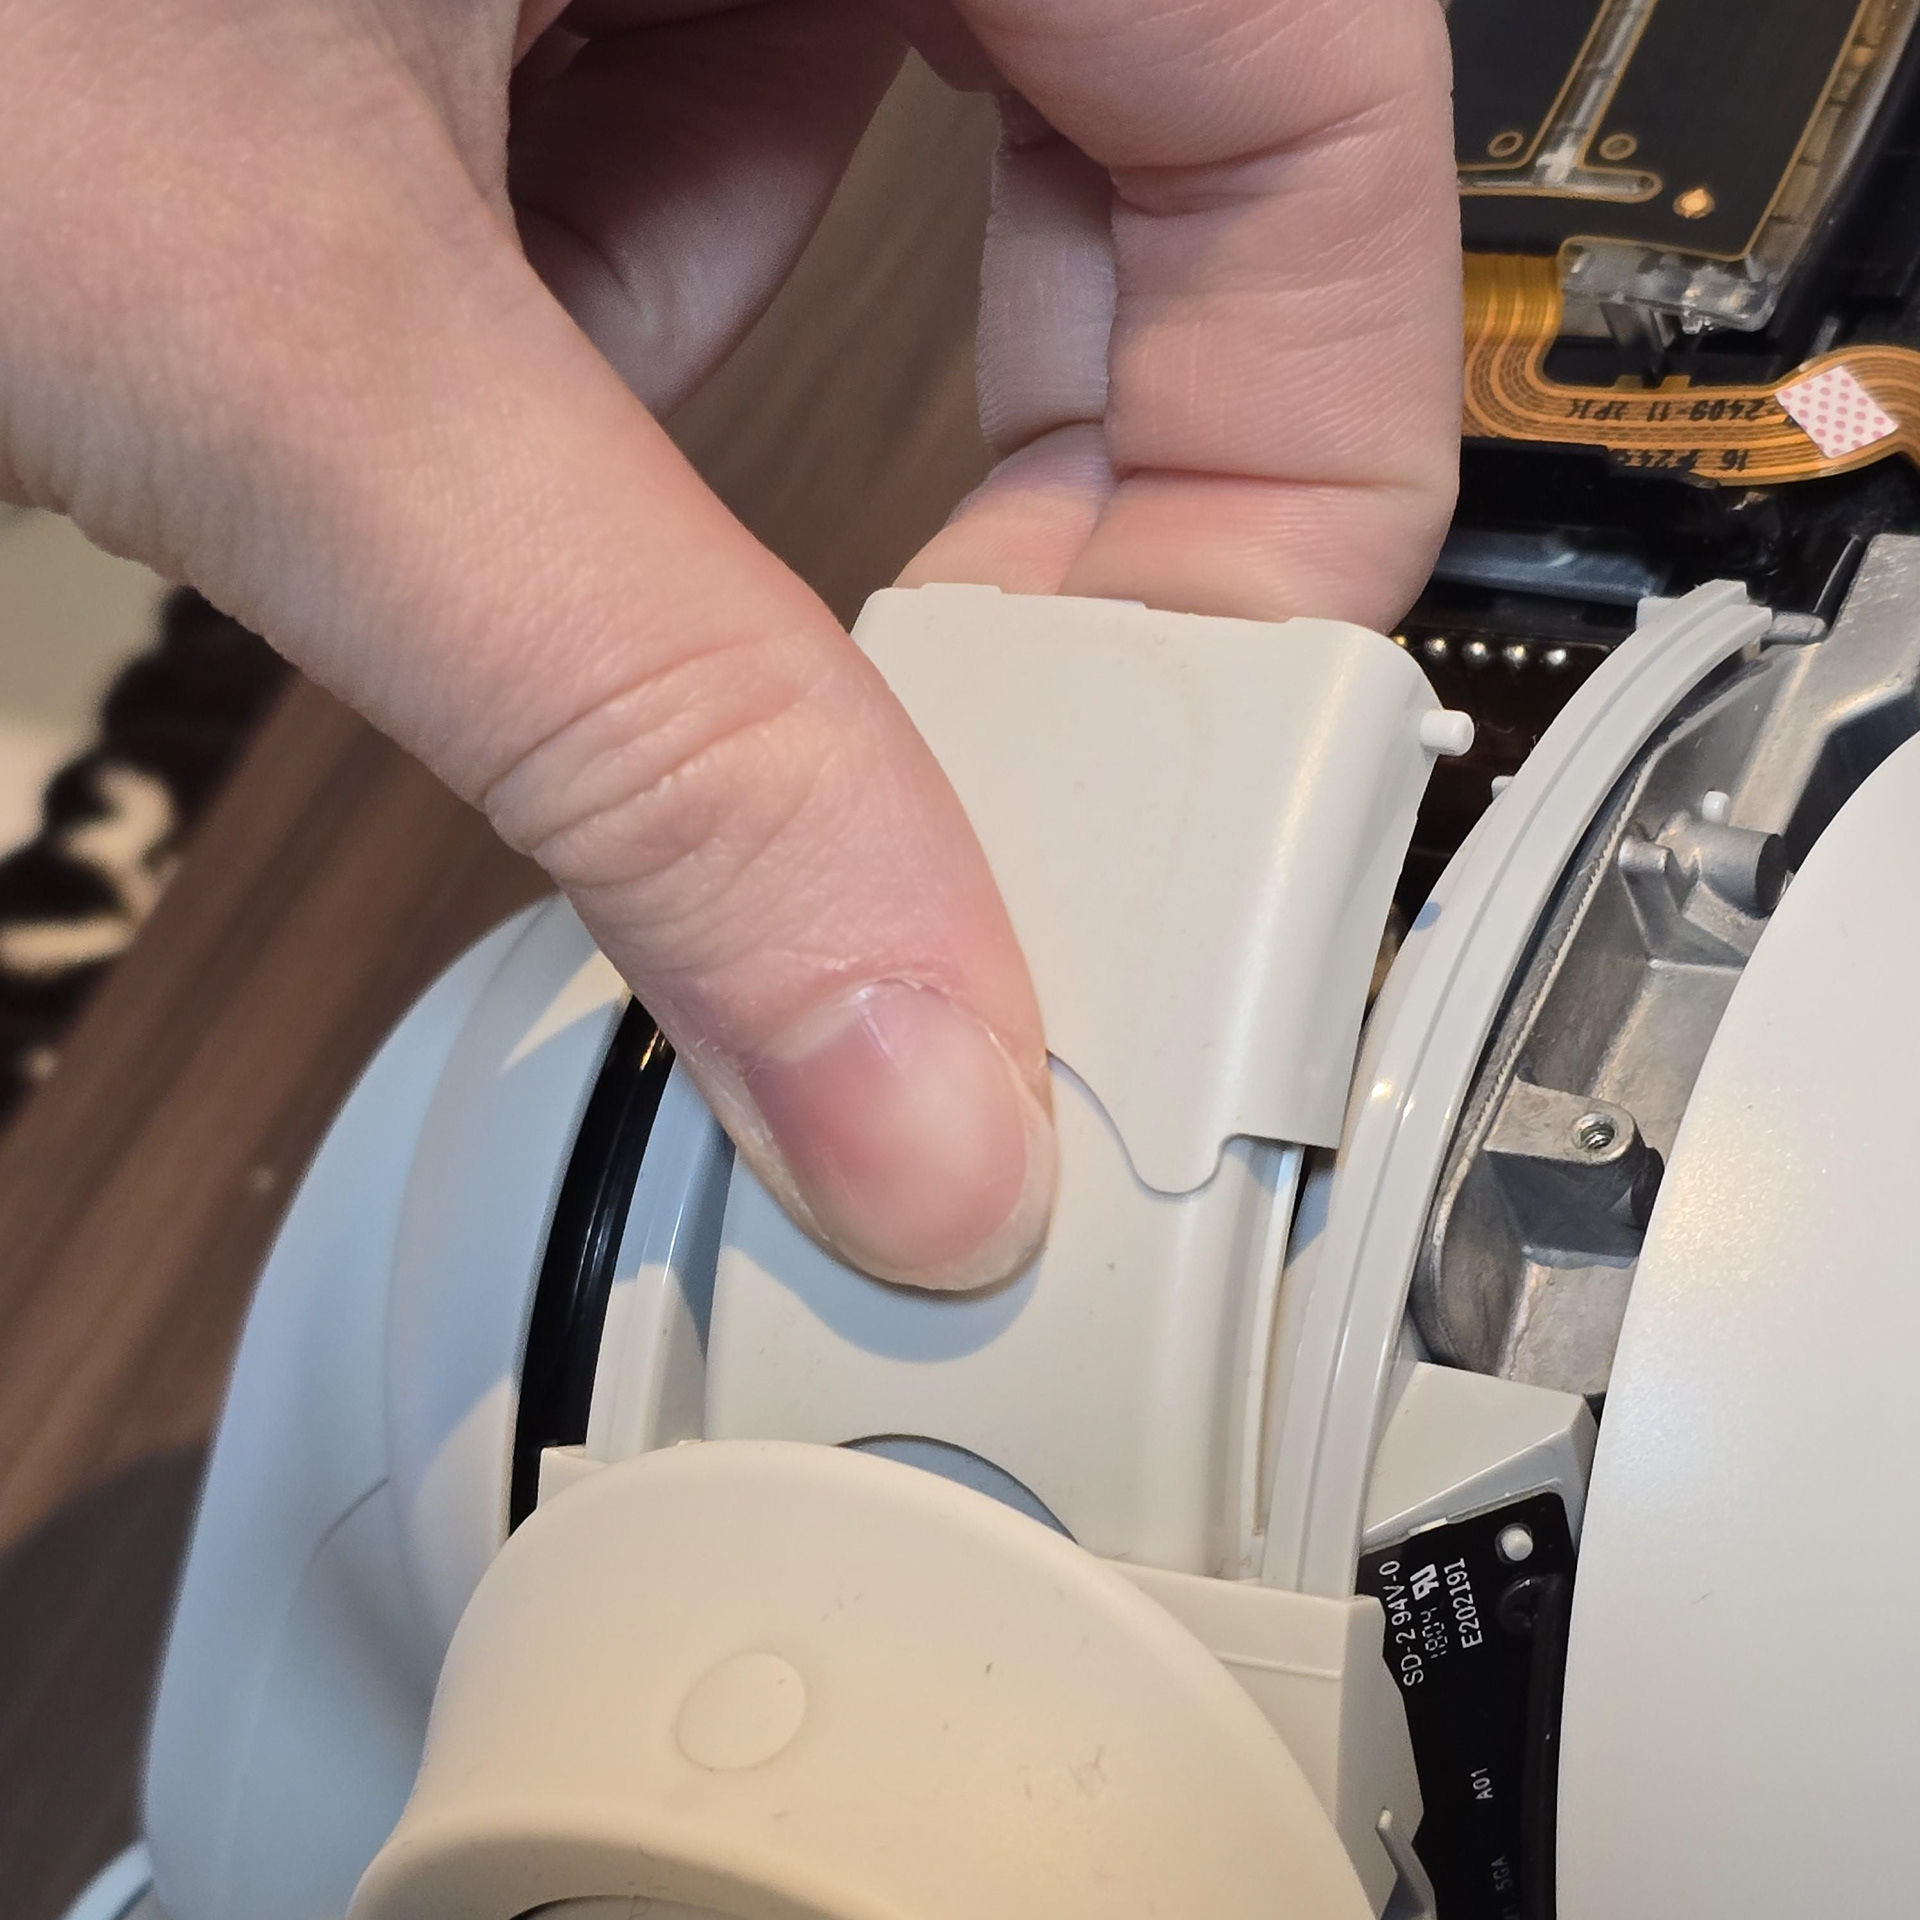
With the screws removed, the plastic retainer will be free to lift off. The dust covers themselves can be pull and twisted free.
ネジを外すと、プラスチック製のリテーナーが自由に持ち上がります。ダストカバー自体は引っ張って回すだけで外れます。
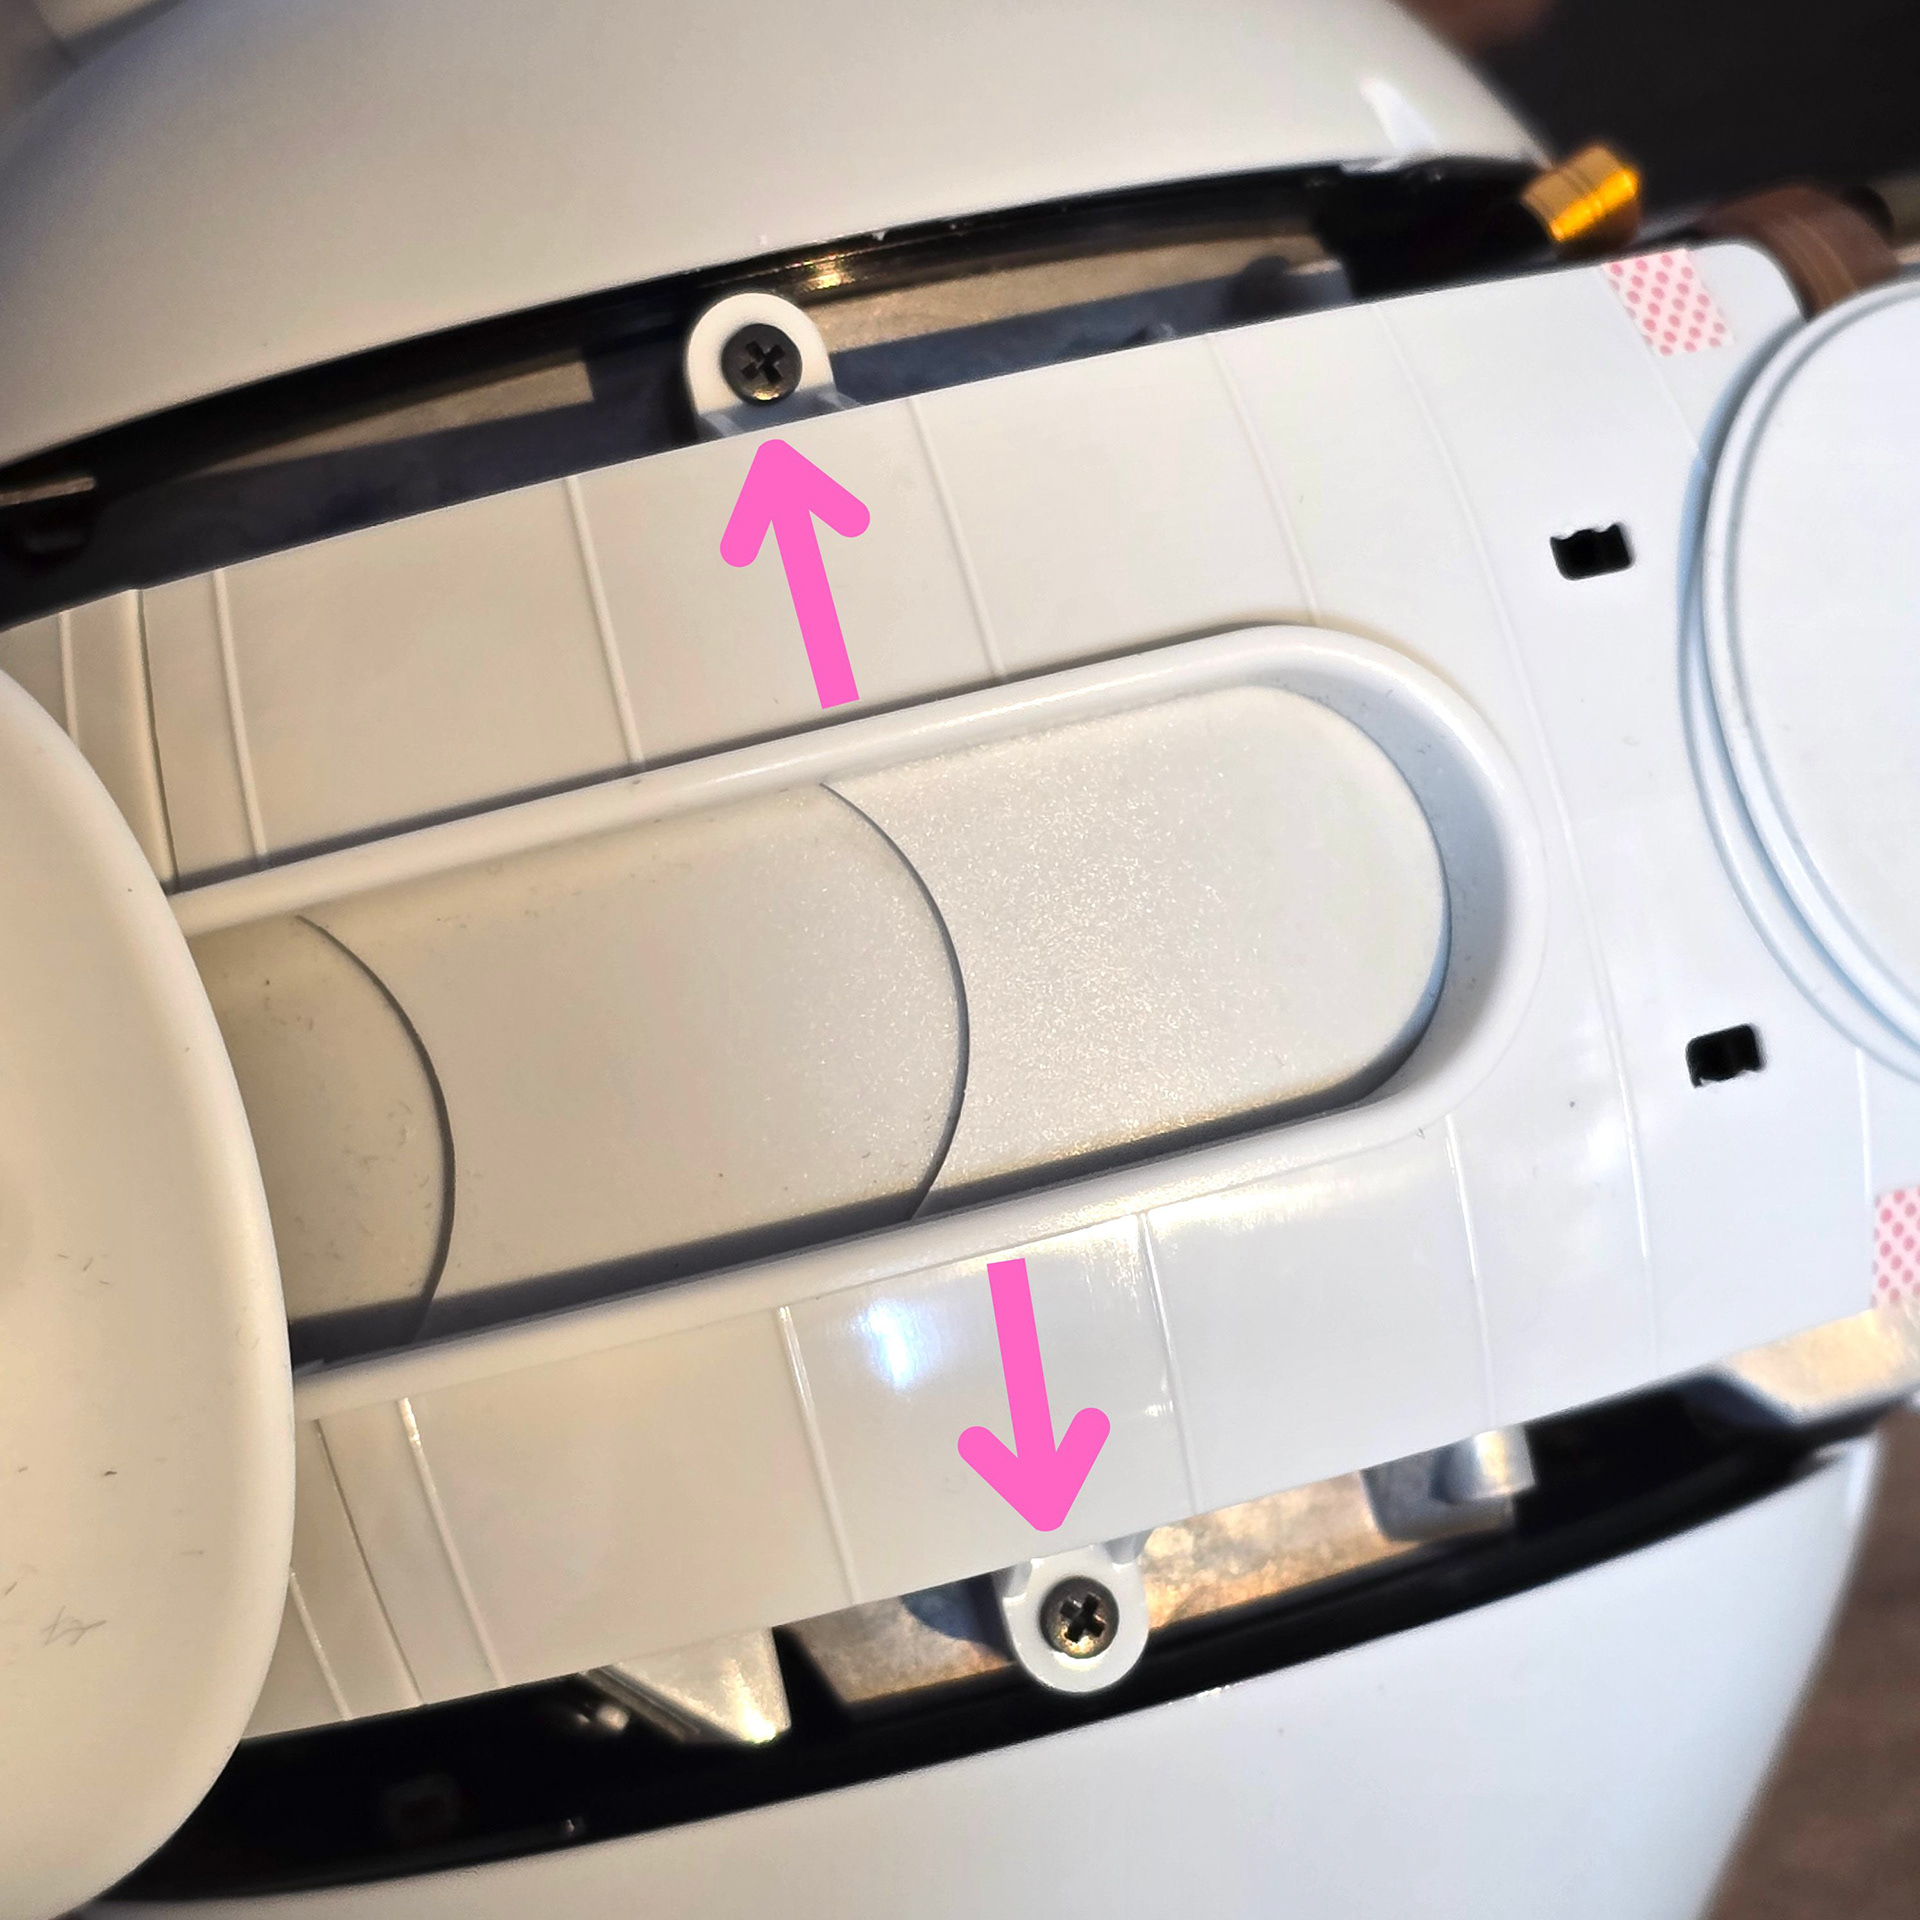
Take out both screws at the side of the neck plastic and pull up/off. As with the back neck dust covers, you can just pull and twist the front set of dust covers free.
ネックのプラスチック側面にあるネジを2本とも外し、上に引っ張って取り外します。背面のネックダストカバーと同様に、前面のダストカバーも引っ張って回すだけで外れます。